Live Chat inside Conversations enables real-time communication between businesses and website visitors directly within HighLevel. This article explains the key benefits of using Live Chat, outlines the necessary setup steps, and provides guidance on managing and responding to messages efficiently.
TABLE OF CONTENTS
- What is Live Chat?
- Key Benefits of Live Chat in Conversations
- Prerequisites for Using Live Chat in Conversations
- Using Live Chat Inside Conversations
- Frequently Asked Questions
More Tutorials From the Community
https://www.youtube.com/watch?v=tOLGWNevaOM
https://www.youtube.com/watch?v=kx5ZKZPOPyQ
https://www.youtube.com/watch?v=UzeMp6nCVFA&feature=youtu.be
https://www.youtube.com/watch?v=BWNvaWU6LUA
What is Live Chat?
Live Chat inside Conversations is a powerful tool that allows businesses to engage with website visitors in real-time, providing instant support and fostering stronger customer relationships. Unlike traditional email or SMS-based communication, Live Chat ensures immediate responses, reducing wait times and improving customer satisfaction. Messages from the website chat widget are routed directly to the Conversations section, where users can manage interactions alongside other communication channels like SMS and email. This centralization helps streamline workflows, eliminating the need to switch between multiple platforms. Additionally, businesses can assign chats to specific team members, use automation to enhance efficiency, and configure fallback messages for unattended inquiries. With Live Chat, businesses can offer a seamless, interactive experience that keeps visitors engaged and increases conversion rates.
Key Benefits of Live Chat in Conversations
Live Chat inside Conversations provides several advantages:
- Instant Communication: Respond to website visitors in real-time without relying on emails or delayed SMS replies.
- Seamless Workflow: All chats appear in the Conversations section alongside emails, SMS, and other communication channels.
- Improved Customer Experience: Faster response times lead to higher engagement and customer satisfaction.
- Centralized Messaging: Manage all customer interactions in one place without switching between tools.
Prerequisites for Using Live Chat in Conversations
Before you start chatting with visitors inside Conversations, the Chat Widget must be installed and configured correctly. Follow these essential setup steps:
Access Chat Widget Menu
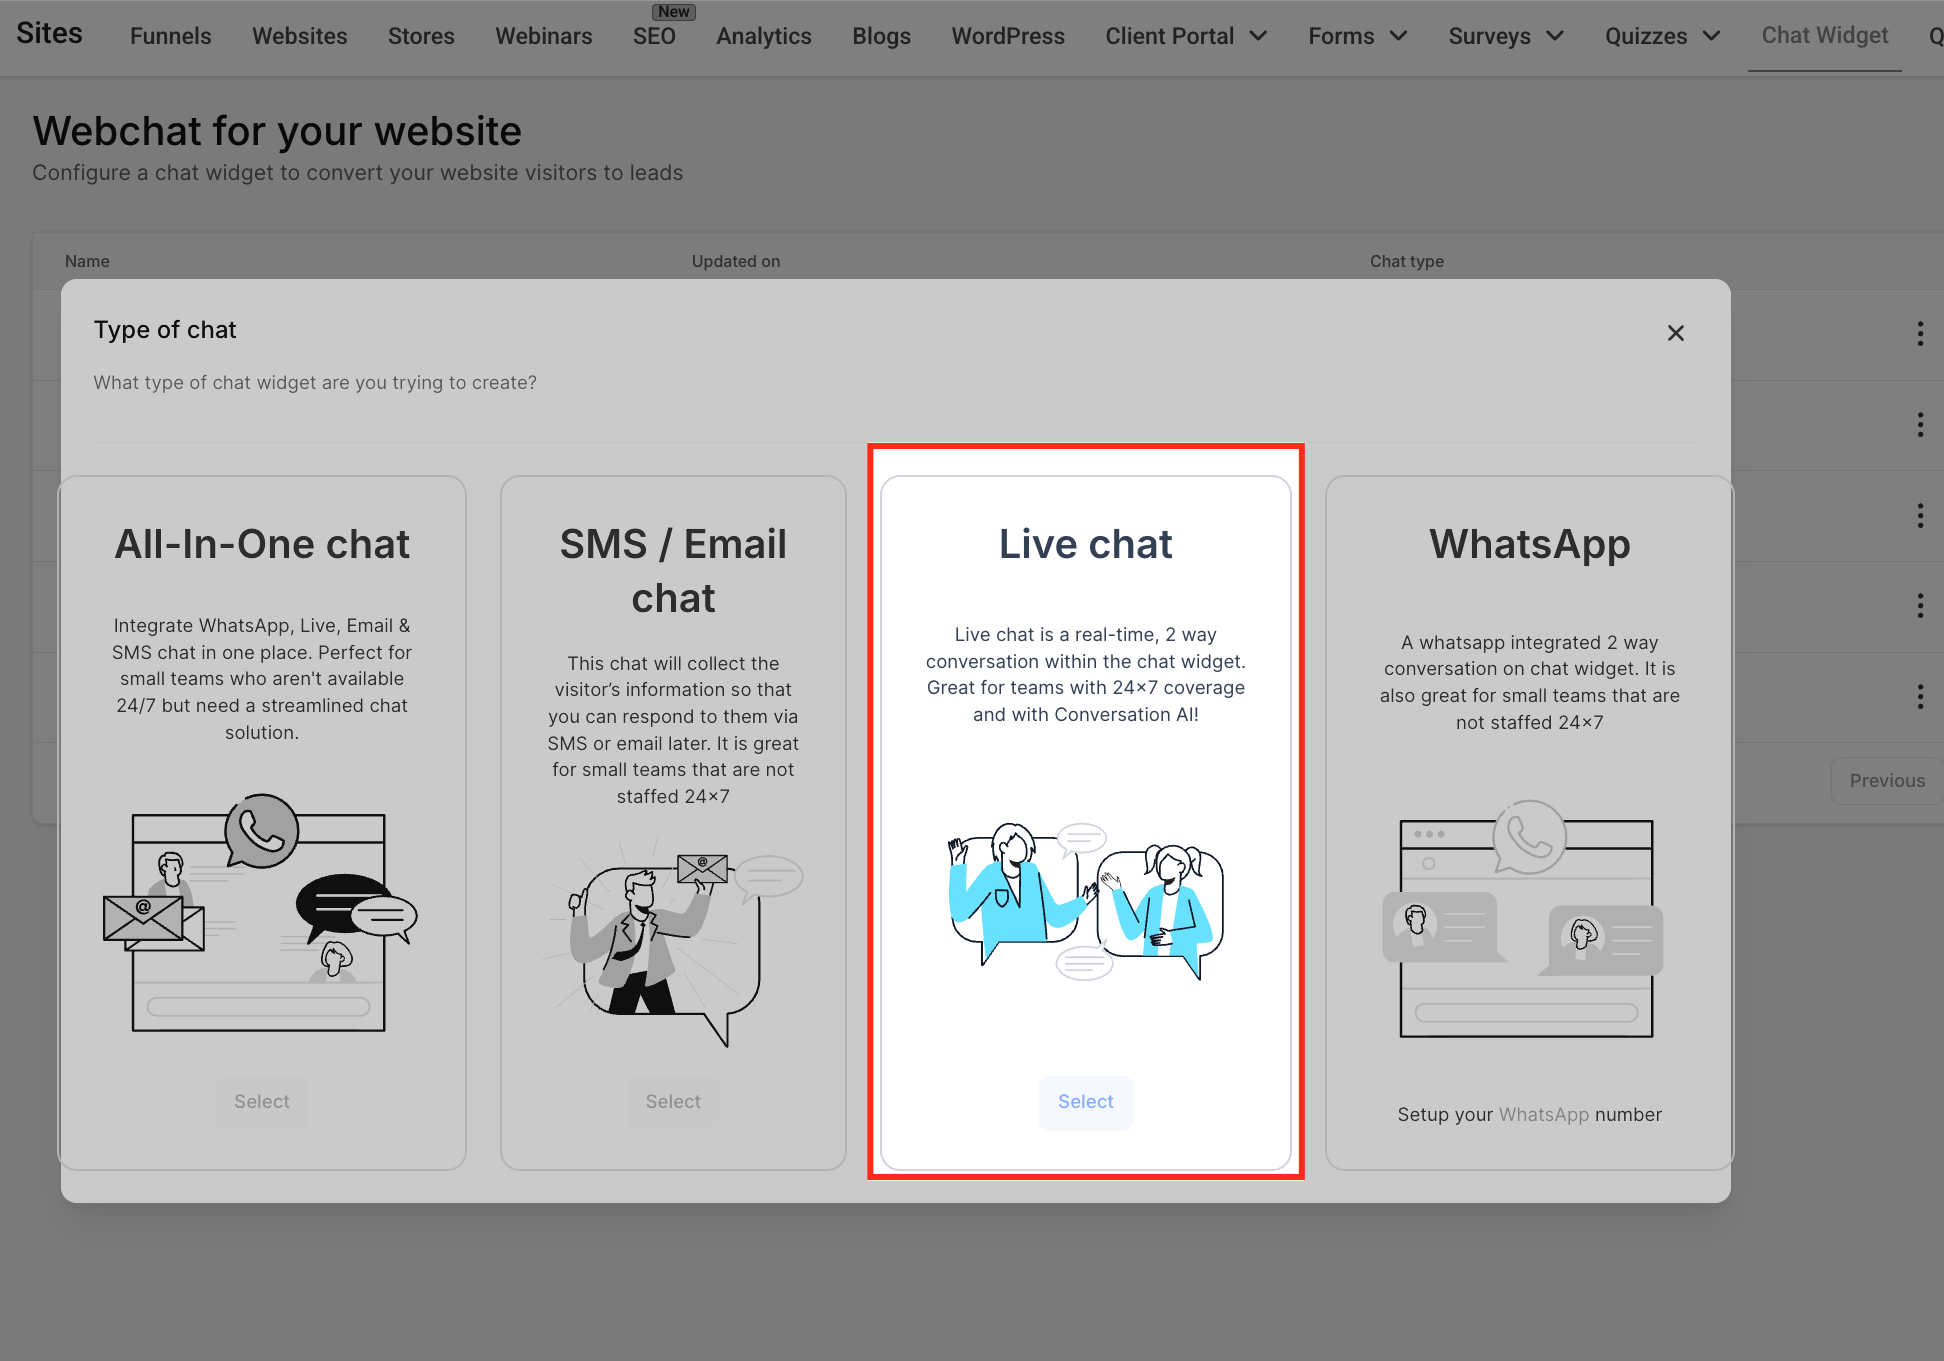
Go to Sites > Chat Widget. Click + New to create a new chat widget.

Set Chat Type
In order to enable real-time messaging inside Conversations, you must set the chat type to Live Chat.
Customize the Widget’s Appearance
To ensure a smooth chat experience, configure the following essential settings inside the Chat Widget:
Intro Message: A short greeting that appears before the chat starts. Click here for more information on customizing the intro message.
Agent Avatar & Branding: Personalize the chat window to match your brand.
Inactivity Fallback Message: If no agent responds within a set time, an automated message collects the visitor’s contact details.
Chat Timeout Message: If the visitor stops responding, the system closes the chat and notifies them.

Install the Widget
Copy the installation code and paste it into your website’s footer or body section.
If using WordPress, install the LeadConnector Plugin to enable the widget.

Using Live Chat Inside Conversations
Once Live Chat is enabled, website visitors can send messages via the chat widget, and you can respond to them directly from the Conversations section.
Viewing & Responding to Live Chat Messages
Open Conversations section. Live Chat messages appear in real-time in the inbox. You can identify live chat messages by looking at the chat icon. Click on a chat to view and send responses instantly.

Live Chat Filter View
You can use the filtering option to view the Live chat messages.
Assigning & Managing Conversations
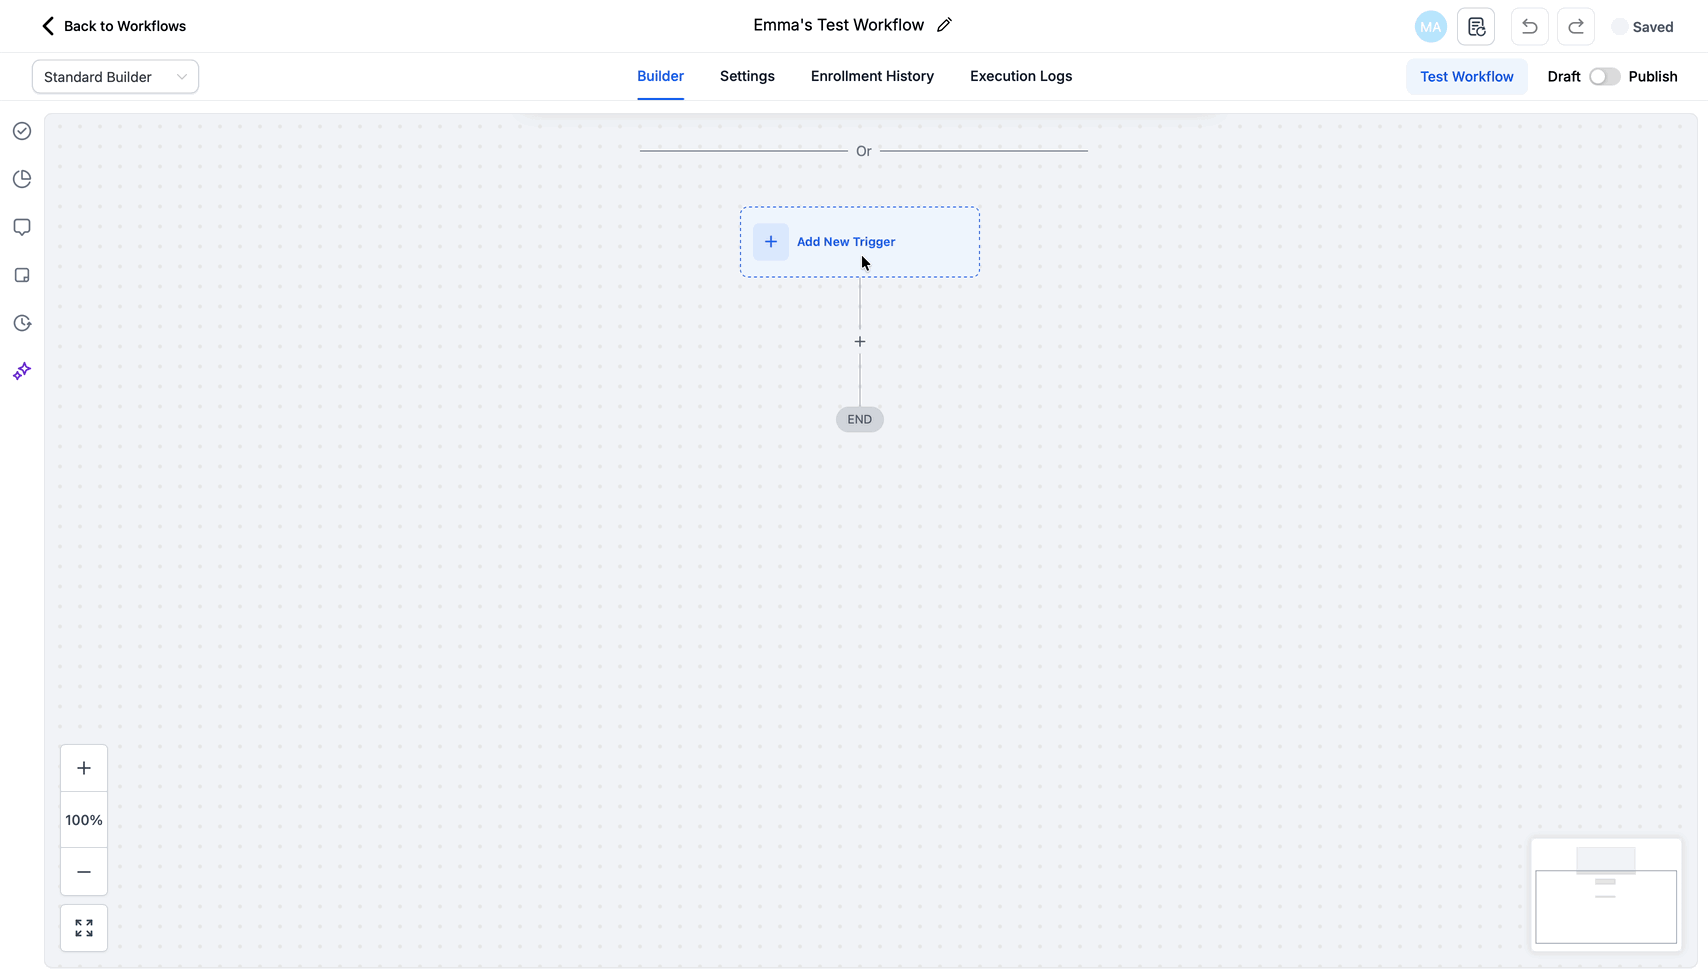
Chats can be assigned manually or automatically to team members. Below is a suggestive workflow you can follow to automatically assign a live chat to a specific user.
It’s a simple setup that routes chats from a chosen chat widget directly to a designated team member.
Create a new workflow → Go to Automations → Workflows → Click + New Workflow.
Add Trigger → Click Add New Trigger → Select Customer Replied or New Chat Message.
Add Filters → Under trigger filters, set Channel = Live Chat, then add another filter Chat Widget is → choose the desired widget from the dropdown.
Add Action → Click + below the trigger → Choose Assign to User.
Select User → In the action settings, pick the specific user you want the chat assigned to.
Save & Publish → Click Save, then toggle from Draft → Publish.
Ending & Closing Chats
Use the “End Chat” option when a conversation is complete. You can also set the inactive time period in your Live chat configuration so the chat can close automatically when the visitor is inactive for a certain period of time.
Frequently Asked Questions
Q. How can I ensure that Live Chat messages appear inside the Conversations section?
To receive Live Chat messages in Conversations, you must first install and enable the Chat Widget on your website. Additionally, make sure the Chat Type is set to Live Chat (instead of SMS/Email Chat) under Sites > Chat Widget. Without this setup, messages will not be routed to Conversations.
Q. What happens if no one responds to a Live Chat message in real-time?
If no agent responds within the Fallback Inactivity Time configured in the Chat Widget settings, an automated message will prompt the visitor to leave their contact details. This ensures that the conversation can continue later via email or SMS, even if live support is unavailable at the time.
Q. Can Live Chat conversations be assigned to specific team members?
Yes, Live Chat messages can be manually assigned or automatically routed to team members based on your workflow settings. This allows businesses to distribute incoming chats efficiently and ensure that the right person is handling each conversation.
Q. Is it possible to filter and view only Live Chat conversations inside the Conversations section?
Yes, you can use filtering option within the Conversations section that allows users to view only Live Chat messages. This makes it easier to manage real-time interactions separately from SMS, email, and other communication channels.
Was this article helpful?
That’s Great!
Thank you for your feedback
Sorry! We couldn't be helpful
Thank you for your feedback
Feedback sent
We appreciate your effort and will try to fix the article