Facebook Conversions API aims to connect your marketing data directly with Funnels and Workflows in LeadConnector and Facebook Meta that help optimize ad targeting, decrease cost per result, and measure outcomes. With Facebook
Conversion API, you can collect the people who are more likely relevant audiences for running your ads for retargeting.
It is a setup for your business to upload server events for your web traffic.
TABLE OF CONTENTS
- What is the difference between Funnel Events and Lead Events in Facebook Conversion API?
- How to set up FB CAPI (Conversions API) Lead Event?
What is the difference between Funnel Events and Lead Events in Facebook Conversion API?
In LeadConnector, we support two types of Facebook Conversion API.
Funnel Events
The events are sent from a web server to record the events when the user visits the page, adds products to a cart, purchase, subscribe, submit an application, and more. To learn more about how to set up Funnel Event Pixel using FB CAPI, please read this article.
Lead Events
The LeadConnector CRM sends the events with how the Lead moves across the pipeline stages. For example, a Business creates a pipeline name Lead Generation. The leads are moving across the pipeline stages, from new leads to booked or abandoned ones. With Lead events, LeadConnector CRM sends the data to Facebook Conversion API - with CRM being the data source.
Using Pipeline stage changes with funnel events
Important: While Pipeline Stage Changes are commonly used with Lead Events, they can also be used with Meta CAPI Funnel Events when the required attribution data is available.
For this setup to work:
- The Facebook Click ID (FBCLID) must be captured when the lead first enters your system.
- The FBCLID should be stored in a custom field or another accessible location within CRM.
- In the Meta Conversion API workflow action, use Custom Mapping to send the stored FBCLID to Meta.
- This allows Meta to attribute the conversion correctly even when the workflow trigger is based on a pipeline stage change.
Example Use Case
- User submits a Facebook lead ad.
- FBCLID is stored in CRM.
- Lead progresses through pipeline stages.
- A Pipeline Stage Change trigger fires.
- Meta CAPI action sends a Funnel Event using Custom Mapping and the stored FBCLID.
Note: Without a valid FBCLID (or equivalent attribution data), Meta may not be able to properly match the conversion event.
Conversion Leads
Facebook conversion leads integration helps your Facebook lead ads Instant Forms optimize for the quality of leads instead of the volume of leads. When users submit the Instant form, their contact information is captured and synced in Highlevel's CRM. This contact information can then be used to follow up with the leads to nurture them and move them further down the sales funnel. As each Lead moves through the sales funnel, the Conversion leads integration allows the advertiser to share the lead status with Meta, which allows Meta to optimize the lead ad for increased lead-to-sales Conversion.
Guidelines to ensure your business is a good fit for the Conversion Leads integration:
- Use Facebook/Instagram Lead Ads (Instant Forms) [Facebook form field mapping inside LeadConnector is used]
- Ensure the 15-16 digit Meta Lead ID is mapped to your CRM
- Generate at least 250 leads per month
- Can upload data regularly at least once per day
- The lead stage you want to optimize for occurs within 28 days of leads being generated
- The lead stage you want to optimize for has a 1% - 40% conversion rate.
Advanced Configuration: If you are using Pipeline Stage Change workflows together with Meta CAPI Funnel Events, ensure the Facebook Click ID (FBCLID) is captured and stored before the workflow executes. The FBCLID can then be passed through Custom Mapping in the Meta Conversion API action for attribution and matching.
How to set up FB CAPI (Conversions API) Lead Event?
Step 1: Create an FB Pixel:
- Please start creating a pixel by going to your Facebook Business Manager (also called the Meta Business Suite) > Head over to the left and then the Events Manager tab.
- Ensure you are connected to the correct Ad Account with all the required Access to that FB Page.

- Head over to the left sidebar and then click on Connect Data Sources

- Choose CRM in the options that show up, and then click on Next.

- It will show you a popup with Best Practices and a button to click Next. The Best Practices are Facebook suggestions on how to utilize this capability best. Click on Next to proceed.

- Click on Create New Pixel or Use an existing pixel from the list for collecting the data. Click Continue when the pixel details are added.

- After creating or selecting the pixel. Choose "LeadConnector" as CRM partner and click on Next

Note:
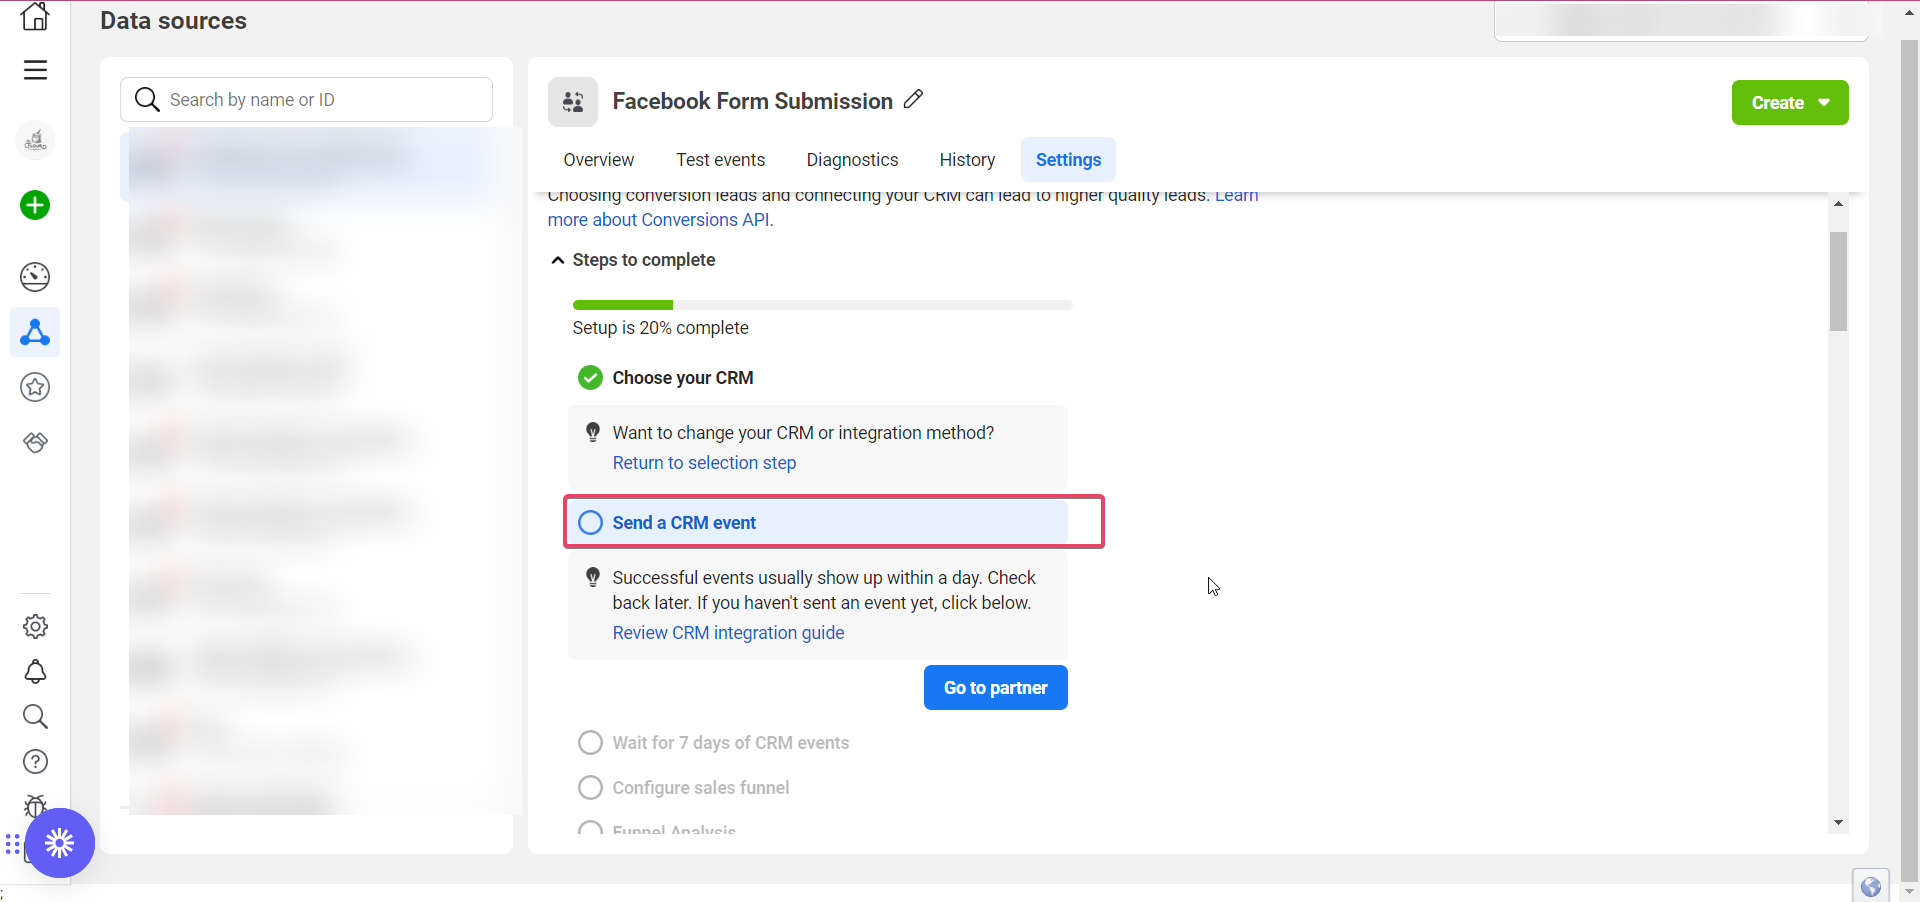
Once you click on Next, Facebook redirects you to login to the partner website, one can ignore that and go ahead with creating a Conversion API workflow to send back CAPI events to Facebook. - You will see the below screen where your CRM is selected.
Important Note: If you are facing the issue of being stuck at "Wait for seven days of CRM events" make sure to -

# Send the data daily (consistently) to your pixel
# Make sure that the count of events adds up to at-least 50 events for 7 days.
# No test events will be considered as actual events
# Atleast 2 stages in your pixel should have the pixel events

- Now you can start sending CRM events for which you will need to setup two workflows which is explained below.
Please Note
Prerequisite for Facebook CAPI - Lead Events

1. In CRM, please go to Settings > Integration > Check the Facebook account is connected with admin permissions. Please ensure that your FB Business Page, which you are an admin of and have all access to, is integrated and the correct FB lead Form is mapped in your CRM account.


2. In Facebook From Field Mapping, the form should be mapped correctly and the status should be enabled. Facebook form mapping has moved under location settings > integrations > Facebook Form Field Mapping. Here is a list of the supported custom fields which include multiple and single option custom fields as well.


Step 2: Create two FB Conversions API Workflows.
Please Note
You need to create Two Workflows for this process to work effectively.

The first workflow focuses on generating leads and adding them to the correct pipeline with an Create/Update Opportunity Action. Once a lead is captured, it is important to ensure that it is properly tagged and categorized in the correct Pipeline and Stage so that it can be effectively managed and tracked as it moves through your sales funnel.

The second workflow focuses on triggering events for Facebook conversion leads. The goal of this workflow is to get fired off by a lead being moved to a specific pipeline stage and then a Facebook Conversions API workflow action pushes them to FB CAPI.

By combining these two workflows, you can create a comprehensive lead generation and management system that is optimized for Facebook conversion leads. This can help you generate more qualified leads, convert more customers, and grow your business over time.
To send a CRM event from your CRM, you need to create a workflow that does that. For now, you can navigate away from the FB Events Manager> Data Sources> Settings (but keep it open in a tab in your browser)and head over to your CRM account.
Workflow -1 to Create/Update Opportunity
- Once the FB page is integrated correctly in sub-account settings, go to your Automations> Workflows >Create a new Workflow.

- Add a new Workflow Trigger in your Workflow and have it get fired off by Facebook Lead Form Submitted (if that is the first stage of your conversions flow)

- You can add filters to choose which specific Facebook Lead Ad form to get the Workflow to be triggered by submissions to that form only

- After this, add another action for "Meta Conversion API".

- Add the required details for Access Token, Pixel ID and Stage Name.

Note:
Addition of Custom Values -
Similar to Google Ads, we are now allowing custom mapping for Facebook Ads conversion tracking parameters.
How It Works:
By default, custom mapping is disabled.
Users can toggle it on to enable custom mapping.
When enabled, users can map:
1. FBCLID for funnel events.
2. Facebook Lead ID for lead events.
3. If custom mapping fields are provided, they will take priority over system defaults.
4. If left empty, the system will continue using its default internal values. - For the Access Token, head over to your Facebook Events Manager> Data Sources> Settings> Scroll down and click on Generate Access Token. Once generated copy the Access token and paste it in the workflow action configuration.

- For the Pixel ID, head over to your Facebook Events Manager> Data Sources> Settings> Scroll down and copy your Dataset ID (this will be Pixel ID). Paste the Pixel ID in the Pixel ID field in your Workflow's FB Conversion API Action.

- And then add the action for Create or Update Opportunity. Also specify the Pipeline and Pipeline Stage for this action.

- The Opportunity Name can be defaulted to the Lead's Full Name by using the custom value dropper:

- Toggle on Allow Duplicate Opportunities for this particular Workflow.

- Publish and Save the workflow
Workflow -2 to send Conversion data to FB Conversion API
- Create another workflow. Add the Pipeline Stage Change trigger and a Facebook Conversion API action.

- Choose Lead Event as the Event Type. Enter the Access Token and Pixel ID.
For Stage Name : It should accurately represent your Pipeline and Pipeline Stage name for better reporting. Select it using the tag icon at the end to add the custom value of the opportunity pipeline and stages.
- For the Access Token, head over to your Facebook Events Manager> Data Sources> Settings> Scroll down and click on Generate Access Token. Once generated copy the Access token and paste it in the workflow action configuration.
- For the Pixel ID, head over to your Facebook Events Manager> Data Sources> Settings> Scroll down and copy your Dataset ID (this will be Pixel ID). Paste the Pixel ID in the Pixel ID field in your Workflow's FB Conversion API Action.

- Save the Action, Save and Publish the Workflow.
- You can test your Workflow using the Lead Ads Test Tool. Choose the correct Page and Lead Ad Form, then Create a Lead.

- The Event should be picked up by your Events Manager, which is actively waiting for Events sent by your Workflow. It takes up to a day to successfully pick up an event sent by your Workflow.
- Once the Event is sent from the Lead Ads Test Tool, please go to Opportunity Pipeline and move the dummy Facebook lead to another stage configured in the Workflow. Once this is completed, check the workflow status as executed and the conversion API event in Event Manager.

11. Return to the “settings” tab in Events Manager to track the progress of the Conversion Leads integration.
Important Note - For both the above workflows, please enable Allow Multiple in Workflow Settings.

Was this article helpful?
That’s Great!
Thank you for your feedback
Sorry! We couldn't be helpful
Thank you for your feedback
Feedback sent
We appreciate your effort and will try to fix the article