Audio Device Settings in the Web Dialer
The web dialer audio settings give you precise control over which devices handle your call audio, from choosing your primary speaker and microphone to ringing multiple devices simultaneously for inbound calls.
This article explains how the audio device settings work, how to configure them, and how to ensure you never miss an inbound call by ringing both your headset and computer speaker at the same time.
What Are Audio Device Settings?
Audio device settings in the HighLevel web dialer let you choose which hardware devices handle your call audio. You can select your primary speaker for listening to calls, pick a microphone for speaking, and optionally ring a second device simultaneously for inbound calls.
This feature is designed to help you customize your call experience based on your workspace setup. Whether you use a headset, external speakers, or your computer's built-in audio, the web dialer adapts to your preferences.
The settings panel is accessible directly from the dialer interface and includes test buttons to preview your audio setup before saving changes.
Key Benefits
Audio device settings provide several advantages for managing your call workflow:
Understanding the Audio Device Options
The audio device settings panel offers three configurable options to control how your calls sound and where they ring:
This is the primary device that plays call audio. Select your preferred output device from the dropdown menu — this could be headphones, external speakers, or your computer's built-in speaker. The Main Speaker plays the other caller's audio during an active Web Dialer call.
Choose a second device to ring simultaneously when inbound calls arrive. This is useful if you want to hear calls on both your headset and desk speaker, ensuring you never miss an incoming call even when you're not wearing your headset. This device only rings for inbound calls and does not play audio during active conversations.
Select the microphone you want to use for speaking during calls. The microphone picker displays a live volume meter so you can verify the device is picking up sound before you save your settings. This ensures your voice is captured clearly on every call.
Use the test buttons next to the speaker and additional device options to preview audio playback before saving. The microphone volume meter updates in real time, so you can confirm the device is working without needing to make a test call.
How to Configure Audio Device Settings
Follow these steps to customize your audio device settings in the web dialer:
Click the gear icon in the web dialer header to open the audio settings panel.
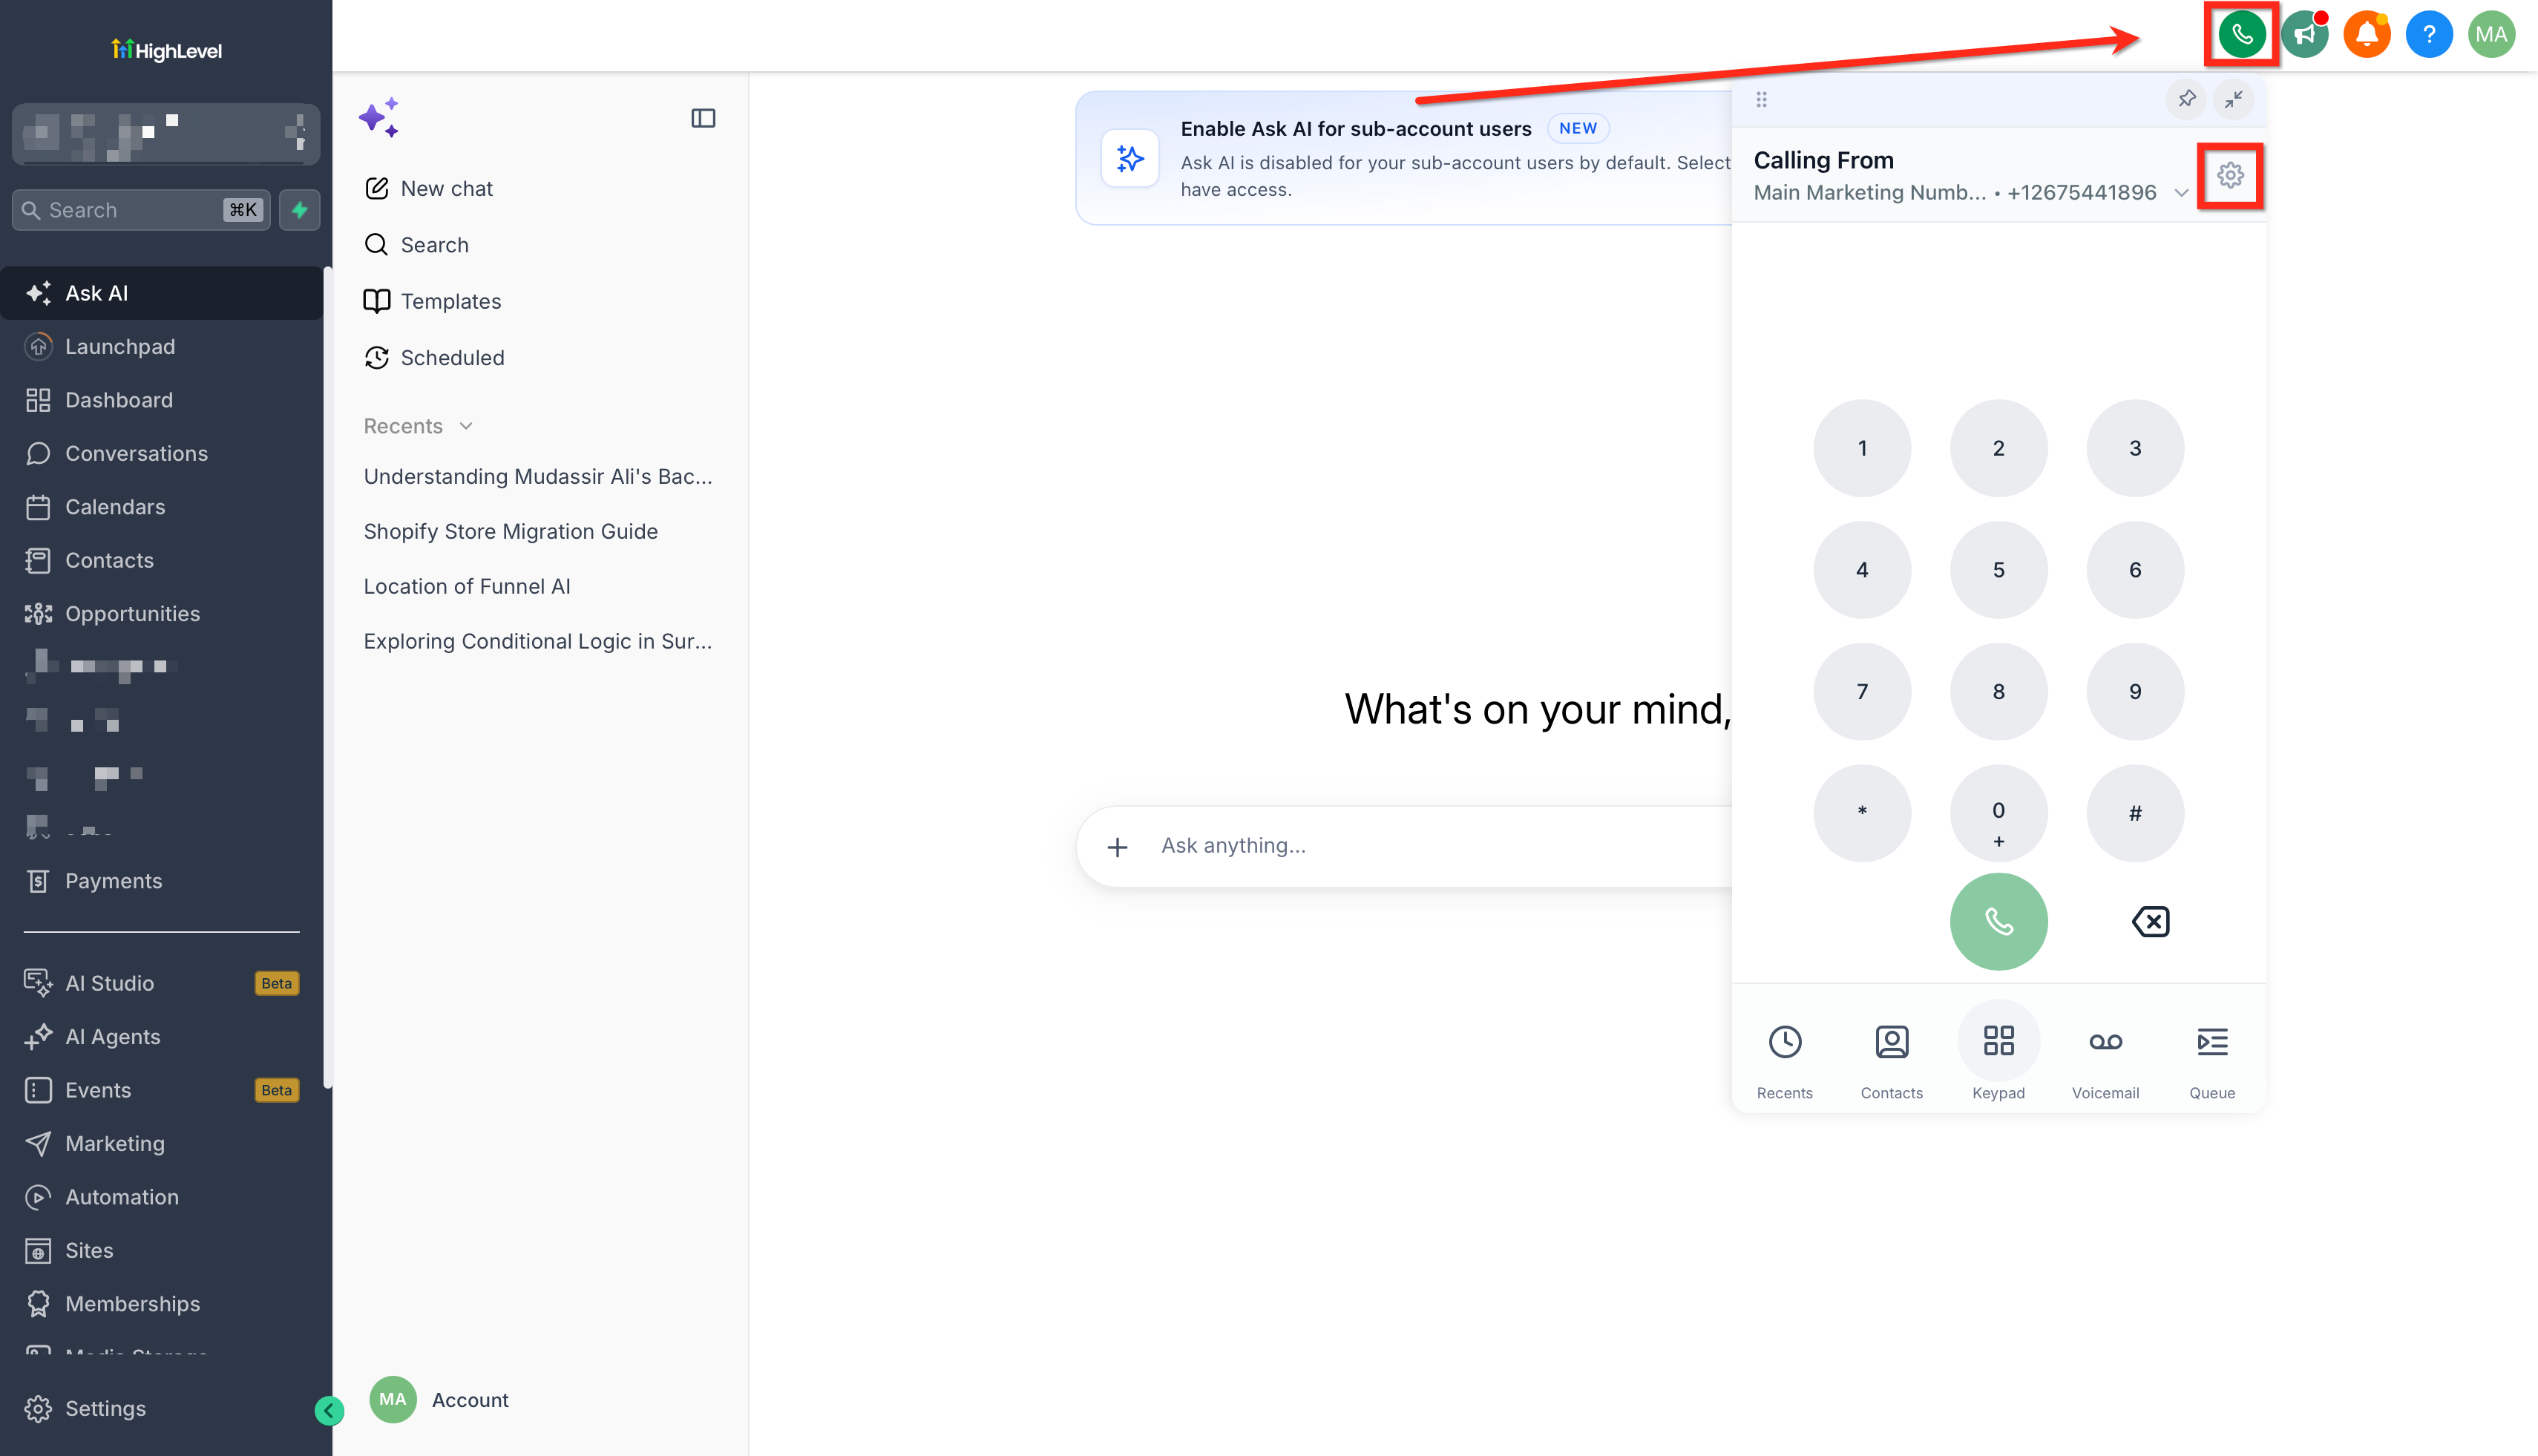
In the audio settings panel, choose your primary speaker from the dropdown menu under "Main Speaker." This device will play all call audio. Use the test button next to the dropdown to preview the device before saving.
If you want to ring an additional device for inbound calls, select it from the "Additional Ring Device" dropdown. For example, you might choose your computer speaker so calls ring on both your headset and desk speaker at the same time. Use the test button to confirm the device rings as expected.
Select the microphone you want to use from the "Microphone" dropdown. The panel displays a live volume meter so you can verify the device is picking up sound. Speak into the microphone and watch the meter to confirm it's working correctly.
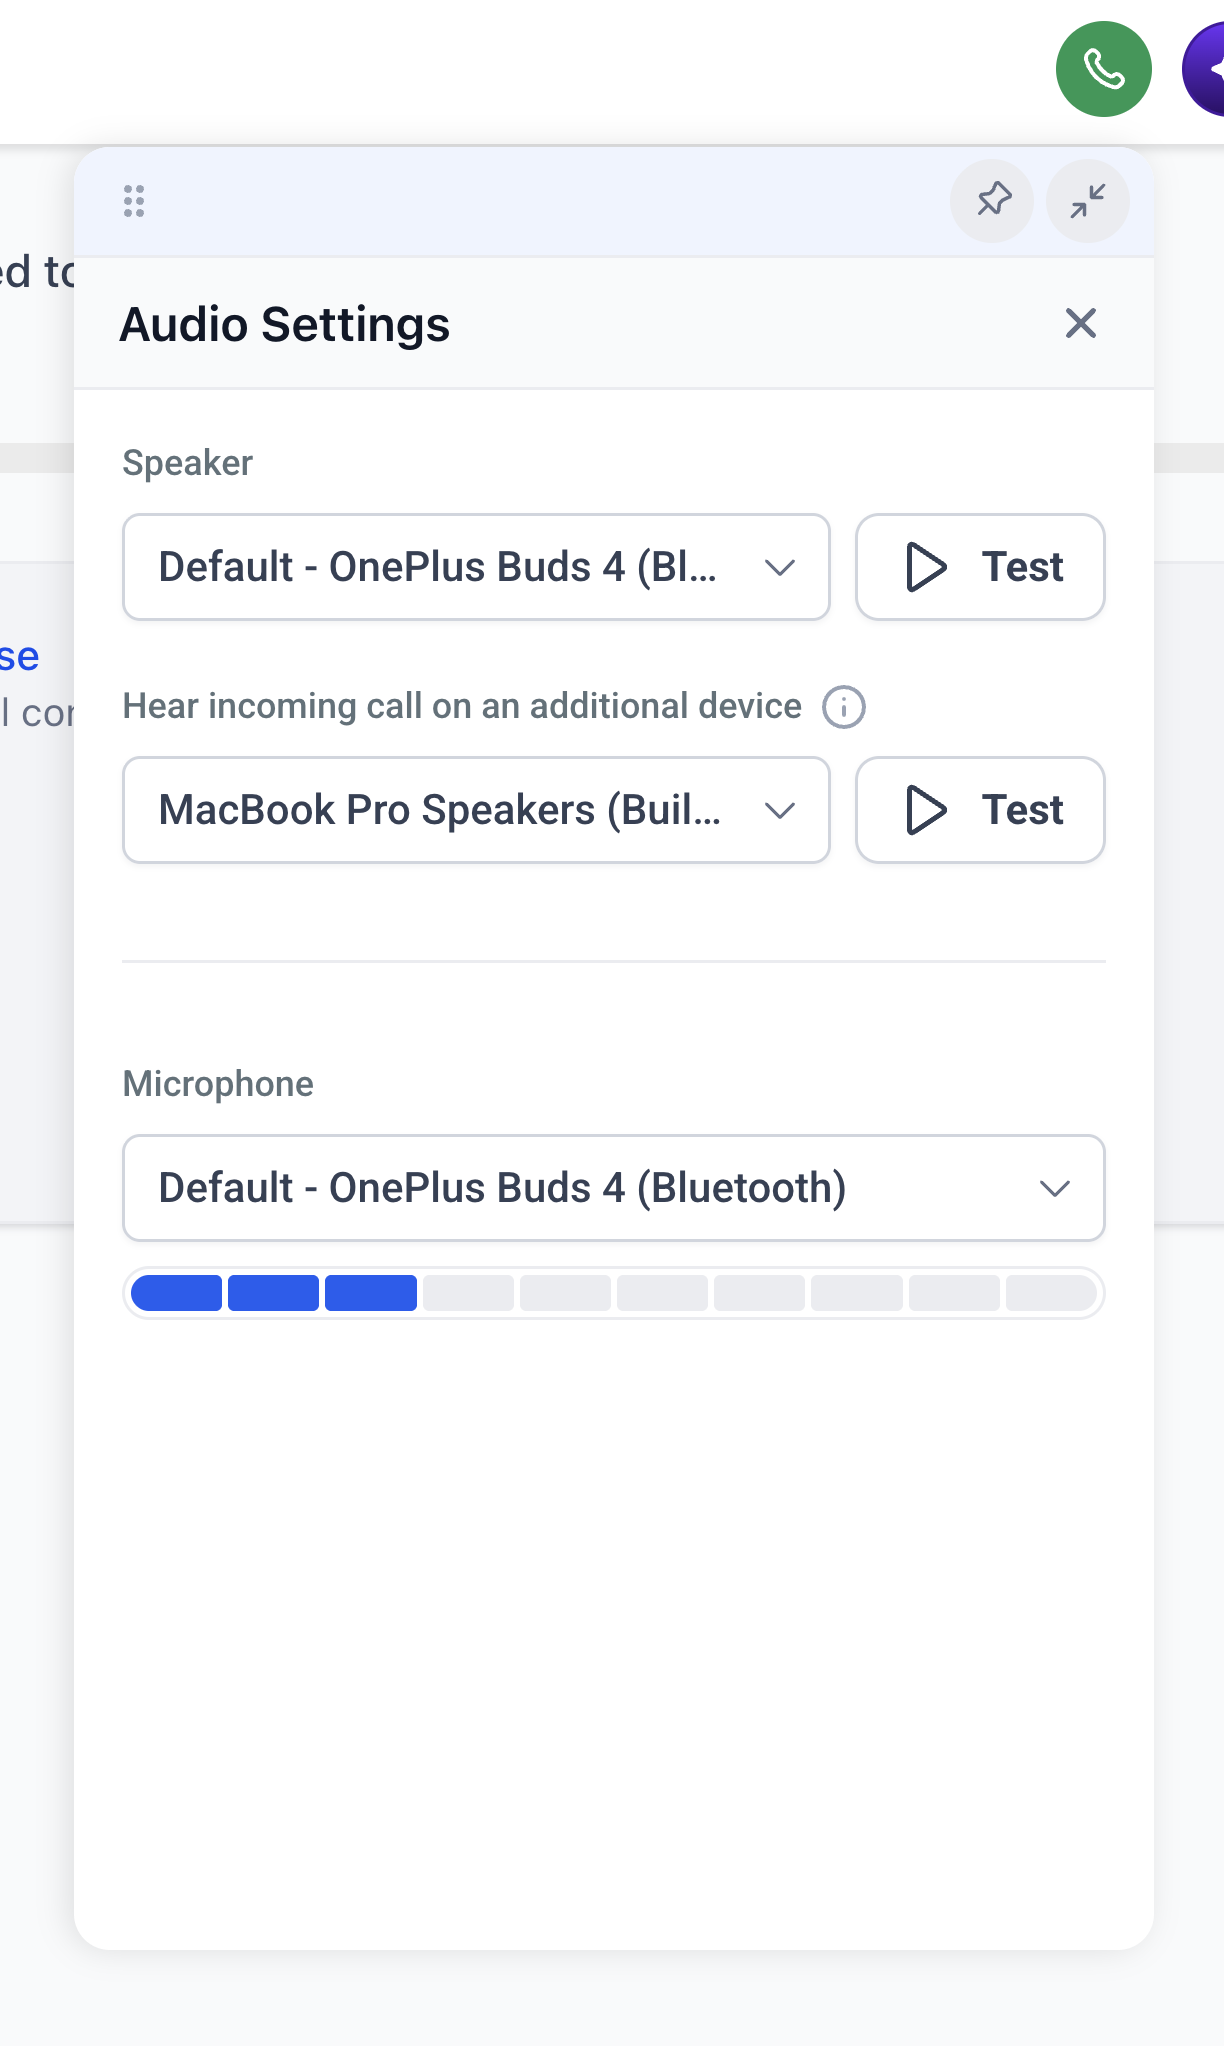
After configuring your devices and testing them, click the save button to apply your changes. Your audio settings are now active for the Web Dialer in this browser and on this device.
If you use HighLevel in another browser or on another computer, configure the audio devices again.
To avoid missing inbound calls, set your main speaker to your headset and your additional ring device to your computer speaker. This way, you'll hear calls on both devices, even if you're not wearing your headset at the moment the call arrives.
Related Articles
Frequently Asked Questions
Was this article helpful?
That’s Great!
Thank you for your feedback
Sorry! We couldn't be helpful
Thank you for your feedback
Feedback sent
We appreciate your effort and will try to fix the article