Social Planner now has post approval flow where the user can get the content of social post reviewed and analyzed by another team member.
Covered in this Article:
Steps to get started with post approval flow -
Editing and applying an Email Template as the Post Approval Email:
How to schedule the CSV for Approving bulk posts?
Steps to get started with post approval flow -
- Navigate to Marketing> Social Planner. Cr

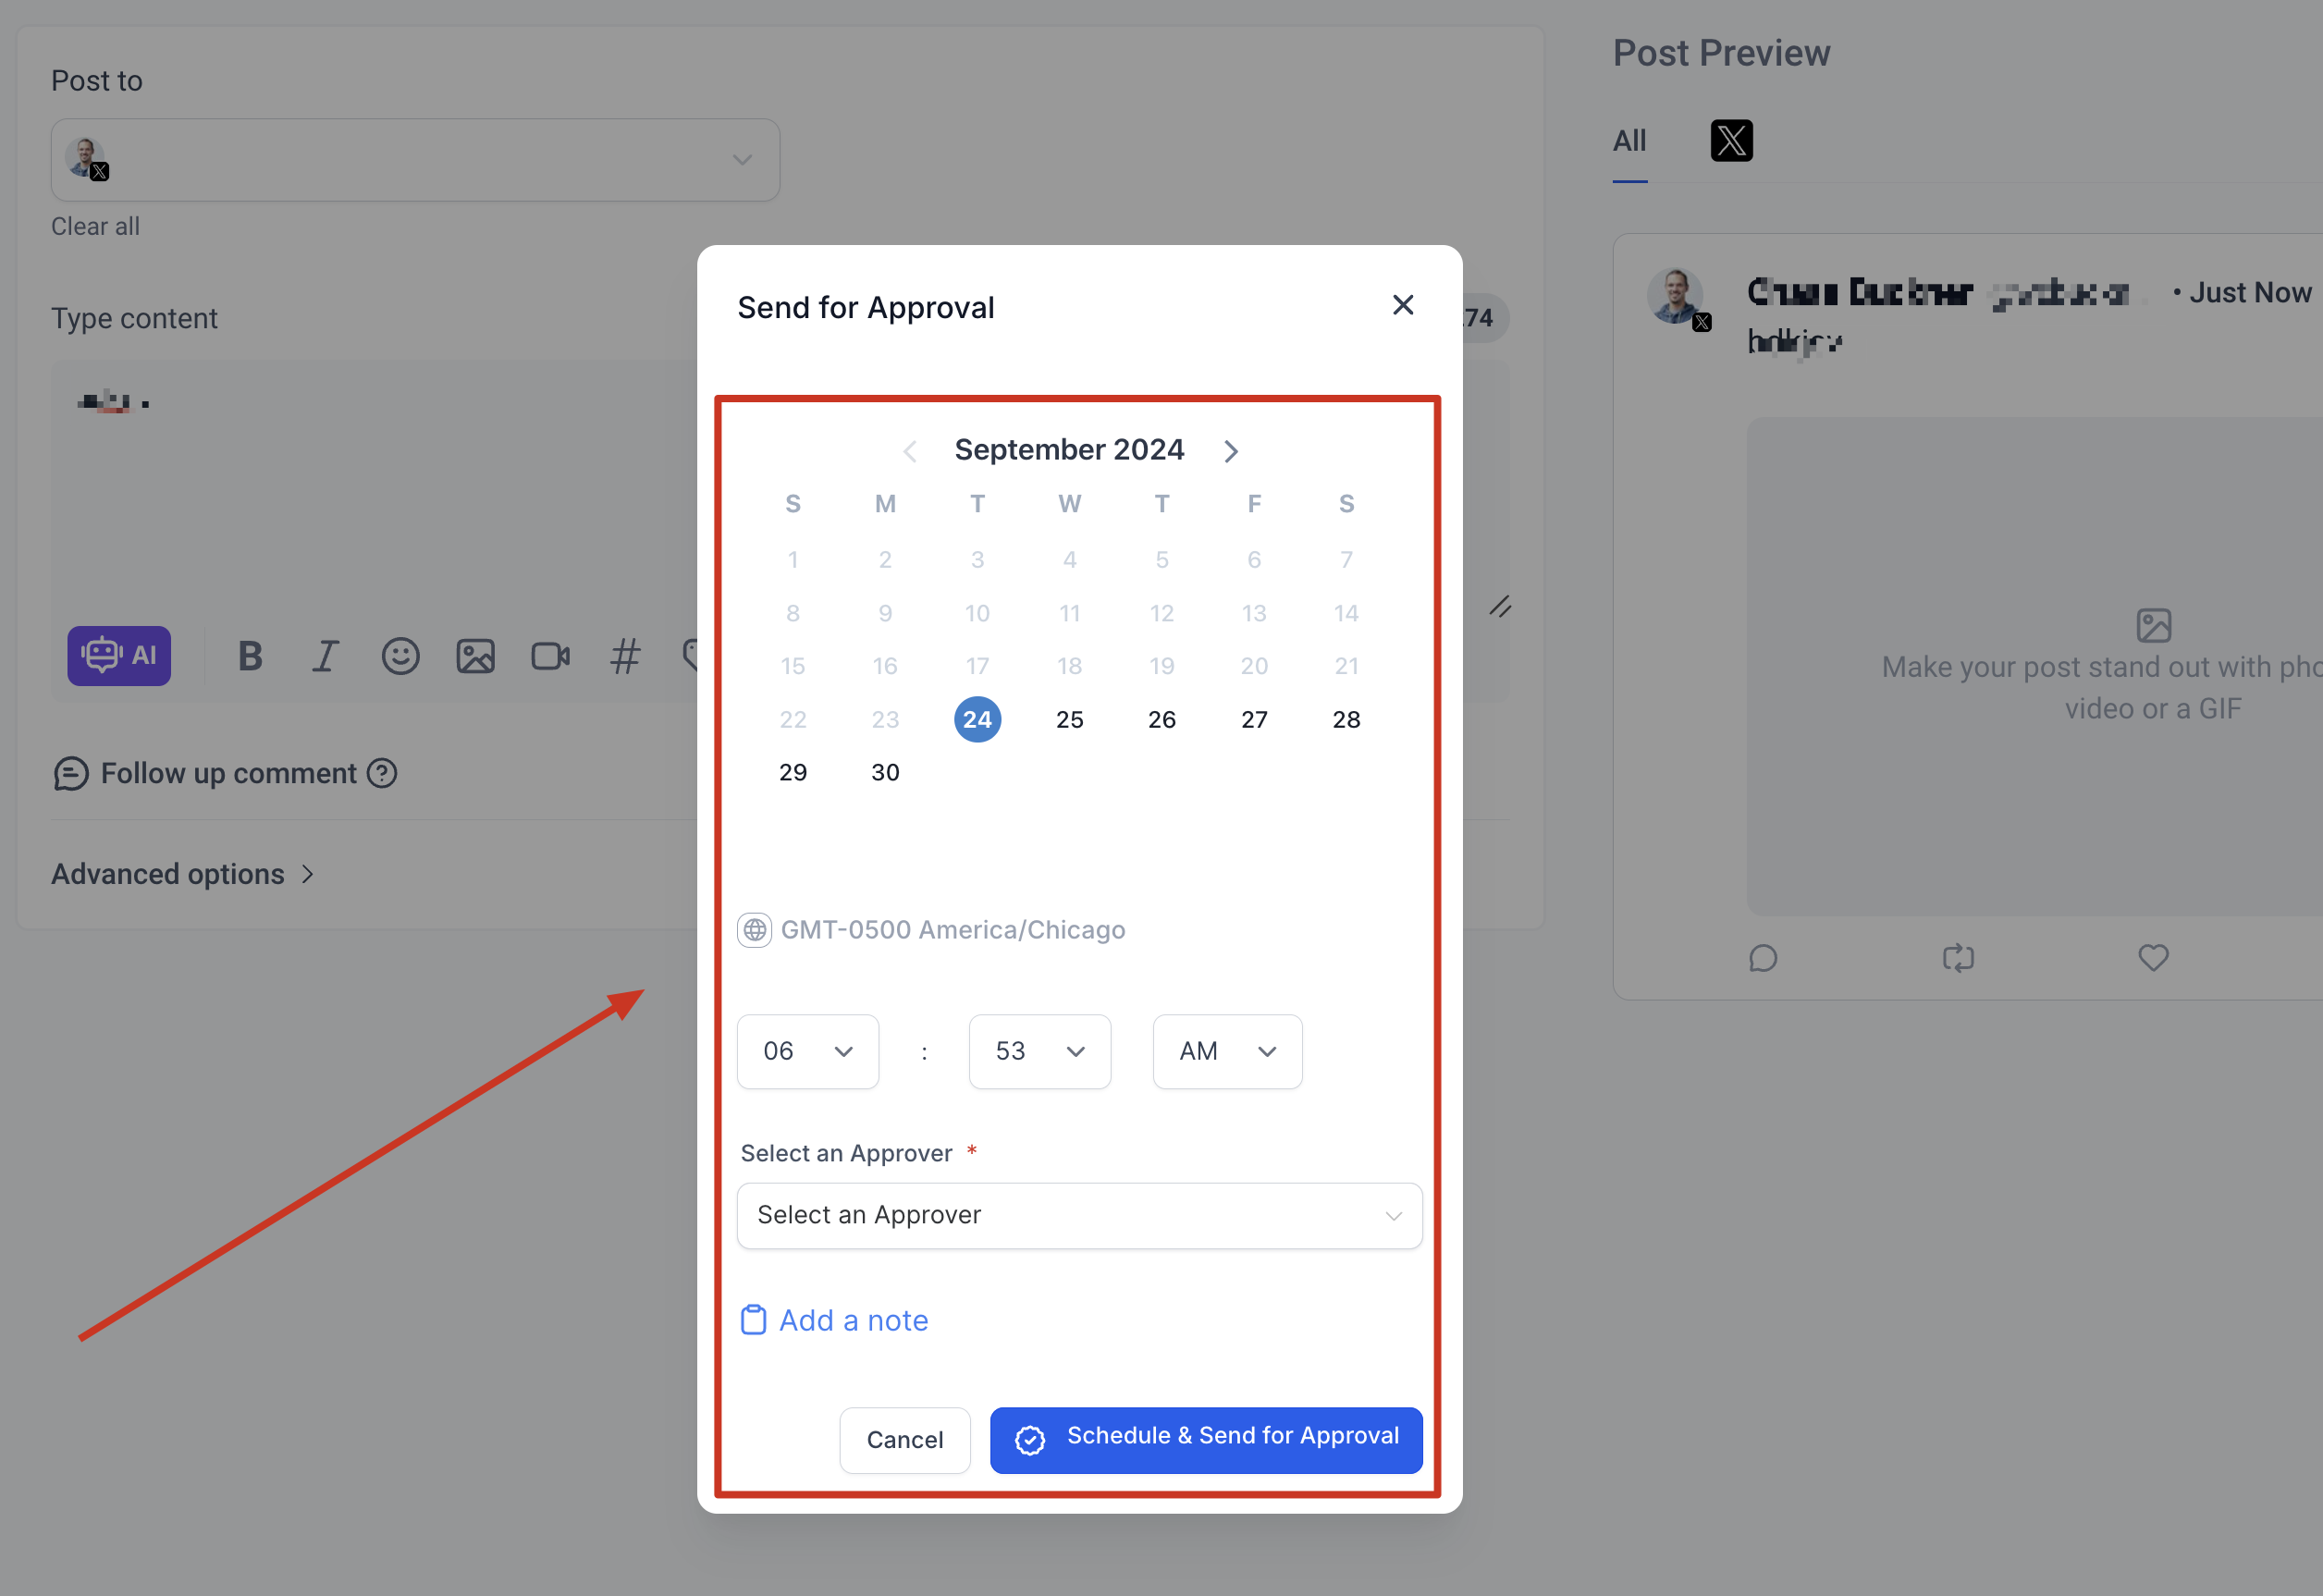
2. Once the post is created with content, rich media, hashtags and more, it can be "Scheduled for Approval"
- Add the date and time for schedule
- Choose the user who would approve the post to be schedule in social calendar
- Add an internal note for the approval for more information.


3. Once the post is sent for review, an email will be delivered for the scheduled post.
4. The reviewer can see the post in Content > Approval tab with the option to view, approve or reject. The view option will allow user to view the details of post than approve or reject. The reviewer team member can view option and it has option to edit the content too for approval flow by clicking "Edit" in view screen.


5. Once the post is approved, it will be scheduled in the social calendar. If the post is rejected, the user can view the comment sent by the reviewer.
6. Approvers can reschedule posts directly within the approval flow. In the approval review screen, they can click the scheduled date and time, choose a new publish date and time, and then click Approve to confirm both the approval and the updated schedule. After approval, the Social Planner calendar updates immediately to show the new scheduled time.

Editing and applying an Email Template as the Post Approval Email:
Users can set the email for approval from Social Planner Settings. The email template can be branded by visiting Marketing > Emails> Templates > New > Email Marketing Templates
You will then be taken to the Template Library where you will need to head to System Templates> Social Planner : Post Approval and use the template. You can edit it as you see fit.
That template can then be applied to the Post Approval email flow in Social Planner Settings> Notifications:

Choose the email template under Setup Email template for Social Post Approval

How to schedule the CSV for Approving bulk posts?
- Create a new CSV when you click "New Post" button
- Once the user adds the CSV file and Select the Socials, there will be option to Select an Approver.

- Once the posts are imported, they go for review from the chosen approver. Once approved, they are scheduled on the social calendar.
Was this article helpful?
That’s Great!
Thank you for your feedback
Sorry! We couldn't be helpful
Thank you for your feedback
Feedback sent
We appreciate your effort and will try to fix the article