KYC (Know Your Customer) verification is a crucial step to ensure the authenticity and security of user identities. This article covers best practices for completing verification, common mistakes to avoid, and how to access KYC verification anytime without waiting for a phone number application.
Access KYC Verification Anytime
You don't have to wait until you're applying for a phone number or registration to start your KYC verification. You can manually trigger the verification process anytime directly from your sub-account settings. This allows you to get verified early and avoid delays when you're ready to port or register a number.
Navigate to the following path in your account:
Sub-account Settings → Phone System → Additional Settings → KYC Verification → Complete Verification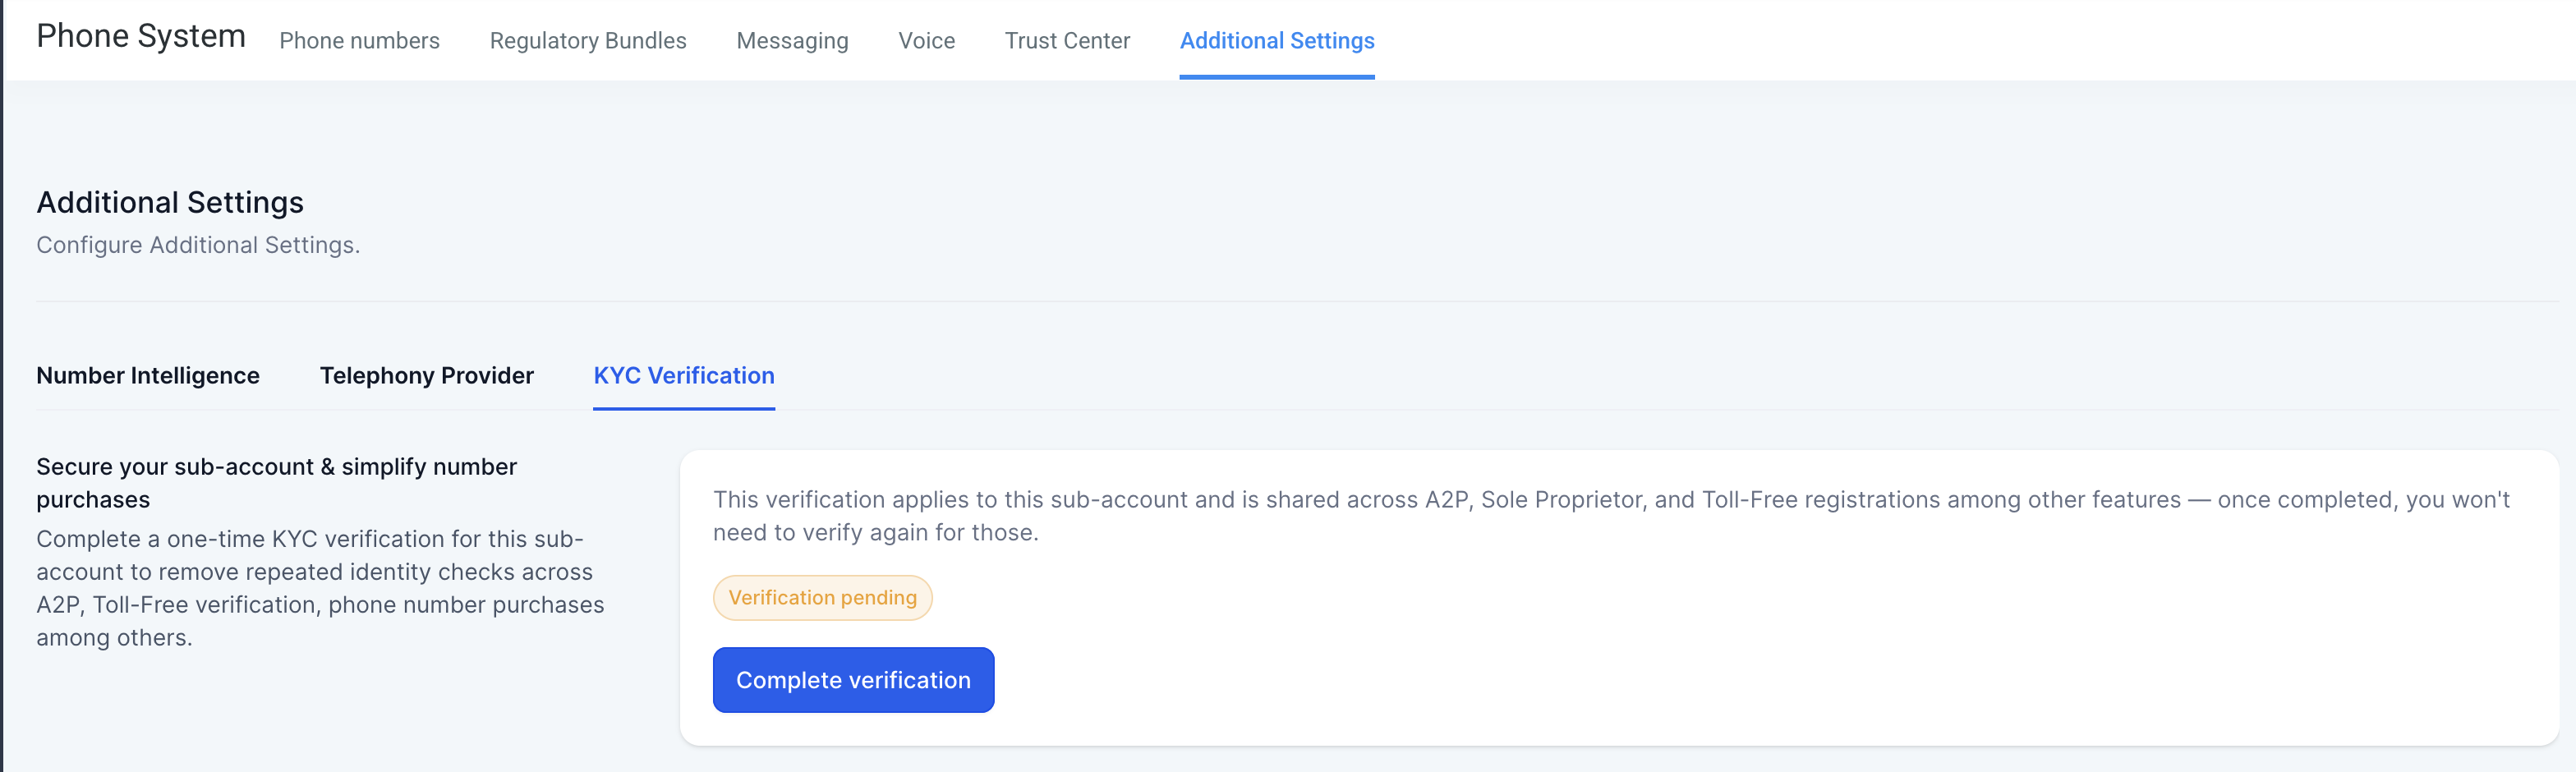
Completing your KYC verification early means you'll have zero delays when you're ready to port a number or set up new phone services. Get verified now and be ready to go.
Best Practices for KYC Verification
Each user is allowed a maximum of 10 attempts to complete their verification. Double-check your information and documents before submitting each attempt. Repeated failed attempts may result in delays or temporary restrictions from retrying the process.
Tip: Ensure your ID photo is clear, not cropped, and that your information matches exactly with your registration details.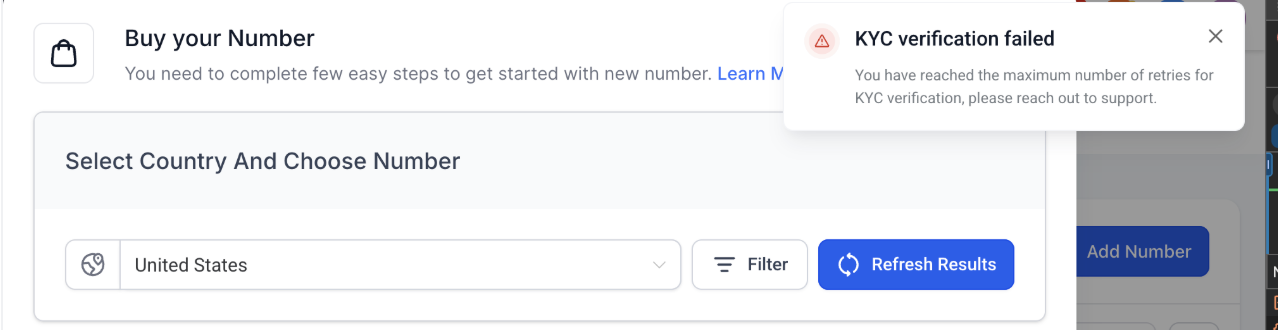
If you encounter a "Session Expired" message, it usually means your verification session wasn't completed, for example, if you closed the browser or navigated away before finishing.
Prevention: Once you begin KYC verification, avoid closing, refreshing, or leaving the browser tab until all steps are completed. Closing too early will leave your verification status as "Pending" until the system automatically updates, which typically takes up to 24 hours.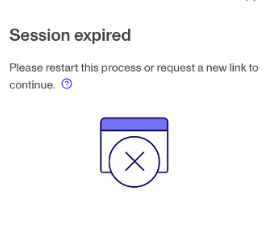
If it persists: If the issue continues beyond 24 hours, submit a support ticket so our team can review your case and reset your verification session.
Always upload an identification document issued by the country you are currently based in. Using documents from a different country may result in verification failure or additional review steps.
Acceptable documents include:
- Passport
- National ID card
- Driver's license (if locally issued)
Note: Acceptable documents can vary from country to country.
Electronic or digital replicas of identification cards (such as screenshots, scanned copies, or photos displayed on another device) are not accepted.
Upload only: Images of the original, physical ID card. This maintains authenticity and prevents verification delays or rejection.
Additional Tips for a Smooth Experience
- Use a well-lit environment when taking document photos to ensure clarity.
- Avoid glare, blur, or cropped edges on your ID images.
- Ensure your name and date of birth match your registered account details exactly.
- Do not use an expired card — your ID must be valid.
- Have a stable internet connection and sufficient time to complete the process in one sitting.
Once you start the verification process, keep your browser tab open and avoid refreshing or navigating away. Closing the tab will interrupt your session and require you to restart.
Frequently Asked Questions
Was this article helpful?
That’s Great!
Thank you for your feedback
Sorry! We couldn't be helpful
Thank you for your feedback
Feedback sent
We appreciate your effort and will try to fix the article