Customize your invoice’s look and feel in HighLevel to match your brand and workflow. This article shows how to customize invoices through changing button colors and text, renaming sections, and editting line-item labels. Use these tools to create professional, on-brand invoices your clients trust.
TABLE OF CONTENTS
What is Invoice Layout Customization?
Invoice Layout Customization lets you control the visual design and section wording of your invoices at the sub-account level. Instead of one fixed template, you can adjust branding, business and contact sections, and line-item labels so every invoice reflects your brand and the specifics of your industry.
Key Benefits of Invoice Layout Customization
Brand Consistency: Align colors and wording with your brand for a polished, trustworthy invoice.
Clarity for Clients: Rename sections and labels so customers instantly recognize what they’re seeing.
Flexibility: Show or hide fields and add up to 3 custom values in Business Information to fit regional or industry needs.
Efficiency: Edit once and reuse, your saved layout appears in the invoice preview and PDFs.
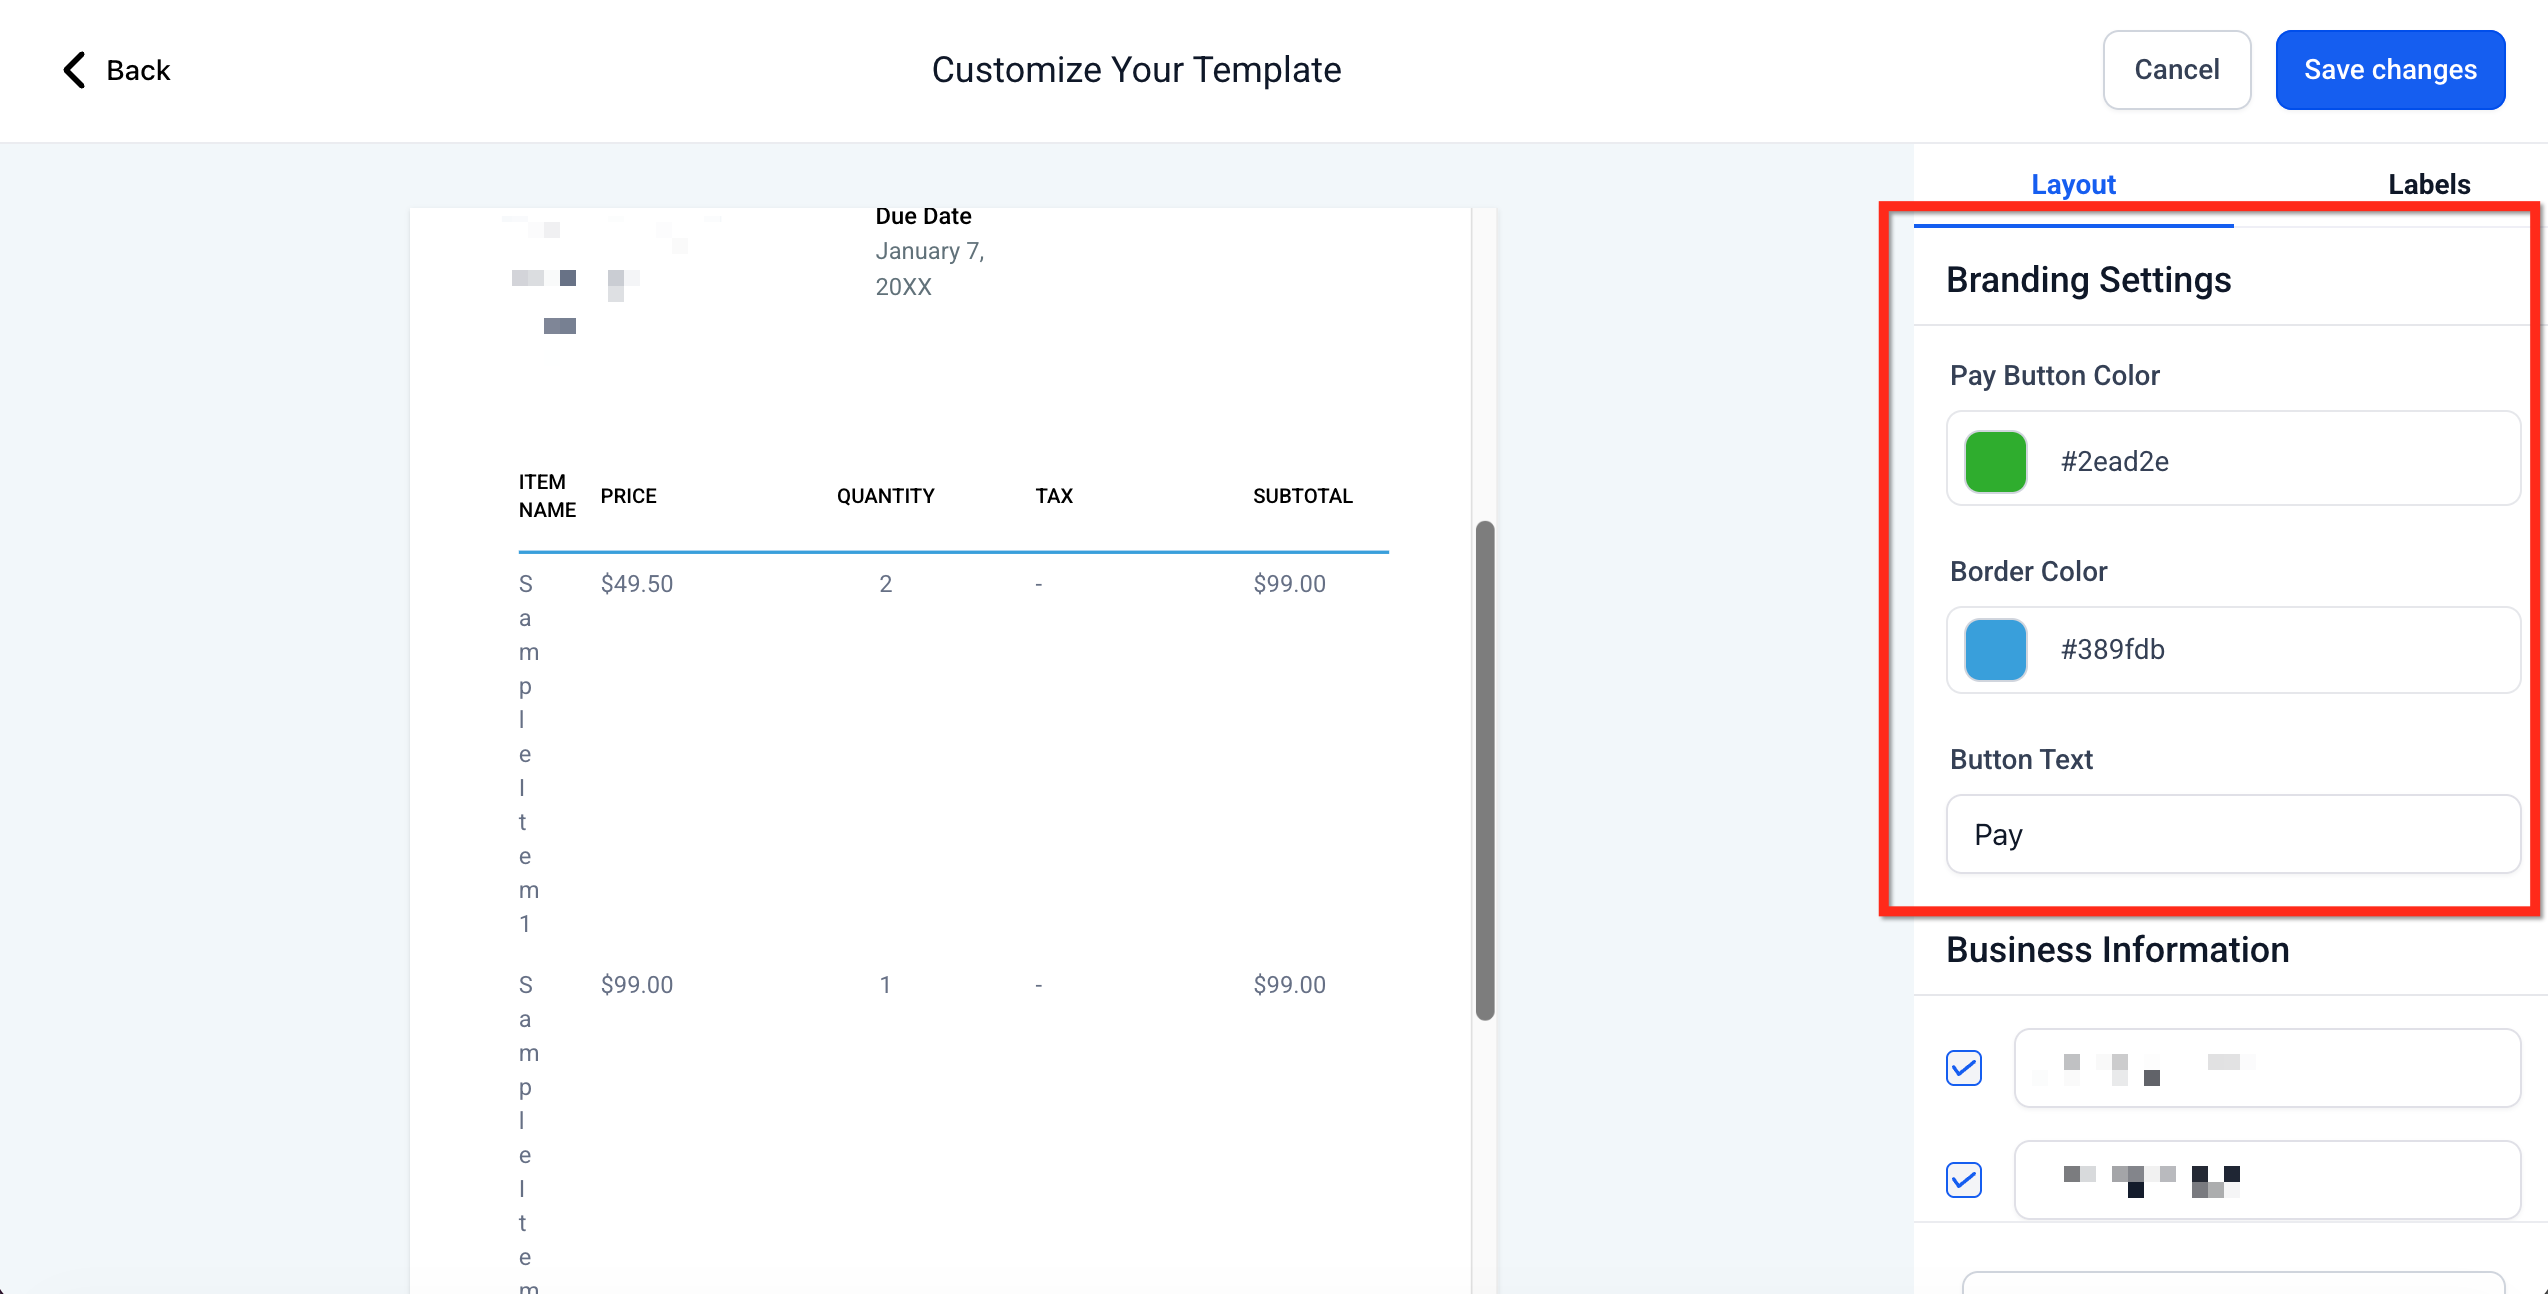
Branding Settings
Branding controls shape first impressions by adjusting the pay button’s color, border, and text. These choices help reinforce your brand and set the right context (e.g., “Pay” vs. “Donate”).
What you can customize:
Pay Button Color (use the color picker)
Border Color (use the color picker)
Button Text (e.g., change Pay to Donate)
Business Information
Business Information identifies who is issuing the invoice. Toggling fields or adding custom values keeps your documents compliant across regions while avoiding clutter.
What you can do:
- Show/Hide standard fields like Company Name, Phone, Address, Tax IDs.
- Add up to 3 custom values (e.g., Company Registration, VAT/GST, Website).
- Reorder or remove custom values as needs change (delete to remove).
Tip: Unchecked fields are hidden from recipients, but your team can still edit their values while creating an invoice.
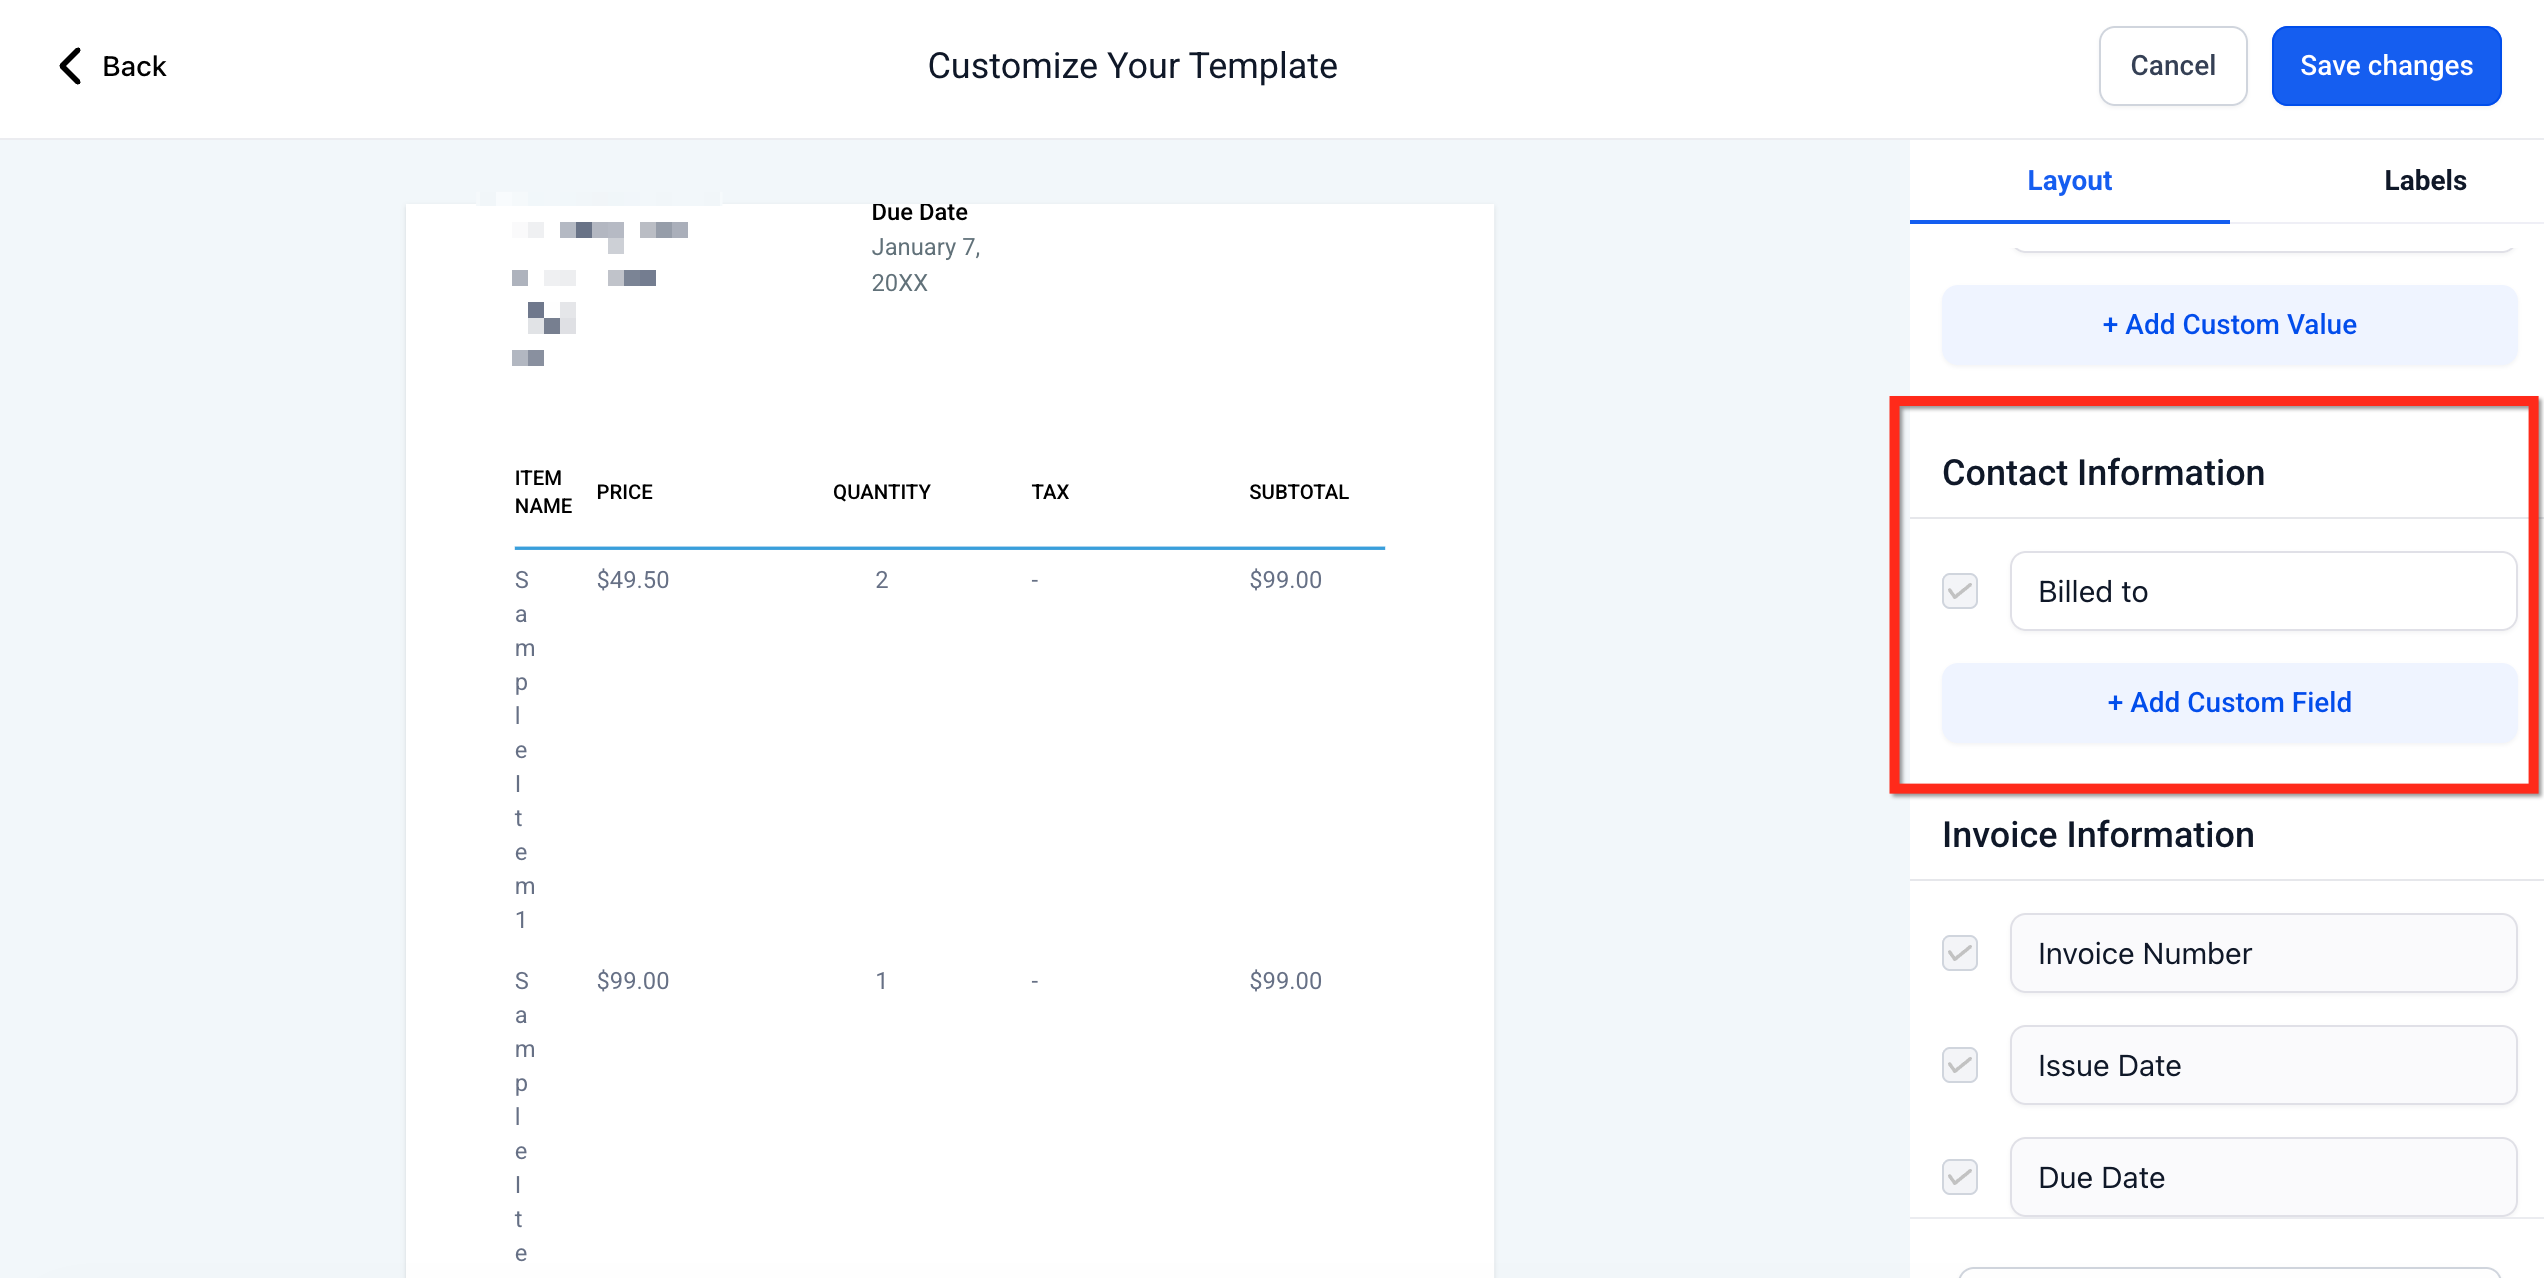
Contact Information
This area defines the recipient block (e.g., “Billed to” or “Shipping details”). Renaming the section improves clarity for your use case (nonprofit, shipping-heavy, B2B, etc.).
What you can do:
Rename the section header (e.g., Billed to → Shipping details).
Add custom fields to capture extra recipient details.
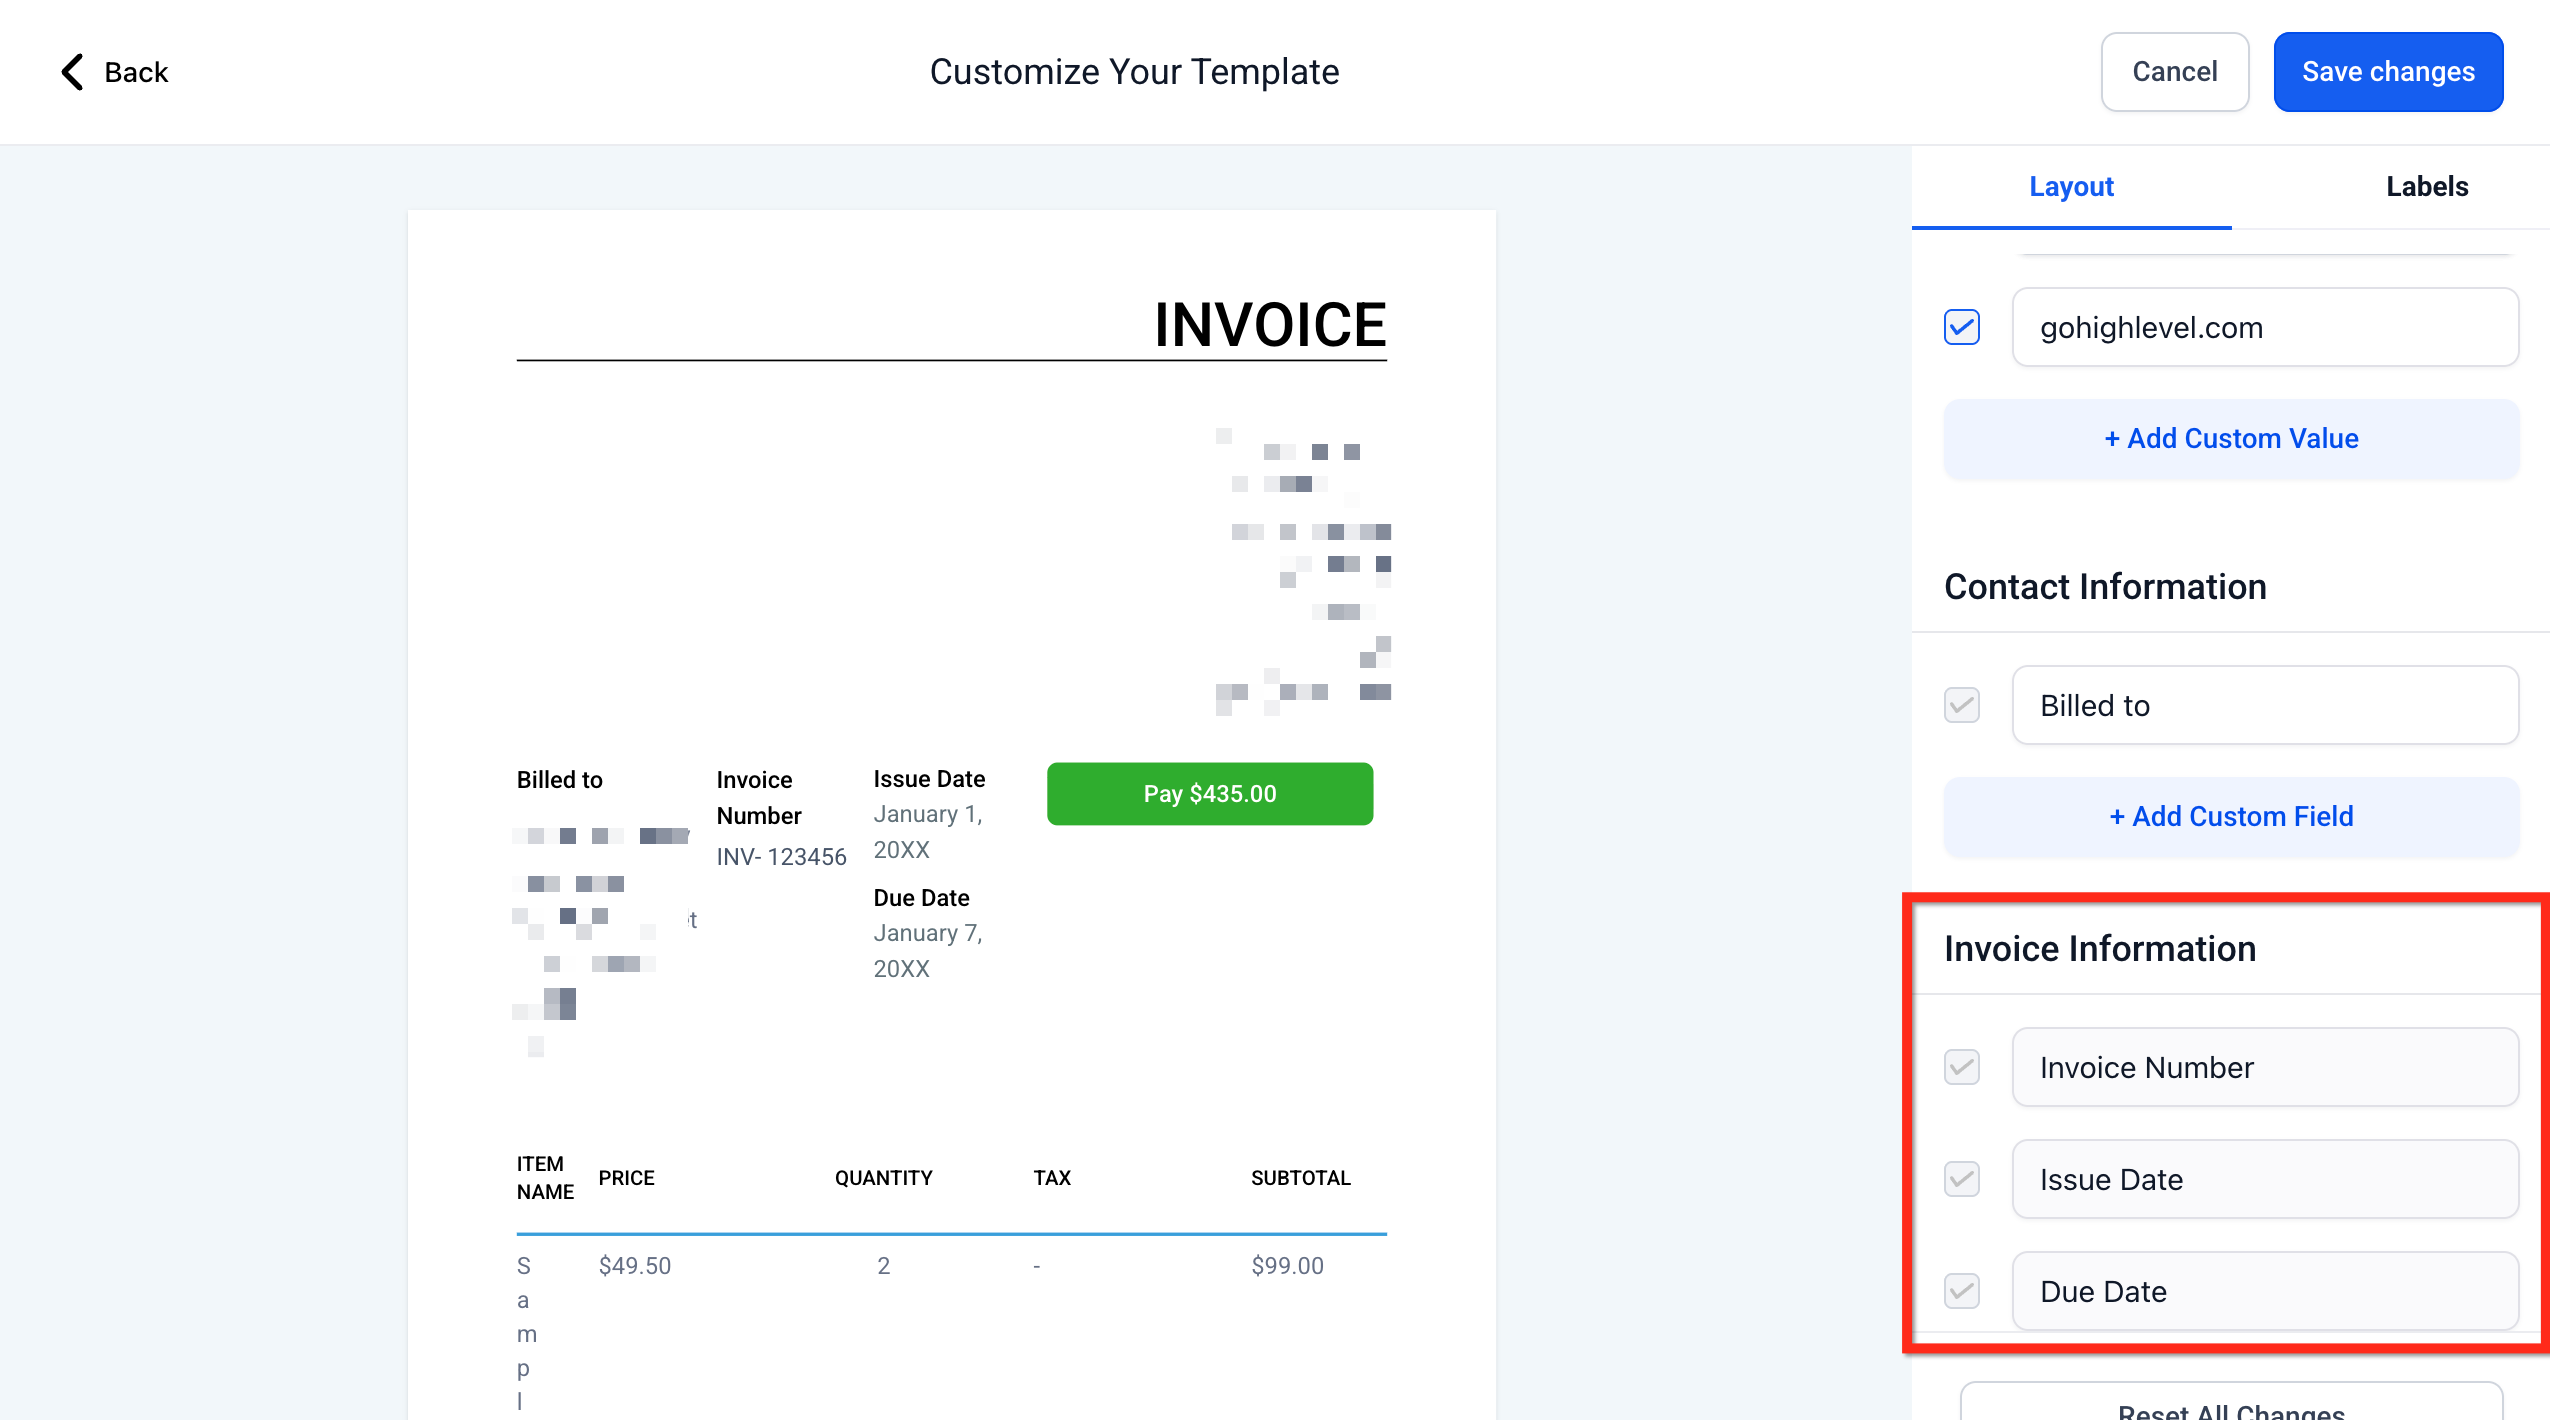
Invoice Information
Invoice Information covers core document details such as invoice number and dates. Keeping only what you need simplifies the layout for customers.
What you can do:
Show/Hide Invoice Number, Issue Date, Due Date, and similar fields.
Keep internal fields editable during invoice creation even if they’re hidden on the recipient view.
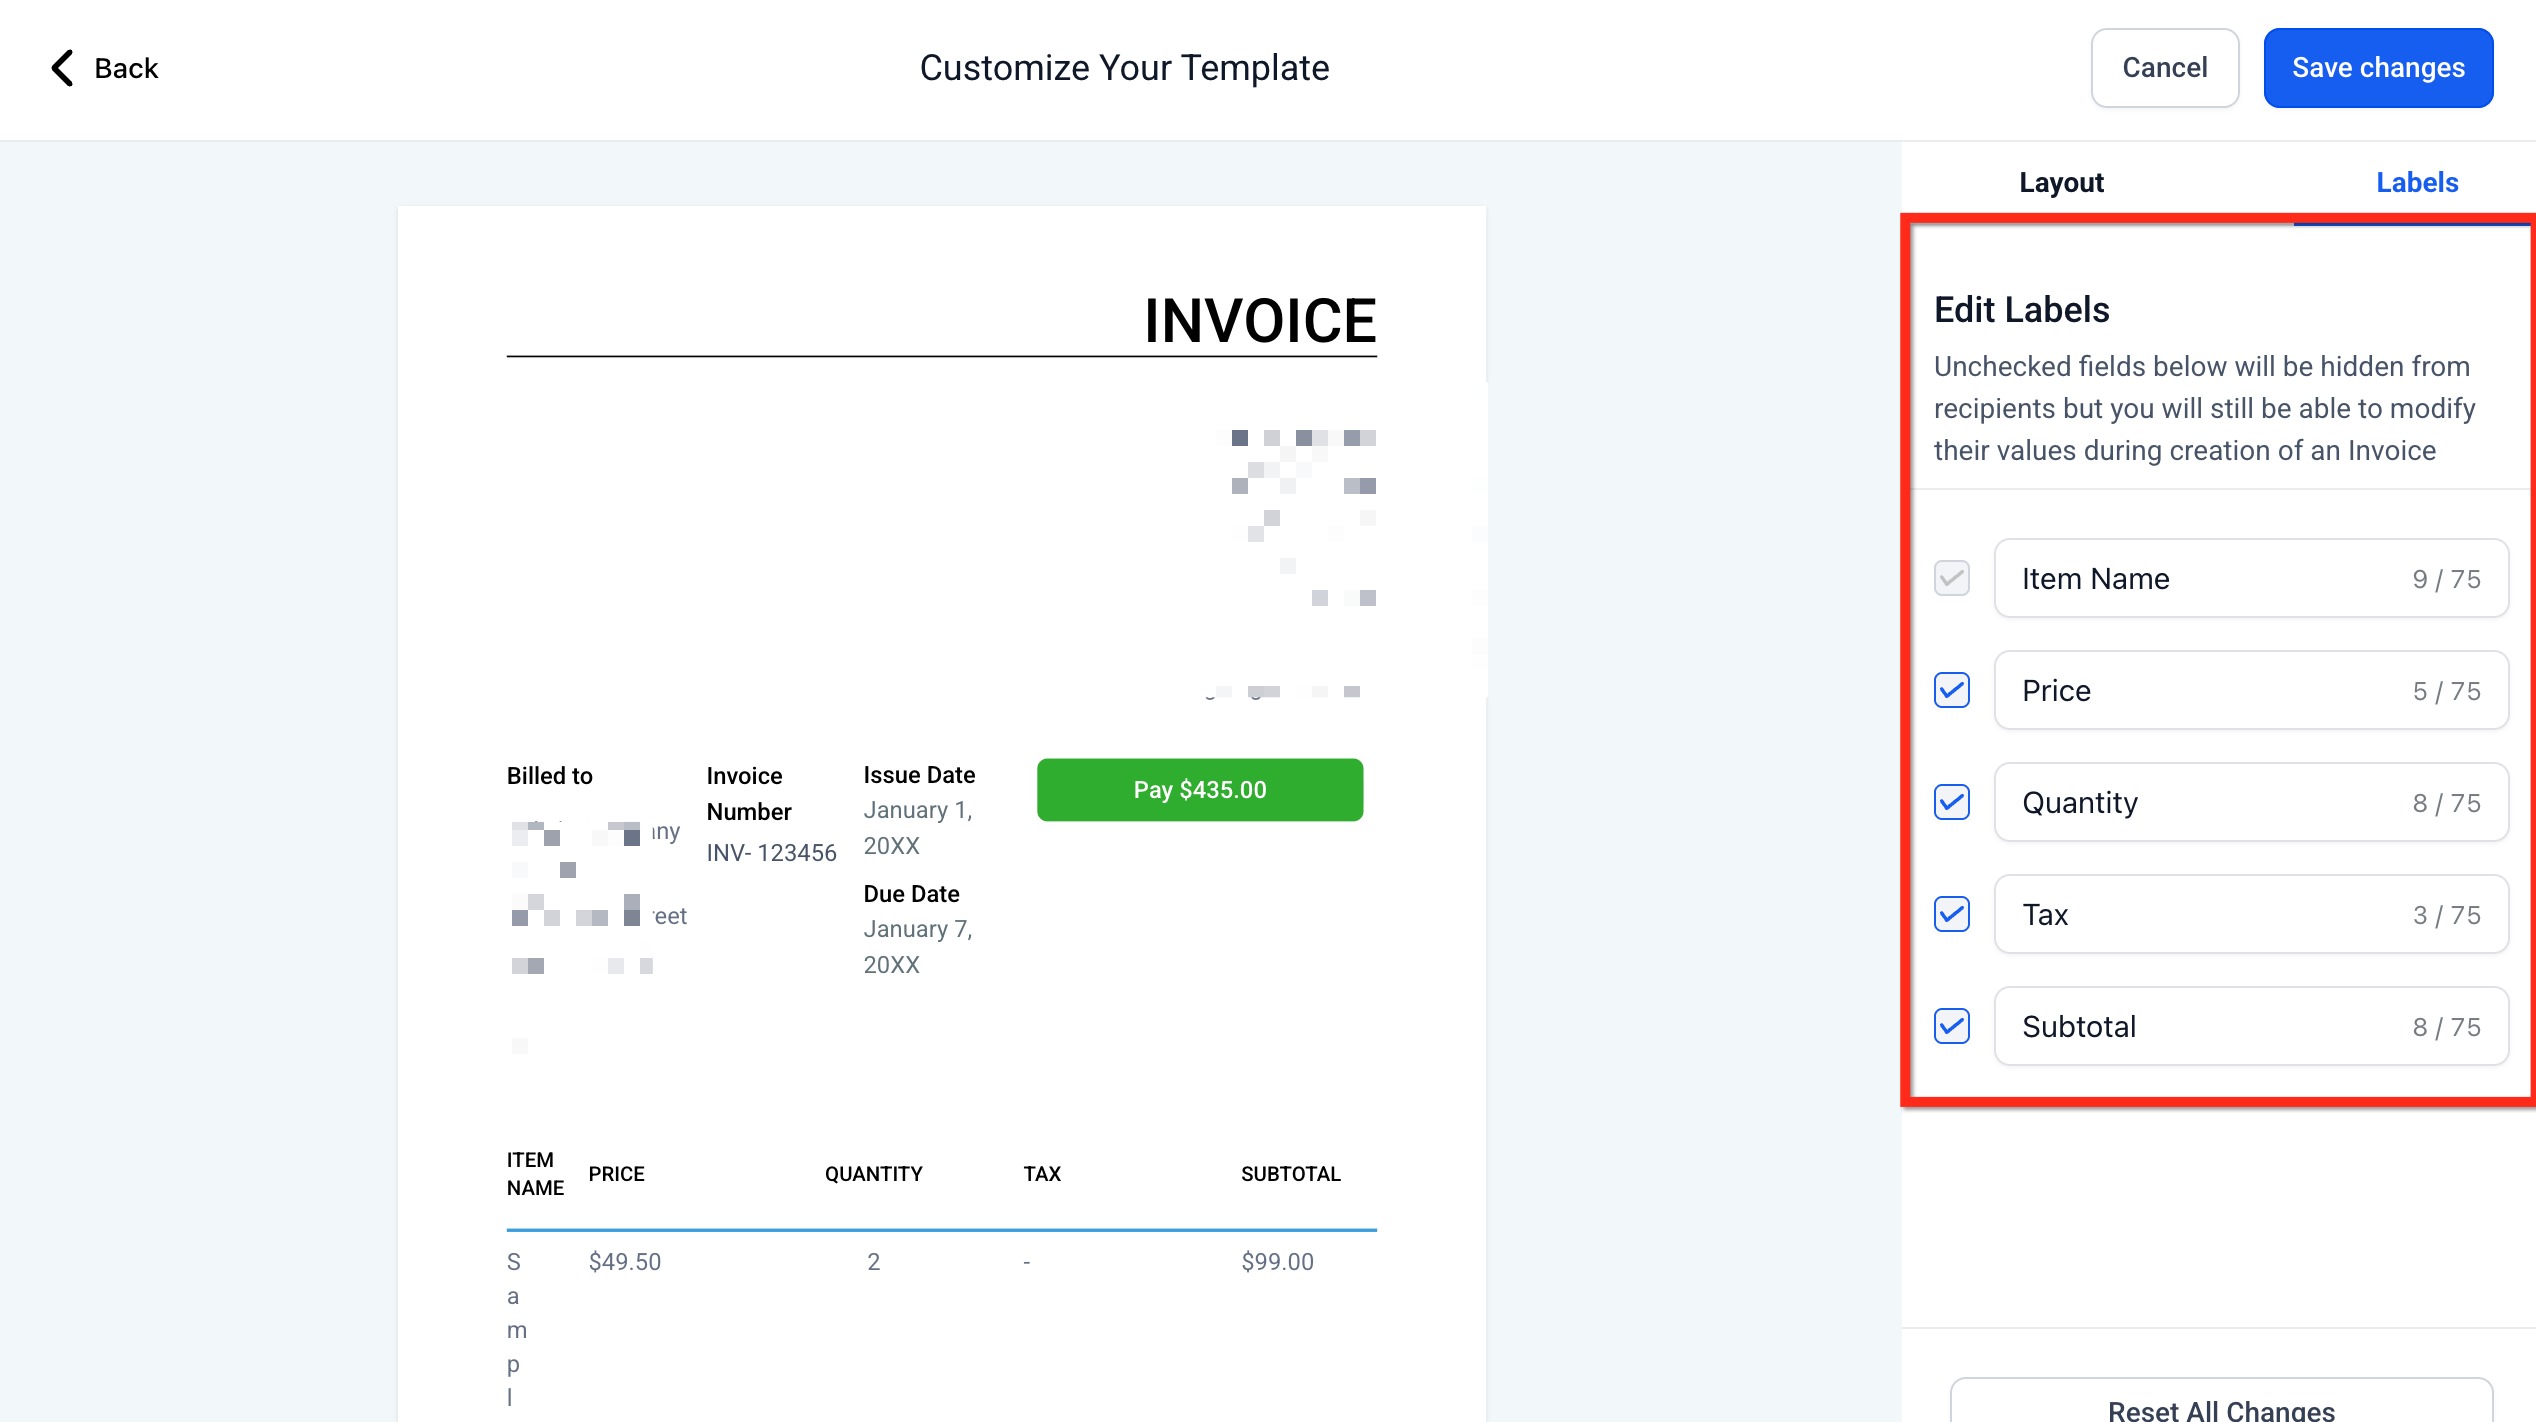
Labels
Labels define the column headers for your line items, what customers read at a glance. Clear labels reduce questions and accelerate payment.
What you can do:
- Rename column headers (e.g., Item Name → Product Name).
- Show/Hide Price, Quantity, Tax, Subtotal, etc.
- Respect character counters (e.g., up to 75 characters) to avoid wrapping.
Tip: If you uncheck a label, that column is hidden from recipients; your team can still enter values during invoice creation.

How To Set Up Invoice Layout Customization
Follow these steps to locate the controls, adjust the layout, and save your design so every new invoice uses your preferred styling.
Step 1: Navigate to Invoices
From the sub-account dashboard, go to Payments → Invoices & Estimates.

Step 2: Settings
Click the Settings button (top-right).

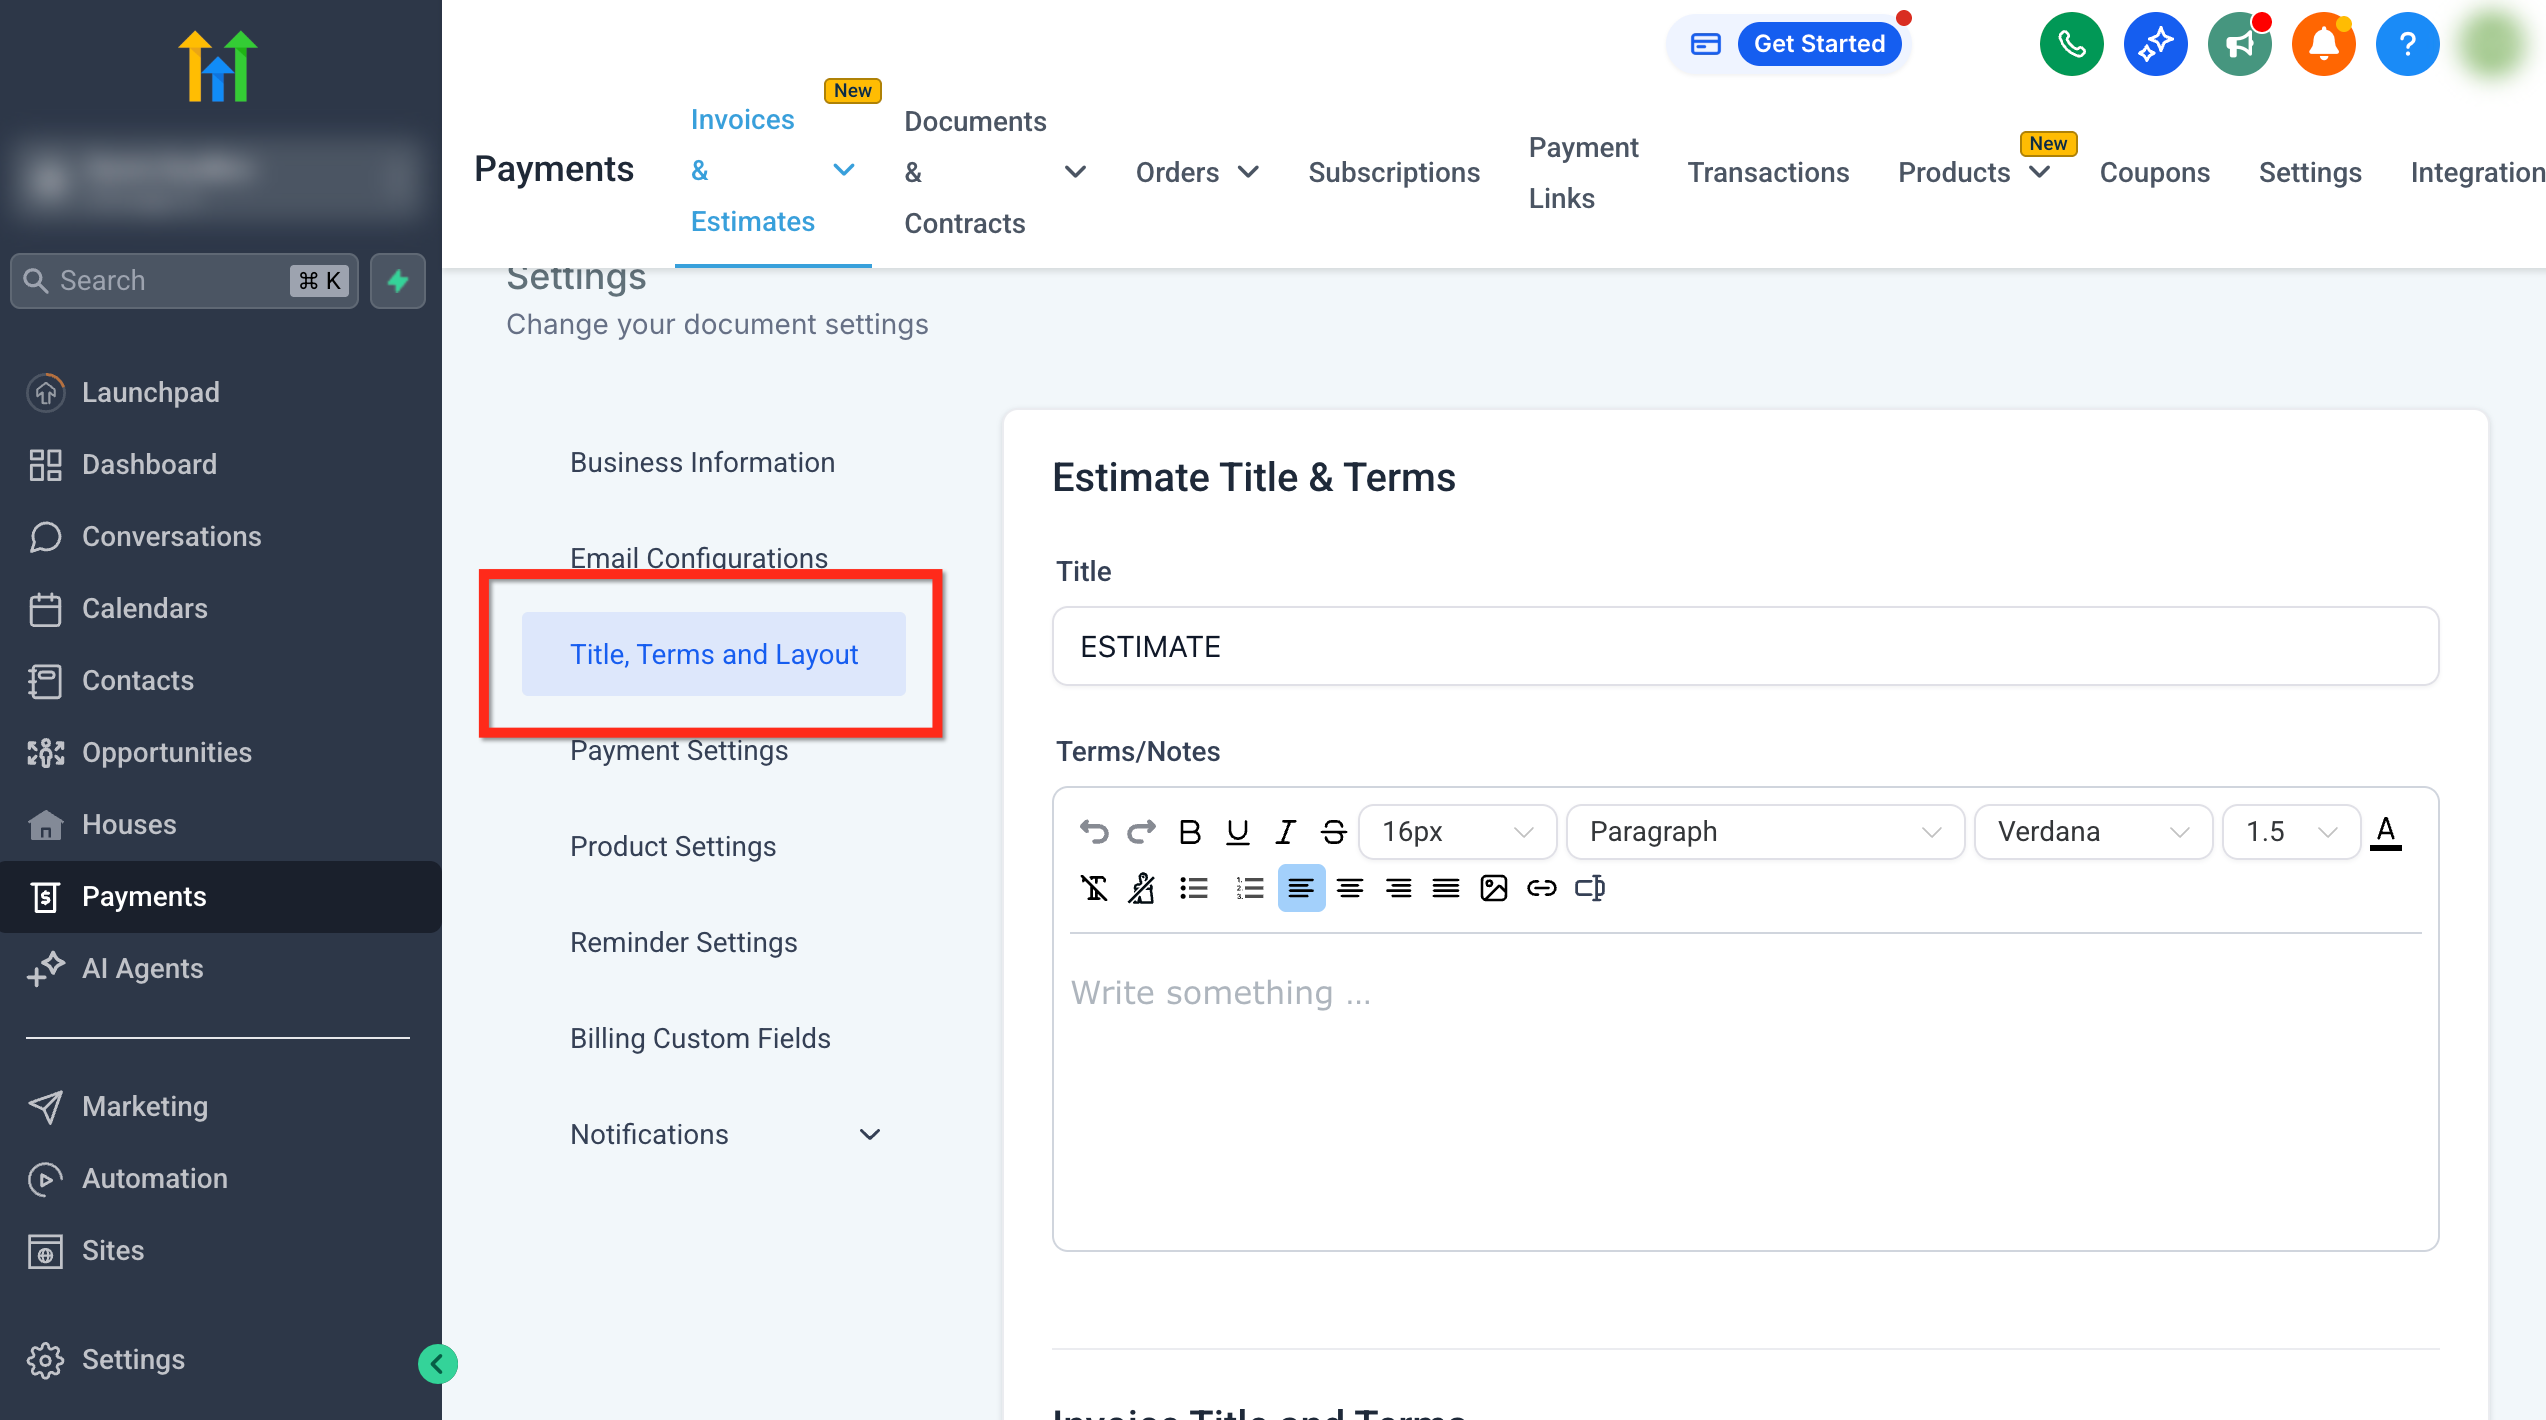
Step 3: Go to Layout
In the secondary navigation, choose Title, Terms and Layout.
Step 4: Click Customize Layout
Scroll to Invoice Layout and click Customize Layout.

Step 5: Layout Tab
In the Layout tab:
Open Branding Settings → choose Pay Button Color and Border Color using the color picker; update Button Text if needed (e.g., Donate).
Expand Business Information → check/uncheck fields; add up to 3 custom values.
Expand Contact Information → rename the section header (e.g., “Shipping details”) and add custom fields as needed.
(Optional) Expand Invoice Information → show/hide Invoice Number, Issue Date, Due Date.

Step 6: Update Labels
Switch to the Labels tab → rename or hide line-item columns (Item Name, Price, Quantity, Tax, Subtotal).
Step 7: Preview & Save Changes
Review the live preview to ensure everything looks correct. Click Save changes (top-right) to apply your design.
Tip: To start over, click Reset All Changes to restore defaults.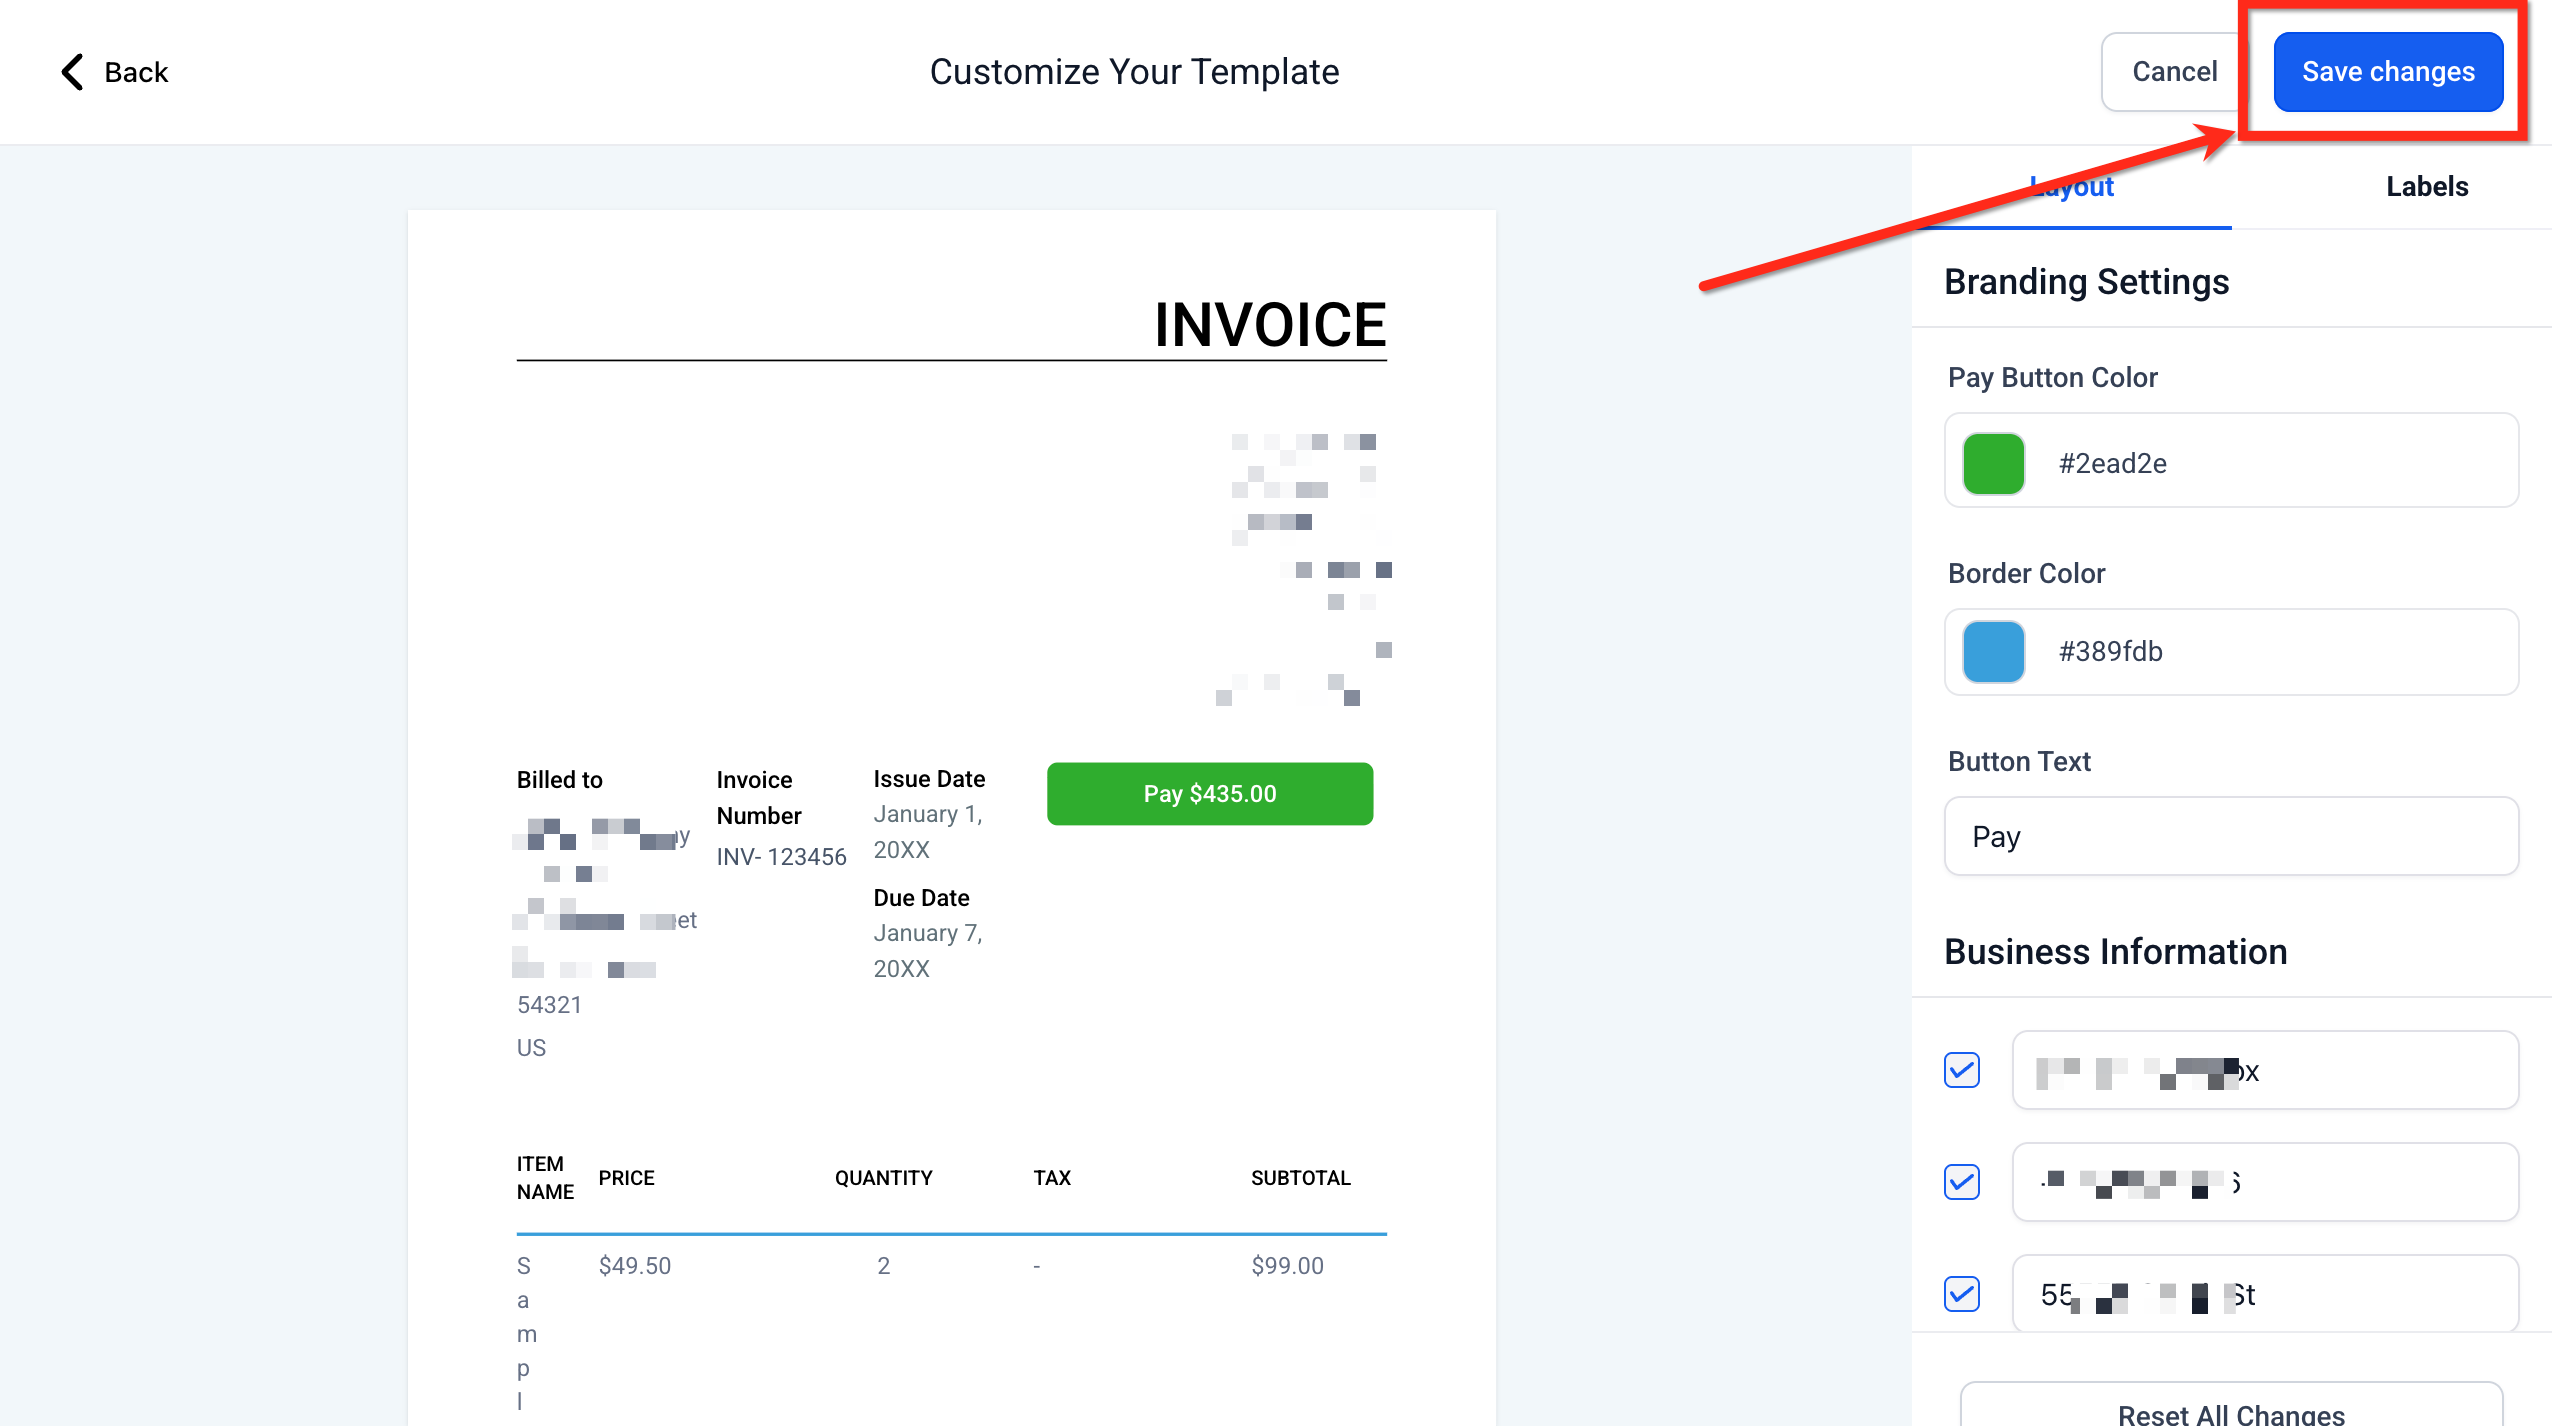
Frequently Asked Questions
Q: Do these changes apply to all invoices in my sub-account?
Yes. Layout customizations are saved at the sub-account level and used for invoices you create in that sub-account.
Q: Will previously sent PDFs update after I change the layout?
No. Previously delivered PDFs won’t change automatically. Create a fresh PDF or resend the invoice so recipients see your latest layout.
Q: Can I hide a column but still enter those values when creating an invoice?
Yes. Hiding a label only hides it from the recipient view; your team can still edit the values during invoice creation.
Q: How many custom values can I add to Business Information?
Up to 3 custom values.
Q: Do layout changes appear in downloaded or emailed PDFs?
Yes. PDFs reflect the saved layout when you generate or resend them. See PDF Generation for Invoices and Receipts for details.
Related Articles
Was this article helpful?
That’s Great!
Thank you for your feedback
Sorry! We couldn't be helpful
Thank you for your feedback
Feedback sent
We appreciate your effort and will try to fix the article