Staying compliant with SMS/MMS regulations can be complex, especially when managing multiple campaigns. This article explains how to use the Automatically Add Opt-Out & Sender Info to Messages Periodically feature to keep your conversations compliant, consistent, and carrier-approved.
You'll learn what the feature does, why it matters, and how to configure it step-by-step inside your account.
What Is Auto-Updating Opt-Out & Sender Info?
This feature is a built-in compliance automation that appends required opt-out language and sender details to your SMS/MMS conversations at regular intervals.
It ensures that ongoing conversations continue to meet standards set by TCPA, CTIA, GDPR, and CCPA, reducing the risk of regulatory penalties or message filtering.
Once configured, the system automatically refreshes compliance details such as “Reply STOP to unsubscribe” and your sender name without you having to manually add them to each conversation.
Key Benefits
This automation is designed to simplify compliance and maintain healthy message deliverability across your campaigns.
How to Set Up Auto-Updating Opt-Out Message & Sender Info
Follow these steps to enable automatic compliance updates for your SMS/MMS conversations.
The Enable Periodic Opt-Out setting is controlled at the sub-account (location) level. Turn it on to automatically re-add sender info and opt-out language at regular intervals for ongoing conversations.
- You want compliance language refreshed automatically for long-running threads.
- You send recurring promotions or nurture messages and want consistent opt-out visibility.
- You only need the first-message compliance behavior and do not want periodic re-insertion.
- You handle follow-up compliance language manually (not recommended).
New sub-accounts: Enabled. Existing sub-accounts: Disabled.
The first outbound message behavior does not change — sender info and opt-out language still apply to the first outbound message in a conversation.
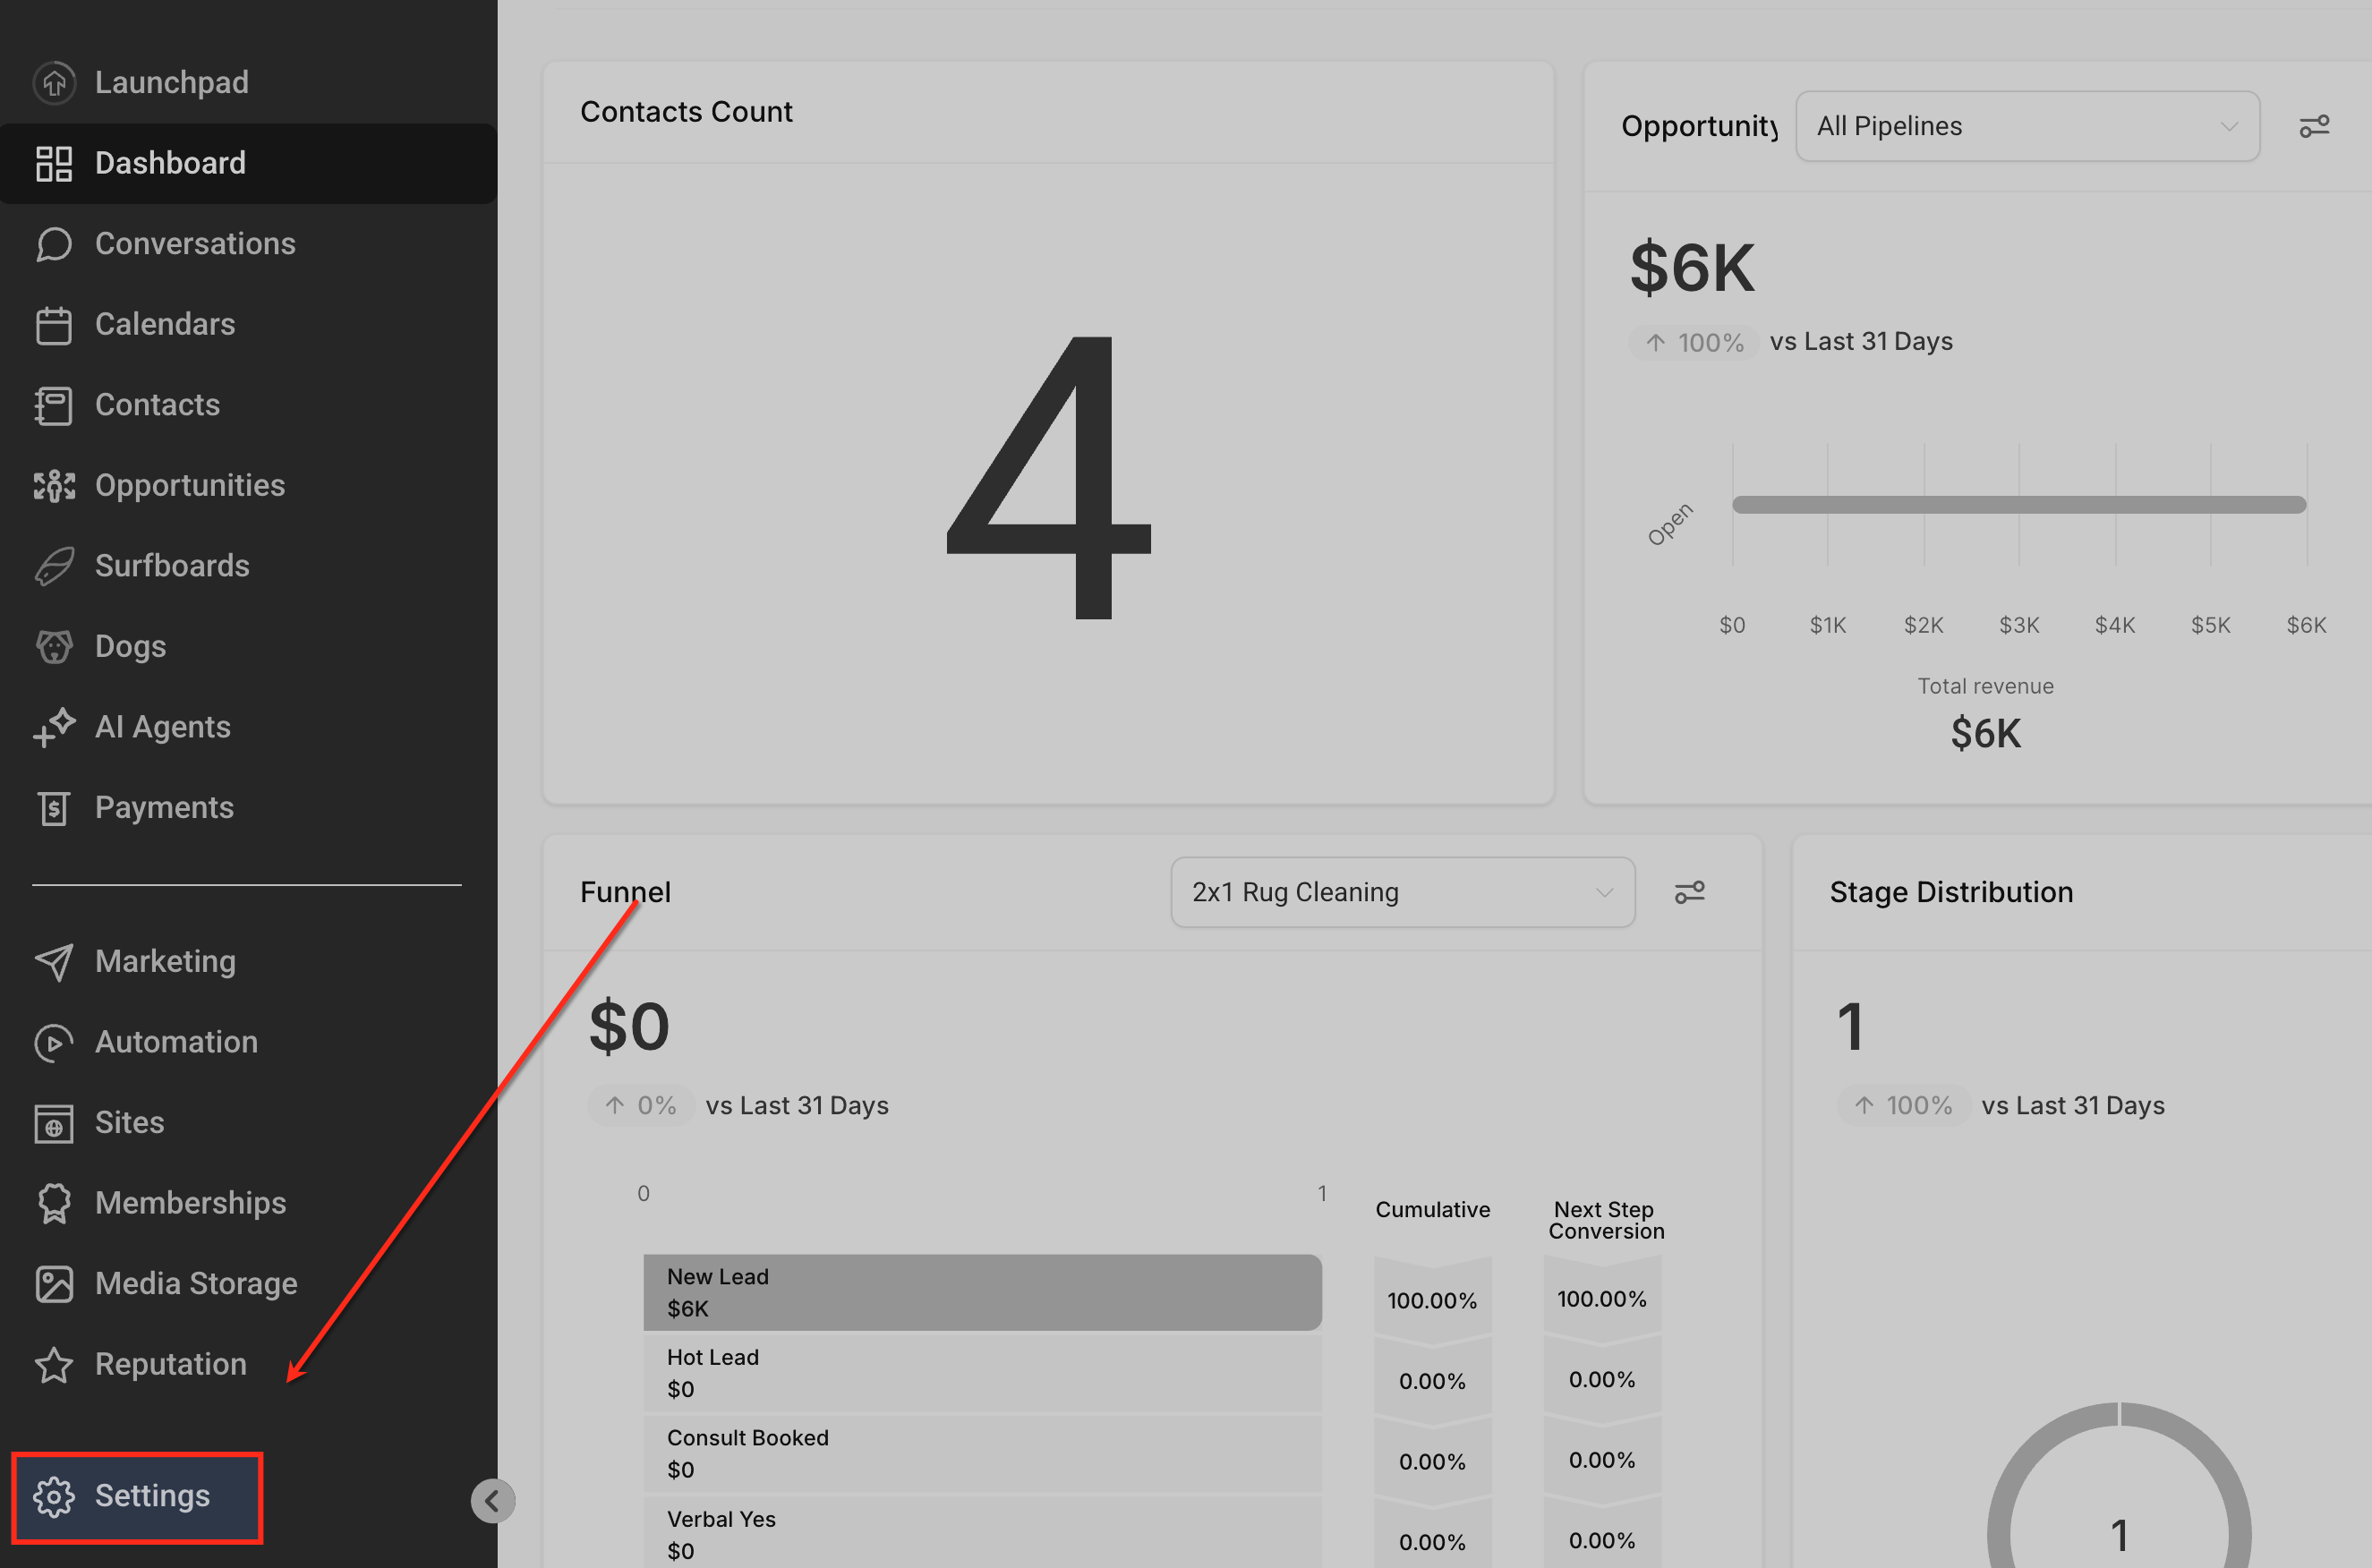
From your main dashboard, click Settings in the left navigation menu. This is where all system-level configurations are managed.
In the Settings menu, select Phone Numbers. This area manages your messaging, voice, and compliance configurations for all connected phone numbers.
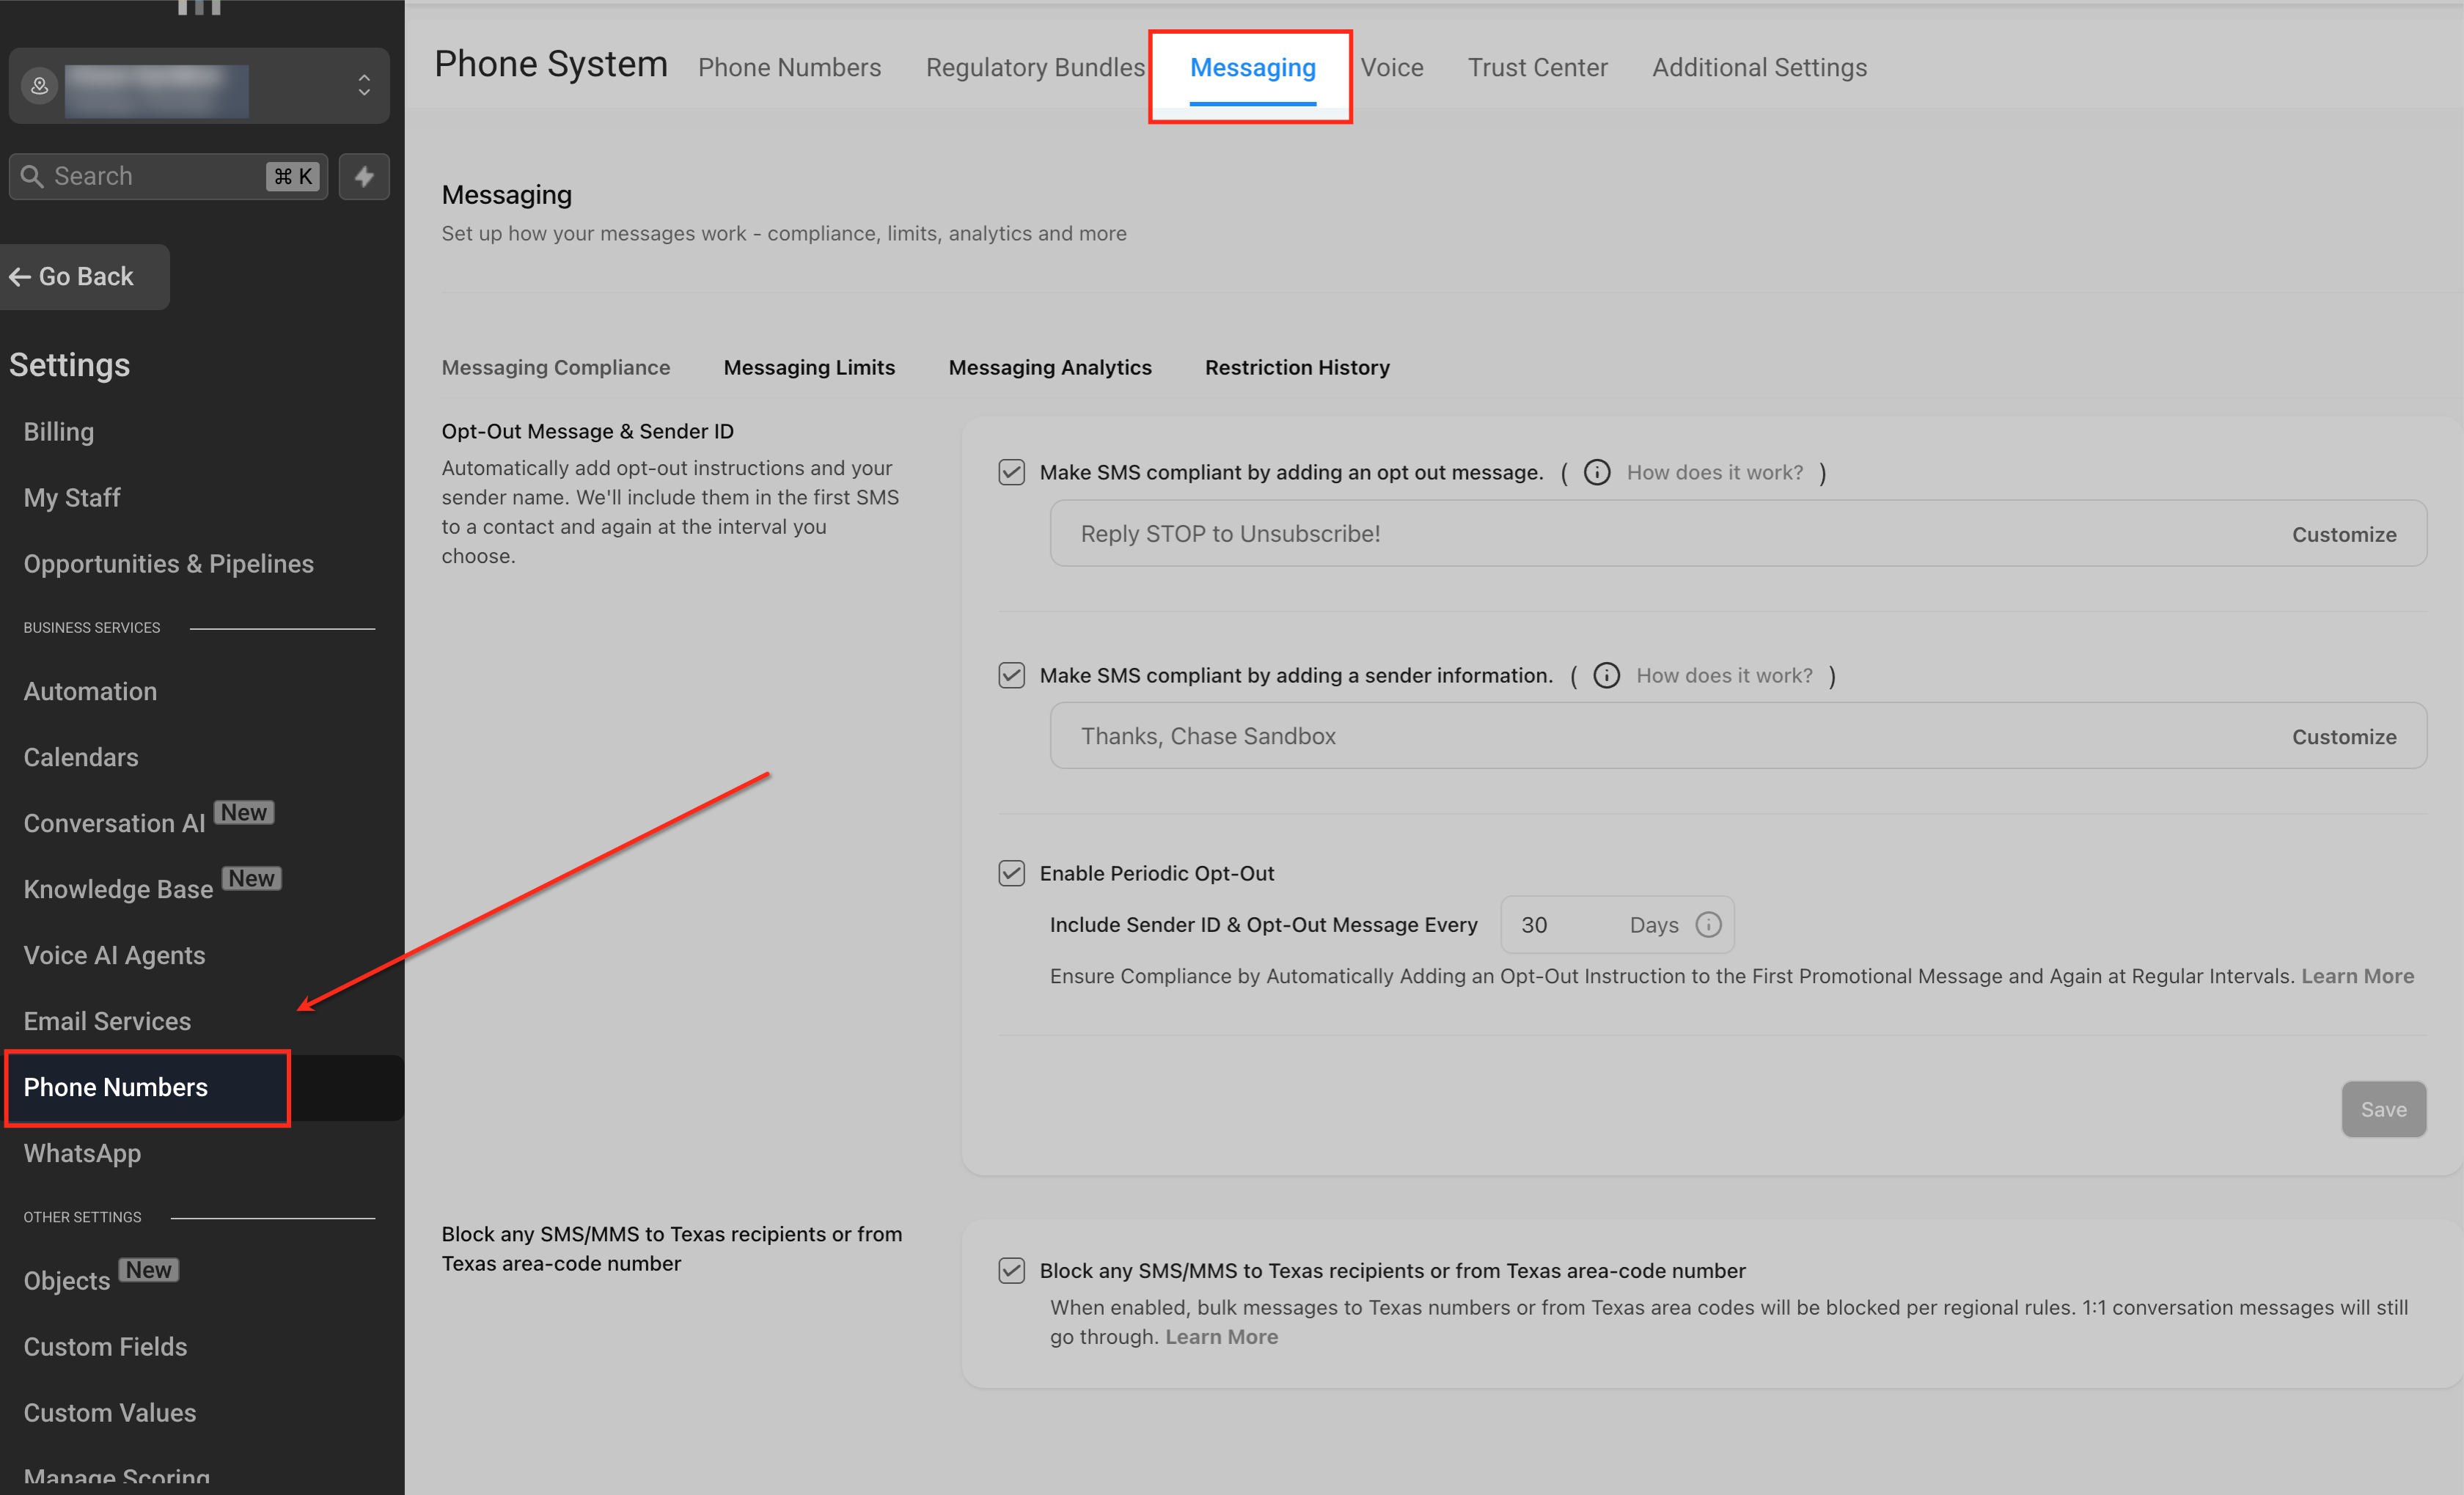
At the top of the Phone System page, click the Messaging tab. This tab includes all settings related to message delivery, compliance, and analytics.
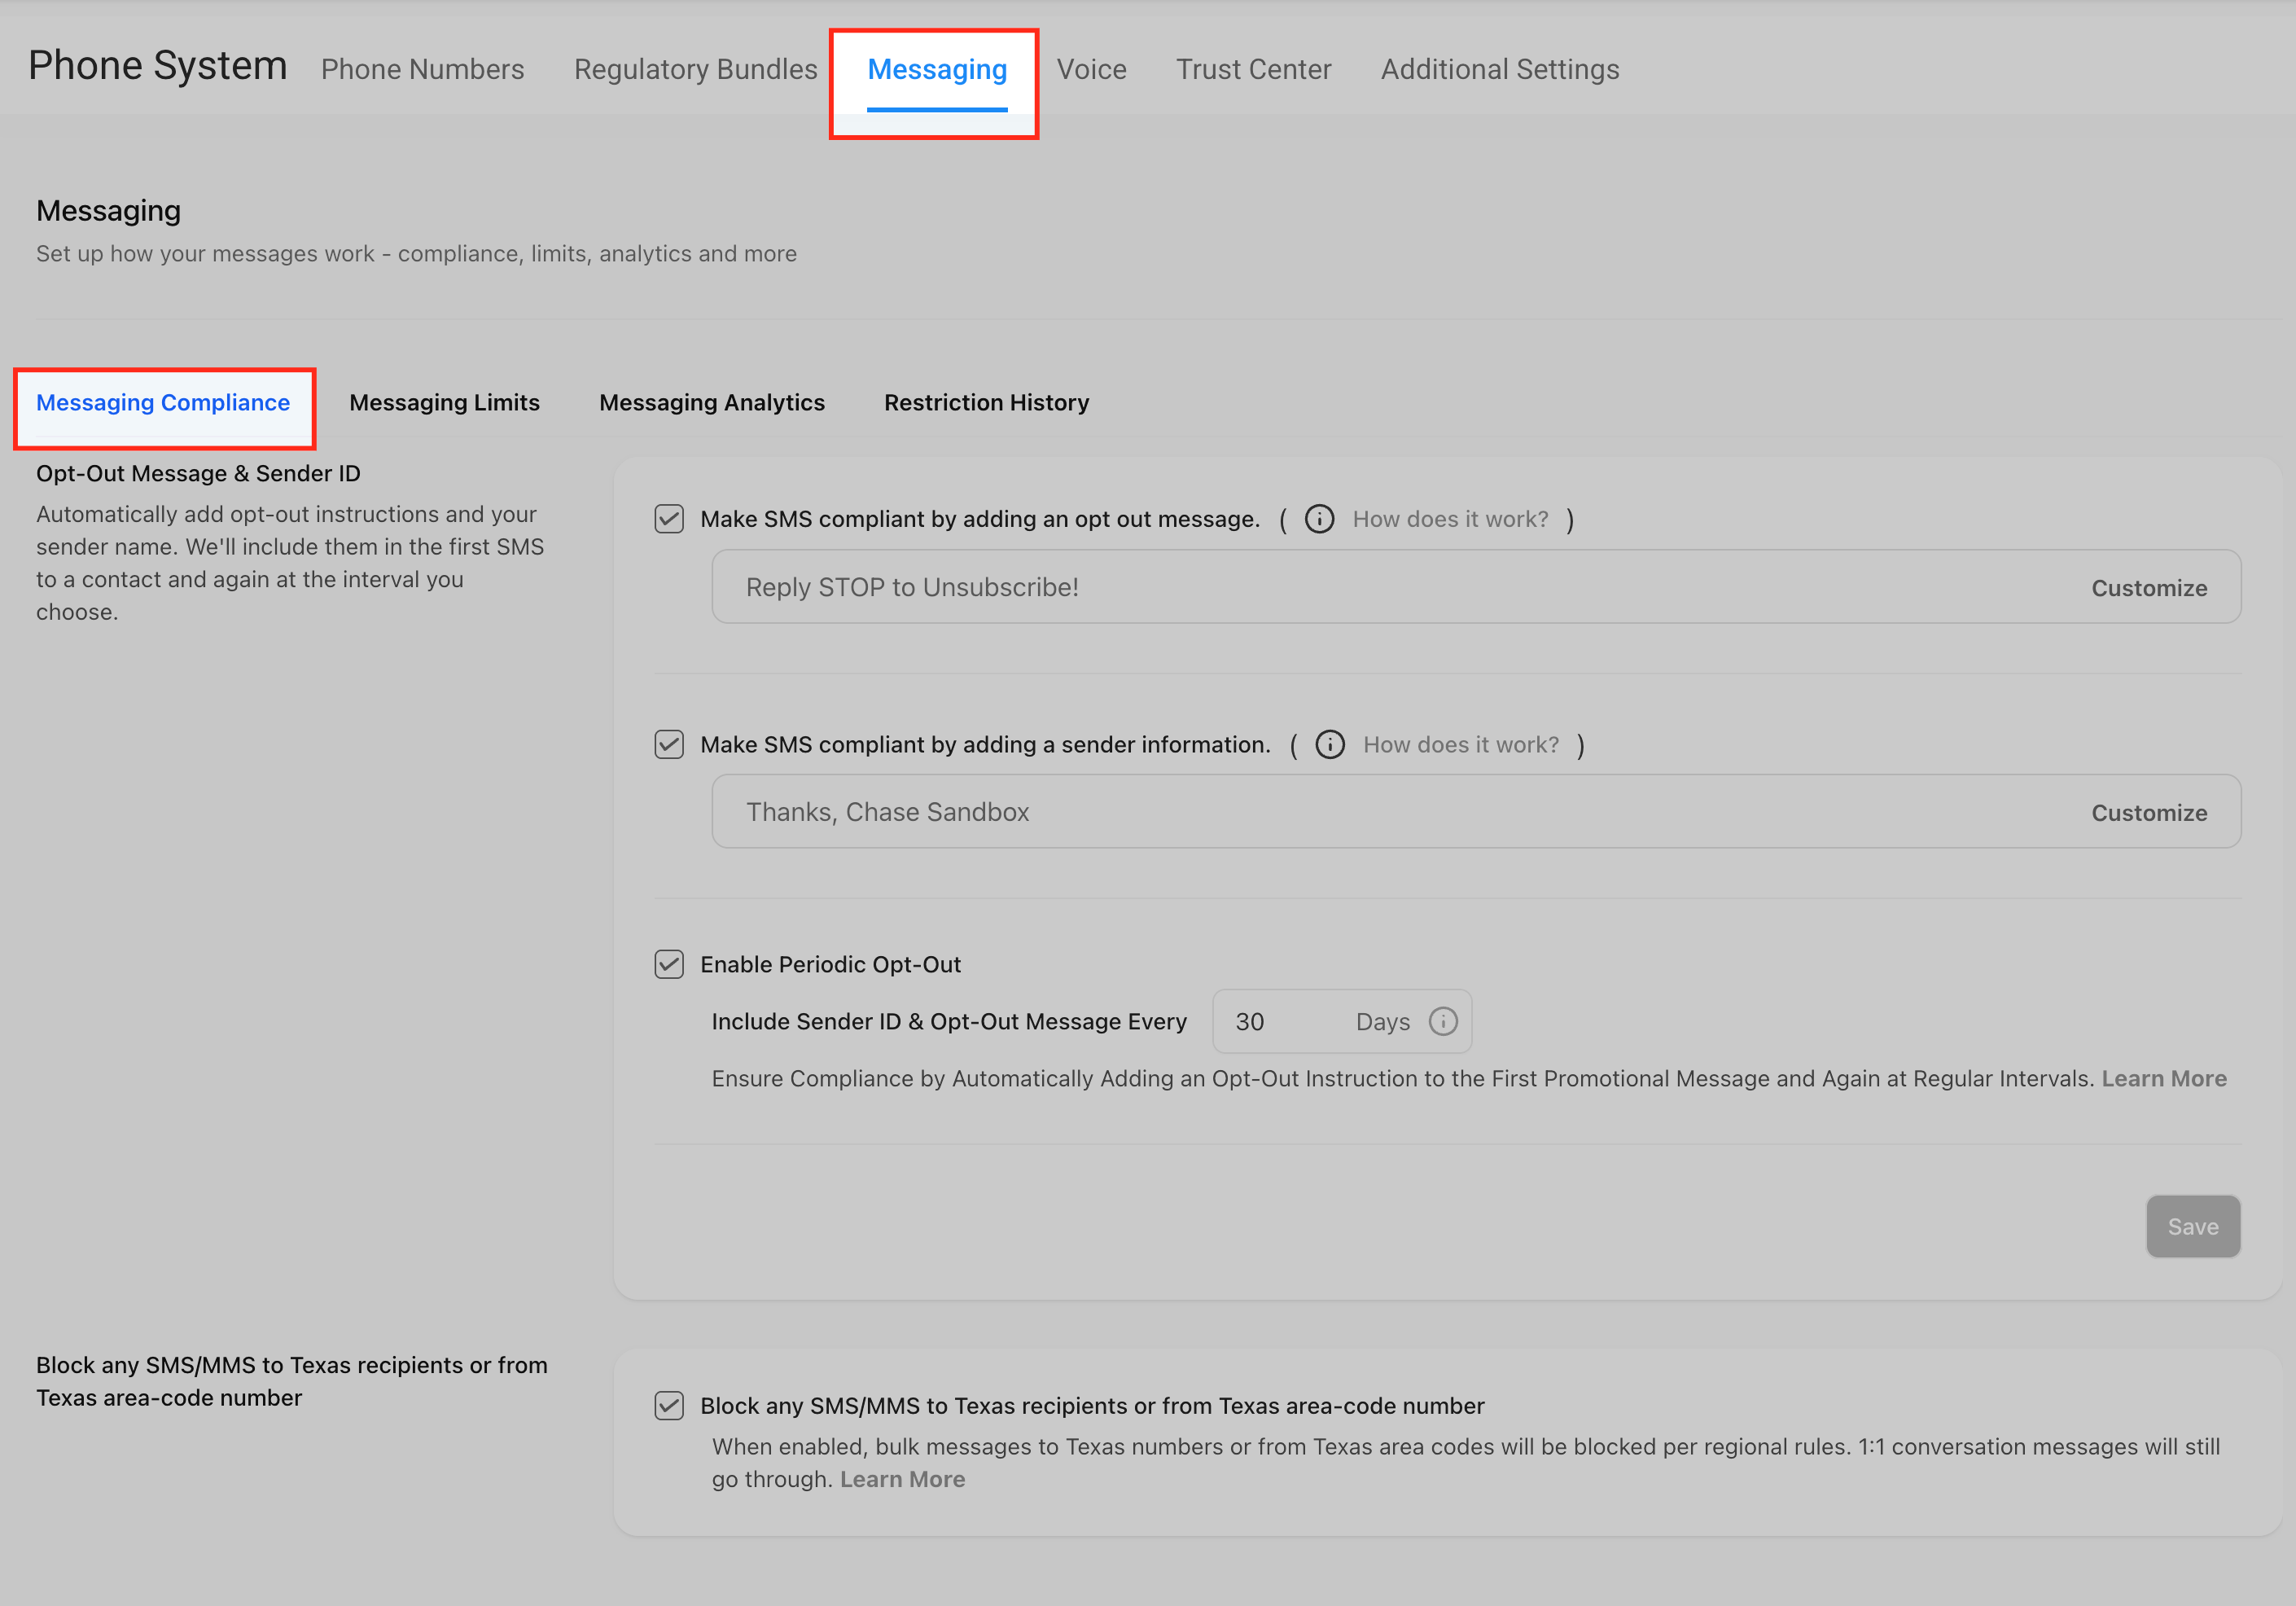
Inside the Messaging tab, select the Messaging Compliance sub-tab. This section contains compliance-related controls, including opt-out messaging, sender details, and periodic compliance automation.
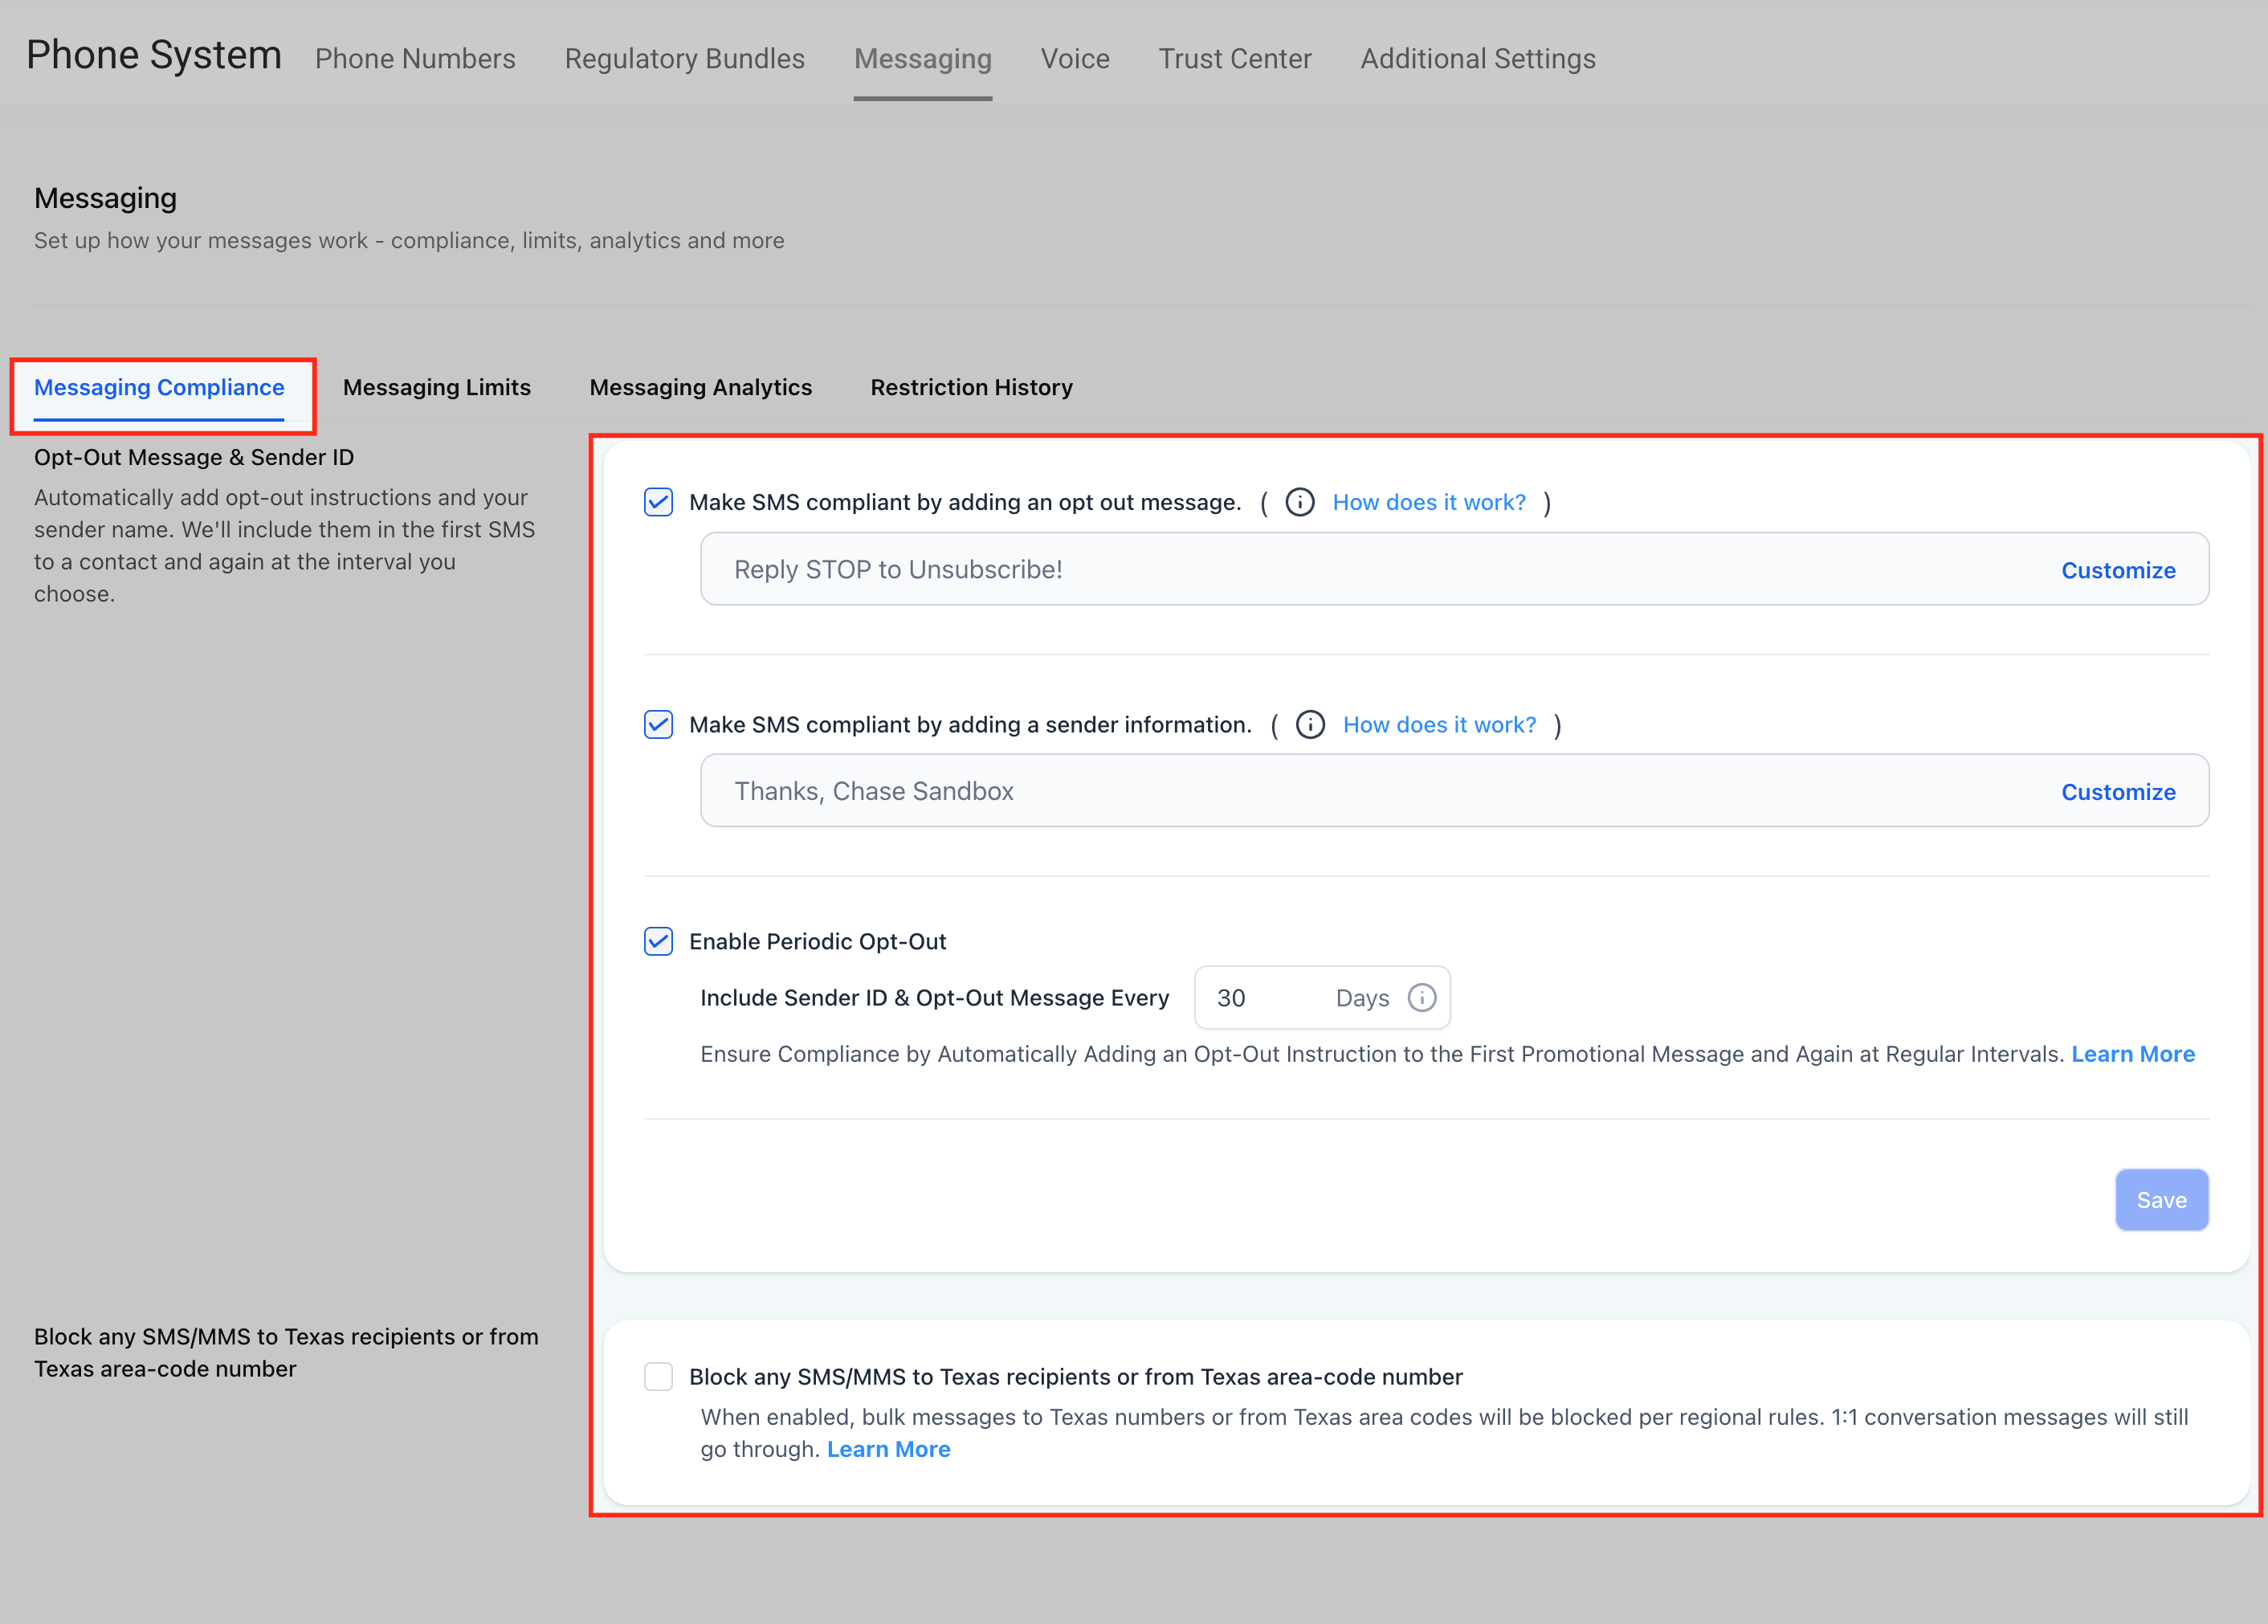
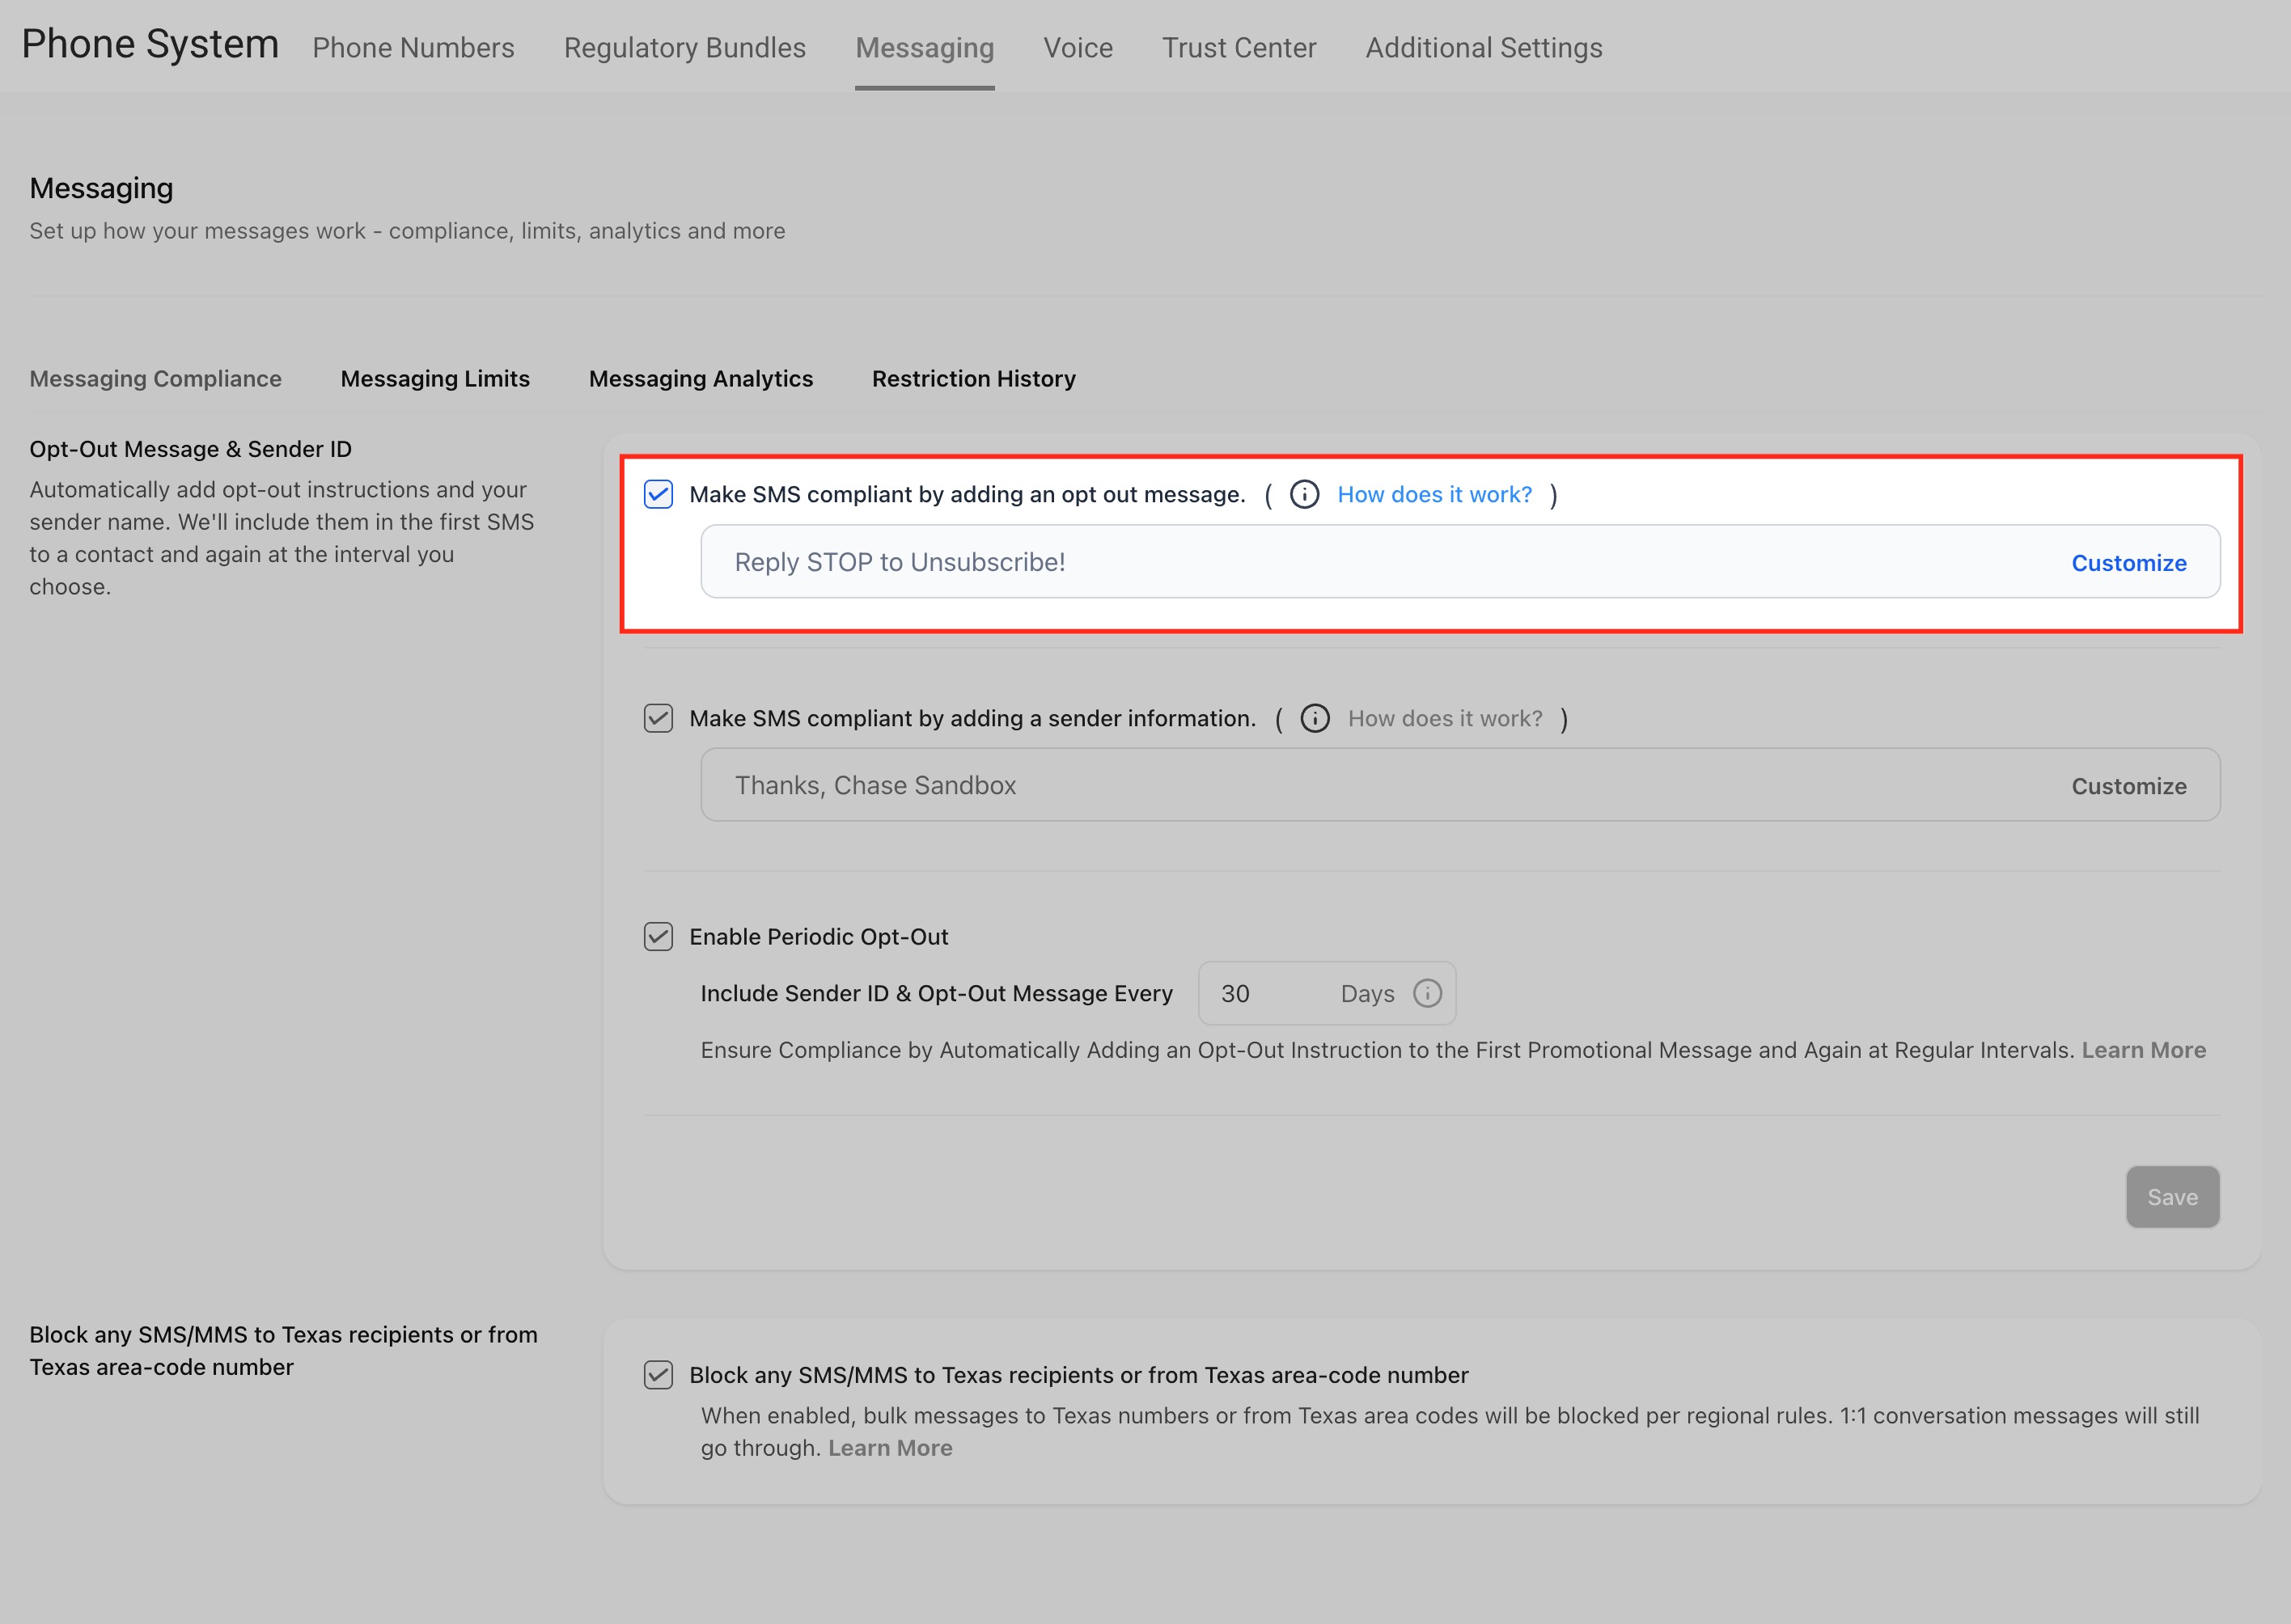
Adding an opt-out message ensures every outbound SMS contains a clear unsubscribe option — a key requirement under TCPA and CTIA.
- Enable Make SMS compliant by adding an opt-out message.
- Enter your opt-out text (for example, Reply STOP to Unsubscribe!).
- Click Customize to open the edit window.

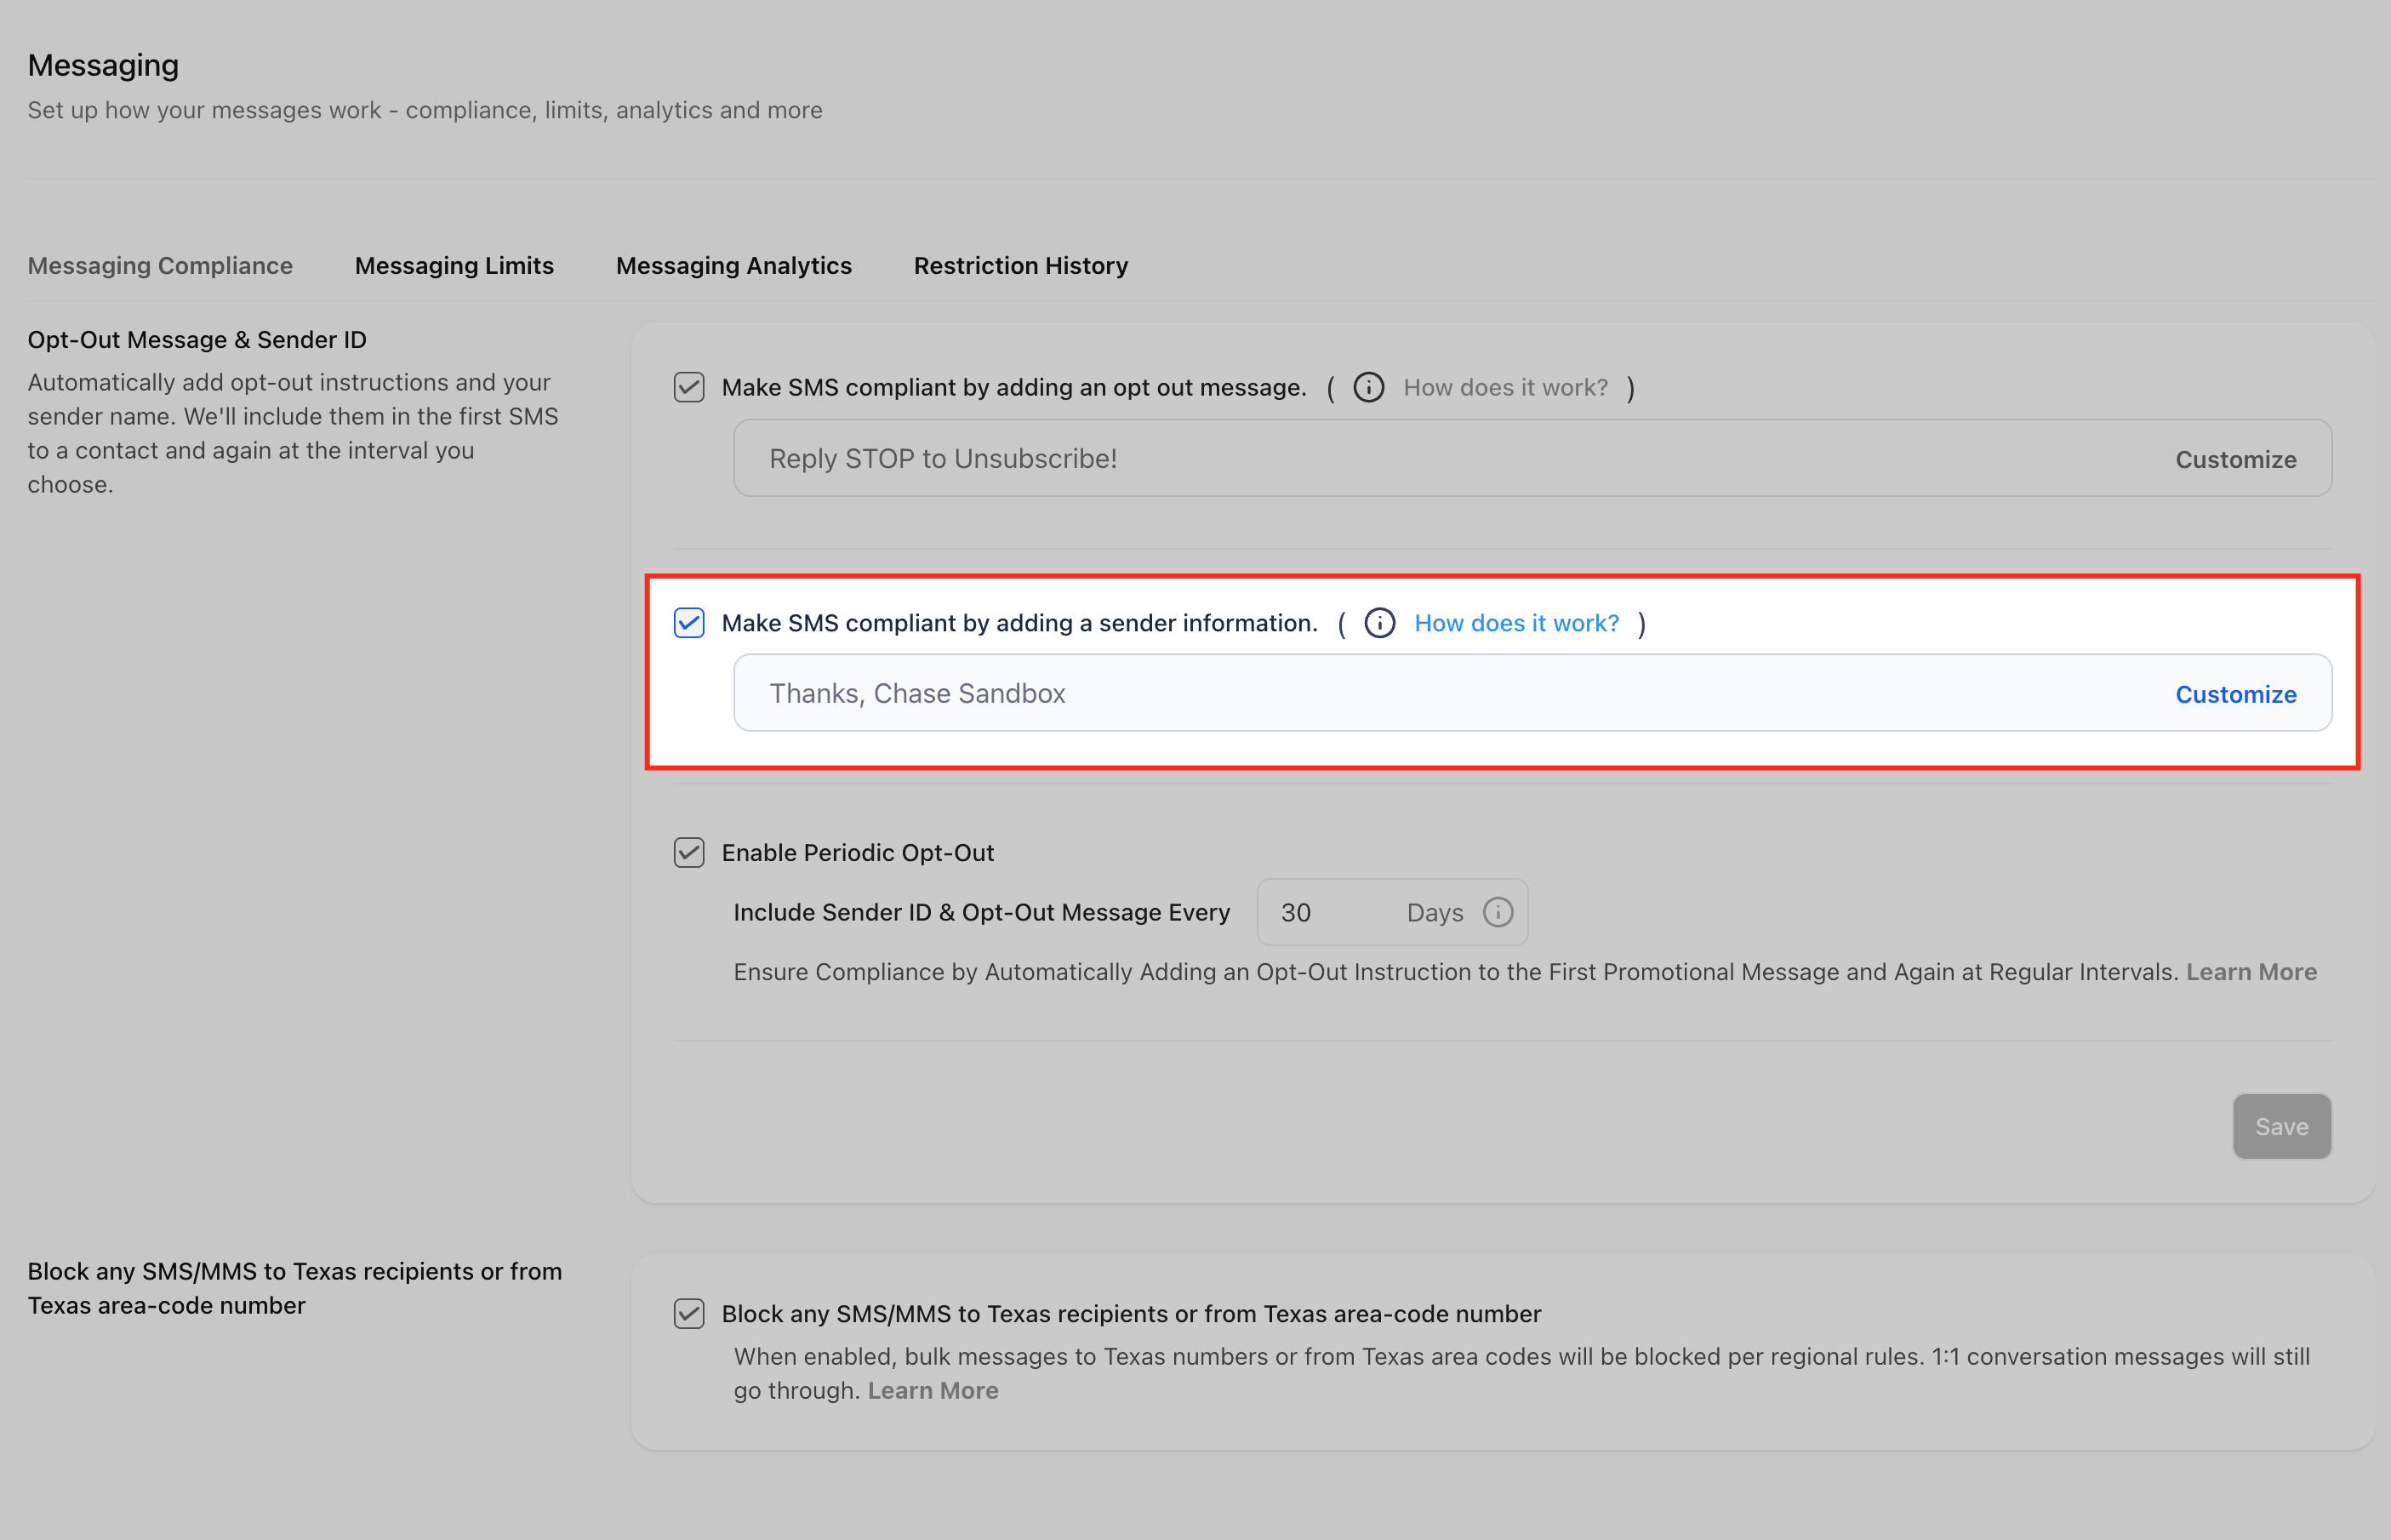
Including sender details adds transparency, helping recipients identify who the message is from — improving trust and compliance.
- Enable Make SMS compliant by adding sender information.
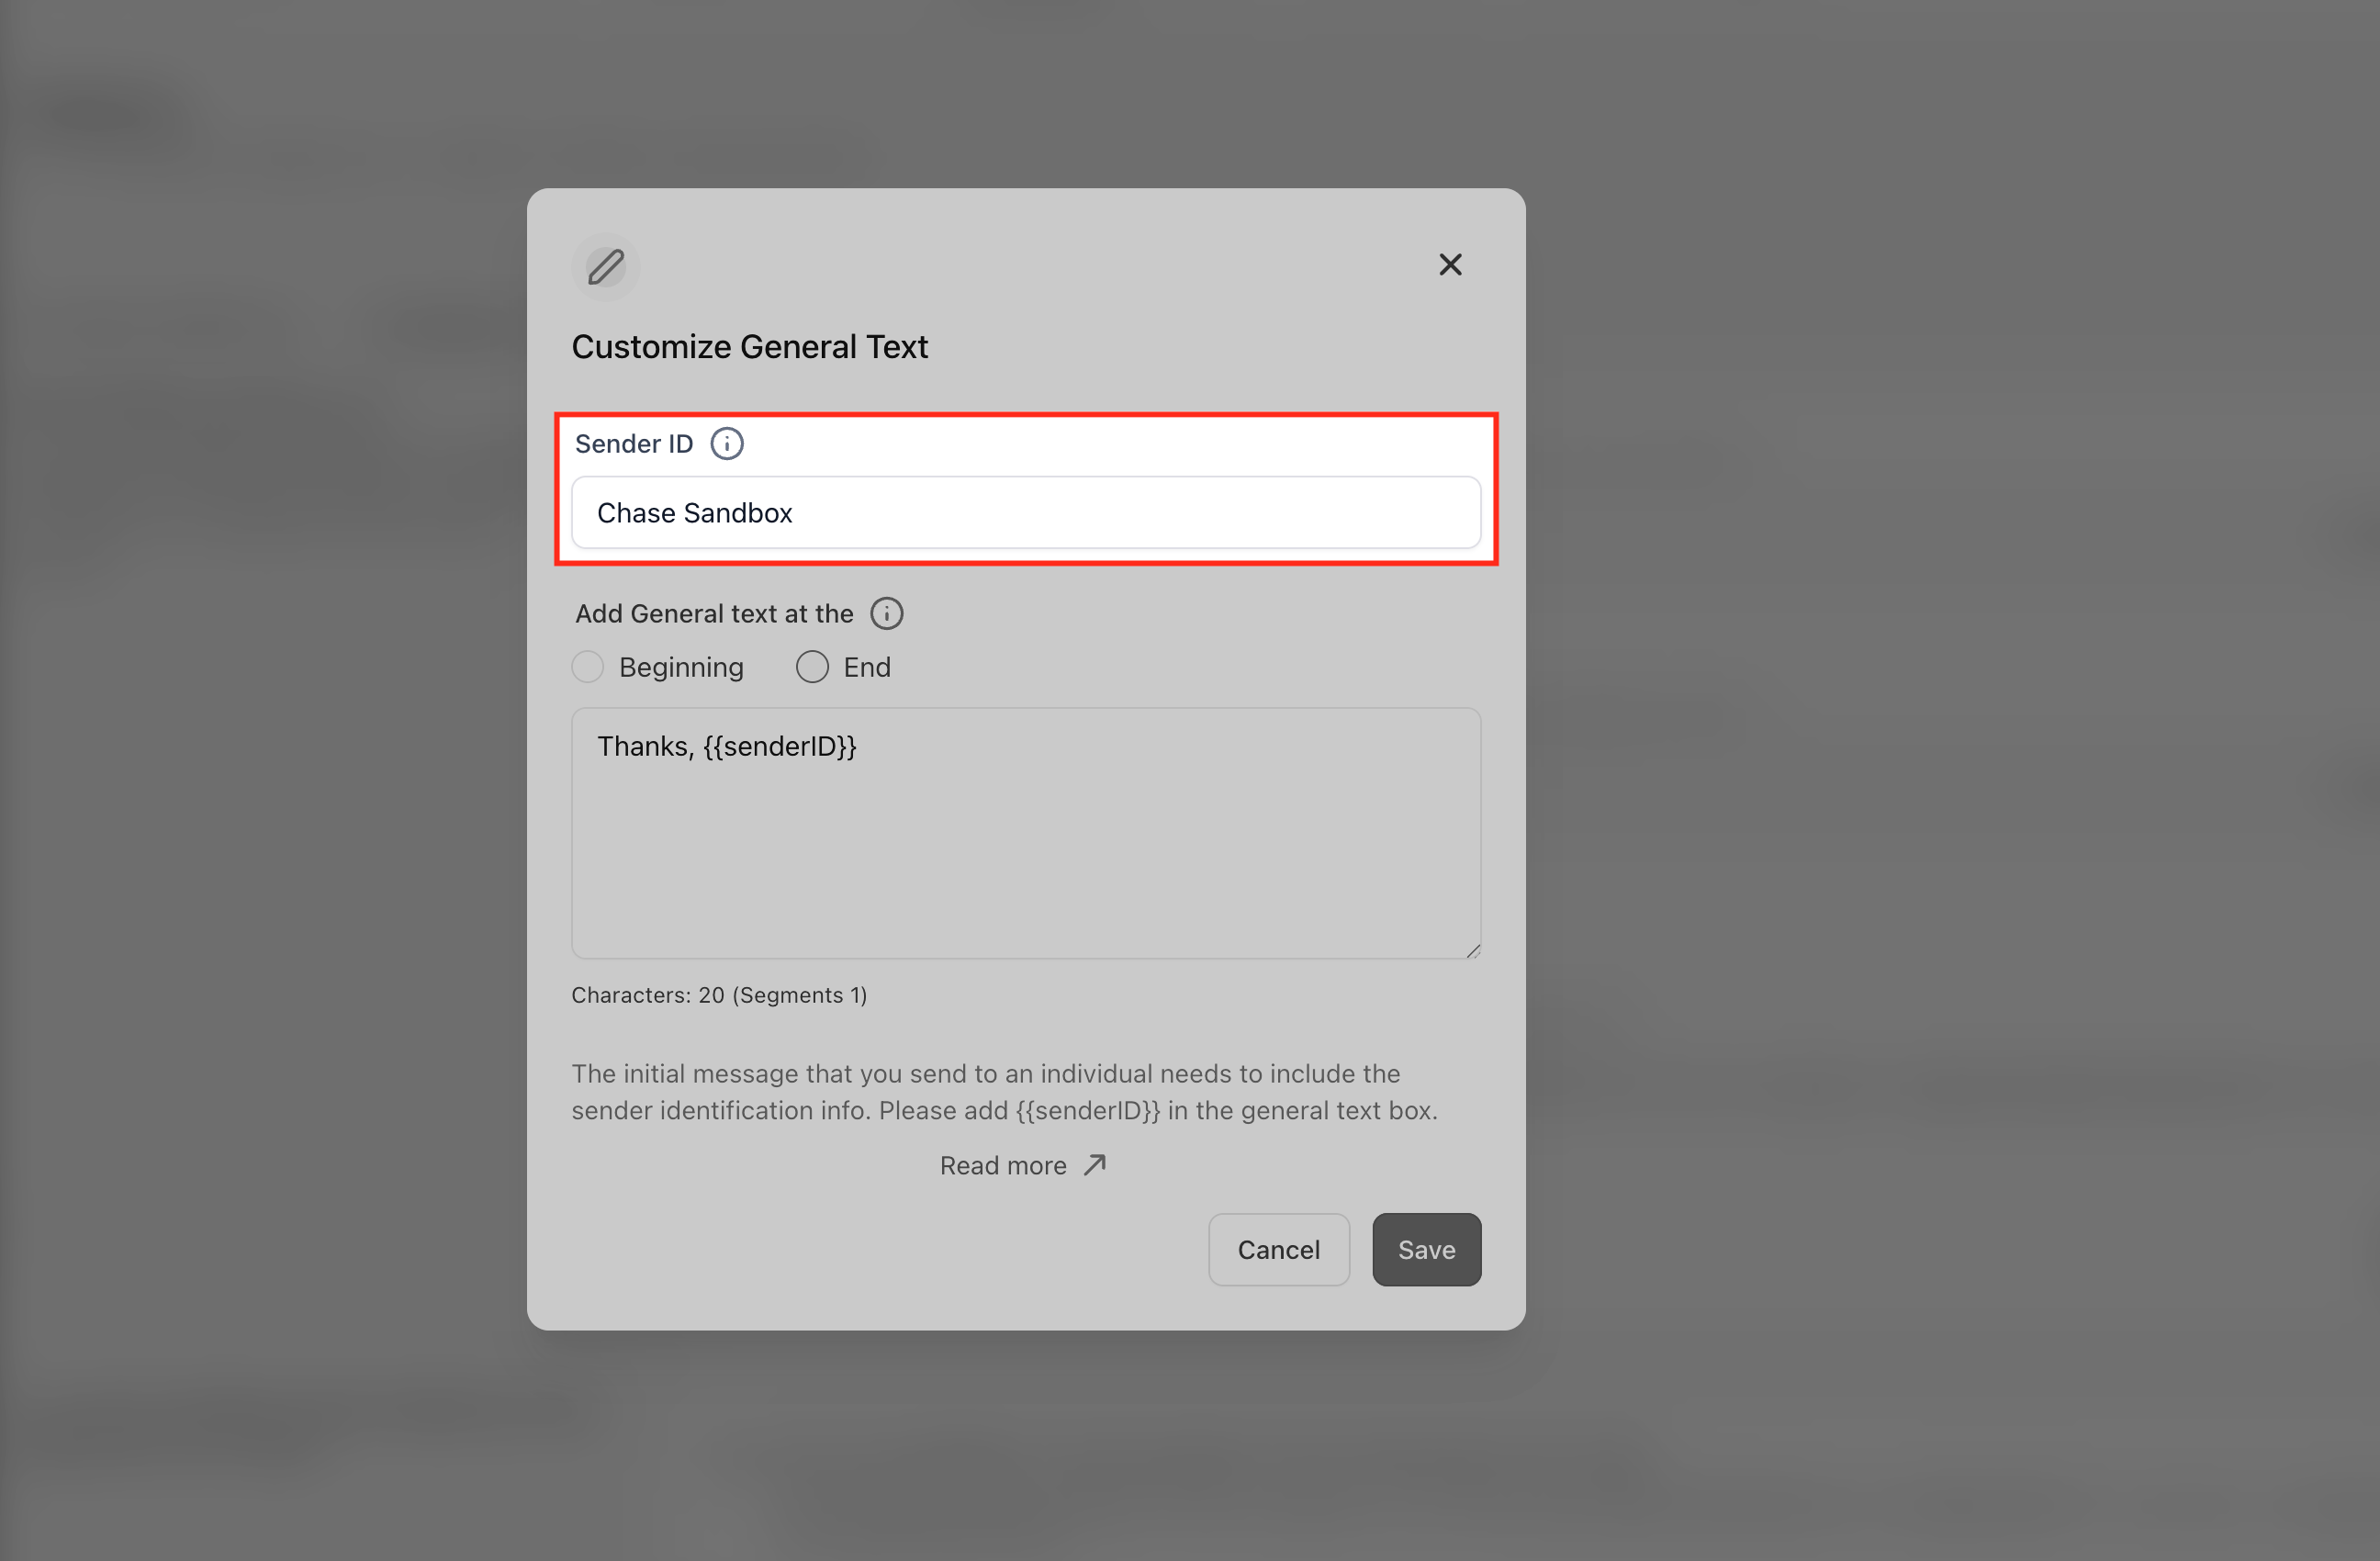
- Enter your business name or sender signature (e.g., Thanks, Chase Sandbox).
- Click Customize to edit the sender text and placement.
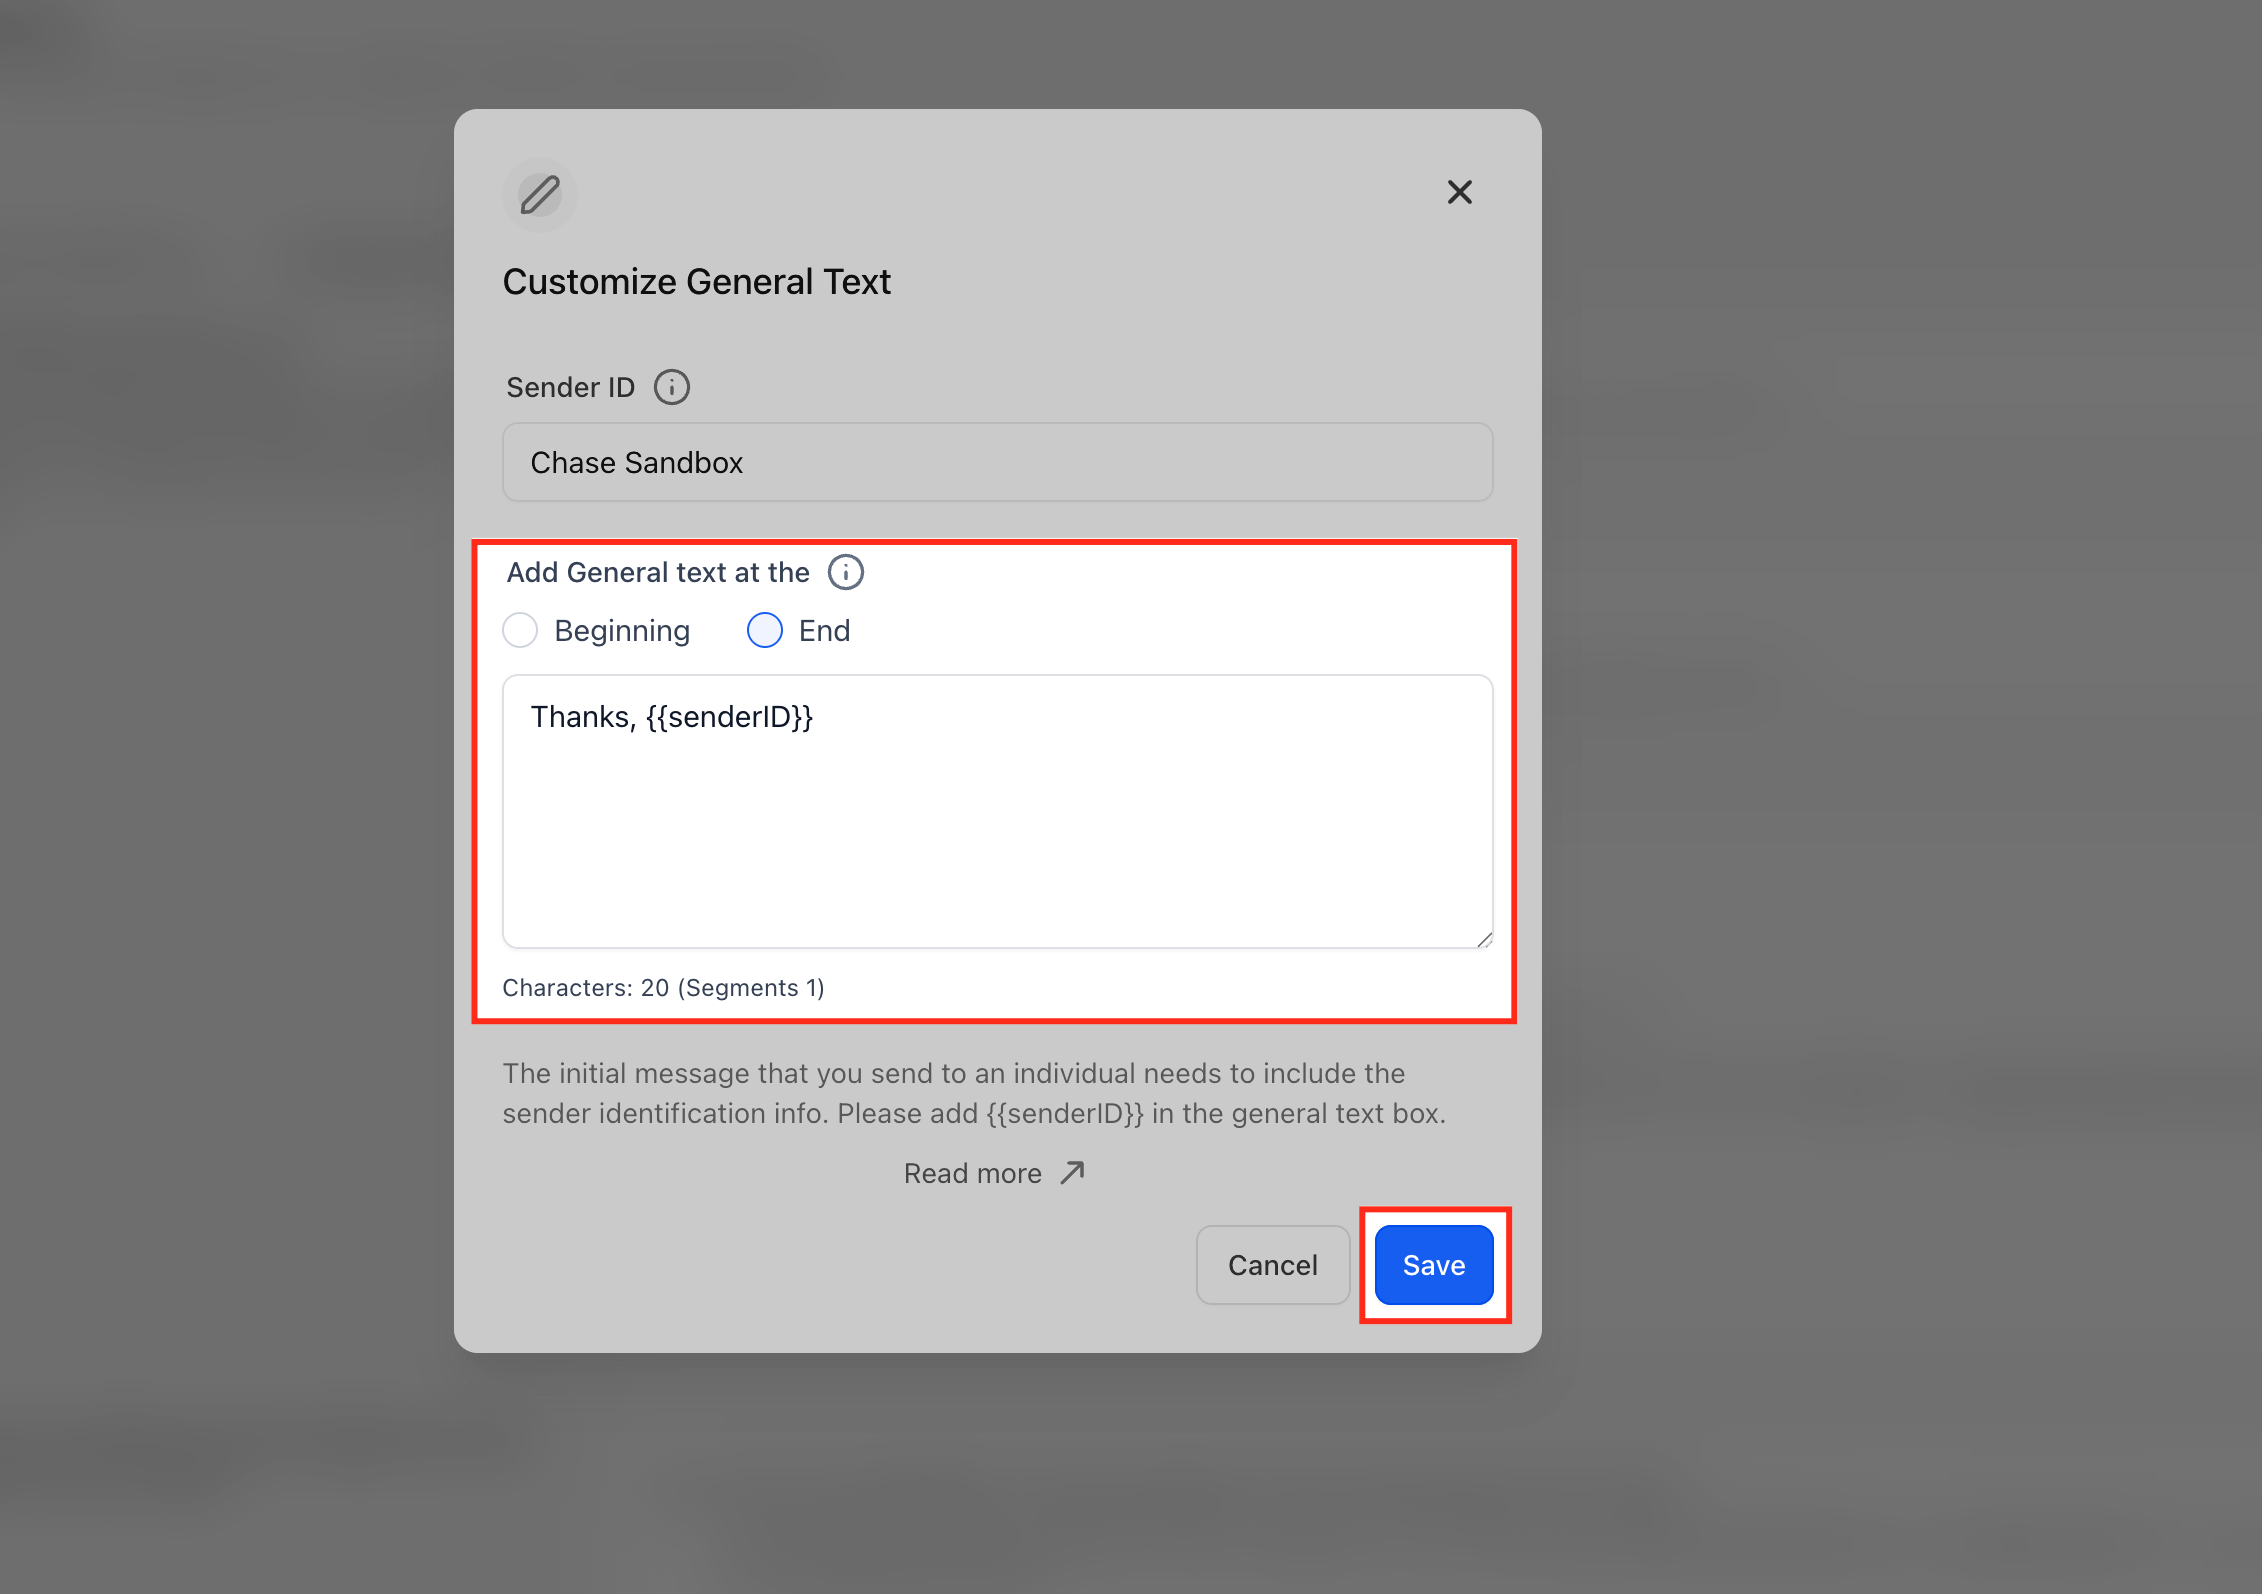
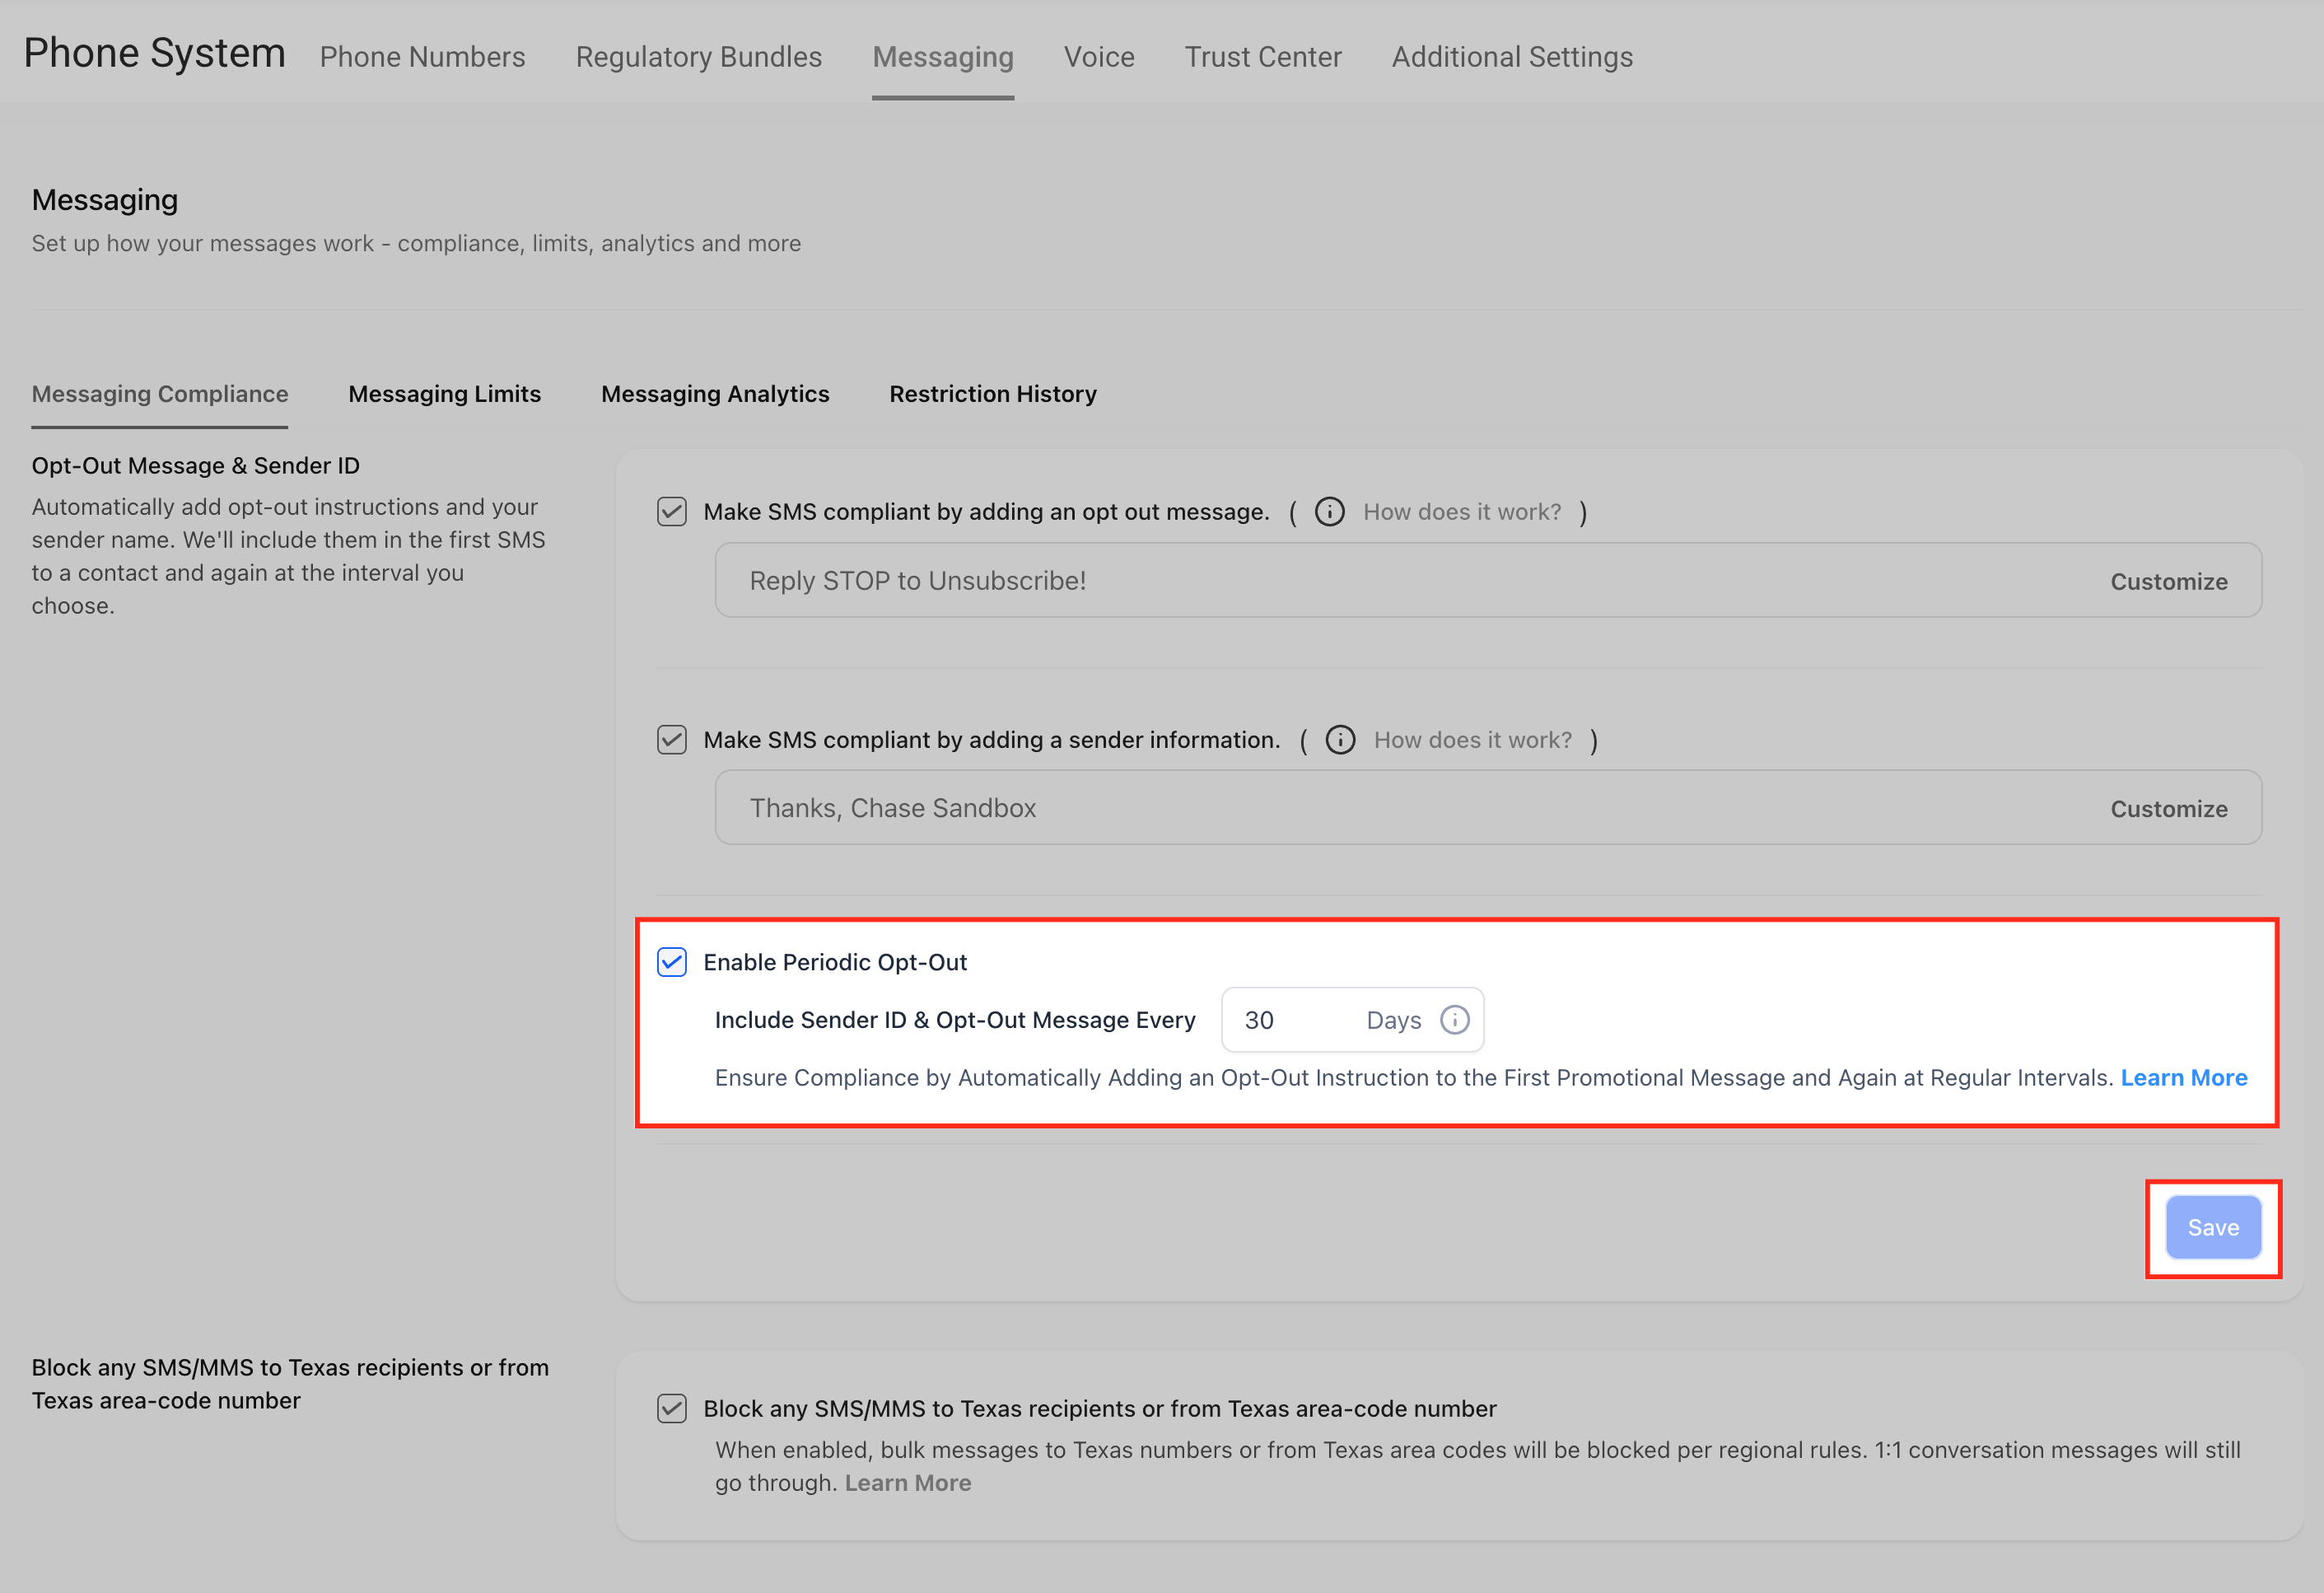
Periodic opt-out ensures ongoing conversations remain compliant by re-adding sender and opt-out details automatically after the selected interval — maintaining regulatory adherence and message deliverability without manual updates.
- Toggle Enable Periodic Opt-Out On (or Off to disable periodic re-insertion for this sub-account).
- In Include Sender ID & Opt-Out Message Every [X] Days, choose your interval (1–60 days).
- Click Save to apply your changes.
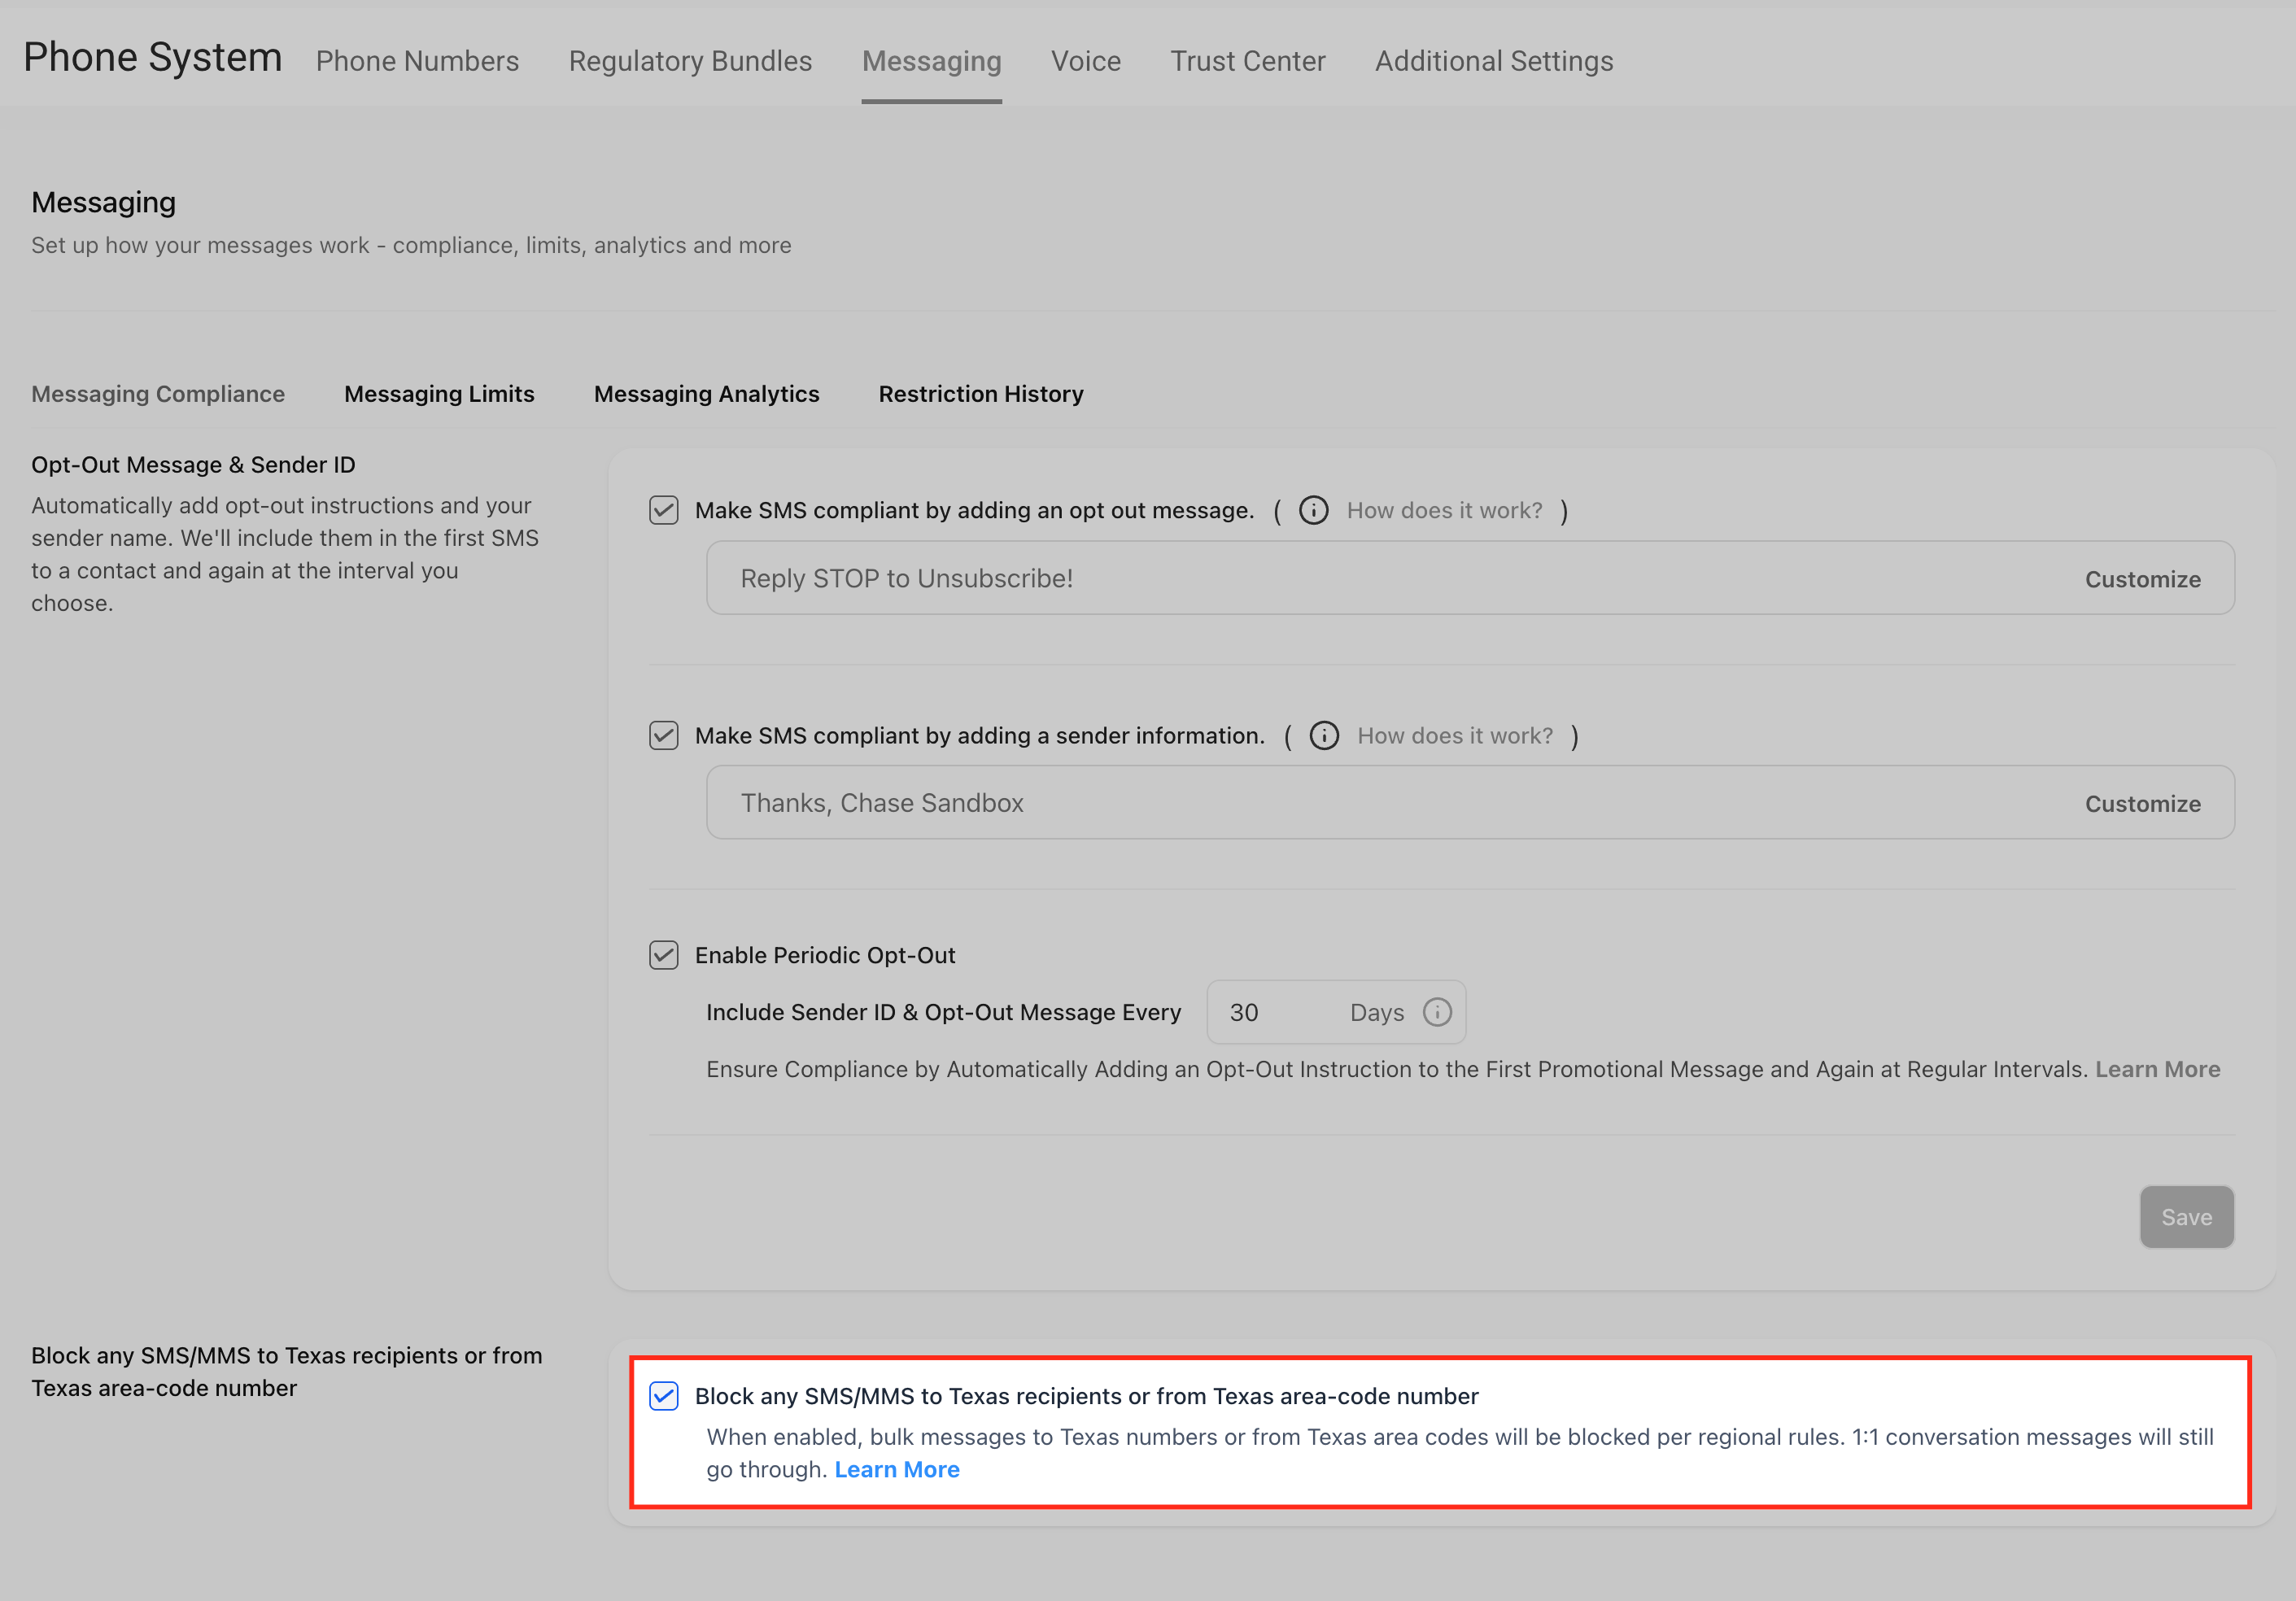
Optionally, enable Block any SMS/MMS to Texas recipients or from Texas area-code numbers if applicable to your region. This ensures compliance with state-specific messaging regulations.
Frequently Asked Questions
Was this article helpful?
That’s Great!
Thank you for your feedback
Sorry! We couldn't be helpful
Thank you for your feedback
Feedback sent
We appreciate your effort and will try to fix the article