Schedule your posts in advance for your community groups and channels directly from the social planner!
TABLE OF CONTENTS
Overview of Scheduling Community Posts from Social Planner
Scheduling Community posts from Social Planner allows you to create content in advance and publish it to selected Community channels at the right time. Instead of manually posting inside each Community channel, you can use Social Planner to prepare posts, attach supported media, select the posting user, and schedule content from one centralized workflow.
Community scheduling is useful for announcements, weekly engagement prompts, course updates, event reminders, and other planned content that should appear inside your Community without requiring manual publishing at the exact time.
Key Benefits of Scheduling Community Posts from Social Planner
- Centralized Planning: Schedule Community content from Social Planner alongside your other planned posts.
- Scheduled Posting: Plan and schedule your content in advance, ensuring posts go live at the optimal time for each community. This helps maintain engagement and ensures your message reaches members at the best times.
- Unified Content Management: Track and manage all posts (past and future) from a single interface. View post history, upcoming scheduled posts, and current statuses across all communities for quick adjustments and oversight.
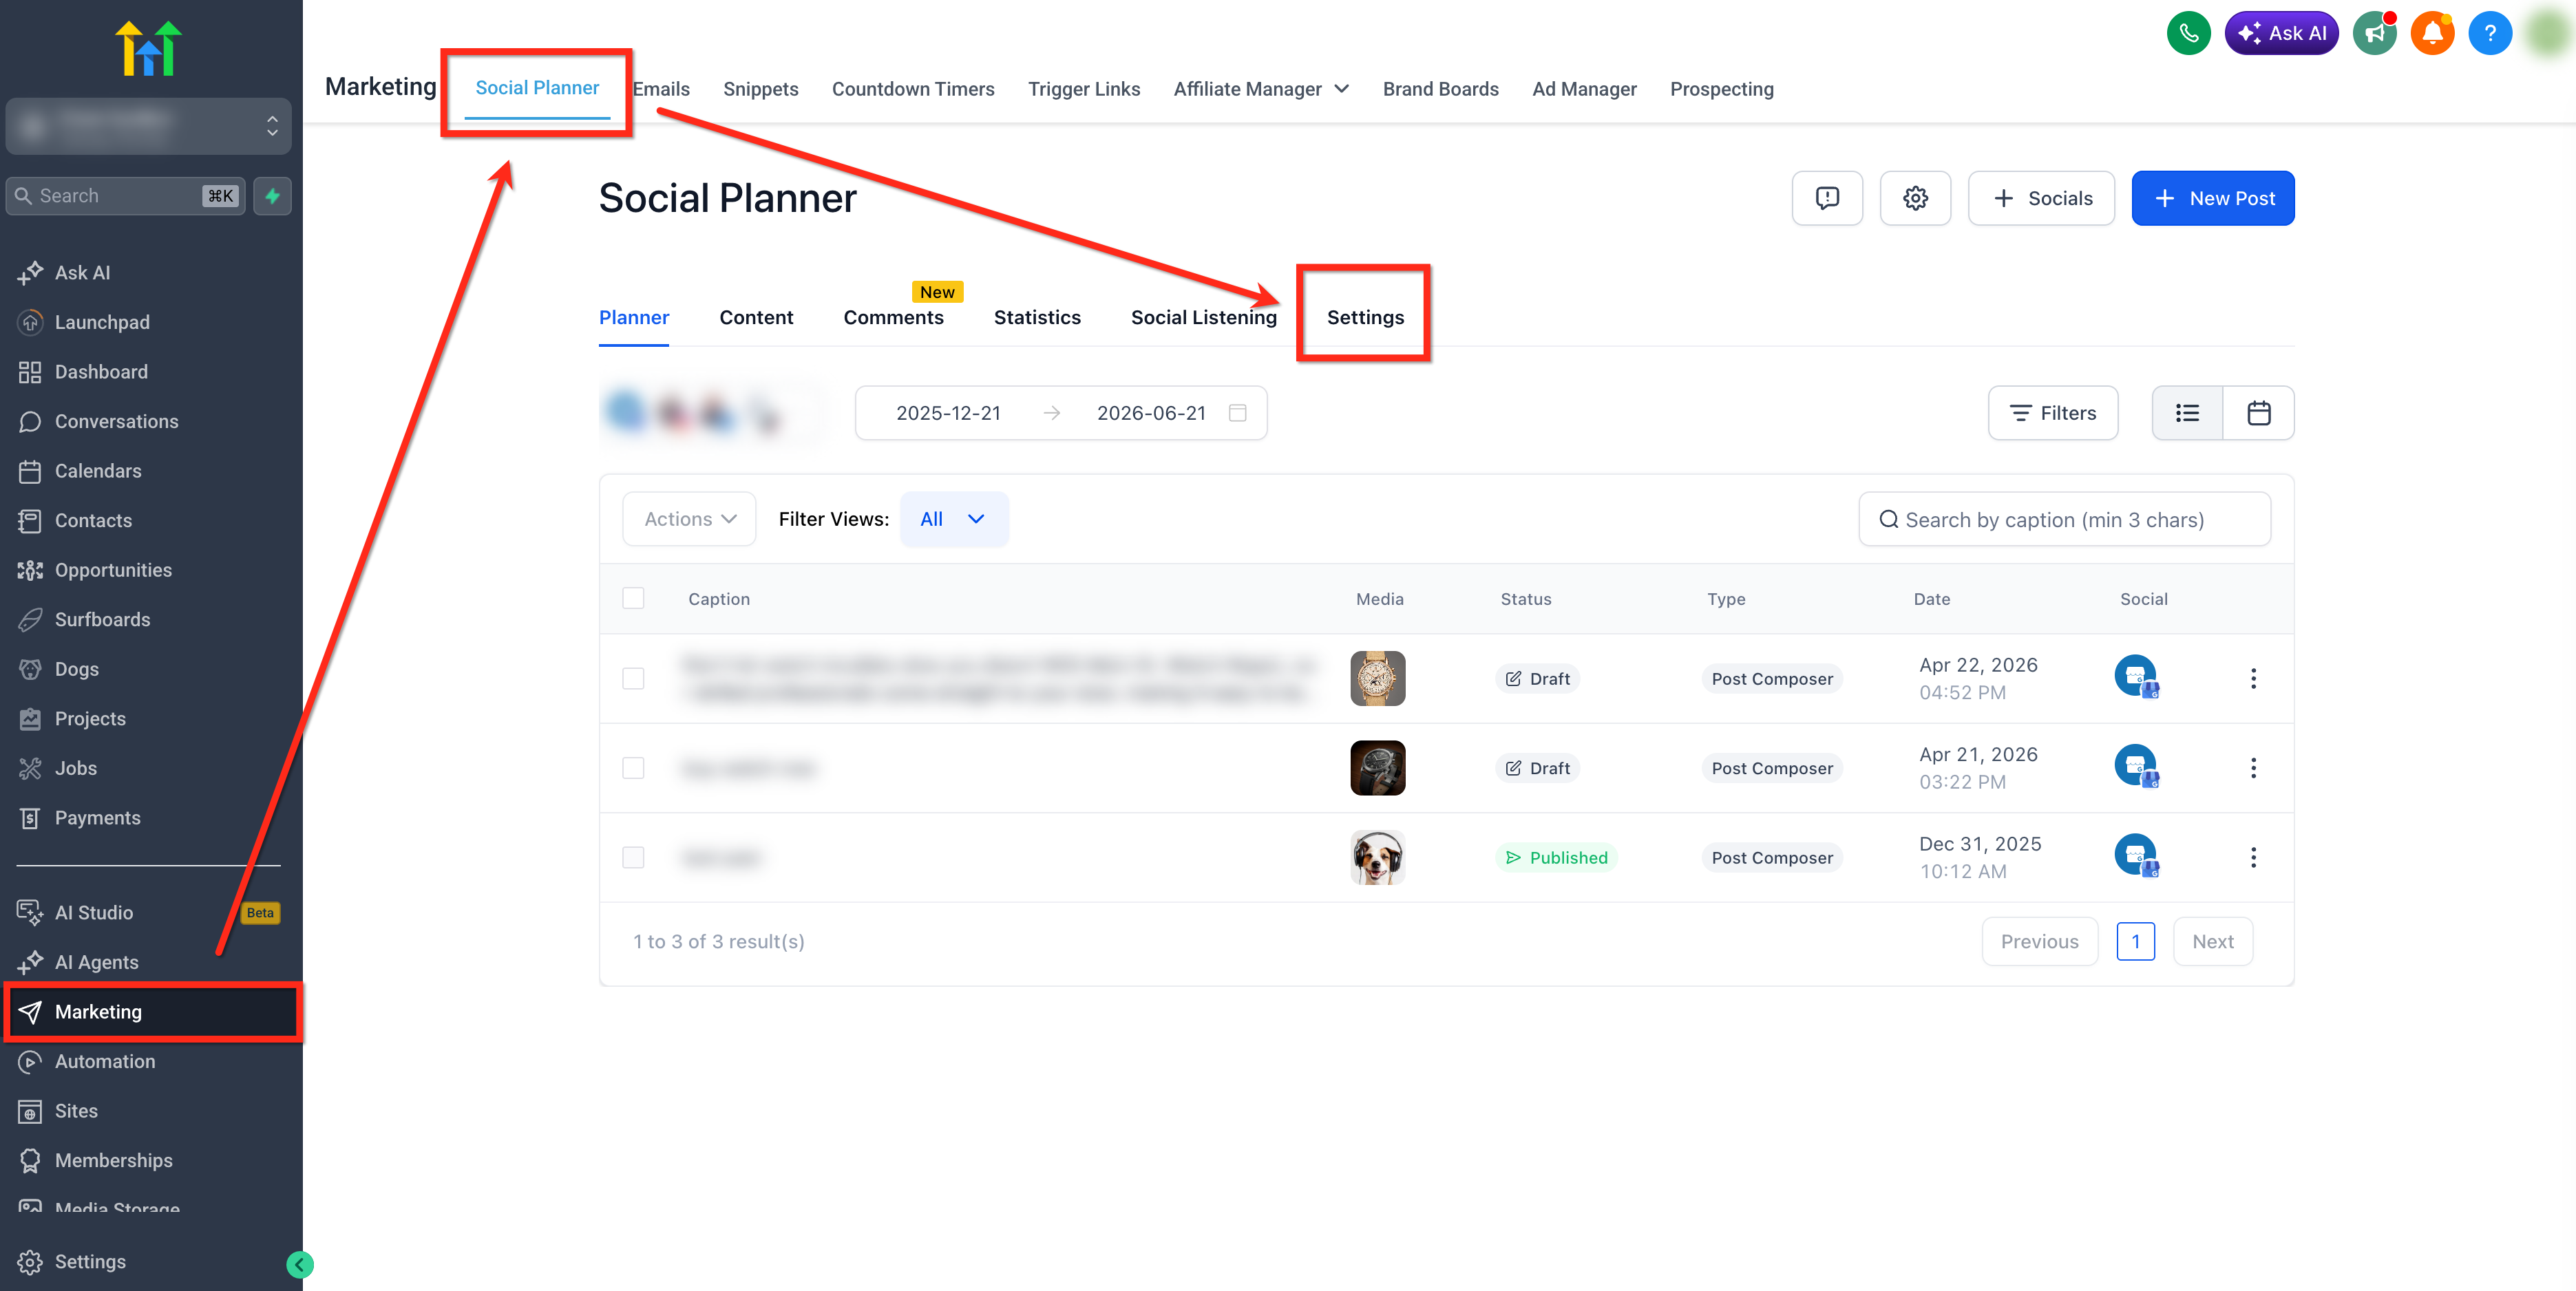
How to Connect Community Groups in Social Planner
To connect Community groups and channels in Social Planner:
- Navigate to Marketing > Social Planner > Settings.
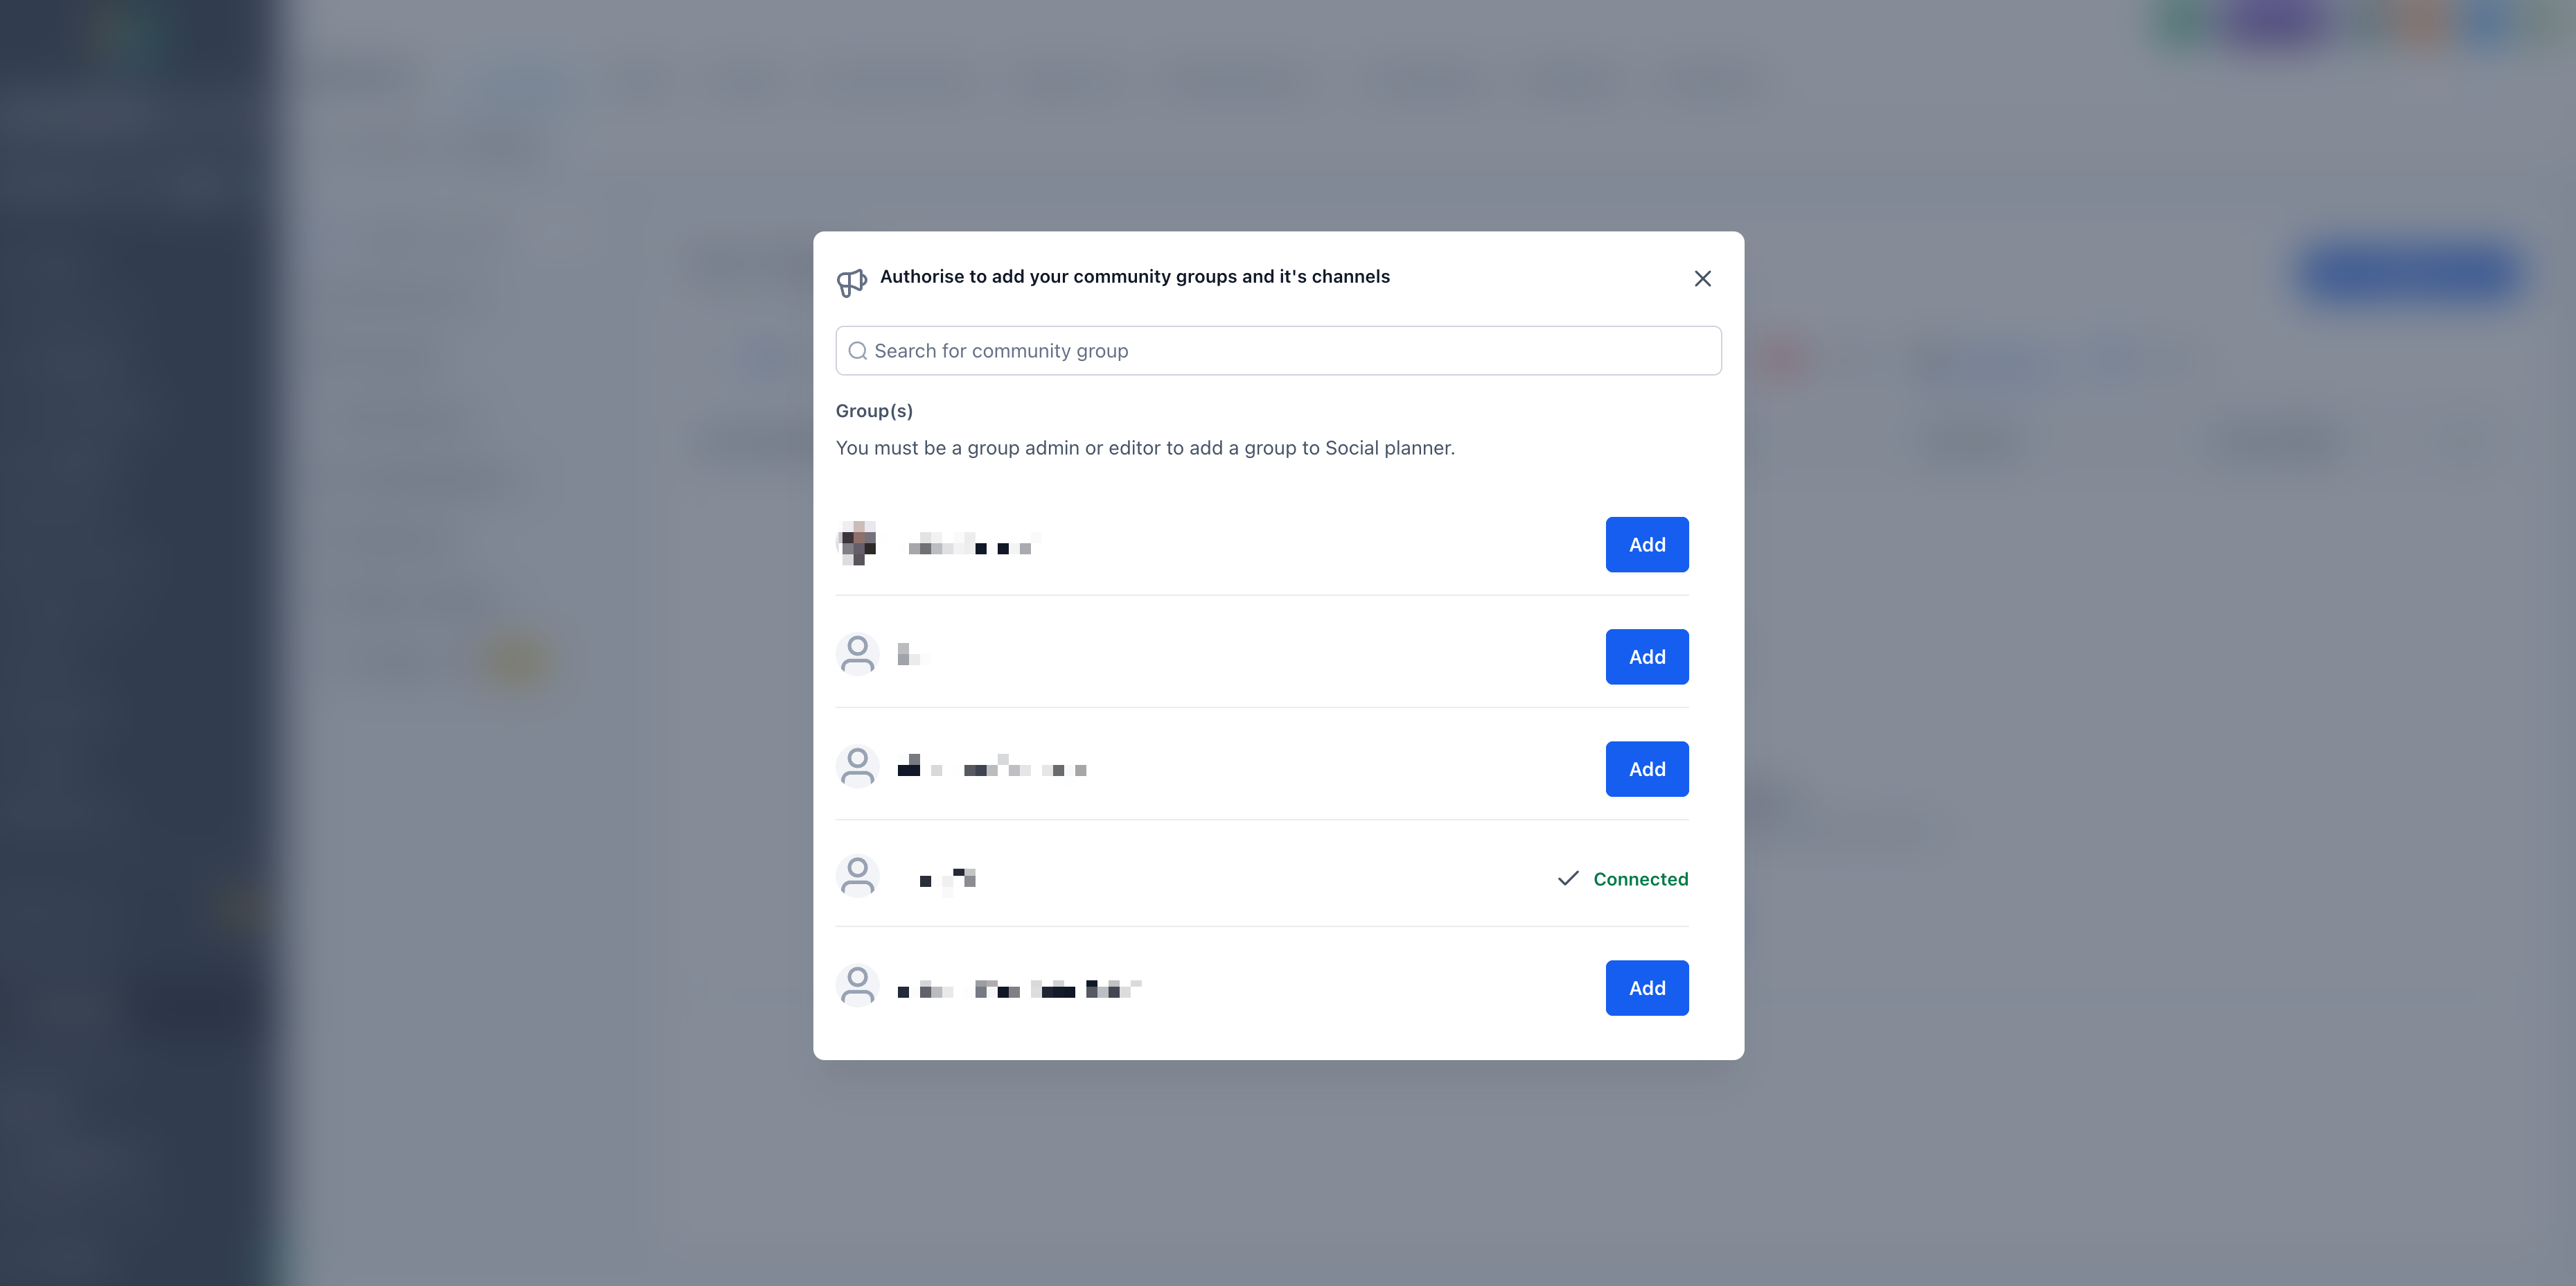
- Select Communities then click Connect Community.
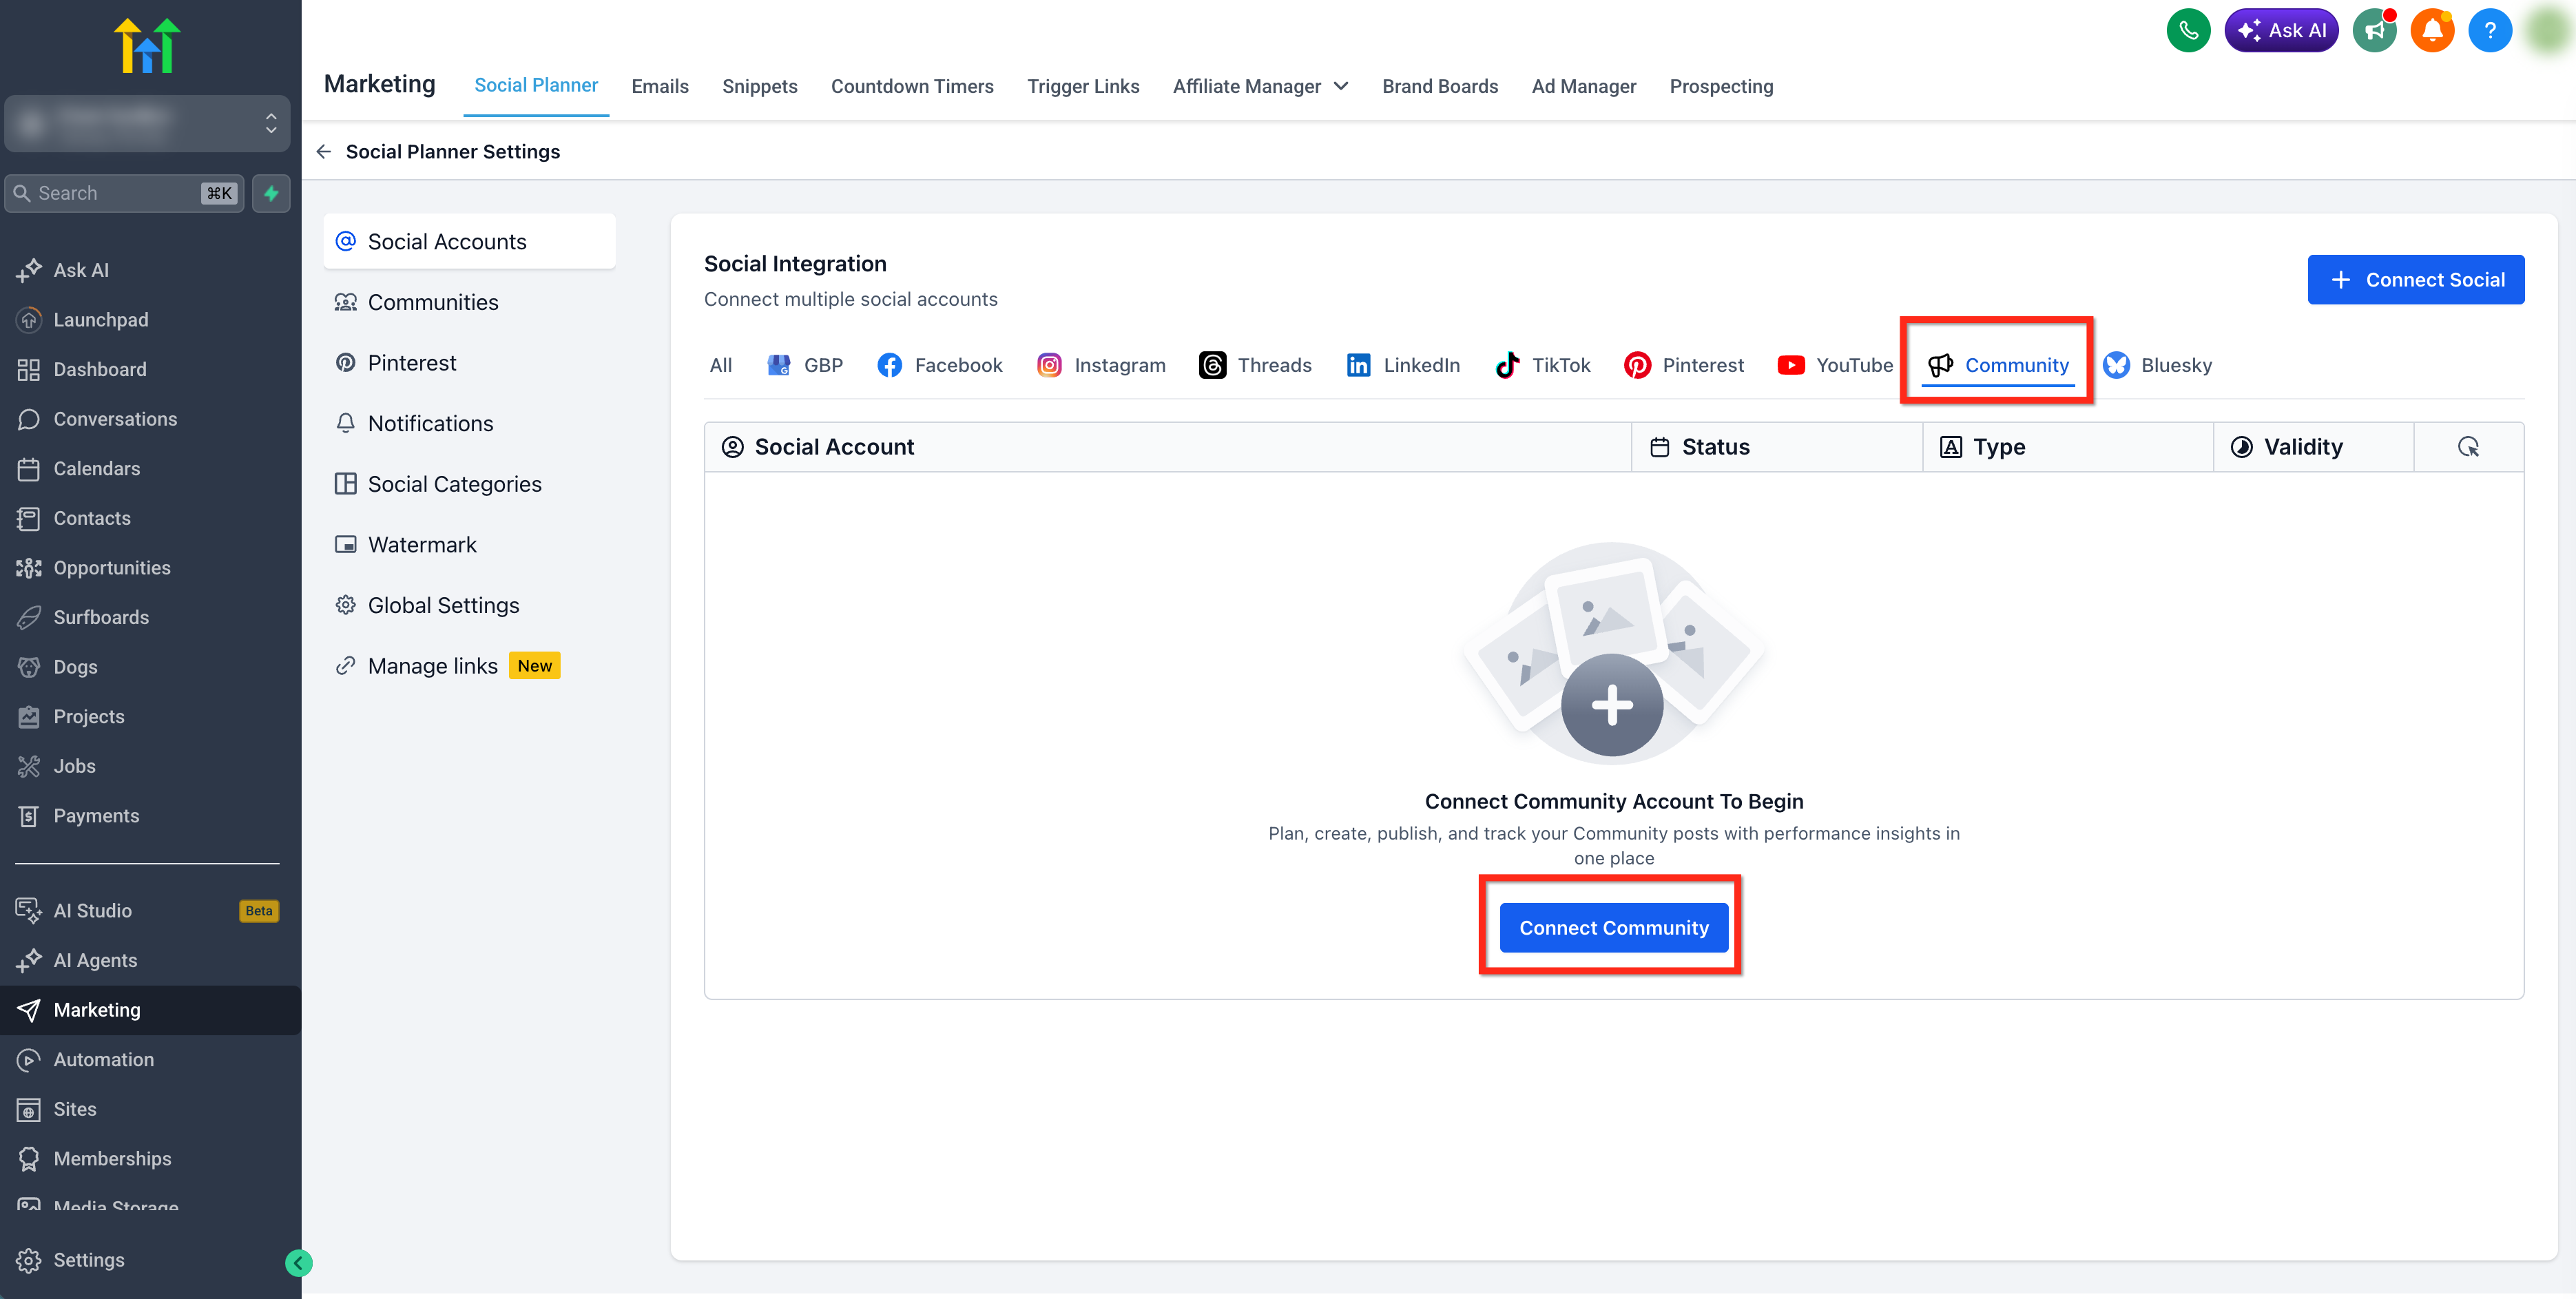
- Choose the Community groups you want to make available in Social Planner.
Note: Community will only be connected from the respective sub-account inside the Social Planner.
How to Create and Schedule Community Posts
- Click + New Post from within the Social Planner.
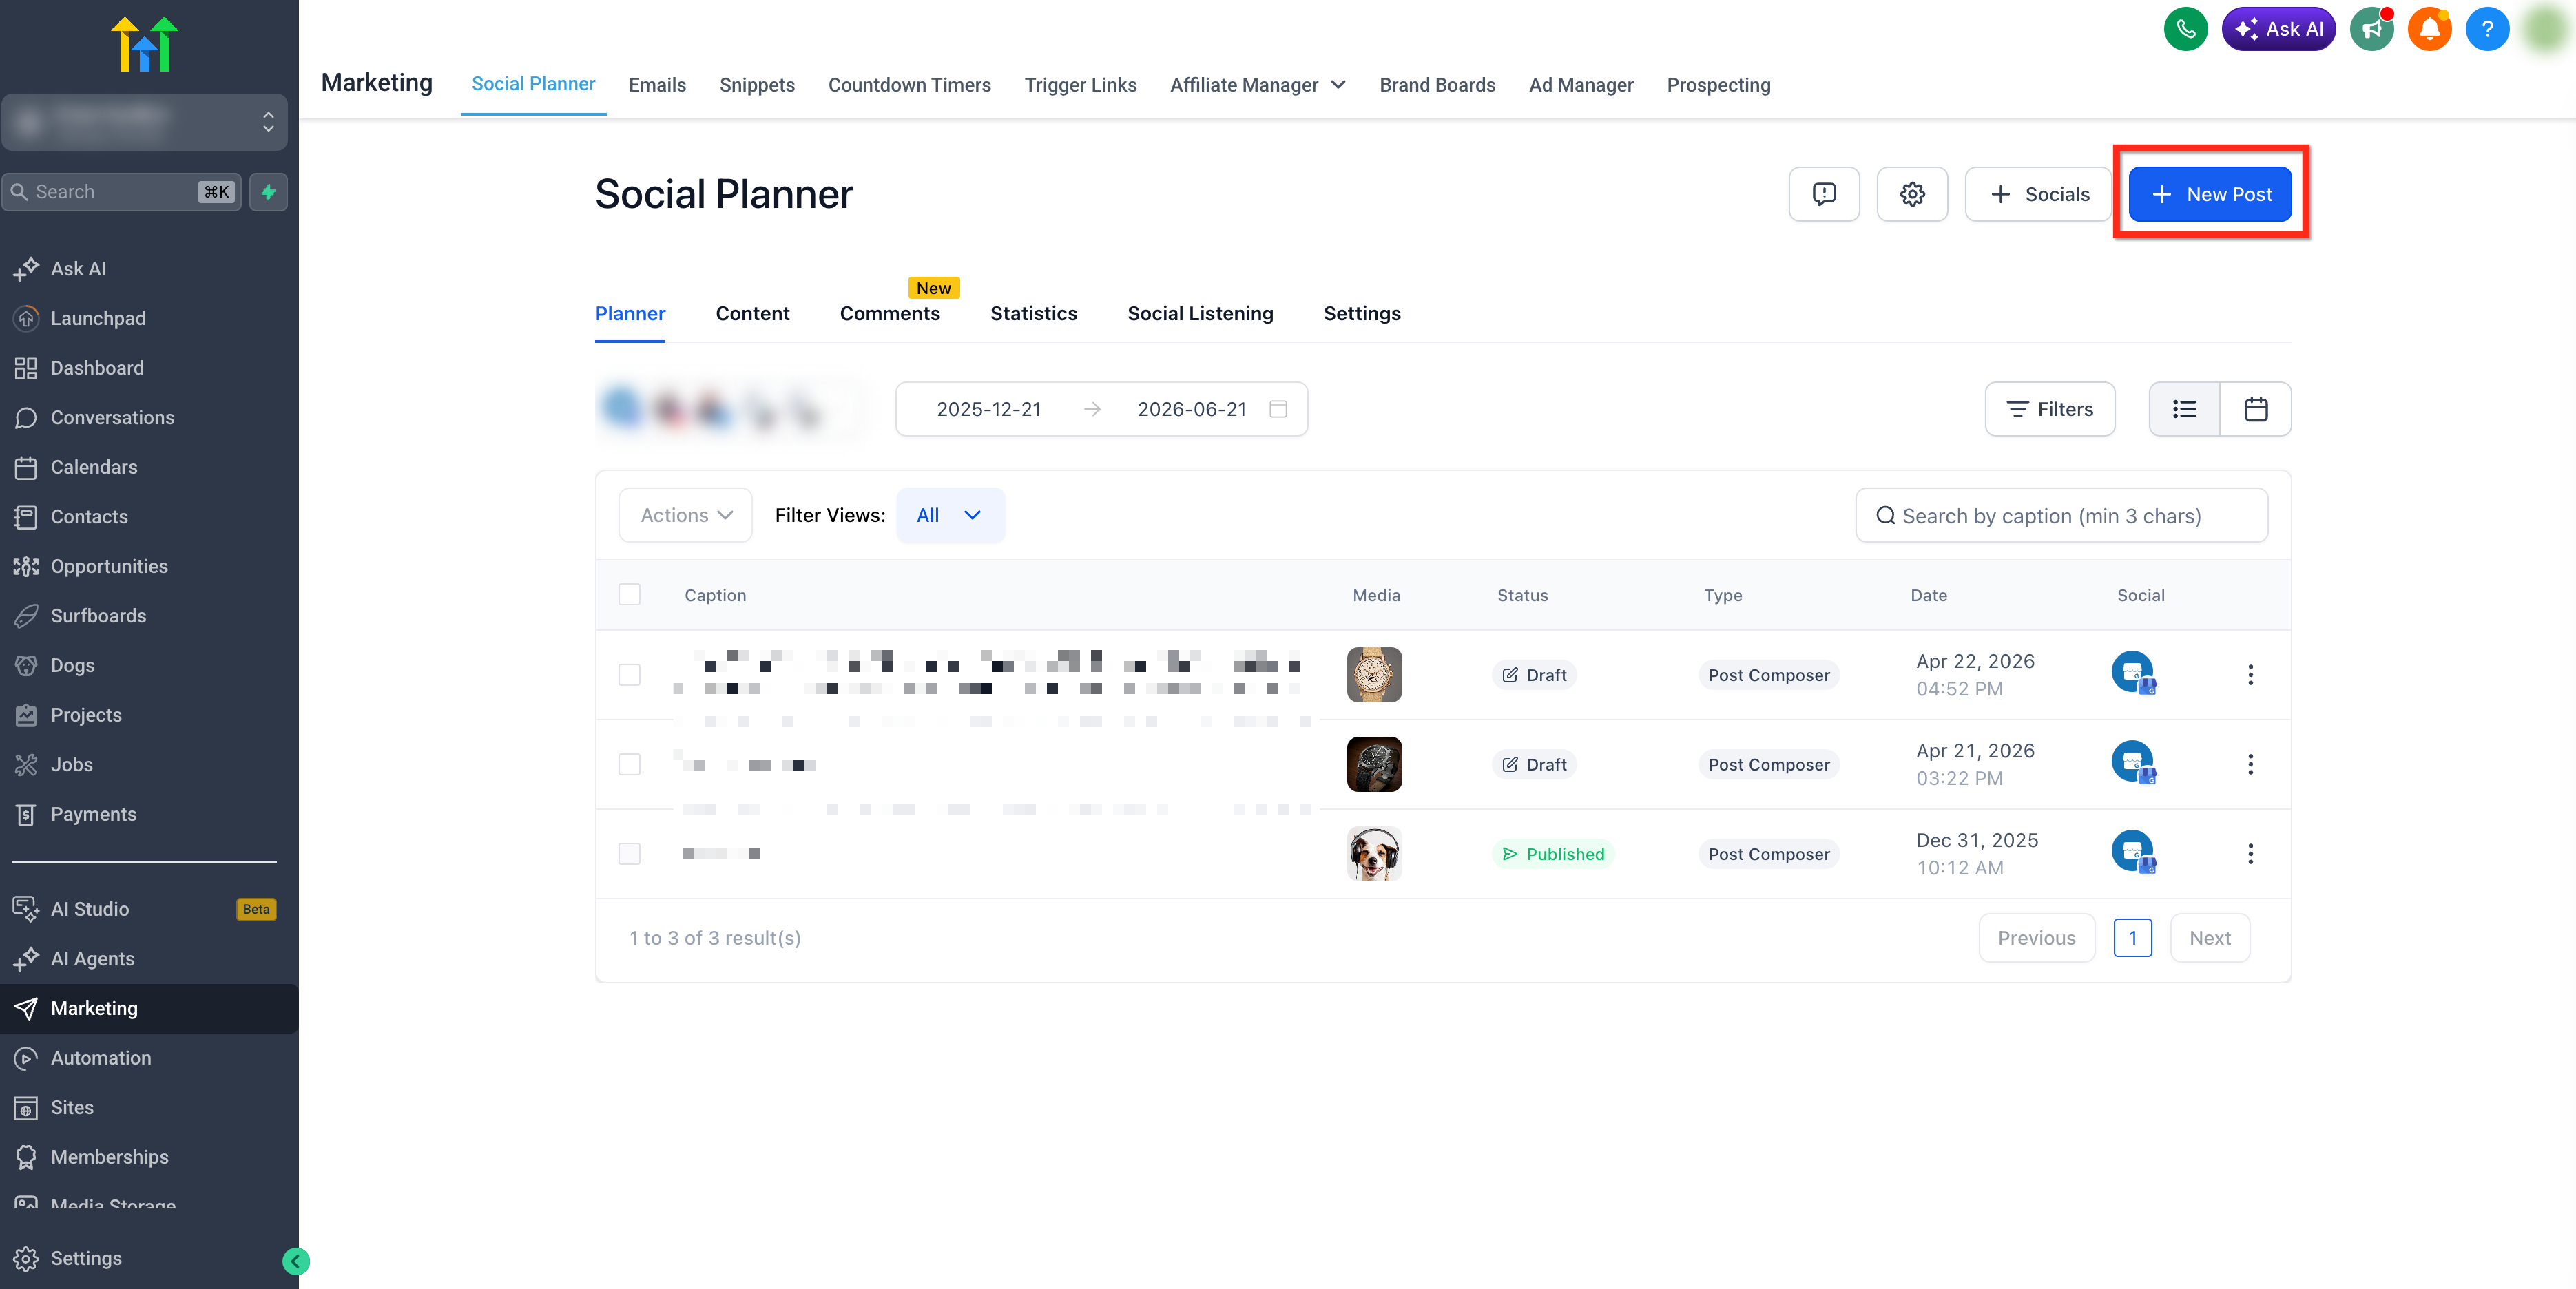
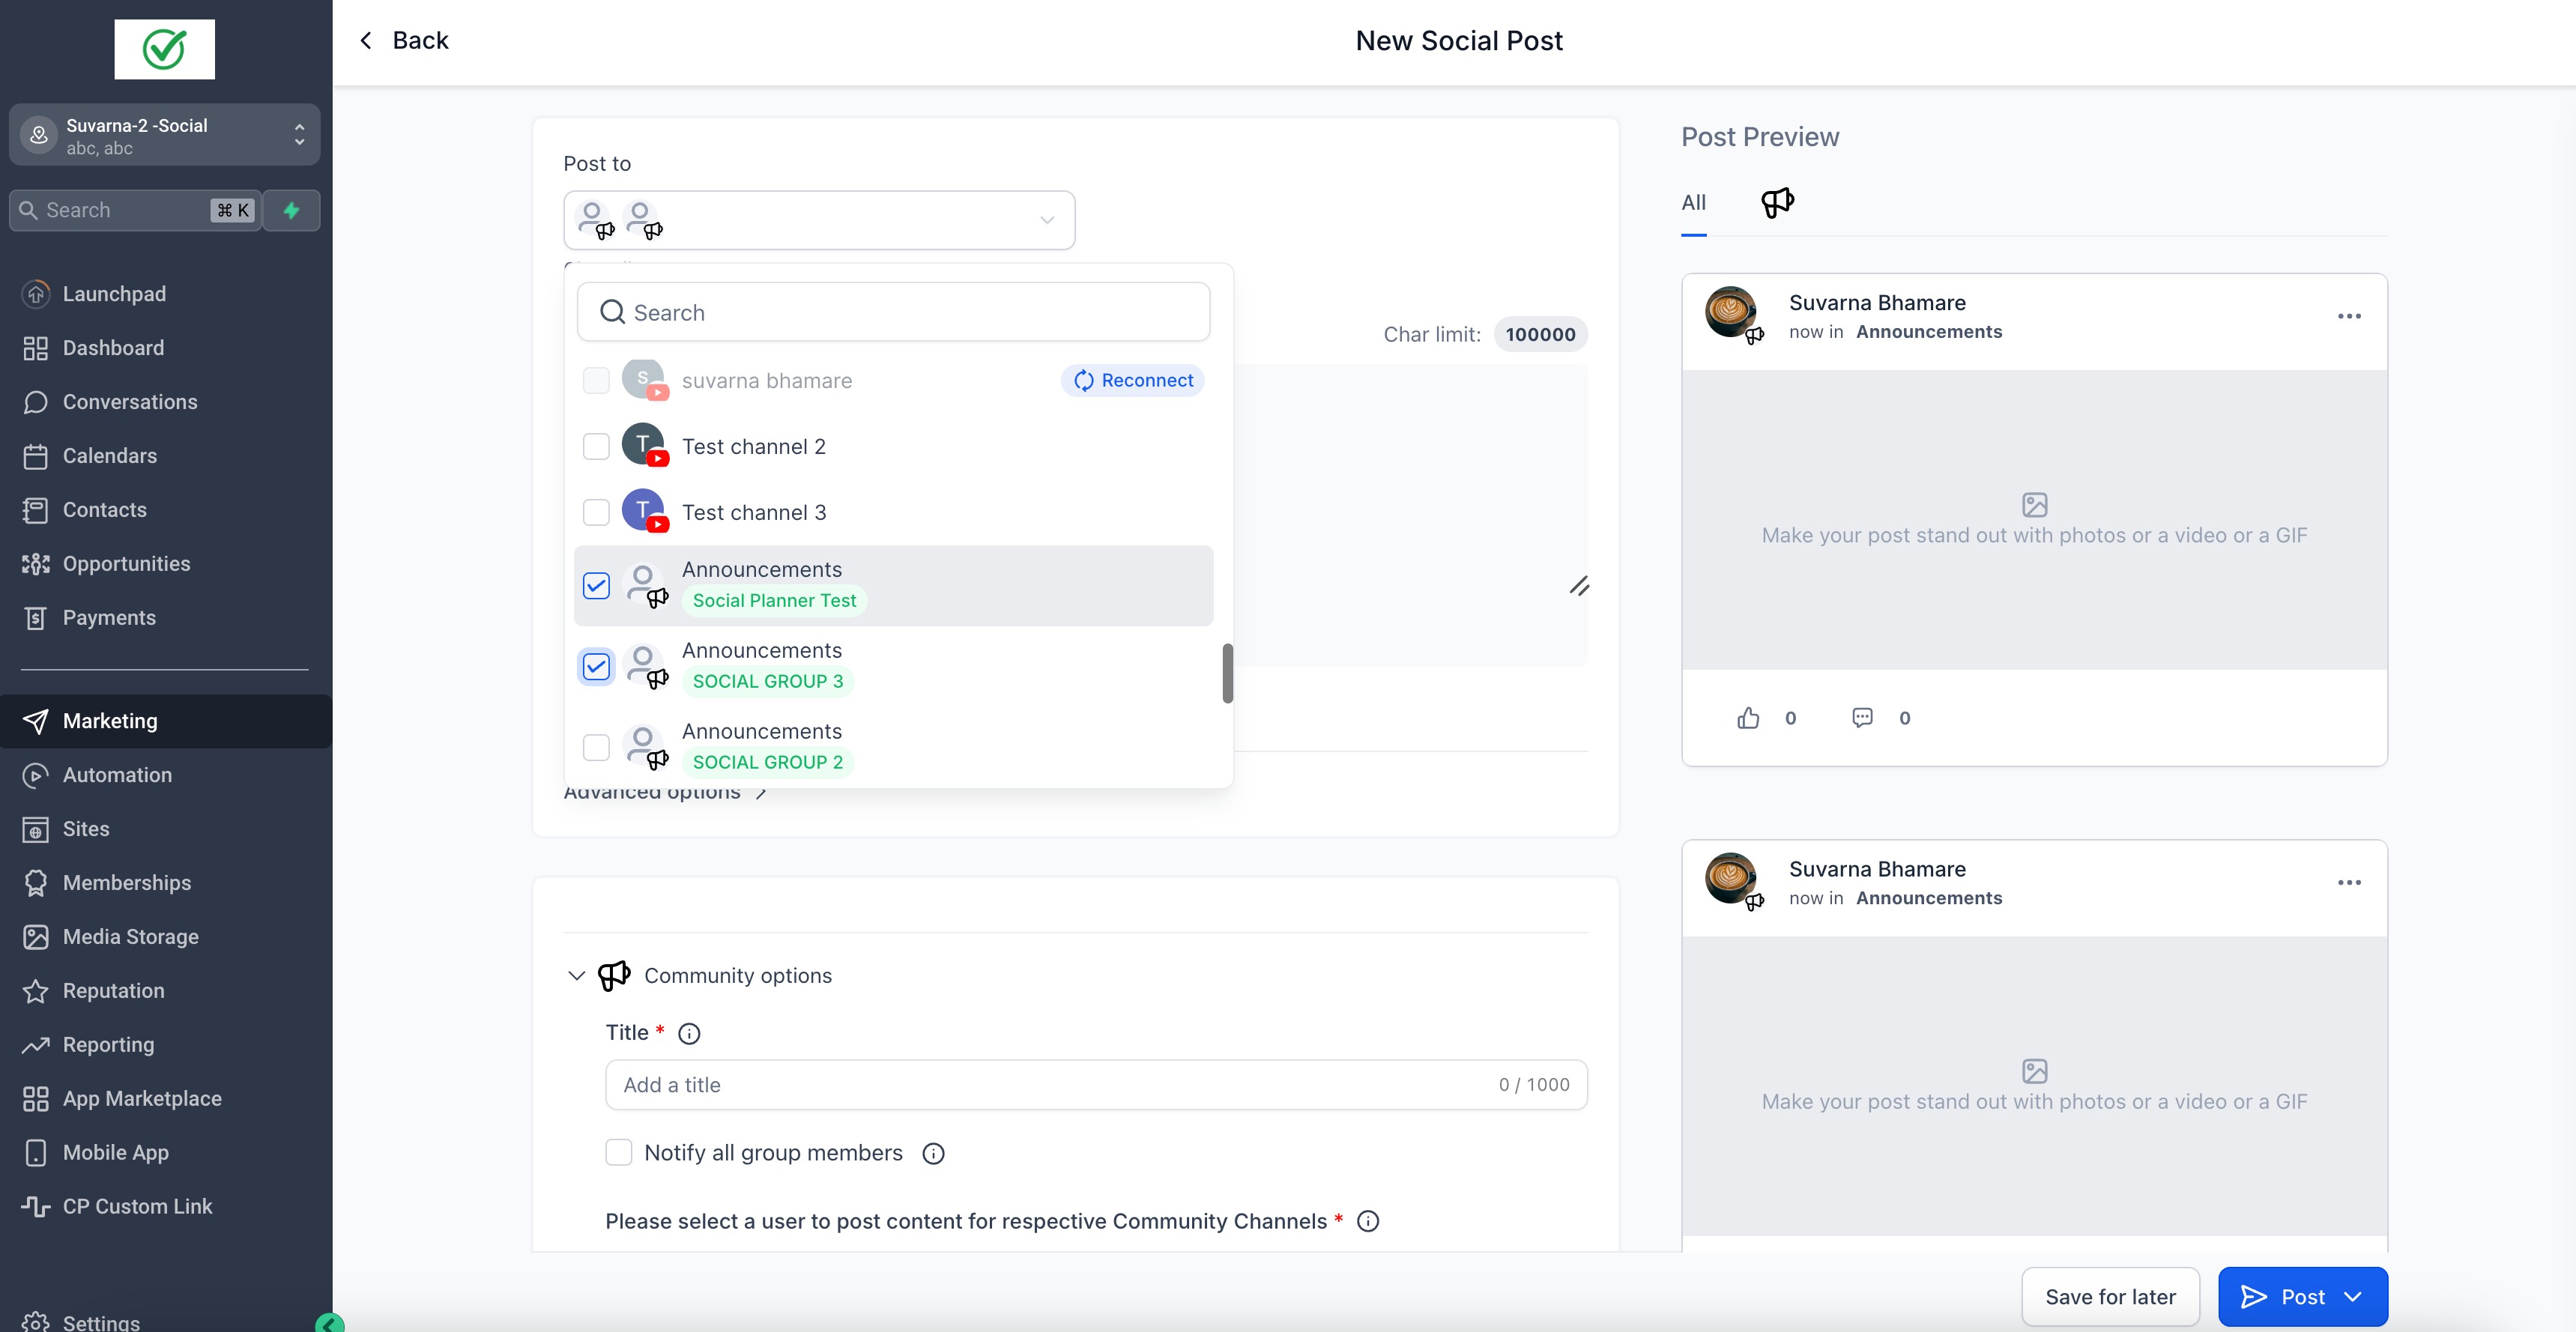
In the channel or account selector, choose the connected Community channels where the post should be published. Select one or multiple Community channels as needed.
Add your content with rich text media:
Both Format - Image and Video are allowed, 10 Image(s) or Video(s) are allowed.
Images - The maximum size of the image is 10 MB
Video - Maximum size for video is 1 GB and duration minimum of 4 seconds.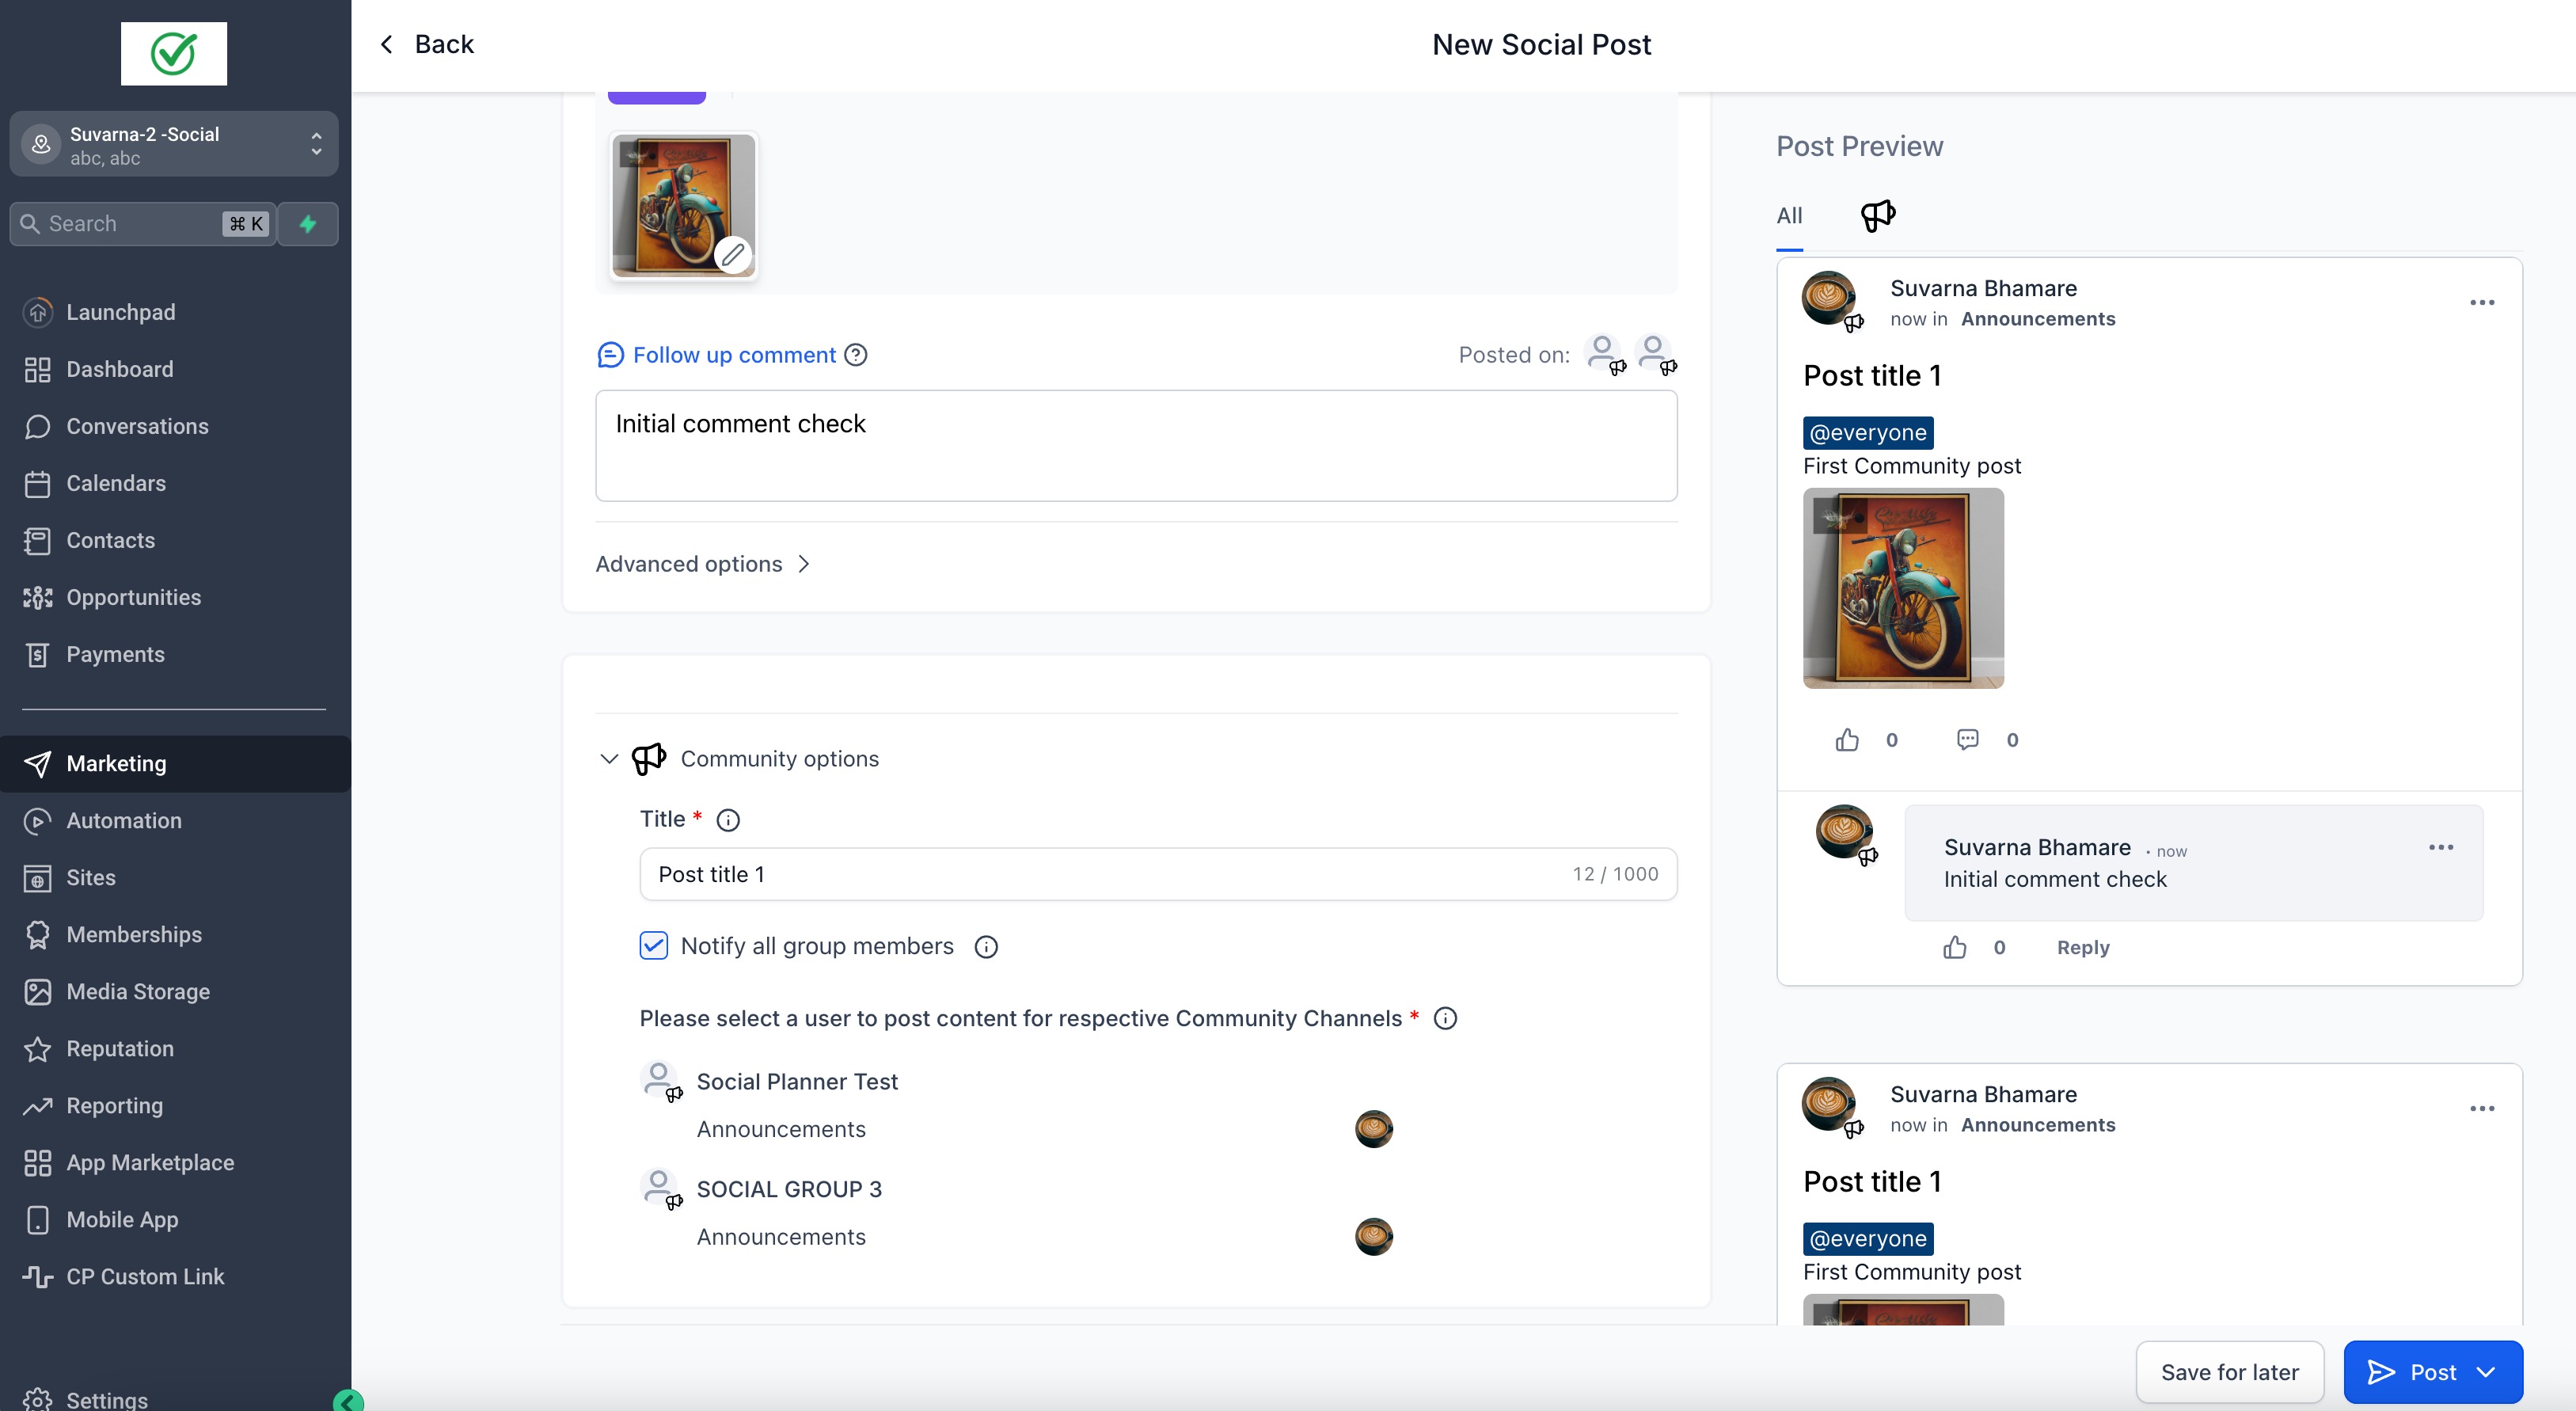
- Fill the mandatory fields such as Title and select the User you want to post as.

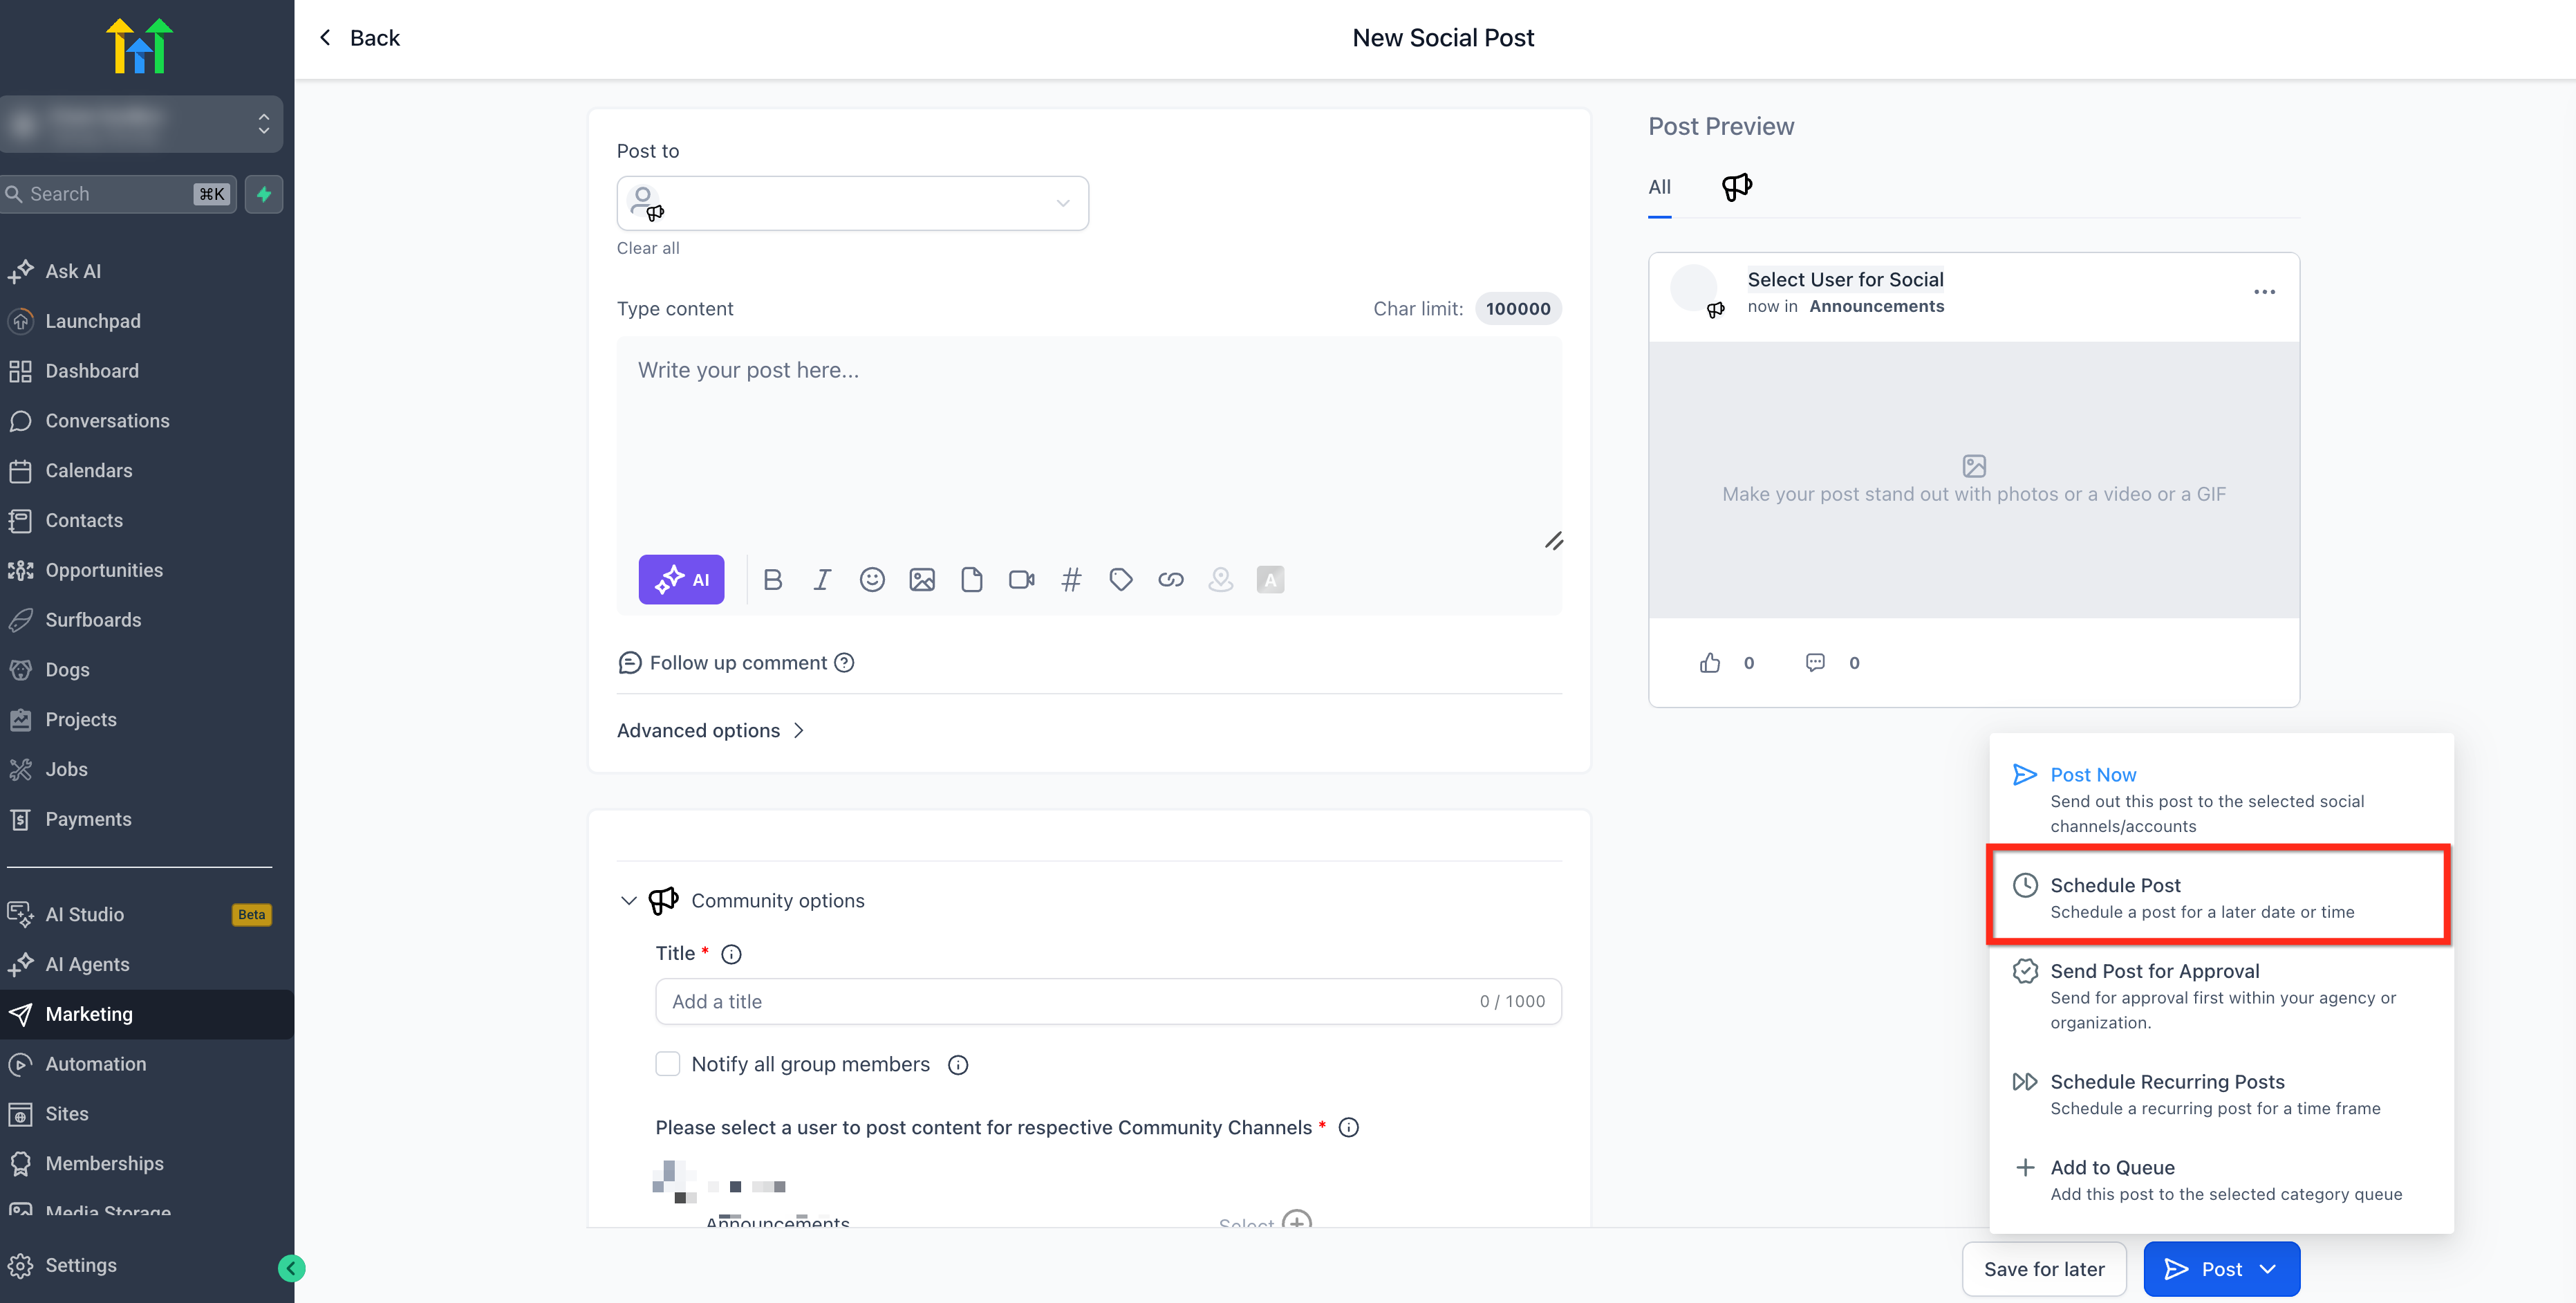
- Once the post has all information added, click Post then select the option Schedule Post.
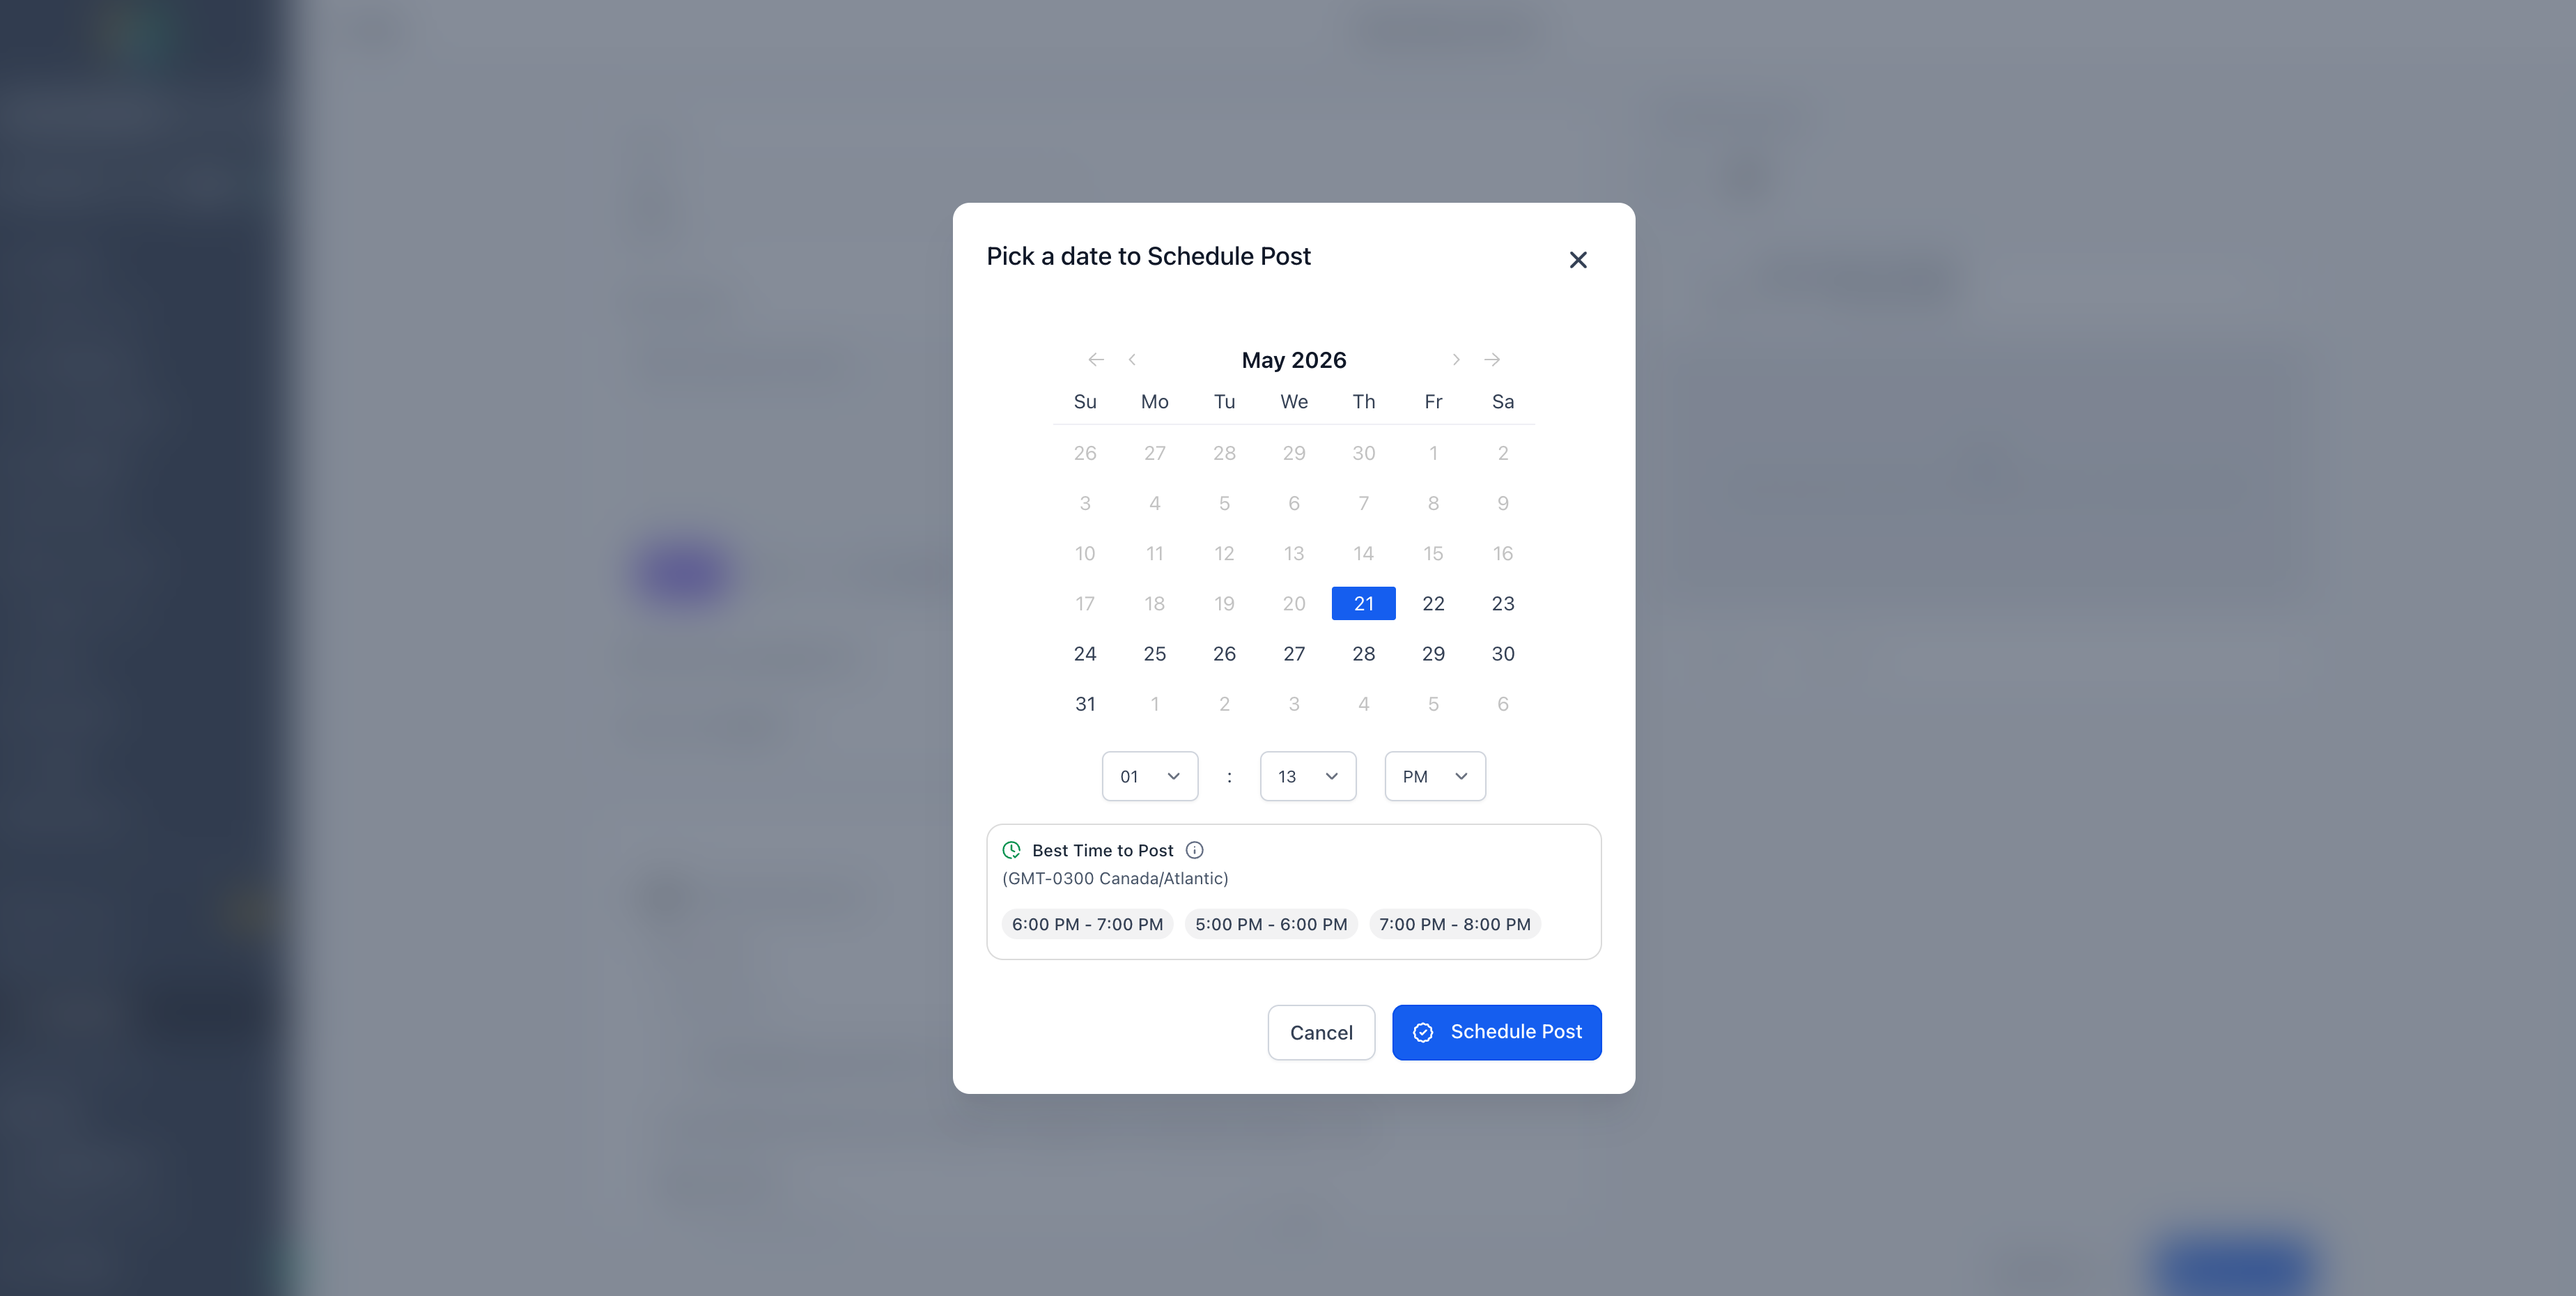
- Choose the desired date and time then click Schedule Post.
Note: Community posting is allowed for CSV and other types of post.Manage Comments from Social Planner
You can view and reply to comments on Communities posts from within Social Planner. For more information, see Manage Comments in Social Planner.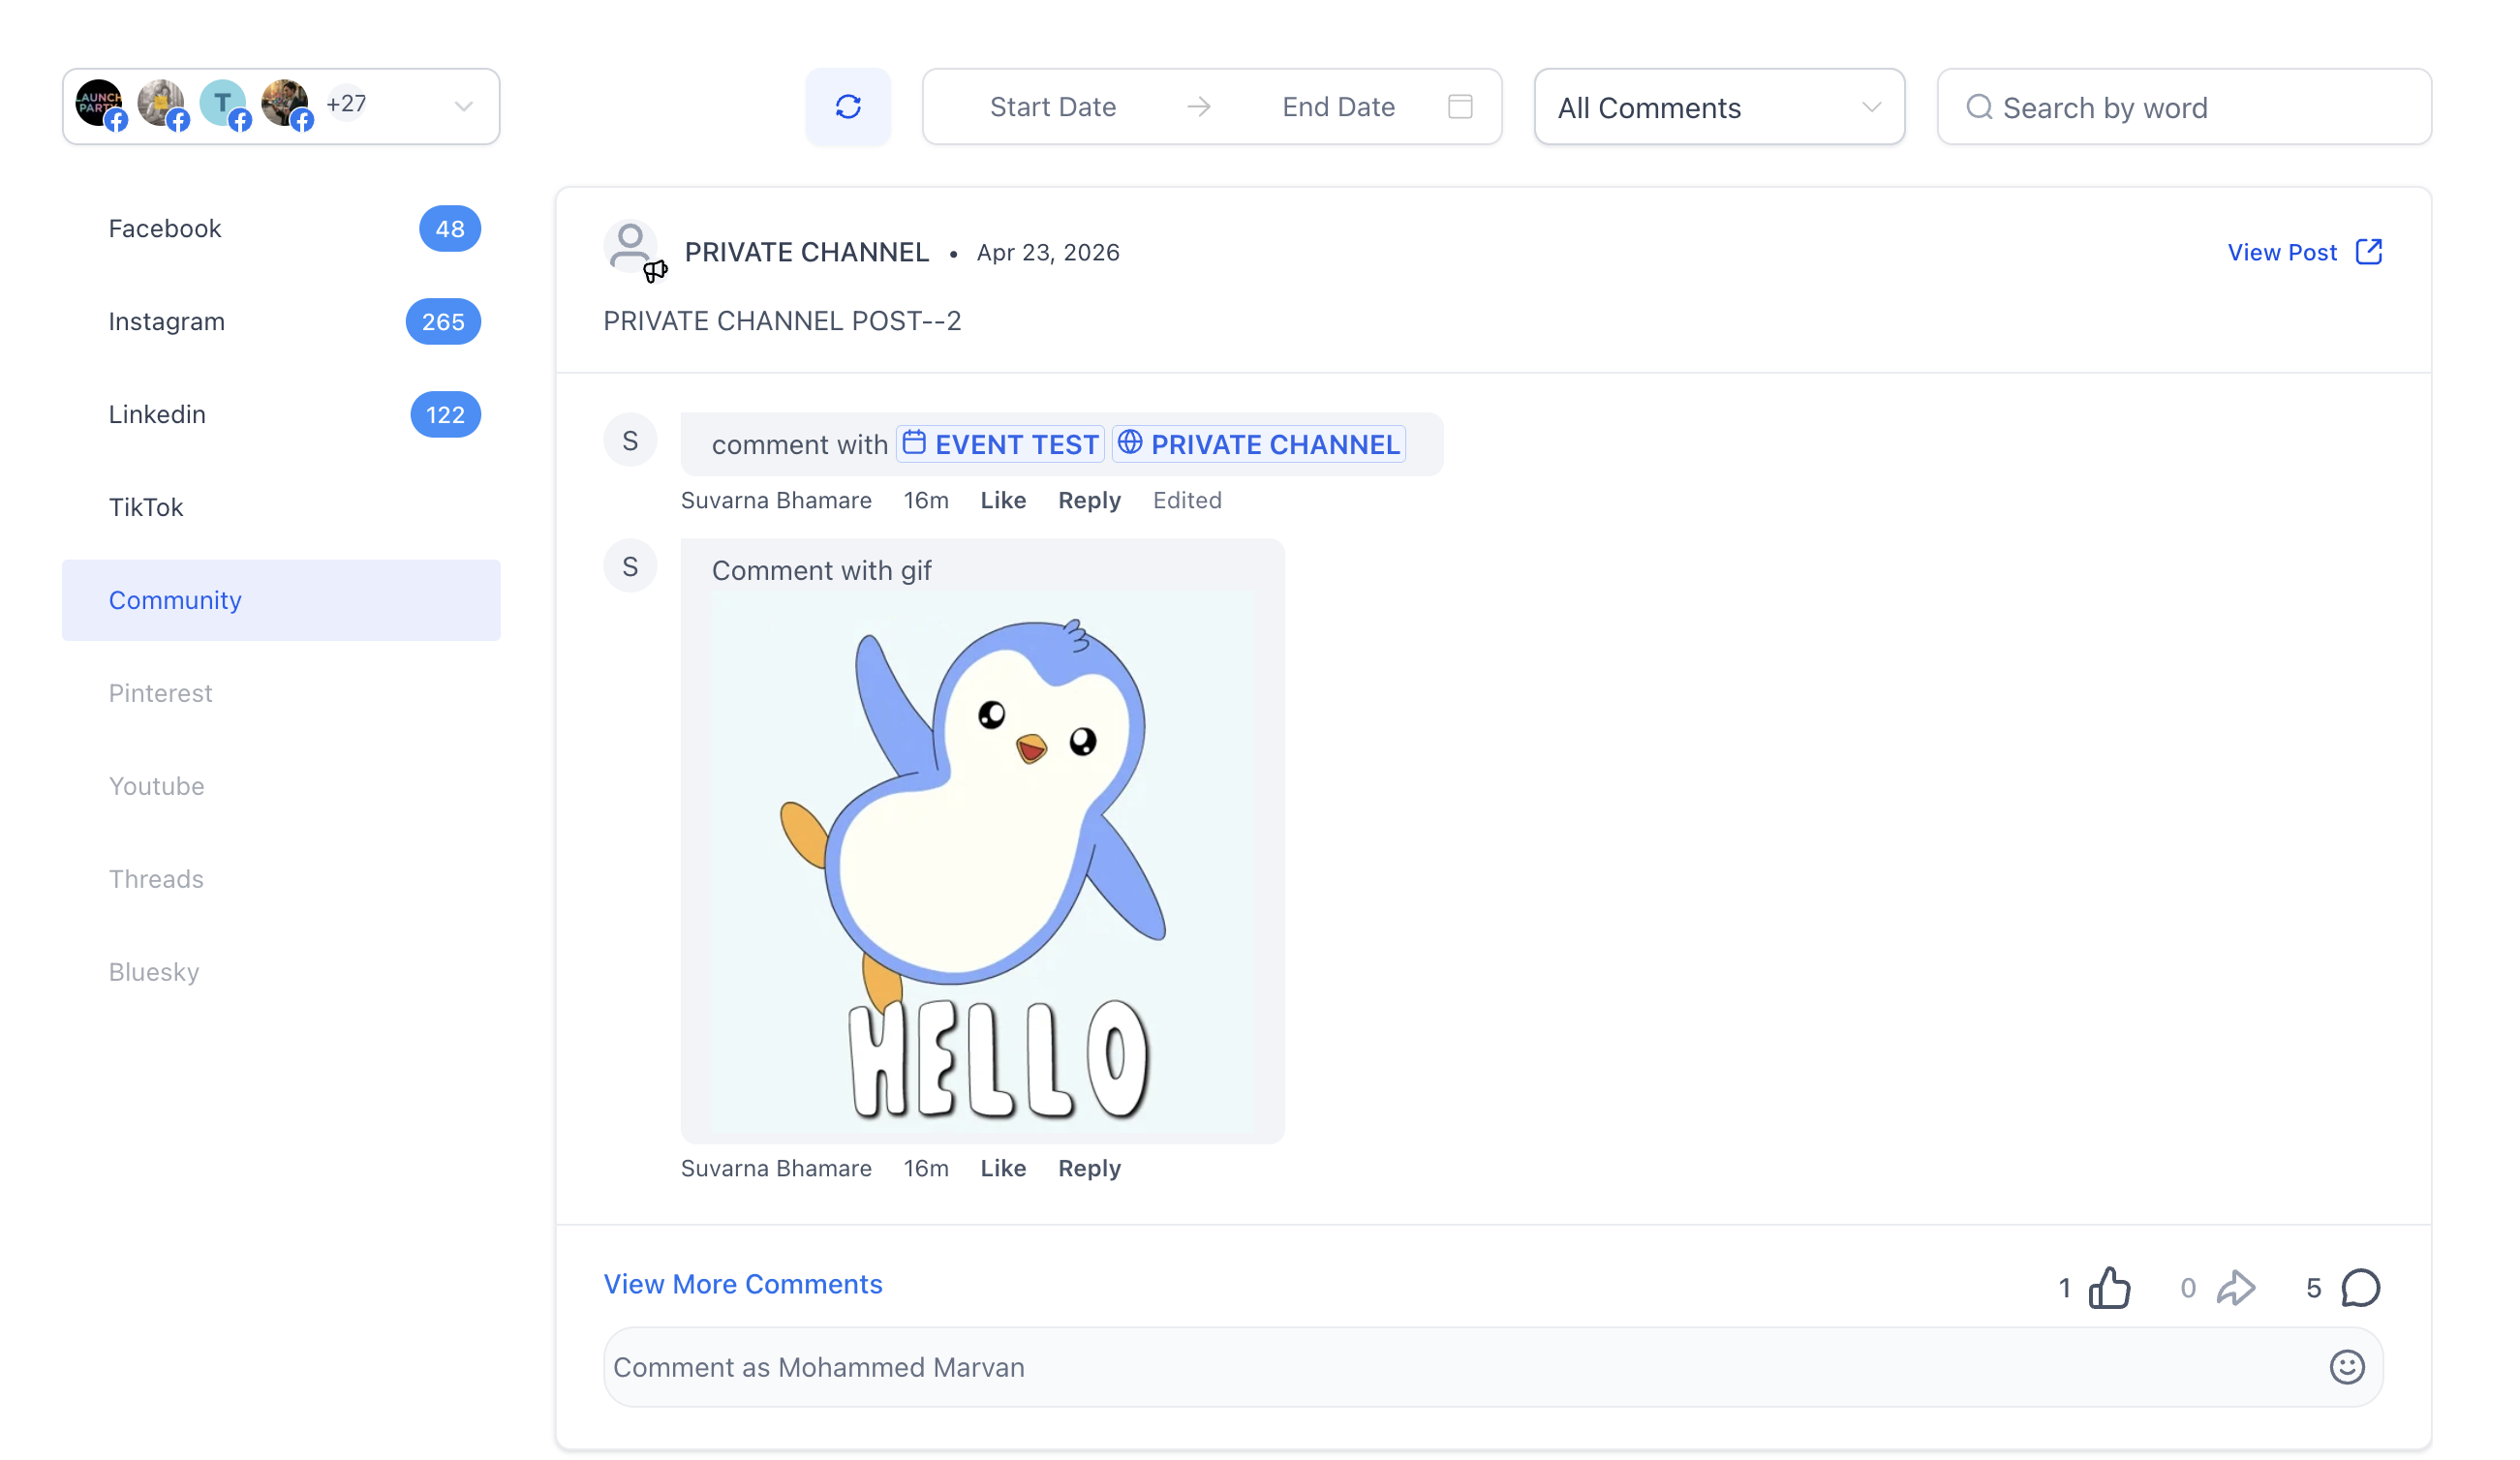
Important Points to Note
- If there are new Channels or changes to Group/Channel details, it will not auto-populate in Social Planner. The user will have to go to Social Planner Settings > Communities to re-sync the groups and channels.
- In Post Composer area, there is option to add user on whose name the post will be published. In Social Planner Settings > there will be option to go to Communities > you can select default users who will be used when you create new social post.
Was this article helpful?
That’s Great!
Thank you for your feedback
Sorry! We couldn't be helpful
Thank you for your feedback
Feedback sent
We appreciate your effort and will try to fix the article