The Google Sheets Premium Workflow Action connects Google Sheets directly with workflows, allowing you to create, look up, update, and clear spreadsheet row data without relying on a third-party integration.
This article explains how to configure the Google Sheets action, use single-row and multiple-row functions, work with Lookup results, and troubleshoot common issues.
TABLE OF CONTENTS
- What is the Google Sheets Premium Workflow Action?
- Key Benefits
- Before You Start
- How to Set Up the Google Sheets Integration
- Google Sheets Action Basic Settings
- Available Google Sheets Actions
- Create Spreadsheet Row
- Create Multiple Spreadsheet Row(s)
- Lookup Spreadsheet Row
- Create Spreadsheet Row if a Lookup Does Not Find a Match
- Lookup Multiple Spreadsheet Row(s)
- Update Specific Spreadsheet Row
- Update Multiple Spreadsheet Row(s)
- Update Spreadsheet Row Using Lookup
- How to Configure Update Spreadsheet Row Using Lookup
- Delete Specific Spreadsheet Row
- Delete Spreadsheet Row Using Lookup
- Using Lookup Results as Custom Variables
- Using Lookup Results in If/Else Conditions
- Troubleshooting
- Frequently Asked Questions
- Related Articles
What is the Google Sheets Premium Workflow Action?
The Google Sheets Premium Workflow Action allows you to connect Google Sheets directly to a workflow and automate spreadsheet data management.
Depending on the selected action, workflows can:
Create new spreadsheet rows
Create multiple spreadsheet rows
Look up existing spreadsheet rows
Return multiple matching rows
Update specific rows
Update multiple rows
Update a row identified by a Lookup action
Clear a specific row
Clear a row identified by a Lookup action
This makes it possible to automate common spreadsheet operations without using an external automation platform.
Note: In the Workflow Builder, Google Sheets is added as an Action. Within the Google Sheets action, options such as Create Spreadsheet Row and Lookup Spreadsheet Row are also displayed as actions.
Key Benefits
- Automate Spreadsheet Data Management: Automatically create, find, or modify spreadsheet records as contacts move through workflows.
- Reduce Manual Data Entry: Send workflow data directly to Google Sheets instead of manually copying information between systems.
- Keep Data Structured: Map workflow information to predefined spreadsheet columns so records follow a consistent structure.
- Support Single and Multiple Records: Use standard row actions when processing one spreadsheet record or multiple-row actions when a workflow execution contains grouped data.
- Use Spreadsheet Data in Later Workflow Steps: Lookup actions can retrieve spreadsheet information and make the returned values available for use in subsequent workflow actions.
Before You Start
Before configuring a Google Sheets workflow action:
Connect a Google account to the applicable sub-account.
Make sure the Google account has access to the required Google Drive and spreadsheet.
Prepare the Google Sheet and add clearly defined column headers in the first row.
Confirm that the correct worksheet tab exists.
Make sure Workflow Premium Features are enabled where required.
Important: Google Sheets is a Premium Workflow Action. Eligible sub-accounts receive 100 free lifetime premium executions. After those executions are consumed, standard premium execution pricing applies unless the sub-account has an applicable Workflow Pro plan. For current pricing, included executions, overage rates, and information, see How to Enable and Workflow Premium Features.
How to Set Up the Google Sheets Integration
Step 1: Add the Google Sheets Action
Go to Automation > Workflows.
Open an existing workflow or create a new workflow.
Click the + icon to add an action.
Search for and select Google Sheets.
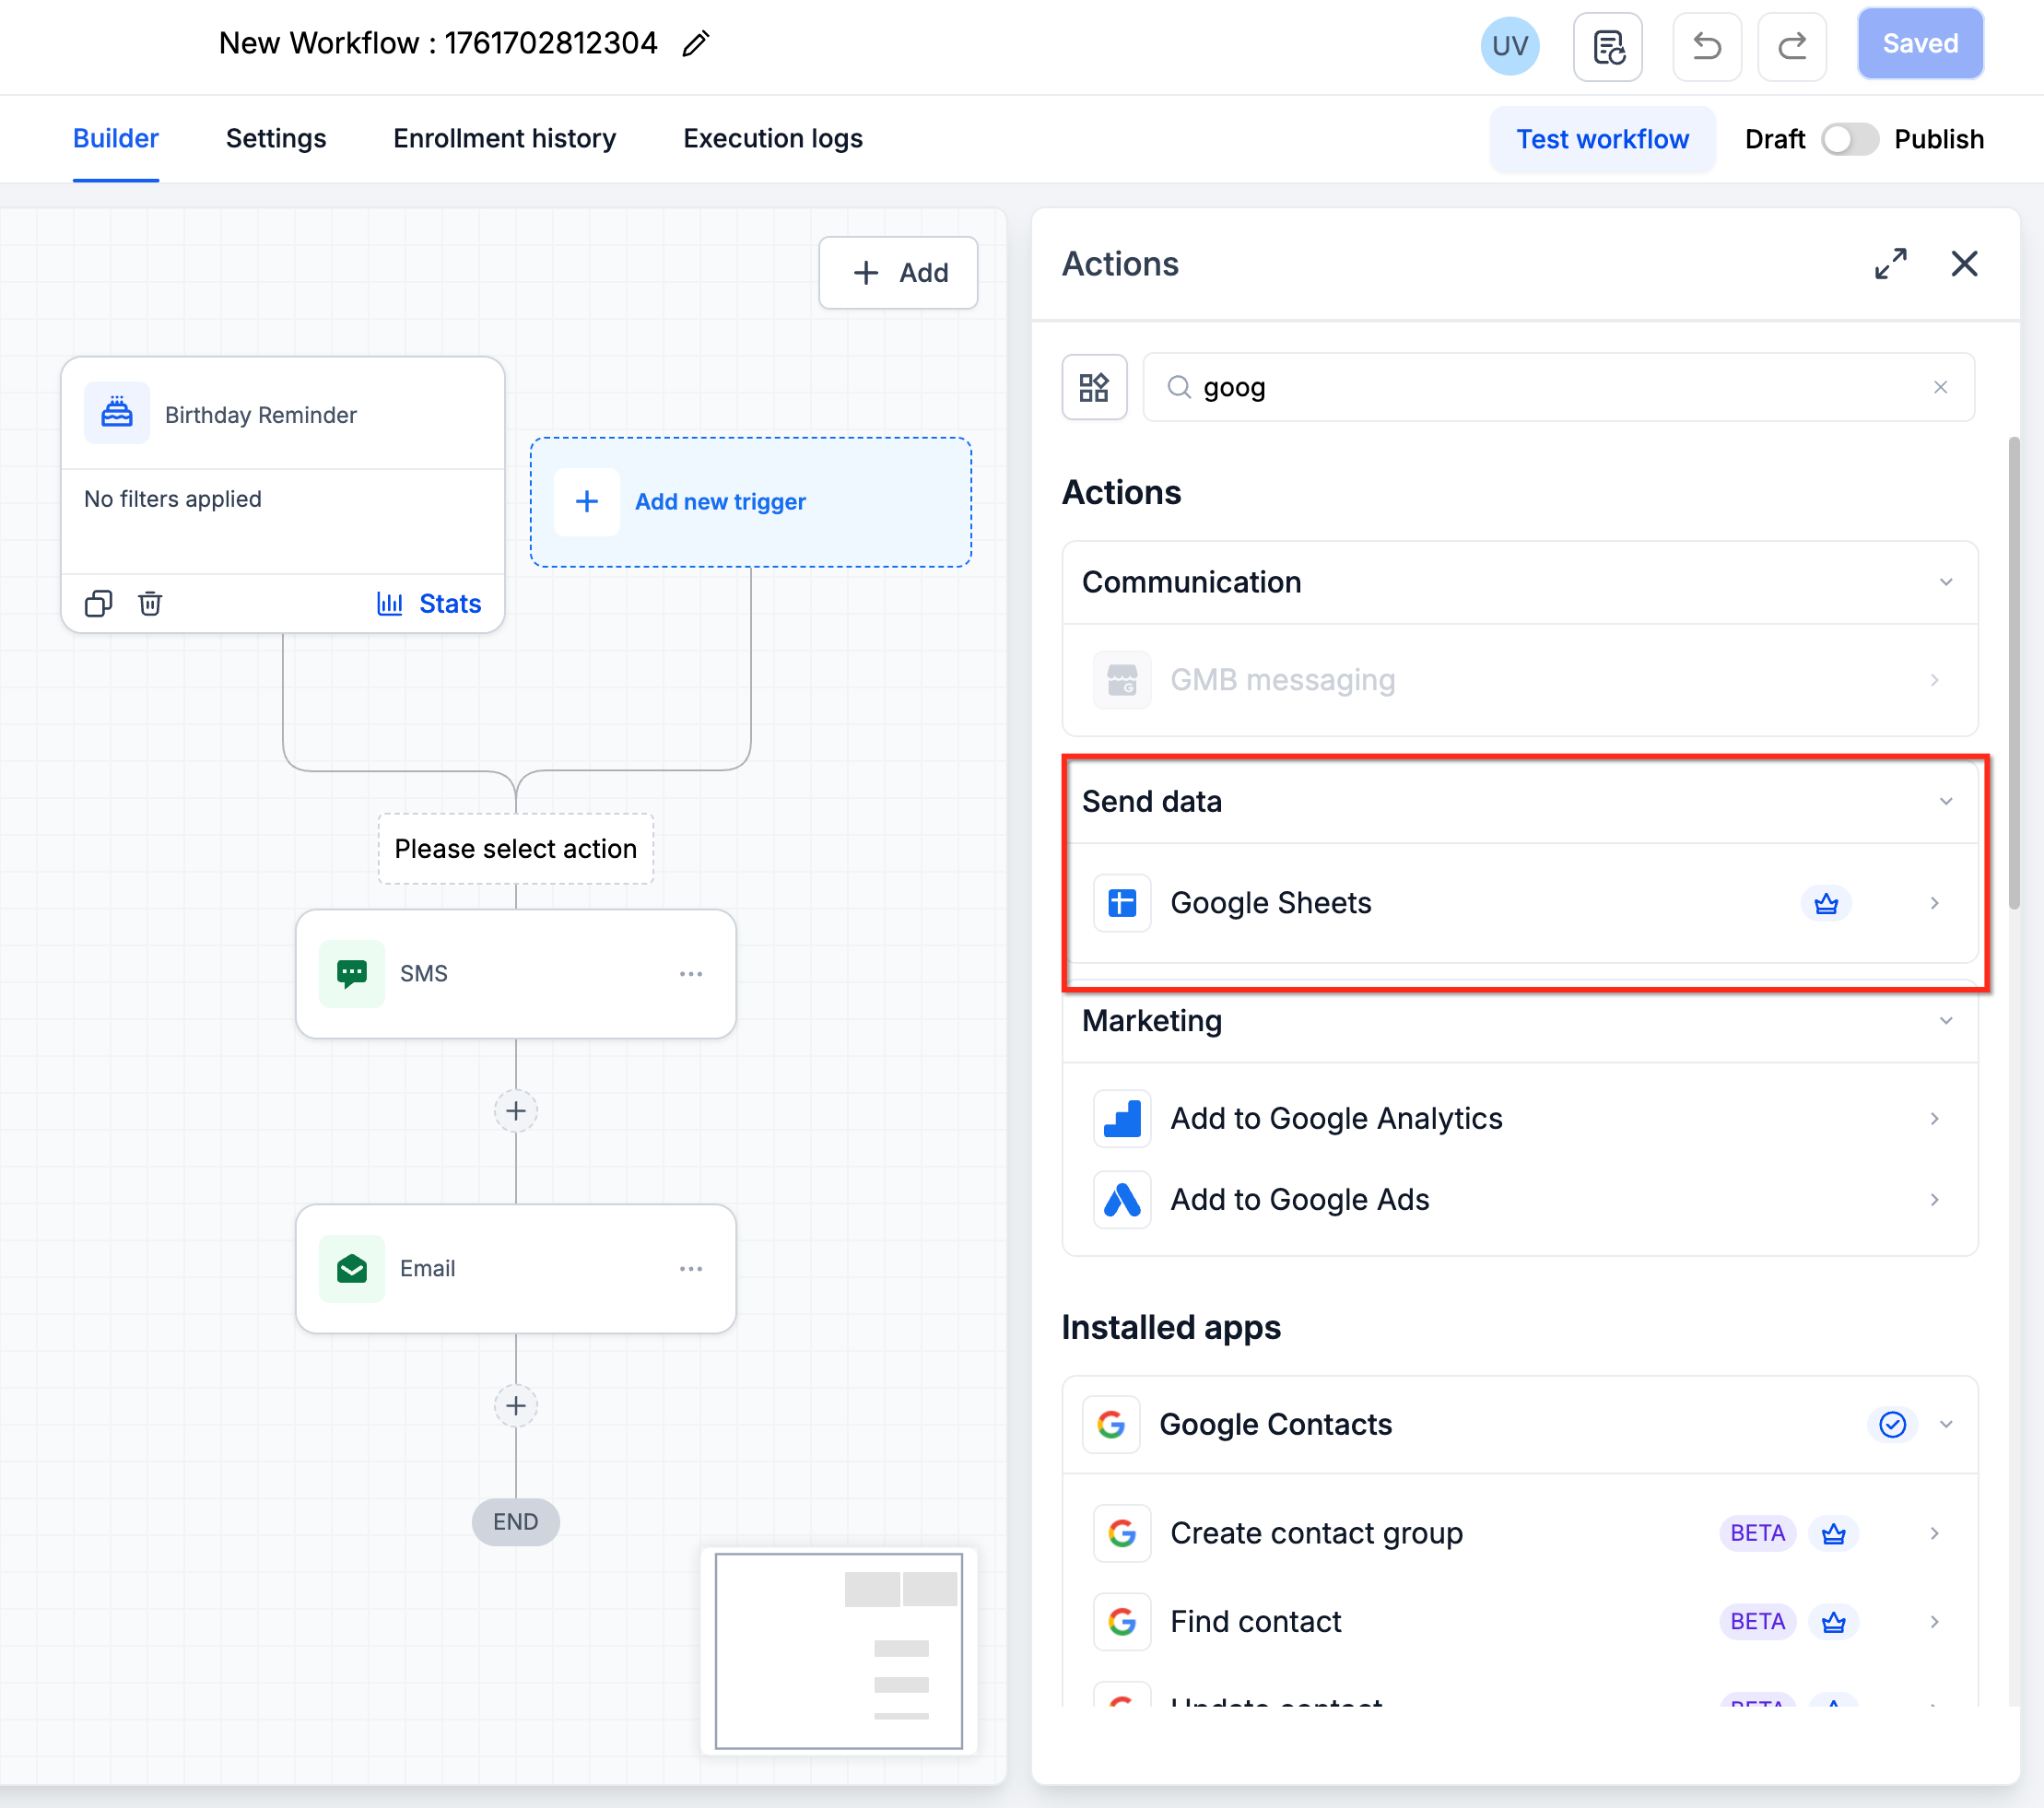
Select the Google Sheets action you want to perform.
Step 2: Connect Your Google Account
If a Google account has not already been connected, connect and authorize the Google account you want to use. The connected account must have access to the Drive and spreadsheet used by the workflow.
Step 3: Select the Google Drive
Select the Drive containing the spreadsheet.
Step 4: Select the Spreadsheet
Choose the Google Spreadsheet where the workflow should create, retrieve, update, or clear data.
Step 5: Select the Worksheet
Select the specific worksheet tab within the spreadsheet.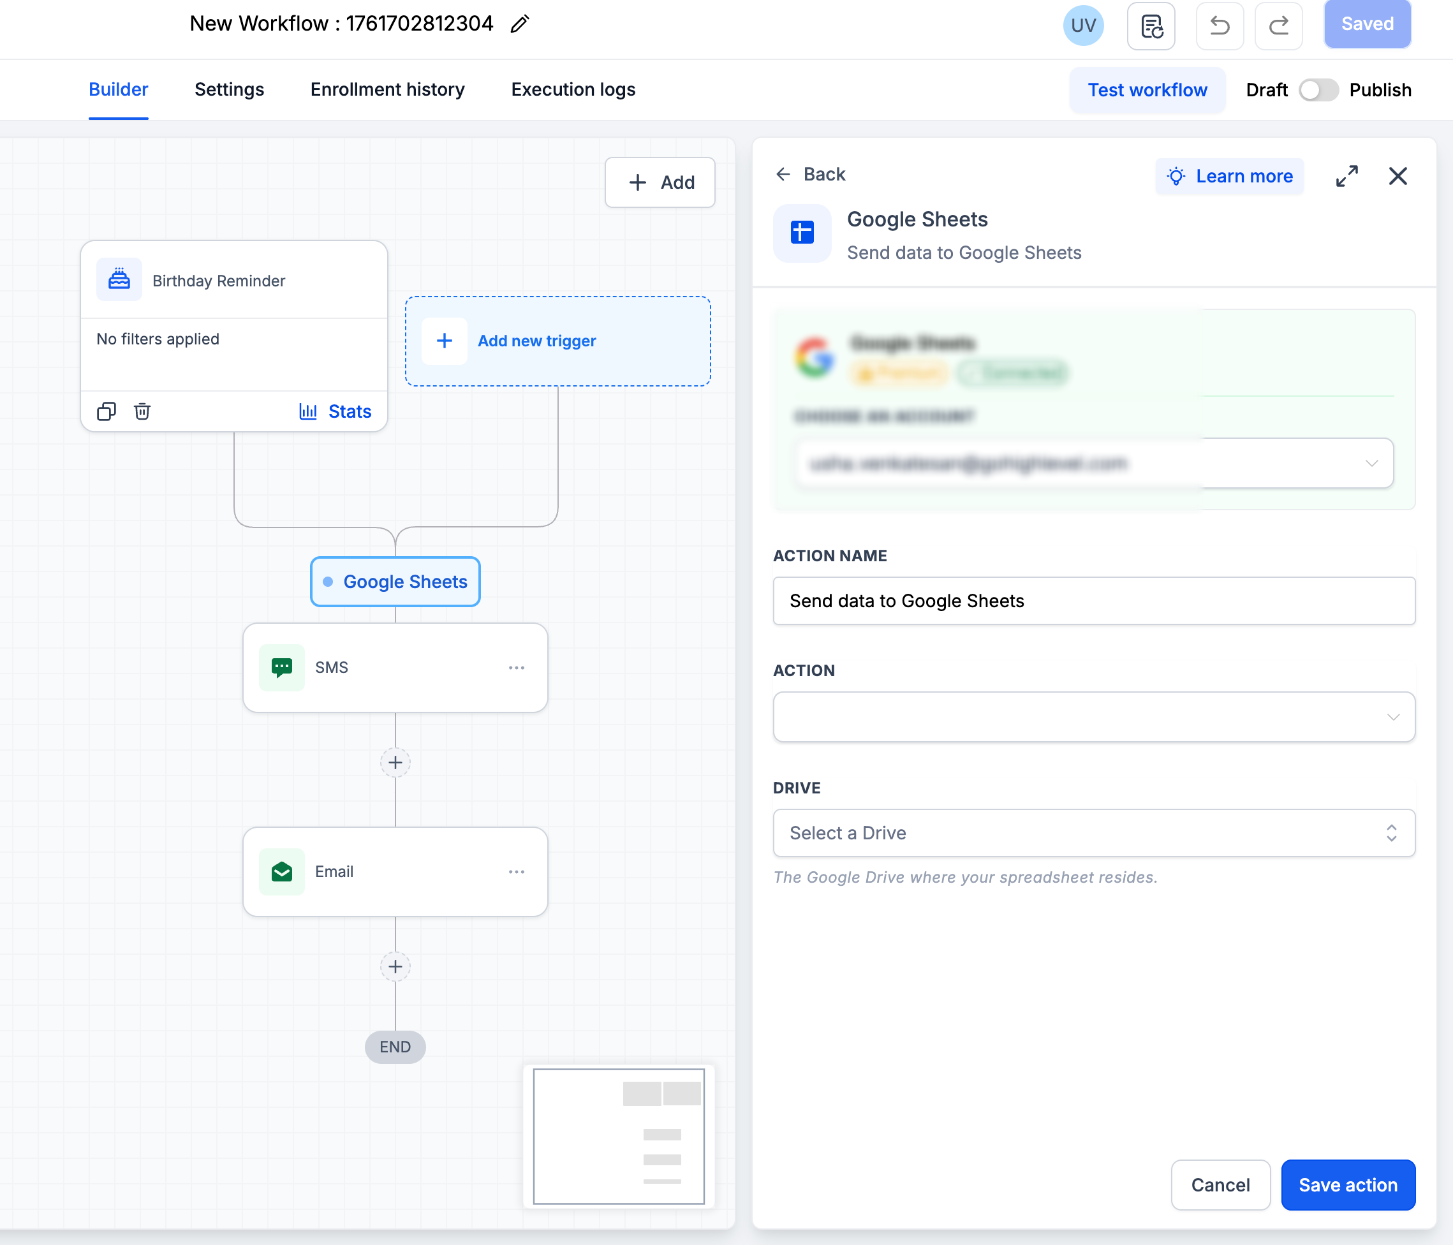
Google Sheets Action Basic Settings
The fields displayed can vary depending on the selected Google Sheets action, but common configuration options include:
Google Account
Select the connected Google account.
Drive
Select the Google Drive containing the spreadsheet.
Spreadsheet
Select the spreadsheet you want the workflow to use.
Worksheet
Select the worksheet tab containing the data.
Refresh Headers
The first row of the worksheet is treated as the header row. If you add, rename, remove, or reorder spreadsheet columns after configuring the workflow, click Refresh Headers to retrieve the latest column structure.
Starting Column and Ending Column
Select the range of spreadsheet columns the workflow action should use. The column headers within the selected range become available for field mapping.
Tip: Knowing the exact Drive, Spreadsheet, and Worksheet names makes it easier to locate them when configuring the action.
Available Google Sheets Actions
| Action | Description |
|---|---|
| Create Spreadsheet Row | Adds a new row to the spreadsheet. |
| Create Multiple Spreadsheet Row(s) | Adds one or more rows when multiple records are available in the workflow execution. |
| Lookup Spreadsheet Row | Finds a matching spreadsheet row based on configured search criteria. |
| Lookup Multiple Spreadsheet Row(s) | Returns multiple rows based on the configured lookup criteria and row count. |
| Update Specific Spreadsheet Row | Updates values in a specified row number. |
| Update Multiple Spreadsheet Row(s) | Updates values across existing spreadsheet rows. |
| Update Spreadsheet Row Using Lookup | Updates the row returned by a previous Lookup action. |
| Delete Specific Spreadsheet Row | Clears the values from a specified row without removing the physical row. |
| Delete Spreadsheet Row Using Lookup | Clears the values from the row returned by a previous Lookup action. |
Important: Delete Spreadsheet Row actions clear the contents of the selected row. They do not physically remove the row from the Google Sheet.
Create Spreadsheet Row
Use Create Spreadsheet Row when the workflow needs to add a single new record to the worksheet. New rows are added after the highest-numbered existing row.
How to Configure Create Spreadsheet Row
Add a Google Sheets action to the workflow.
Select Create Spreadsheet Row.
Select the Google Account.
Select the Drive.
Select the Spreadsheet.
Select the Worksheet.
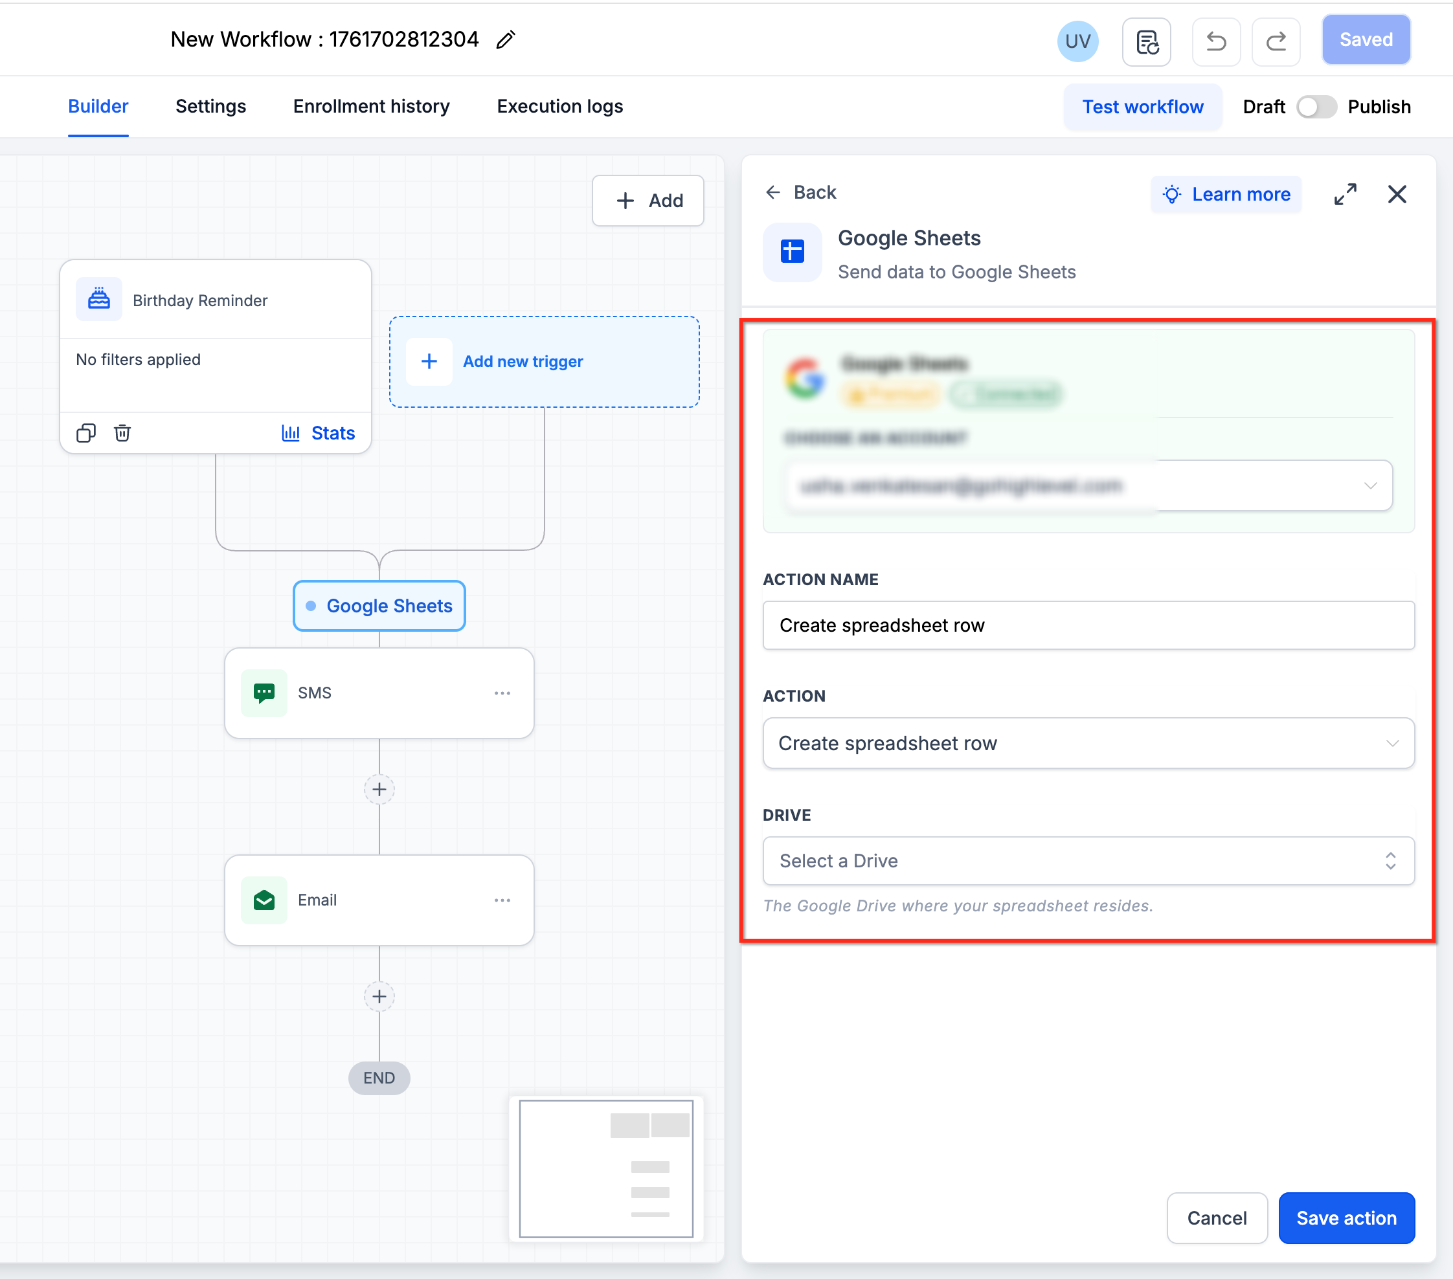
Click Refresh Headers if the worksheet structure has changed.
Select the Starting Column and Ending Column.
Map workflow values to the appropriate spreadsheet columns.
Click Save Action.
Use this action when each workflow execution should create one spreadsheet row.
Create Multiple Spreadsheet Row(s)
Use Create Multiple Spreadsheet Row(s) when a single workflow execution contains multiple records that need to be added as separate spreadsheet rows.
How Create Multiple Spreadsheet Row(s) Works
The action creates multiple rows only when the workflow execution receives the data as an array (list) of row objects.
Each object in the array becomes one spreadsheet row.
For example, an array containing three row objects creates three spreadsheet rows.
Important: Contacts entering a workflow separately are processed as separate workflow executions. Create Multiple Spreadsheet Row(s) does not wait for additional contacts or automatically combine independently enrolled contacts into a batch.
If only one record is available during the workflow execution, the action creates only one row.
How to Configure Create Multiple Spreadsheet Row(s)
Add a Google Sheets action.
Select Create Multiple Spreadsheet Row(s).
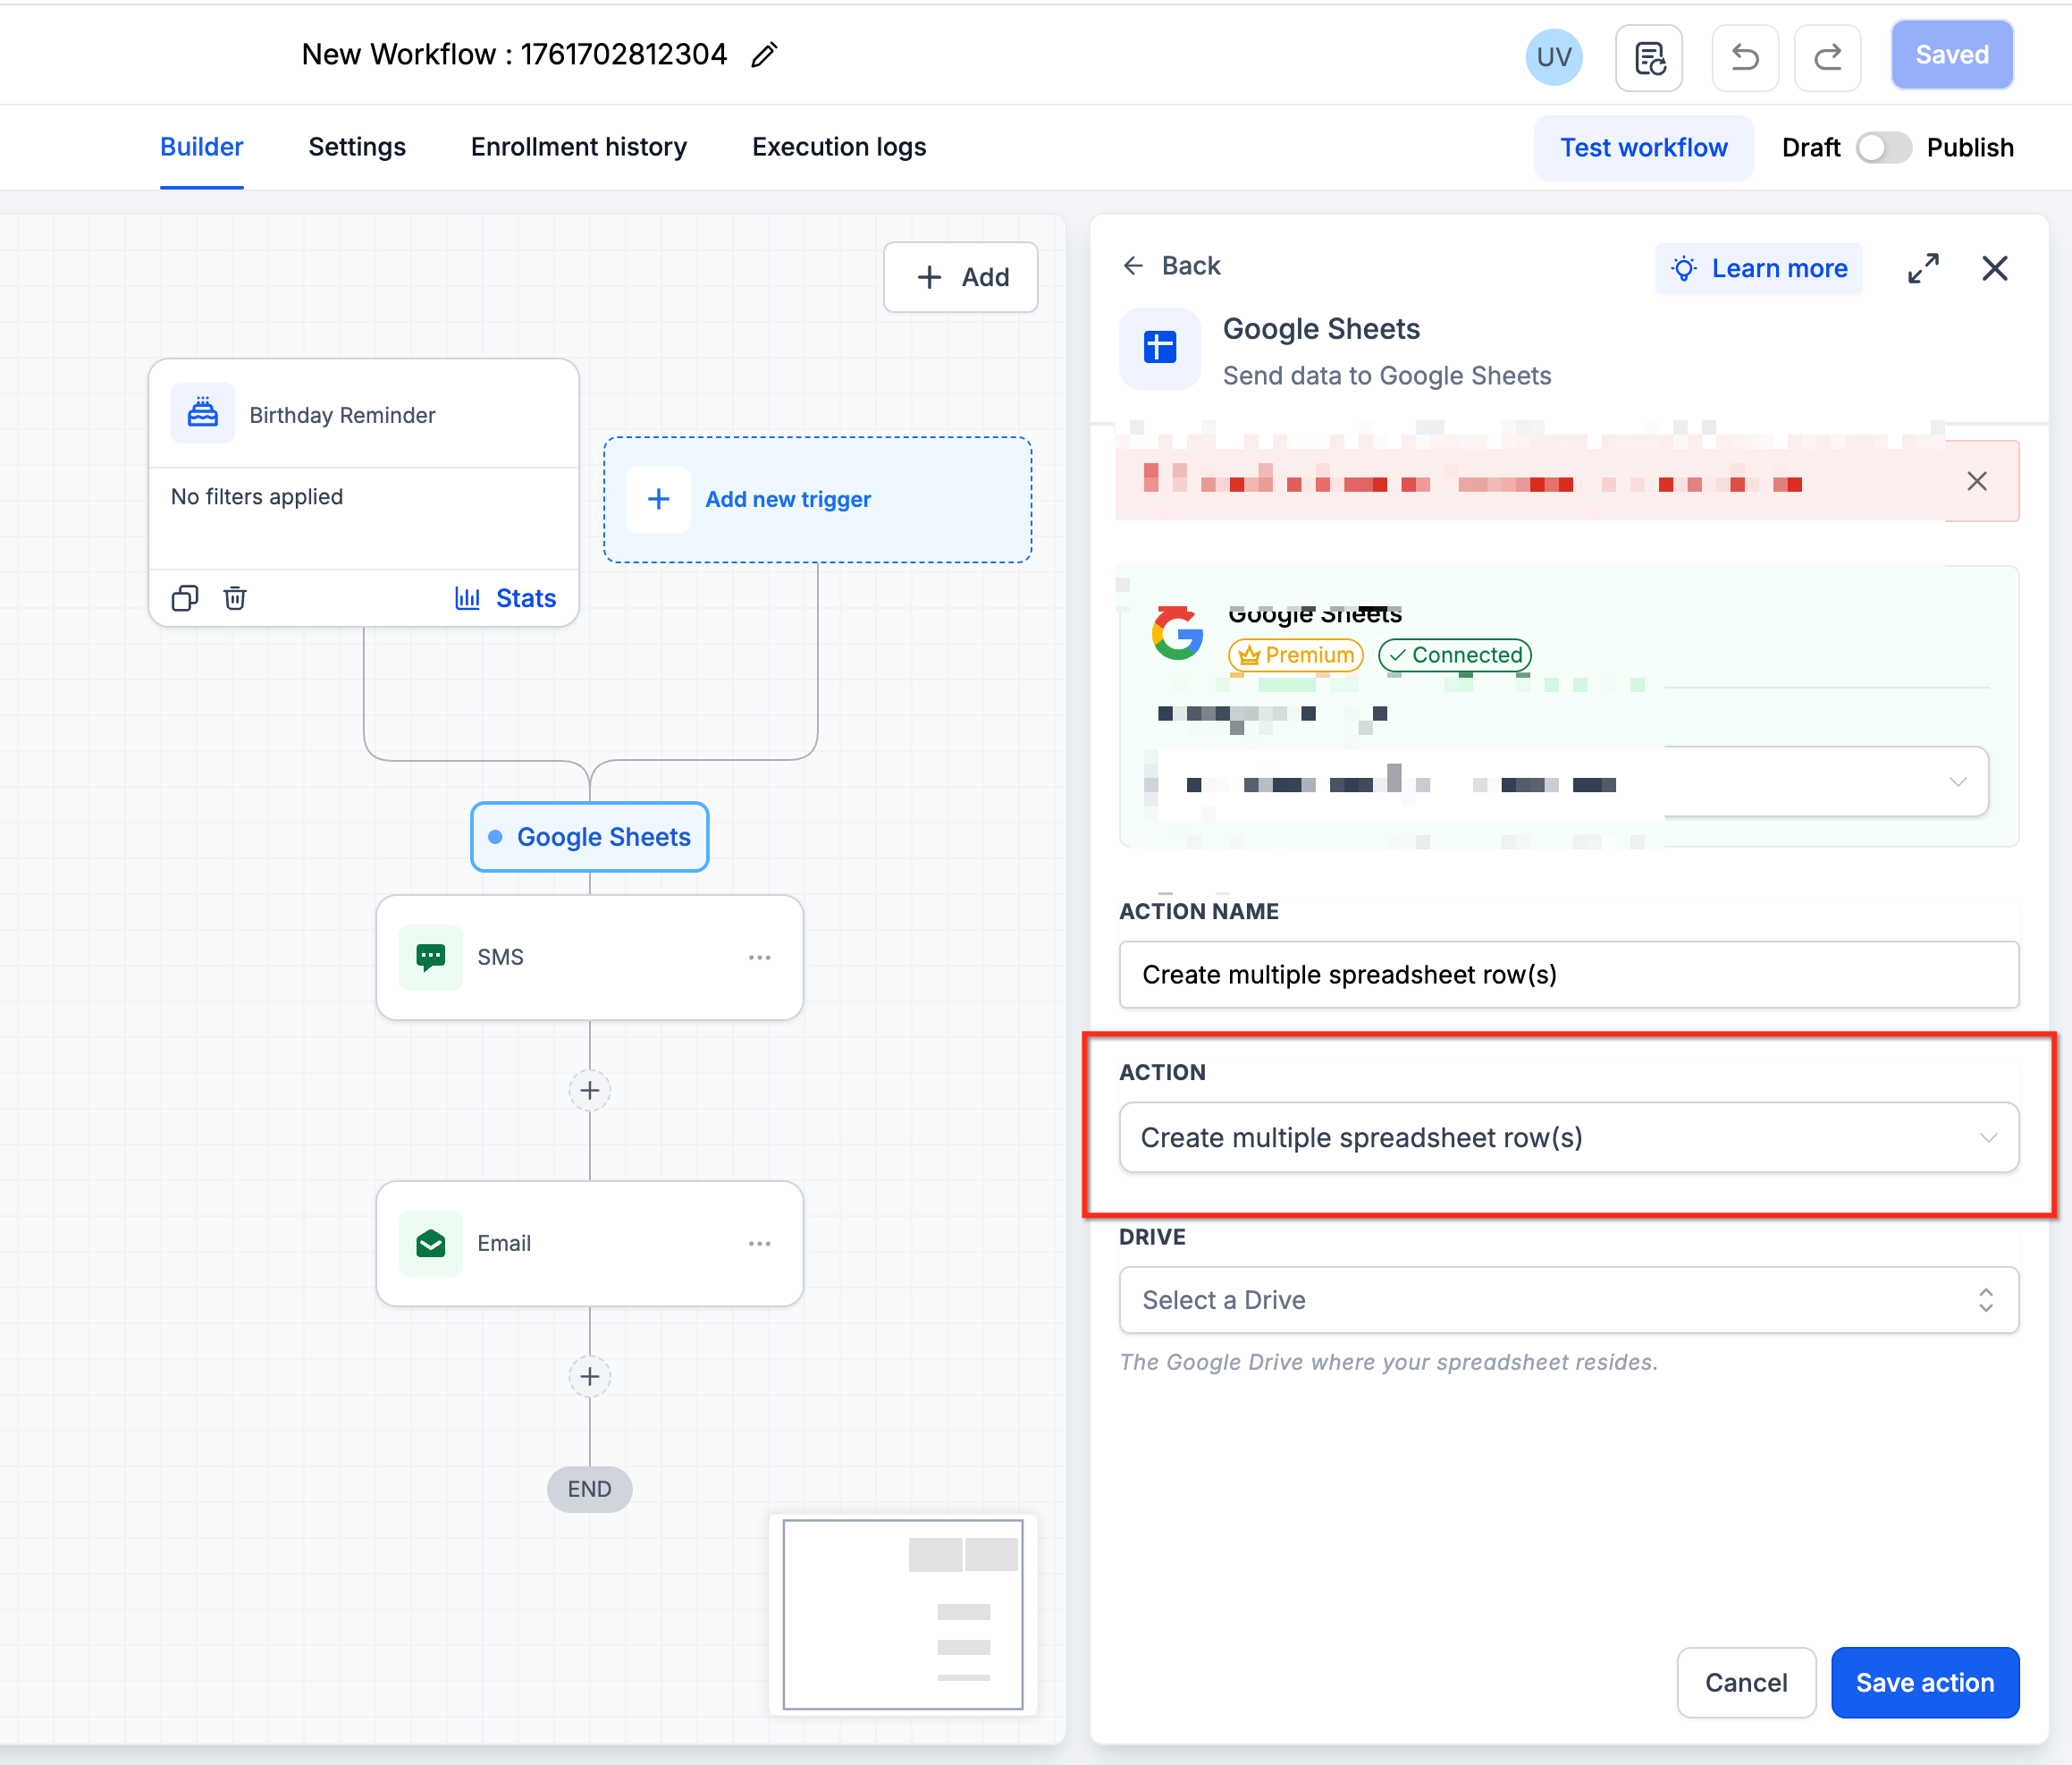
Select the connected Google Account.
Select the appropriate Drive.
Select the Spreadsheet.
Select the Worksheet.
Click Refresh Headers if the spreadsheet columns have changed.
Select the Starting Column and Ending Column.
Map the available array data to the spreadsheet columns.
Click Save Action.
How to Pass Multiple Rows
The workflow must receive or build an array of row objects during the same workflow execution. Common sources can include:
An Inbound Webhook containing an array of records
A webhook-based integration where a previous step returns an array that can be mapped into the action
For example, enrolling thousands of existing contacts individually into a workflow does not automatically combine those contacts into one multiple-row request. Each contact runs through the workflow independently.
Best Use Cases
Use Create Multiple Spreadsheet Row(s) for:
Logging grouped records
Recording repeated data received in a single workflow execution
Storing multiple related records in separate spreadsheet rows
Processing an array received through an inbound webhook
For detailed array examples, see Workflow Action - Create & Update Multiple Rows in Google Sheets.
Lookup Spreadsheet Row
Use Lookup Spreadsheet Row to search for an existing spreadsheet row based on specified criteria. Once a matching row is found, its values can be referenced in subsequent workflow actions.
For example, you can search for a spreadsheet record using a contact's email address or phone number.
How to Configure Lookup Spreadsheet Row
Select the Worksheet
Choose the worksheet containing the data you want to search.
Select Search Order
Choose the direction in which the worksheet should be searched.
From the top of the Sheet: Returns the first matching row.
From the bottom of the Sheet: Returns the most recent matching row based on its position in the sheet.
Select a Column and Lookup Value
Select the column the workflow should search and provide the value that should be matched. The first row of the worksheet is treated as the header row.
If the available headers are outdated, click Refresh Headers.
Add an Additional Lookup Column
You can add another Column and Lookup Value when the match should depend on more than one condition. When an additional column is configured, the values must satisfy the configured lookup criteria to identify the matching row.
Create Spreadsheet Row if a Lookup Does Not Find a Match
Within the Lookup Spreadsheet Row action, you can enable the option to create a spreadsheet row when no matching row exists.
When enabled, the workflow executes Create Spreadsheet Row if Lookup does not return a matching row.
Note: The Create Spreadsheet Row execution is logged and charged separately as a premium execution.
This option is useful for workflows that need to:
Update an existing spreadsheet record when one exists
Create a new spreadsheet record when one does not exist
Lookup Multiple Spreadsheet Row(s)
Lookup Multiple Spreadsheet Row(s) extends the standard Lookup action by allowing the workflow to return multiple spreadsheet rows.
The configuration is similar to Lookup Spreadsheet Row, with an additional Row Count field.
How to Configure Lookup Multiple Spreadsheet Row(s)
Add a Google Sheets action.
Select Lookup Multiple Spreadsheet Row(s).
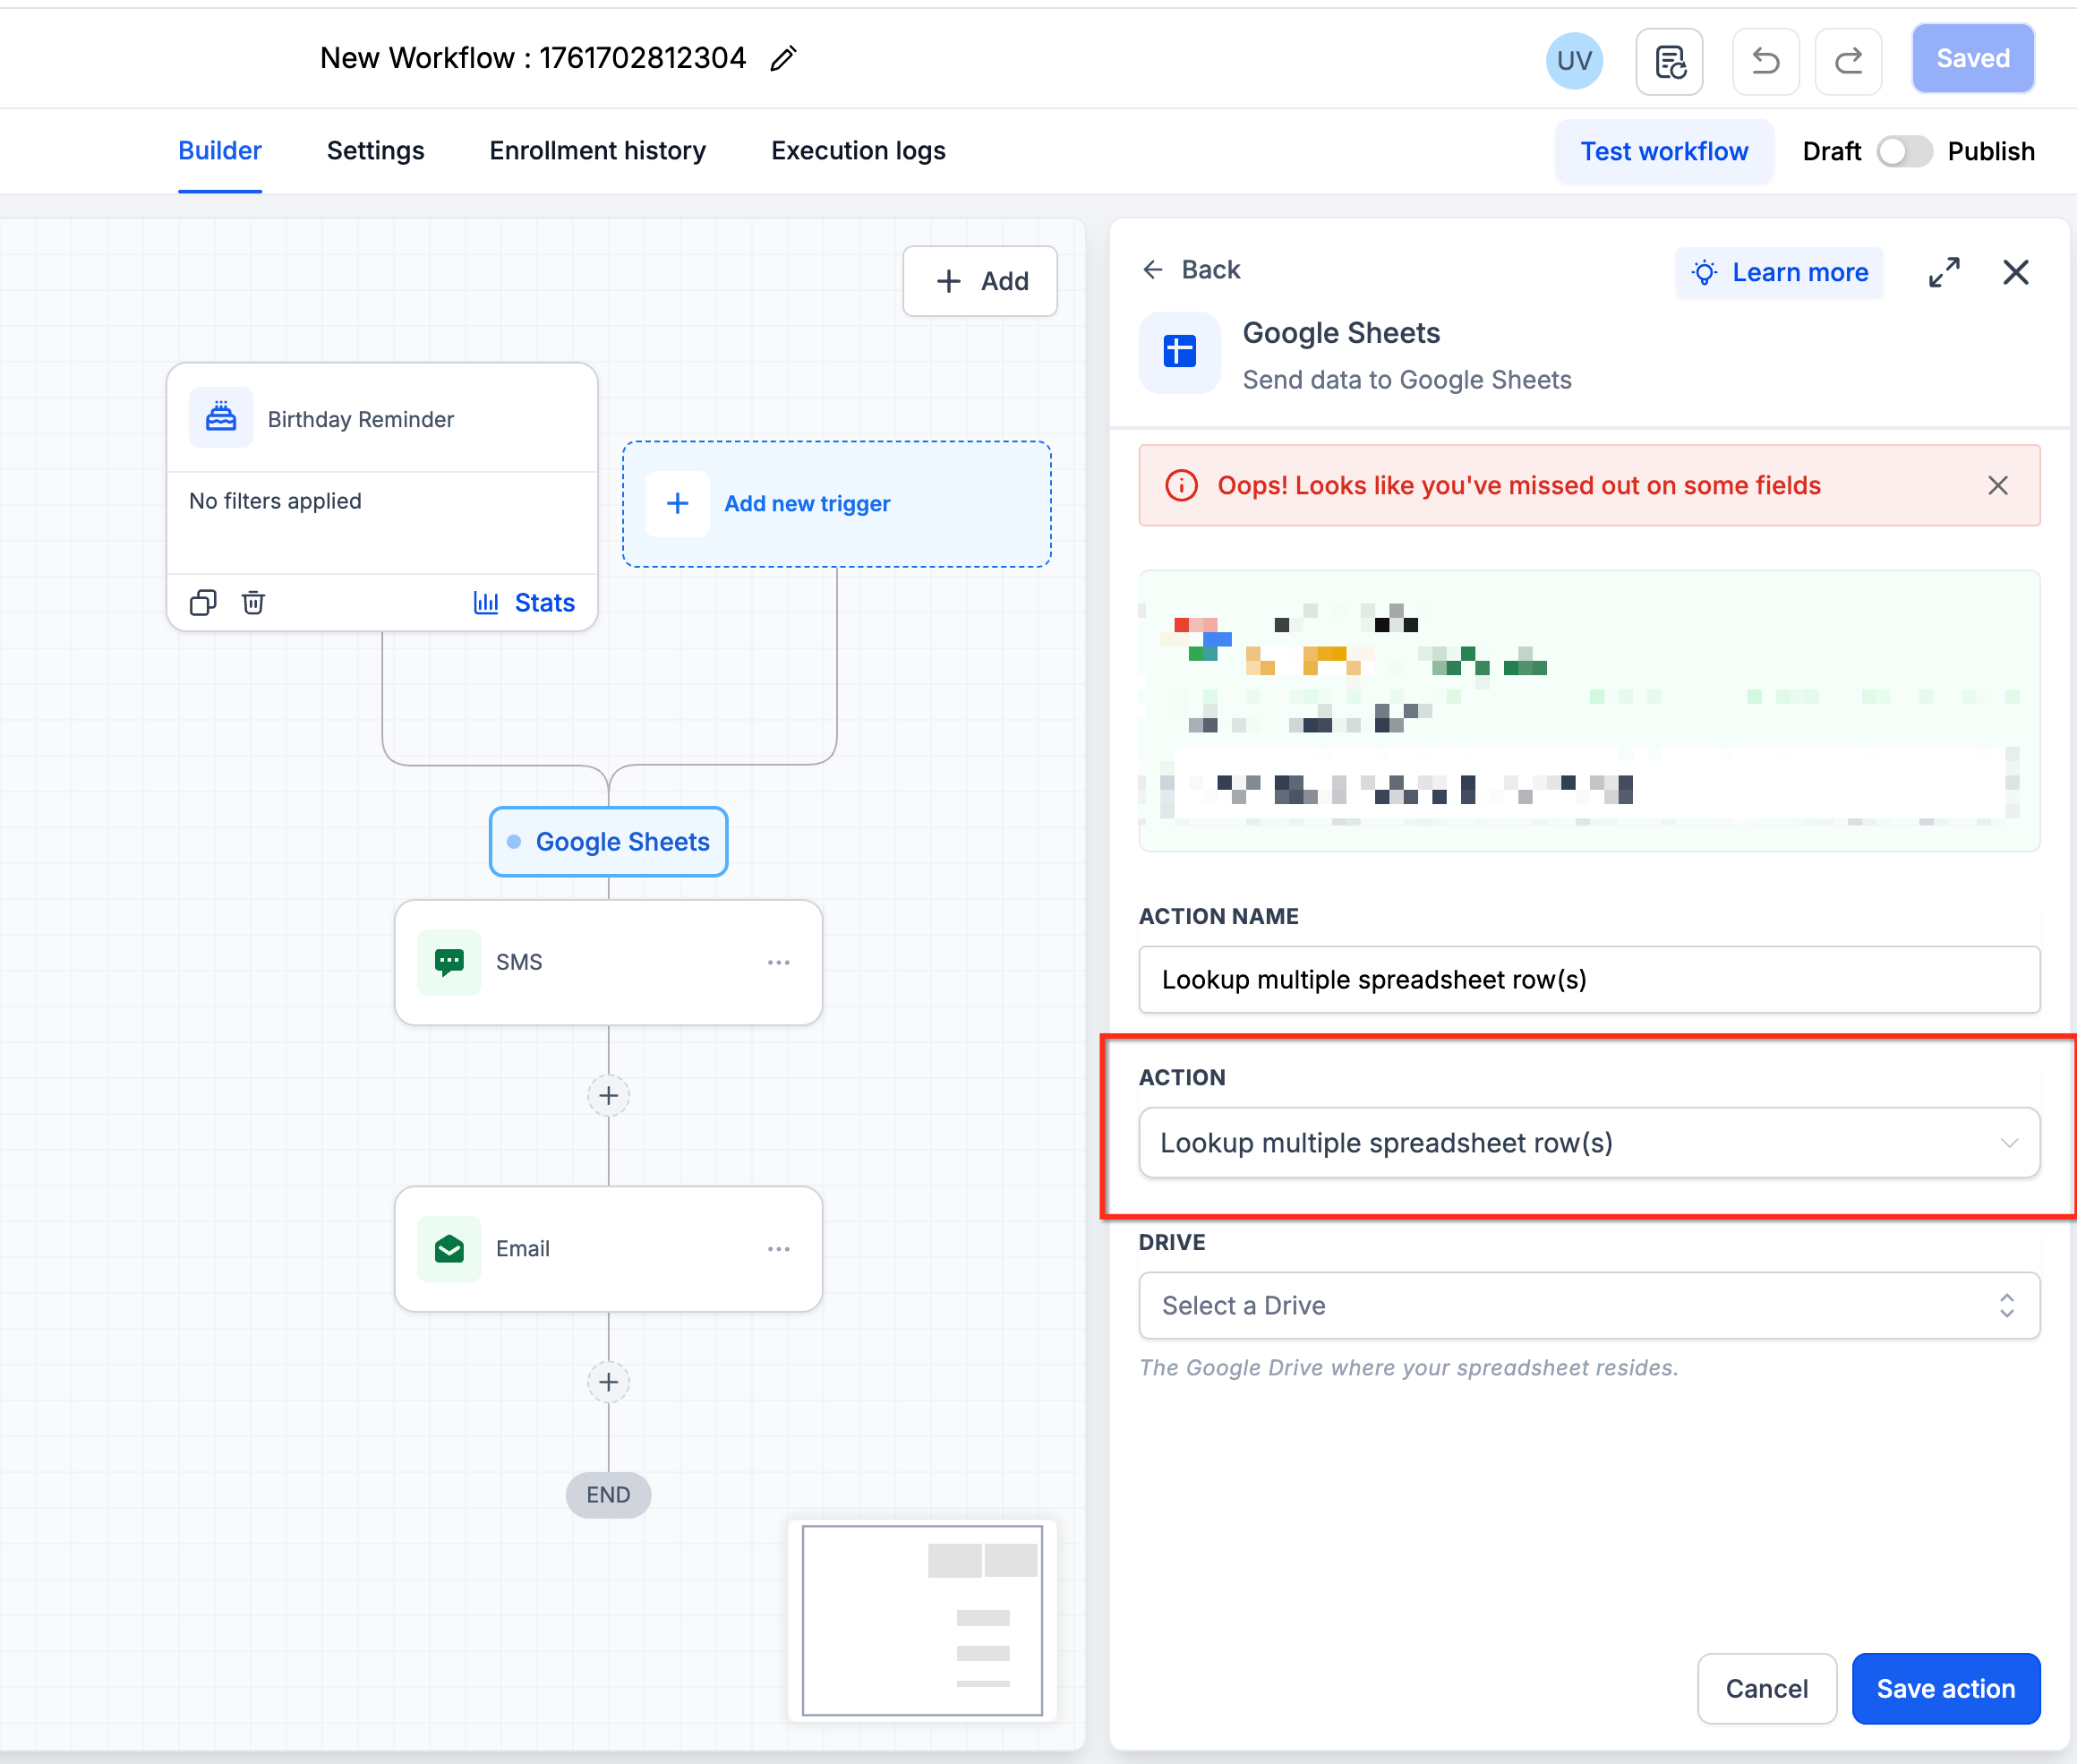
Select the Google account, Drive, Spreadsheet, and Worksheet.
Configure the lookup criteria.
Select the appropriate search order.
Enter the number of rows to return in the Row Count field.
Save the action.
Use this action when the workflow needs to retrieve more than one matching spreadsheet record.
Update Specific Spreadsheet Row
Use Update Specific Spreadsheet Row when you already know which spreadsheet row needs to be modified.
How to Configure Update Specific Spreadsheet Row
Add a Google Sheets action.
Select Update Specific Spreadsheet Row.
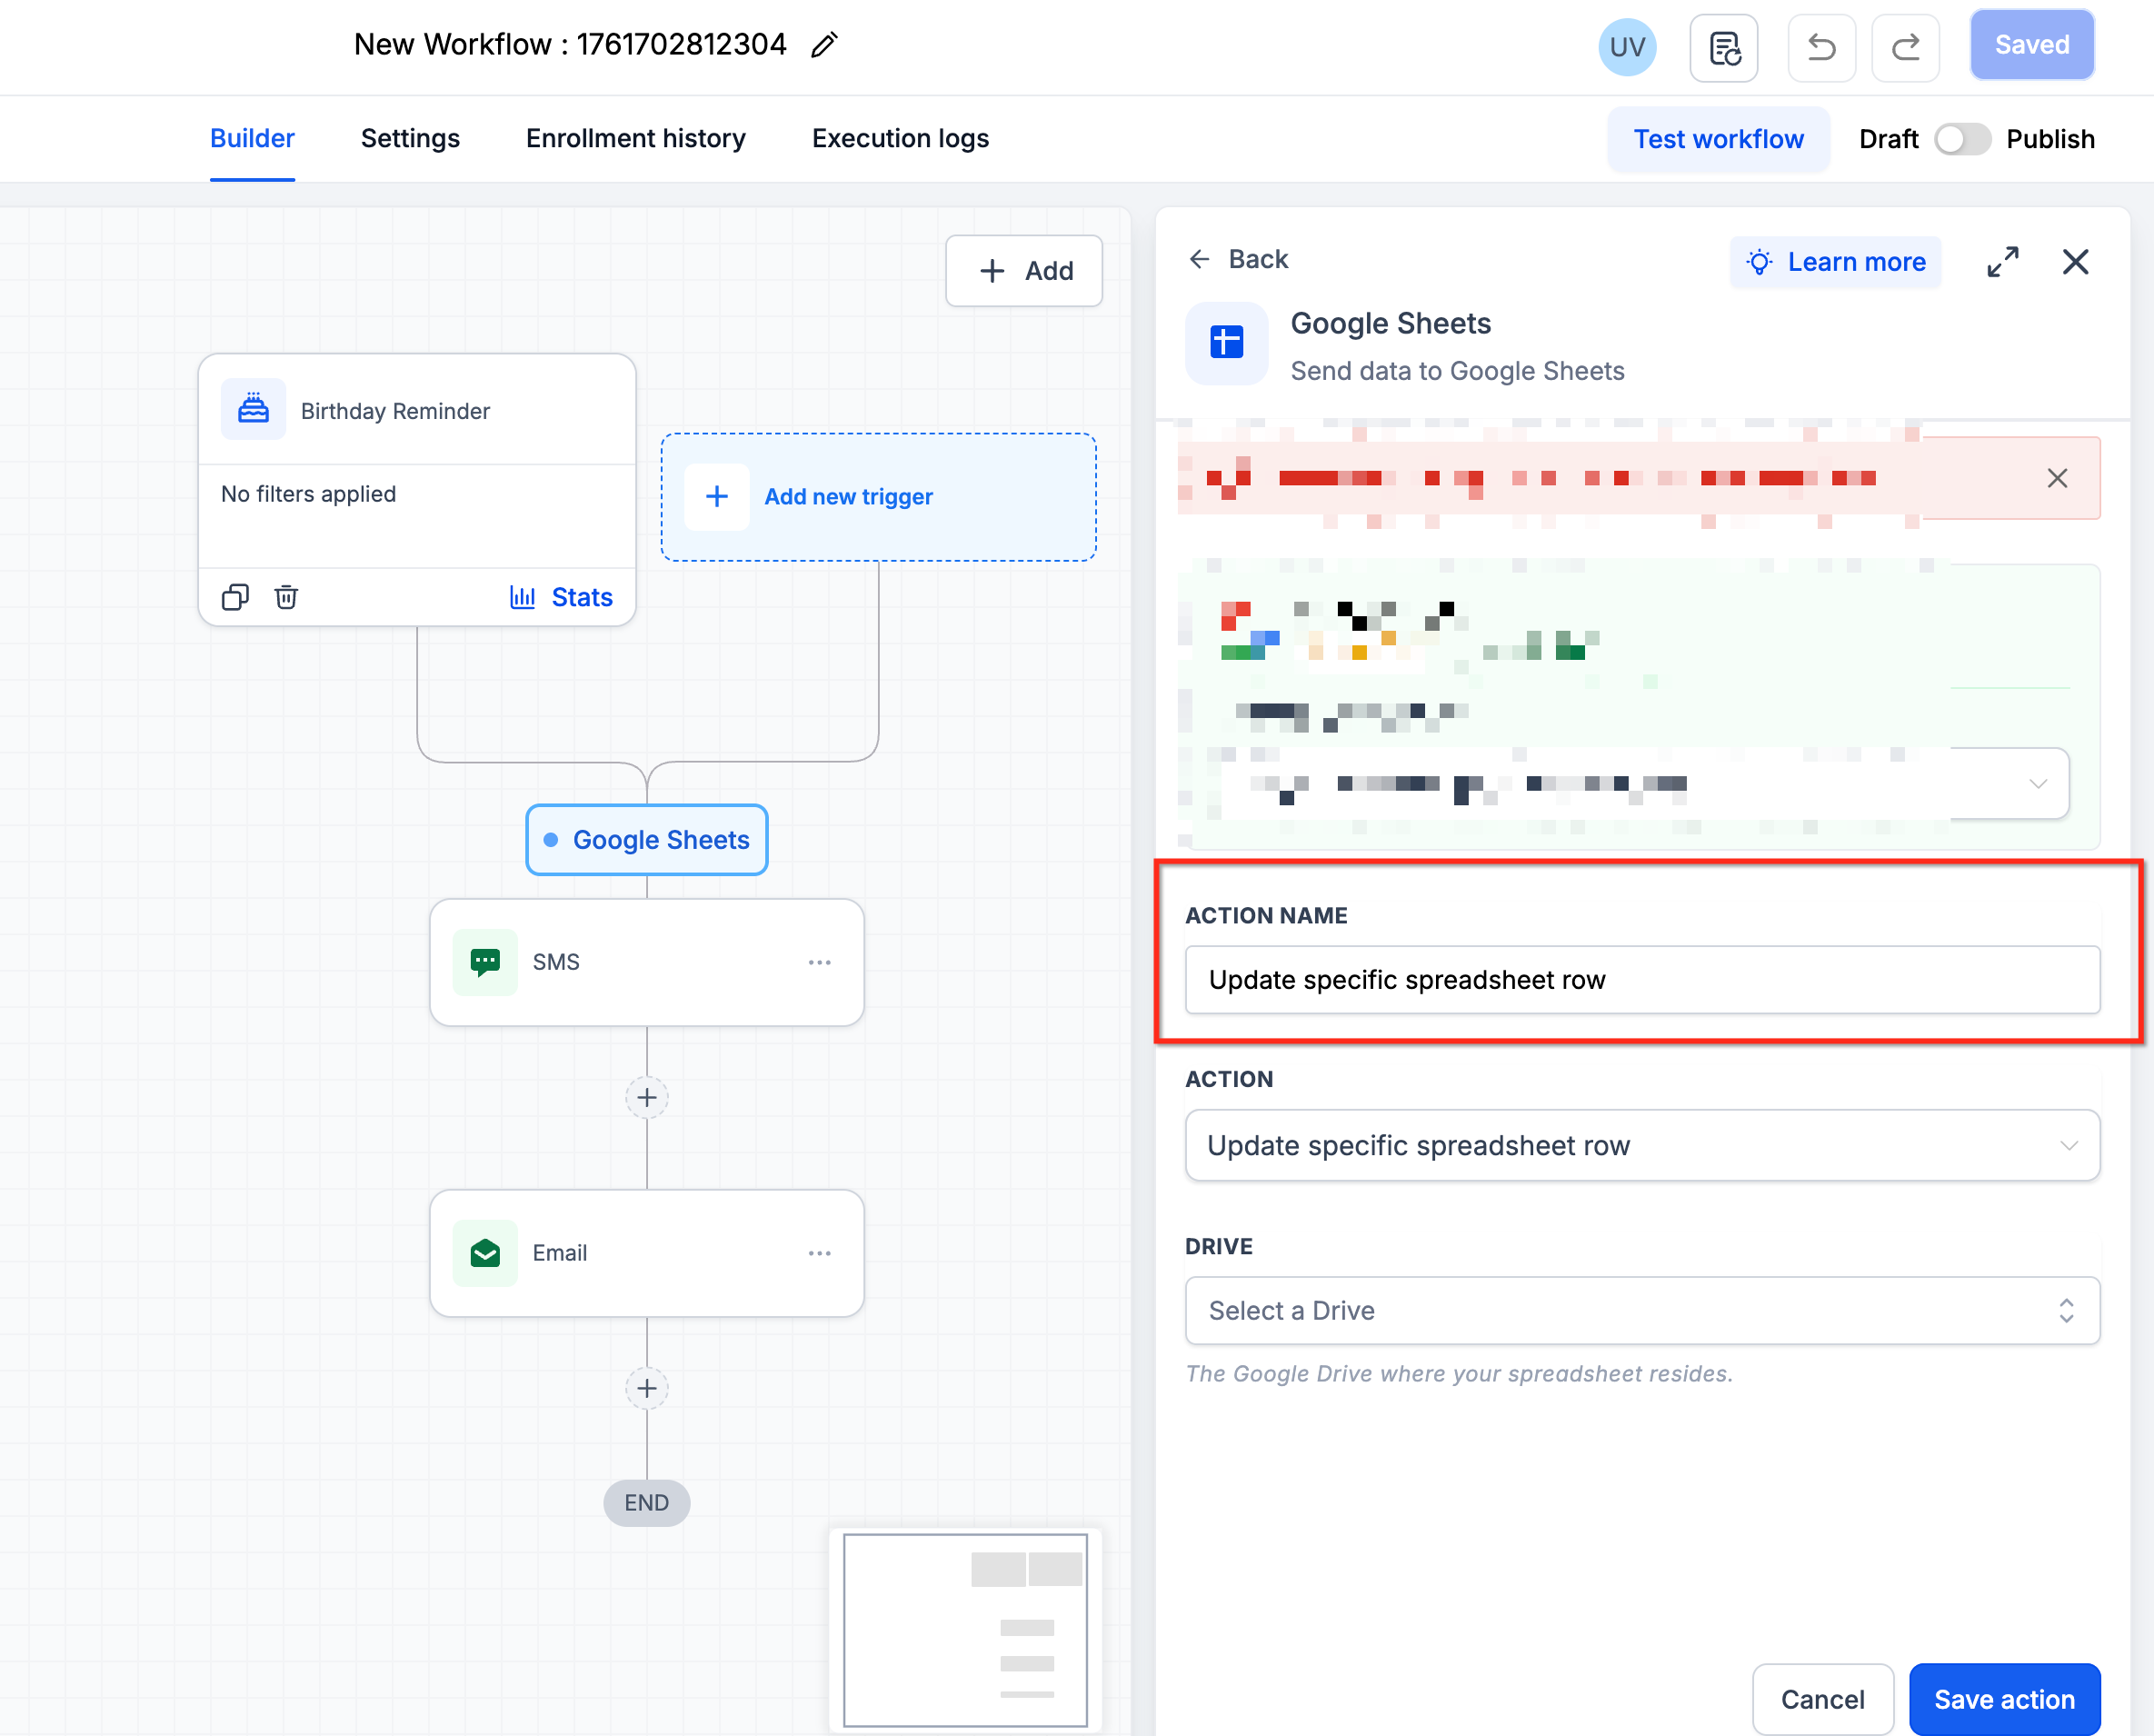
Select the Google account, Drive, Spreadsheet, and Worksheet.
Enter the Row Number to update.
Select the Starting Column and Ending Column.
Map the new values to the appropriate columns.
Click Save Action.
The Row Number can also be supplied dynamically using the Custom Variable Picker when an appropriate dynamic value is available.
You can leave a mapped field blank when you do not want that particular column updated, where supported by the action configuration.
Update Multiple Spreadsheet Row(s)
Use Update Multiple Spreadsheet Row(s) when spreadsheet rows already exist and the workflow needs to modify values across multiple rows.
This is useful when existing spreadsheet data needs to remain current without creating duplicate records.
How to Configure Update Multiple Spreadsheet Row(s)
Add a Google Sheets action.
Select Update Multiple Spreadsheet Row(s).
Select the connected Google Account.
Select the Drive.
Select the Spreadsheet.
Select the Worksheet.
Enter the row number from which the update should begin.
Select the Starting Column and Ending Column.
Click Refresh Headers if the worksheet structure has changed.
Map the values that need to be updated.
Click Save Action.
When to Use Update Multiple Spreadsheet Row(s)
Use this action when:
The target spreadsheet rows already exist
Existing values need to be replaced or refreshed
Multiple spreadsheet rows need to be modified
You want to update existing data rather than create additional rows
For additional configuration guidance, see Workflow Action - Create & Update Multiple Rows in Google Sheets.
Update Spreadsheet Row Using Lookup
Use Update Spreadsheet Row Using Lookup when the workflow should first locate a spreadsheet row and then update the returned row.
A Lookup Spreadsheet Row action must appear earlier in the workflow.
How to Configure Update Spreadsheet Row Using Lookup
Step 1: Add Lookup Spreadsheet Row
Configure the Lookup action to find the target spreadsheet row.
Step 2: Add Update Spreadsheet Row Using Lookup
Add another Google Sheets action and select Update Spreadsheet Row Using Lookup.
Step 3: Select the Lookup Action
Choose the Lookup action whose result should be updated. Only eligible Lookup actions positioned earlier in the workflow are available for selection.
Step 4: Configure the Columns
Select the Starting Column and Ending Column, then map the updated values.
Important Considerations
Only one Lookup action can be selected for the update action.
If the selected Lookup action does not return a row, the update step is skipped and the workflow continues.
The Lookup action must appear before the Update Using Lookup action.
Delete Specific Spreadsheet Row
Use Delete Specific Spreadsheet Row to clear all values from a specific spreadsheet row.
How to Configure Delete Specific Spreadsheet Row
Add a Google Sheets action.
Select Delete Specific Spreadsheet Row.
Select the Google account, Drive, Spreadsheet, and Worksheet.
Enter the Row Number.
Save the action.
You can also provide the Row Number dynamically using the Custom Variable Picker when an appropriate value is available.
Important: This action clears the contents of the specified row. It does not physically remove the row from the worksheet.
Delete Spreadsheet Row Using Lookup
Use Delete Spreadsheet Row Using Lookup when the workflow should locate a row first and then clear its contents.
A Lookup action must appear earlier in the workflow.
How to Configure Delete Spreadsheet Row Using Lookup
Add and configure Lookup Spreadsheet Row.
Add another Google Sheets action.
Select Delete Spreadsheet Row Using Lookup.
Select the applicable Lookup action.
Save the action.
Only eligible Lookup actions positioned earlier in the workflow are available for selection. If the Lookup action returns a row, the values associated with that row are cleared.
If the Lookup action does not return a matching row, the Delete Using Lookup step is skipped and the workflow continues.
Important: Delete Using Lookup clears the row's contents. It does not physically remove the row from the worksheet.
Using Lookup Results as Custom Variables
One of the key benefits of Lookup Spreadsheet Row is that values returned from the matching row can be used later in the workflow.
When Lookup finds a row, spreadsheet values can be mapped according to their corresponding column headers and made available to subsequent workflow actions.
For example, if your worksheet contains columns for:
Name
Email
Phone
Status
a Lookup using an email address can retrieve the matching row and make its values available for subsequent workflow steps.
These values can then be used in supported workflow actions or conditions.
Lookup Index
When you add a Lookup action, an index is automatically generated. The index identifies the Lookup action and is used internally when mapping the returned spreadsheet data.
Once generated, the index cannot be manually changed.
Retrieve the Row Number
You can reference the row number returned by a Lookup action using:
{{sheet.x.rowNumber}}
Replace x with the index of the applicable Lookup action.
The returned row number can be useful when another workflow action needs to reference the spreadsheet row dynamically.
Using Lookup Results in If/Else Conditions
Lookup results can also be used with workflow conditions.
For example, you can build logic that:
Updates a spreadsheet row when a matching record exists
Creates a new spreadsheet row when no matching record exists
This can help prevent duplicate records and keep spreadsheet information synchronized.
Important: If a Lookup action does not find a matching row, subsequent Google Sheets actions that depend on that Lookup result may be skipped because no matching result is available.
Consider this behavior when using actions such as:
Update Spreadsheet Row Using Lookup
Delete Spreadsheet Row Using Lookup
Troubleshooting
Spreadsheet or Worksheet Is Not Appearing
Confirm that:
The correct Google account is connected
The connected Google account has access to the Drive
The correct Drive is selected
The account has permission to access the spreadsheet
The expected worksheet exists in the selected spreadsheet
If necessary, reconnect or reauthorize the Google account.
Spreadsheet Headers Are Missing or Outdated
If you recently added, renamed, deleted, or reordered columns, click Refresh Headers in the Google Sheets action.
After refreshing, review your field mappings before publishing the workflow.
Column Mapping Is Incorrect
Verify that:
The first worksheet row contains the expected headers
The correct Starting Column and Ending Column are selected
Headers have been refreshed after spreadsheet changes
Workflow values are mapped to the correct spreadsheet columns
Lookup Does Not Return a Row
Check:
The selected lookup column
The Lookup Value
Search order
Any additional lookup criteria
The actual values stored in the Google Sheet
Remember that actions depending on the Lookup result can be skipped if no row is returned.
Update or Delete Using Lookup Is Being Skipped
Check the preceding Lookup action.
If Lookup does not return a matching row, actions that depend on that Lookup result do not have a target row to process and may be skipped.
Use workflow execution logs to confirm whether Lookup returned a result.
Create Multiple Spreadsheet Row(s) Creates Only One Row
Check the data being passed into the action.
Create Multiple Spreadsheet Row(s) requires an array of row objects to create multiple rows during a single workflow execution.
If only one record is available, only one row is created. Contacts entering the workflow separately are not automatically grouped into one array.
A New Spreadsheet Column Is Not Available
Click Refresh Headers after modifying the worksheet structure. Then review and update the column mappings before saving the action.
Frequently Asked Questions
What is the difference between Create Spreadsheet Row and Create Multiple Spreadsheet Row(s)?
Create Spreadsheet Row creates one new row during a workflow execution.
Create Multiple Spreadsheet Row(s) can create multiple rows during one workflow execution when the workflow receives an array containing multiple row objects.
Does Create Multiple Spreadsheet Row(s) automatically batch contacts entering the workflow?
No. Contacts entering a workflow independently are processed as separate workflow executions. To create multiple rows during one execution, the workflow must already contain an array of row objects.
Why did Create Multiple Spreadsheet Row(s) create only one row?
The workflow execution may contain only one record. To create multiple rows, pass an array containing multiple row objects to the action.
What is the difference between Create Multiple Spreadsheet Row(s) and Update Multiple Spreadsheet Row(s)?
Create Multiple Spreadsheet Row(s) adds new spreadsheet entries.
Update Multiple Spreadsheet Row(s) changes values in spreadsheet rows that already exist.
Can I update or delete all rows returned by Lookup Multiple Spreadsheet Row(s)?
Lookup Multiple Spreadsheet Row(s) can return multiple rows, but single-row actions such as Update Spreadsheet Row Using Lookup and Delete Spreadsheet Row Using Lookup do not automatically iterate through every result.
For supported bulk-update scenarios, use Update Multiple Spreadsheet Row(s).
If your use case requires processing individual Lookup Multiple results separately or applying custom logic to each returned row, additional workflow logic may be required.
What happens if I rename a Google Sheet header?
Click Refresh Headers in the Google Sheets workflow action and review the mappings affected by the change.
Can I use multiple Google Sheets in one workflow?
Yes. Each Google Sheets action can be configured with its own Google account, Drive, Spreadsheet, and Worksheet where available.
Does Delete Spreadsheet Row remove the actual row?
No. Delete Spreadsheet Row actions clear the values stored in the targeted row but do not physically remove the spreadsheet row itself.
Why should I use Lookup before Update Using Lookup or Delete Using Lookup?
Lookup identifies the target spreadsheet row. Update Spreadsheet Row Using Lookup and Delete Spreadsheet Row Using Lookup use that result to determine which row should be modified or cleared. If Lookup does not return a result, the dependent action is skipped.
Do I need headers in my Google Sheet?
Yes. The first row of the worksheet is treated as the header row and determines the columns available for mapping.
Use clear and unique column names to make workflow configuration easier.
Related Articles
Was this article helpful?
That’s Great!
Thank you for your feedback
Sorry! We couldn't be helpful
Thank you for your feedback
Feedback sent
We appreciate your effort and will try to fix the article