Recurring billing gets easier and more reliable with Auto Payments in HighLevel. This article explains how Auto Payments charge a customer’s card on each invoice due date, the card options you can use, what happens on failures, and how to manage settings in a recurring invoice template. Learn best practices, prerequisites, and where to customize notifications.
Important: Auto-Pay behavior can vary depending on when the recurring invoice is created, whether the next invoice has already been generated, and whether a valid card is already available. Always review the next scheduled occurrence and the selected payment method after enabling Auto-Pay.TABLE OF CONTENTS
- What is Auto Payments in Recurring Templates?
- Key Benefits of Auto Payments
- How Auto-Pay Works (New vs. Existing Schedules)
- Enabling Auto-Pay on an Existing Recurring Schedule
- Creating a New Recurring Schedule
- Notifications & Reminders
- Failed Payments & Retry
- Editing Schedules & When Auto-Charge Pauses
- How To Set Up Auto Payments
- Enable Auto-Pay in an Ongoing Schedule
- Choose: Create New or Open Existing
- Manage Auto Payment
- Turn on Auto-Pay and choose the card source
- Disable Auto-Pay for Future Invoices
- Frequently Asked Questions
- Related Articles
What is Auto Payments in Recurring Templates?
Auto Payments automatically charge your customer’s saved or provided card whenever a recurring invoice becomes due. Instead of waiting for a manual payment each cycle, HighLevel processes the charge on schedule using the card source you select.
Auto Payments can be set to use one of these card types. Each card choice affects when auto-charging begins and how future invoices are handled.
Prerequisites
Before enabling Auto-Pay, confirm the billing setup is ready to charge correctly on future recurring invoice dates.
- A recurring invoice must already be created or in the process of being created.
- A supported payment gateway must be connected.
- A valid customer card must be available if you want future recurring invoices to be charged automatically.
- Auto-Pay applies to recurring billing behavior and should be verified before the next scheduled invoice is generated.
Customer Card
Uses the card the customer first uses to pay any invoice in the schedule.
Auto-Pay begins on the next occurrence after that first successful payment.
Example: If the first payment happens on the 4th invoice, auto-pay starts with the 5th (if scheduled).
Saved Card
Uses a card already on file in the customer’s profile.
Auto-charging starts from the first occurrence in the schedule; no initial manual payment required.
If a charge fails, both the location user and the customer receive a notification.
New Card
Add a new card while creating or editing the schedule; the card is saved for future use.
Auto-Pay begins from the first occurrence after saving the card.
A small authorization/verification may occur when the card is added.
Where to Manage Cards on File:

Open the customer record → Payments → Cards on File. (Only the last digits and expiry are visible.)
Key Benefits of Auto Payments
Understanding the advantages helps you decide when to enable Auto Payments and which card option to pick.
- Faster Collections: Charges process automatically on the due date, reducing delays.
- Lower Admin Effort: Fewer manual follow-ups and reconciliations per cycle.
- Predictable Cash Flow: More consistent revenue timing across billing cycles.
- Flexible card control: Choose Customer Card, Saved Card, or enter a New Card at setup.
- Improved customer experience: Optional reminders and successful-payment confirmations keep customers informed.
How Auto-Pay Works (New vs. Existing Schedules)
Auto-Pay timing depends on whether you add it to an existing recurring schedule or set it at creation.
Auto-Pay automatically charges the customer’s card for future recurring invoice occurrences based on the billing schedule you define. After Auto-Pay is enabled, it is important to confirm which card will be used and whether the next invoice is still upcoming or has already been generated.
Enabling Auto-Pay on an Existing Recurring Schedule
- The next invoice in the sequence must be paid manually once.
- After that payment succeeds, all future invoices are charged automatically using the selected card option.
- You cannot modify the date of invoices already created. Example, If an invoice was created on December 1, its date cannot be changed to December 3.
Note: Enabling Auto-Pay does not always retroactively change invoices that were already generated. In general, payment-related changes apply to future invoice occurrences rather than previously created ones.
Creating a New Recurring Schedule
- If a Saved Card exists: The first invoice auto-charges, and all future invoices auto-charge.
- If no Saved Card exists: The first invoice must be paid manually. After that payment, the card is saved (if applicable) and future invoices auto-charge.
Use this quick matrix to confirm whether the first invoice auto-charges or requires manual payment based on your setup.
Scenario | First Invoice | Future Invoices | Notes |
|---|---|---|---|
Auto-Pay turned ON for an existing recurring schedule | Manual | Auto | Manual payment captures the card (Customer Card) for future auto-charges. |
New schedule + Saved Card on file | Auto | Auto | Starts charging immediately on the first occurrence. |
New schedule + No Saved Card | Manual | Auto | Customer’s first successful payment stores the card for future auto-charges. |
Notifications & Reminders
Keep teams and customers informed with reminders, success alerts, and failure alerts. You can also customize certain templates.
Customer receives:
Optional upcoming-charge reminders (based on your reminder settings)
Payment success notifications
Payment failure notifications
Location user receives:
Payment success alerts
Payment failure alerts
Notice if a child invoice was edited before its auto-charge (that invoice’s auto-pay is paused)
Customize invoice notifications: See Customize Email and SMS notifications for invoicing (link in Related Articles) to brand and tailor messages.
Automated reminders: You can configure multiple reminder touchpoints from invoice settings (link in Related Articles).
Failed Payments & Retry
Understand how HighLevel retries failed auto-payments for invoices and what actions you or the customer can take.
If an auto-payment fails, both the customer and the location user are notified.
The customer can:
Pay manually with the same card, or
Pay with a new card (the new card becomes the default for future auto-pay in this schedule)
The system makes two additional retry attempts, 24 hours apart.
If payment still fails:
No further automatic attempts occur for that invoice
The invoice must be paid manually
Editing Schedules & When Auto-Charge Pauses
Certain edits to a queued/child invoice can pause its auto-charge to prevent unintended charges.
- Editing a generated child invoice before its charge time will pause auto-payment for that invoice only.
- When auto-pay is enabled on an edited recurring invoice, HighLevel also sends an email notification about the auto-payment change.
- To resume charging, ensure details are correct and let the schedule proceed; future occurrences are unaffected unless edited.
How To Set Up Auto Payments
Use these guided steps to turn Auto-Pay on or off from the recurring invoice builder. The callouts below reference the highlighted areas in each screenshot so you can click the correct controls with confidence.
Enable Auto-Pay in an Ongoing Schedule
Go to your recurring invoices list.
Navigate to Payments → Invoices & Estimates → Recurring Invoices and open the schedule you want to update.
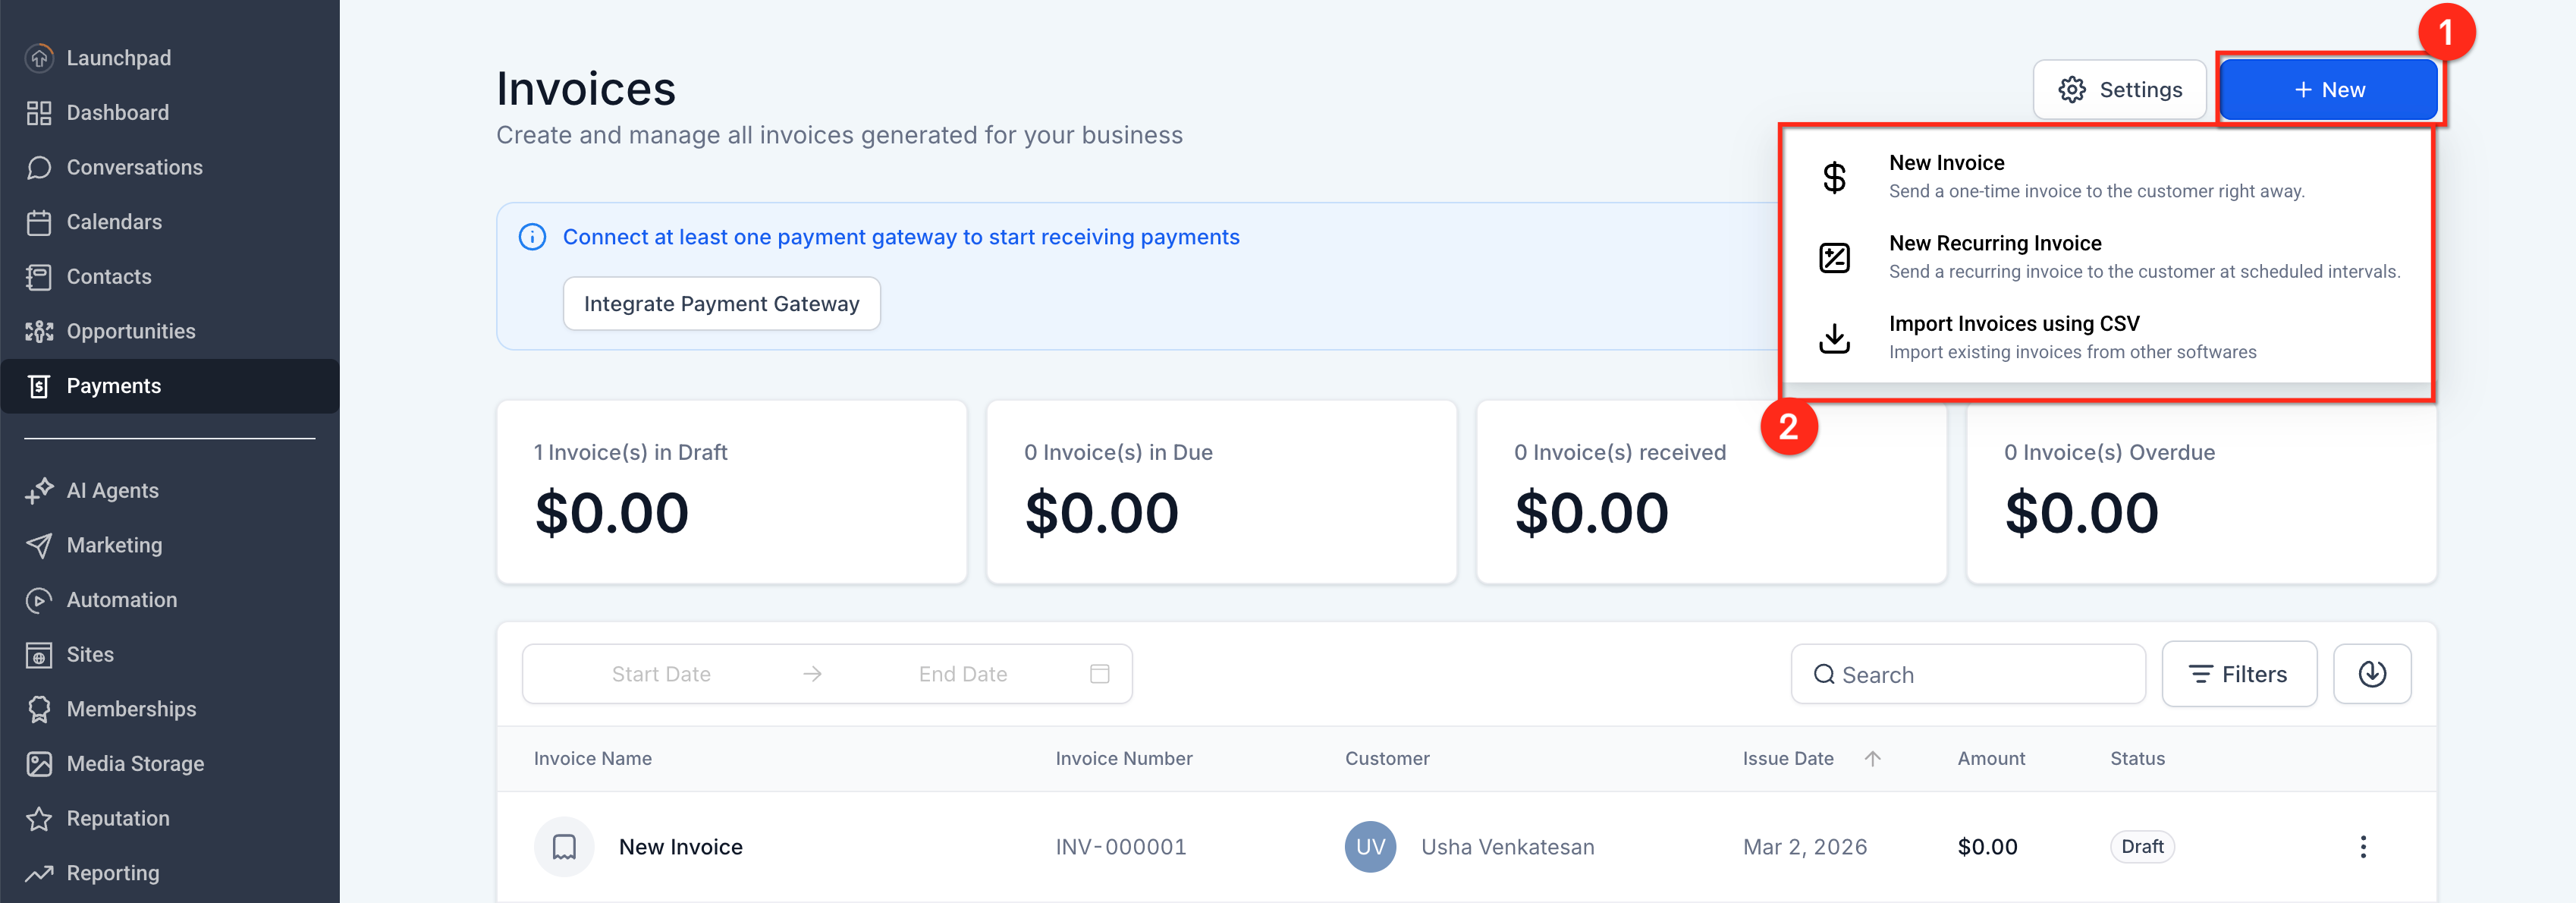
Choose: Create New or Open Existing
From here you can:
Create a New Schedule: Click New → New Recurring Invoice.
Open an Existing Schedule: Click any row in the list to edit that schedule.
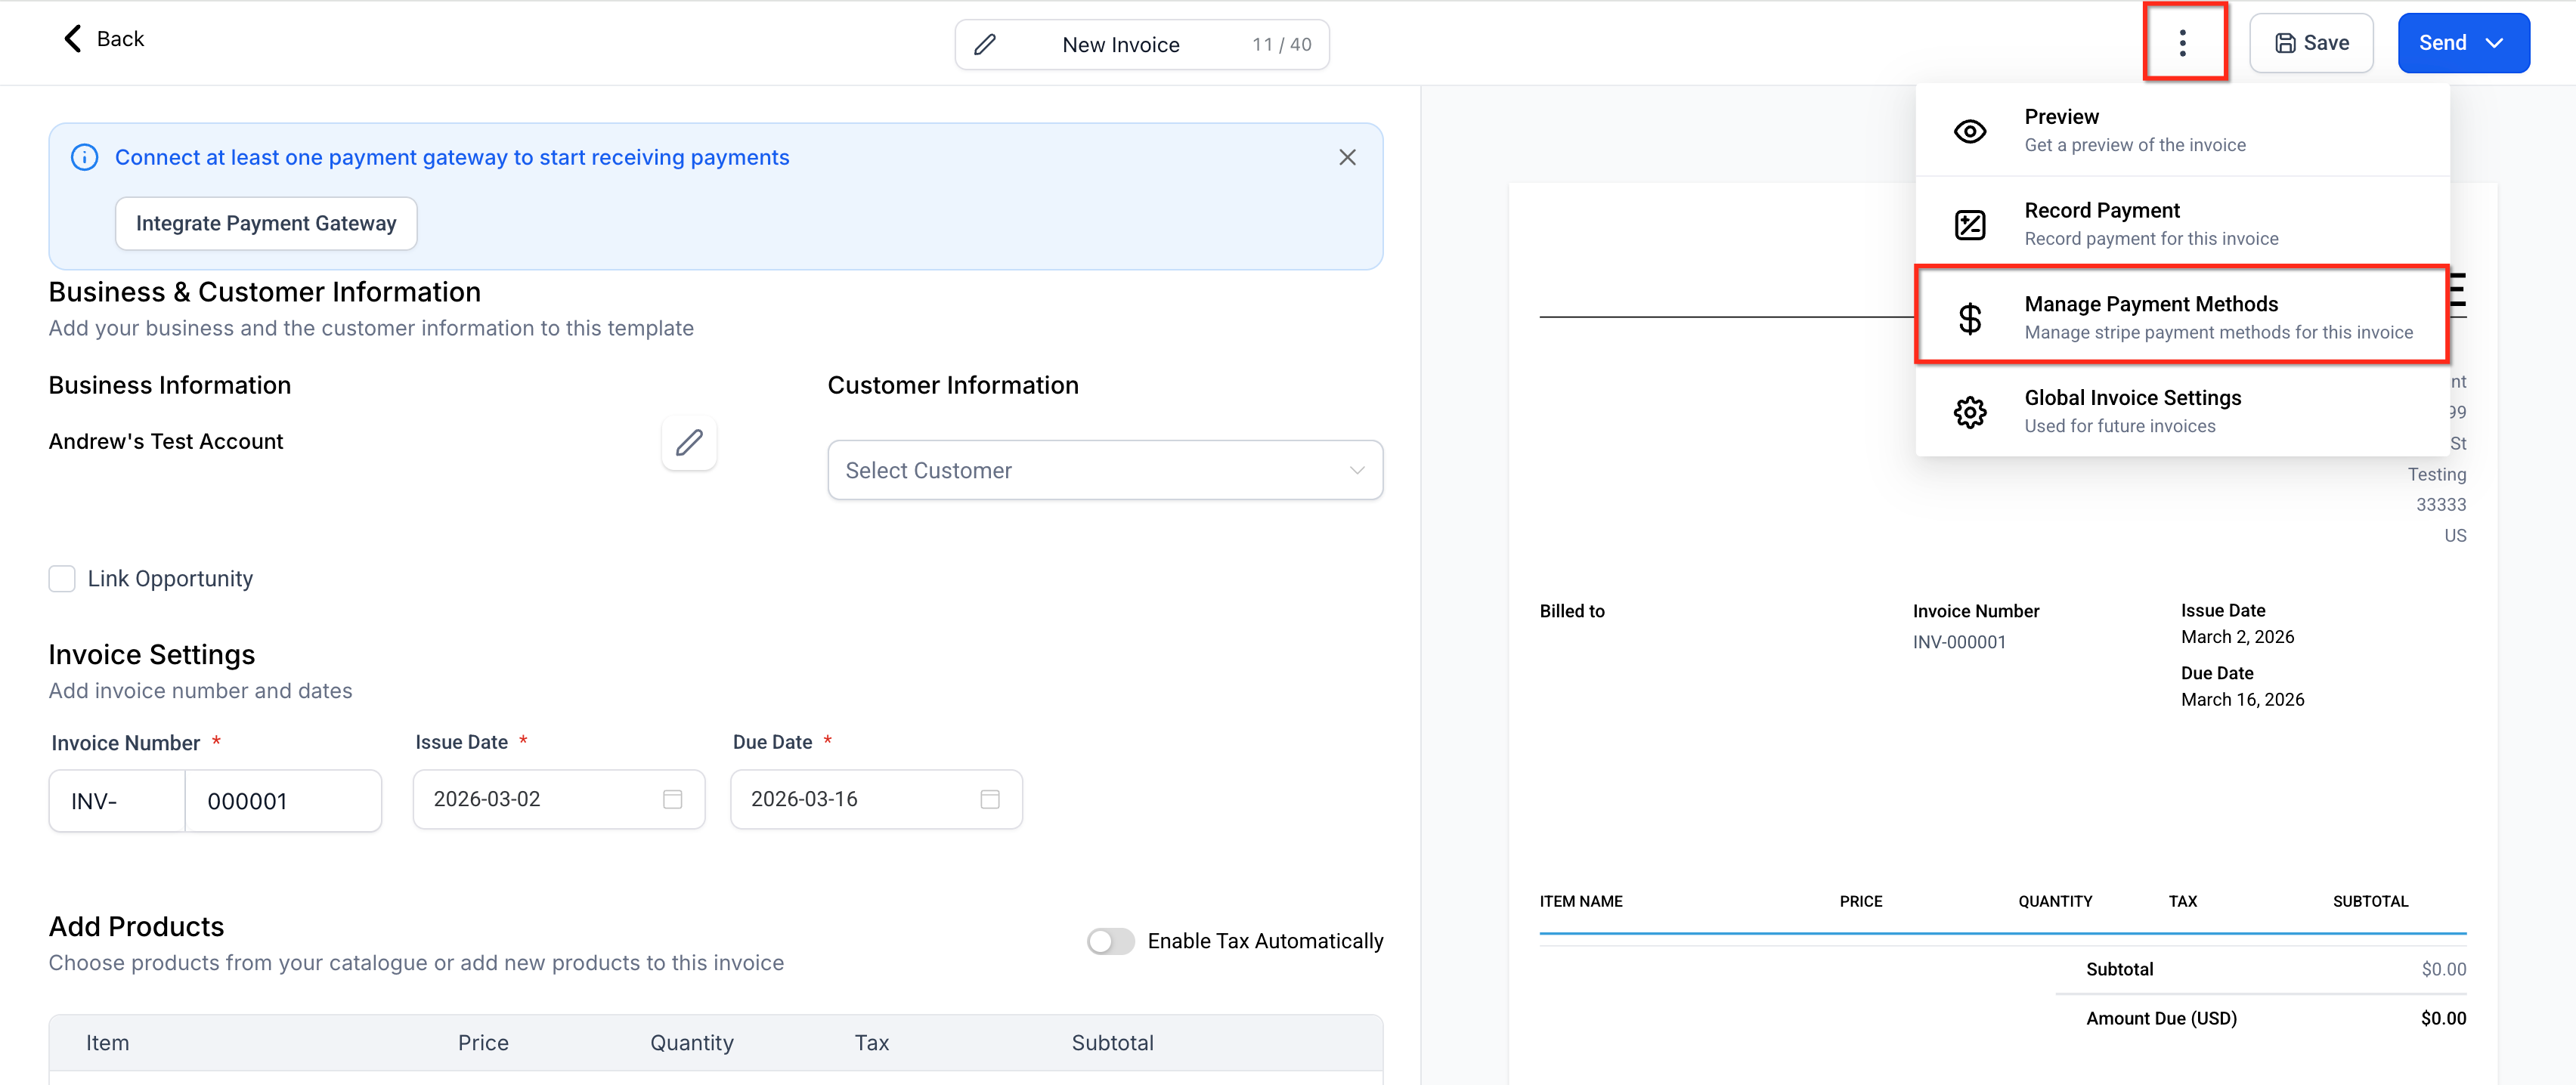
Manage Auto Payment
Open the Auto-Pay controls. In the editor, click the ⋮ (three dots) menu in the top-right corner, then choose Manage Auto Payment.
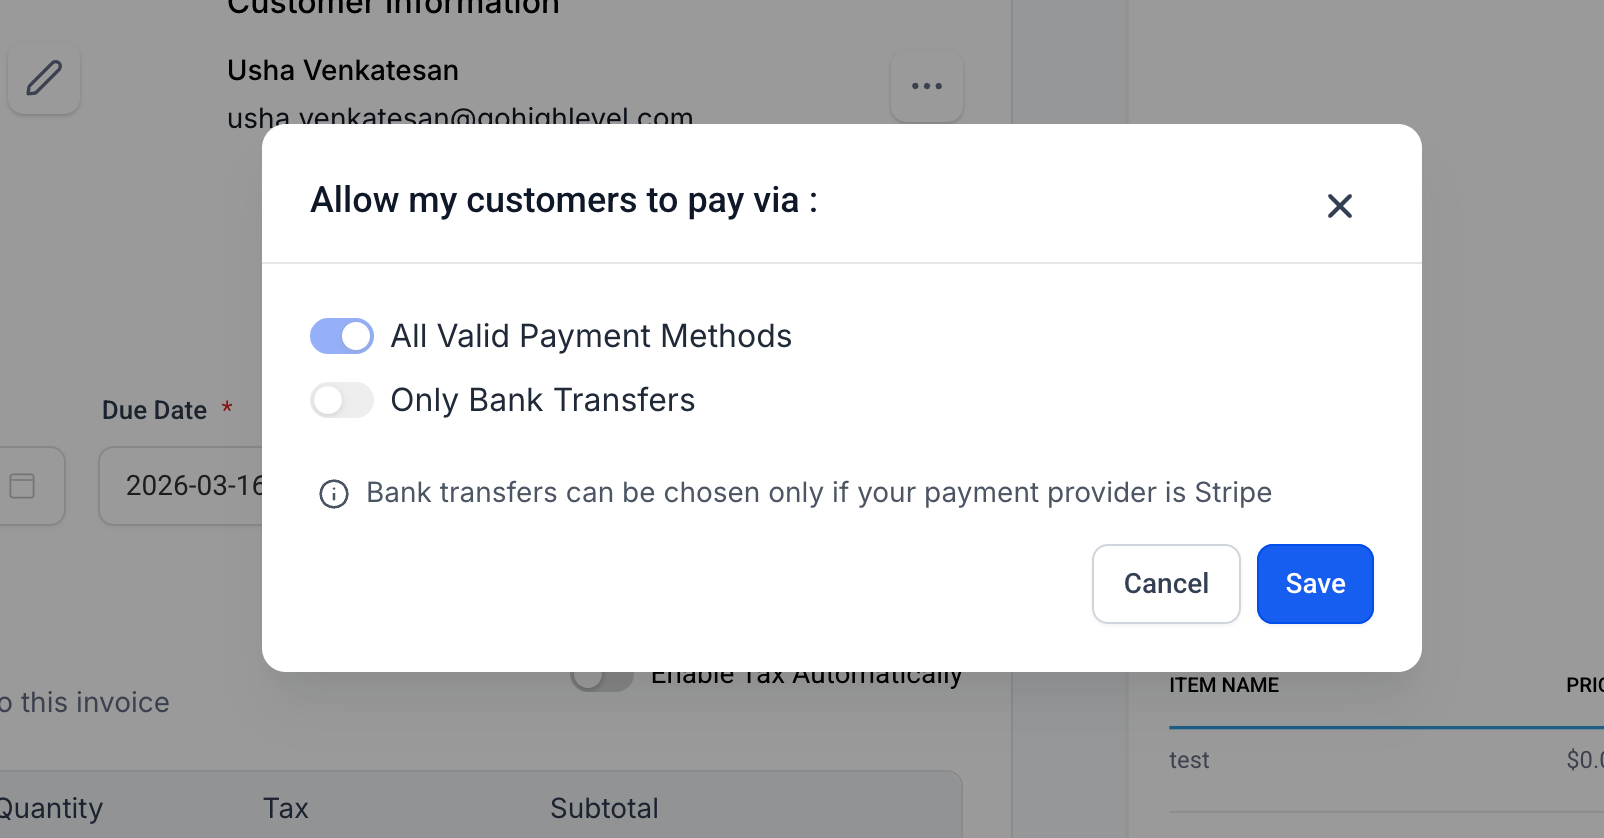
Turn on Auto-Pay and choose the card source
Toggle Enable autopayment ON, then select Customer Card, Saved Card, or New Card. Click Save.
Disable Auto-Pay for Future Invoices
Open the same schedule and click the ⋮ menu → Manage Auto Payment.
Turn Auto-Pay off and save. In the modal, toggle Enable autopayment OFF, then click Save.
Auto-Pay will stop beginning with the next invoice occurrence.

How to Verify Auto-Pay Is Active
After saving your recurring invoice settings, confirm the following:
- Auto-Pay shows as enabled in the recurring invoice configuration.
- The intended payment method is selected.
- The next scheduled occurrence has not already passed or already been generated under older settings.
- The customer has a valid card available for future charges.
Troubleshooting Auto-Pay
If Auto-Pay does not run as expected, review these common causes before making changes:
- The next invoice was already generated before Auto-Pay was enabled.
- A valid card is not available for the customer.
- The recurring invoice was updated after an earlier occurrence was already created.
- The payment setup is not configured for automatic charging.
- The invoice requires manual review because the charge was not completed successfully.
Frequently Asked Questions
Q: Where can I find the “Manage Auto Payment” option?
Open a recurring invoice → click the ⋮ menu (top-right) → Manage Auto Payment to enable, disable, or choose the card source.
Q: Does the first invoice always auto-charge?
Not always. If no card is on file at schedule creation, the first invoice is paid manually; future invoices auto-charge after that successful payment. With a Saved Card, the first invoice auto-charges.
Q: Which payment methods are supported for Auto-Pay?
Card payments. Manual methods (cash, bank transfer, etc.) are not auto-charged.
Q: What happens if a card is declined?
HighLevel notifies the customer and location user, retries twice (24 hours apart), and then stops automatic attempts. You can collect a manual payment with a new card.
Q: Can I change the card used for future auto-charges?
Yes. Add or select a different card from the customer’s profile. The next auto-charge will use the updated card.
Q: Do edits to a generated invoice affect auto-pay?
Editing a child invoice before charge time pauses auto-pay for that invoice only. Future occurrences continue as scheduled.
Q: Can I brand or customize the payment emails?
Yes. Customize invoice notifications (subject, body, branding) from your invoice notification settings.
Q: How can I automate follow-ups on failed payments?
Use workflow triggers like Invoice and Payment Received to notify your team, tag the contact, or send recovery messages.
Q: Why did Auto-Pay not start on the very next invoice?
Auto-Pay may only affect future recurring invoice occurrences, depending on when it was enabled and whether the next invoice had already been generated. After enabling Auto-Pay, review the next scheduled occurrence and confirm the selected payment method.
Related Articles
Was this article helpful?
That’s Great!
Thank you for your feedback
Sorry! We couldn't be helpful
Thank you for your feedback
Feedback sent
We appreciate your effort and will try to fix the article