Learn how SaaS V1 and V2 differ, connect the appropriate payment provider, create plan categories and SaaS plans, sell through funnels or checkout links, onboard customers, and manage the subscription lifecycle after the initial sale.
SaaS V1 and SaaS V2 are separate billing architectures. SaaS V1 remains Stripe-based, while SaaS V2 uses an Agency Sub-Account as the billing system of record. The SaaS V1 subscription bridge described in this guide keeps eligible selling-sub-account subscriptions aligned after supported upgrades and downgrades; it does not convert V1 subscriptions into V2.
What is the SaaS Configurator?
The SaaS Configurator is HighLevel's built-in tool for packaging platform access into recurring SaaS subscription plans. Agencies can define pricing, features, snapshots, add-ons, usage billing, and other plan settings while controlling how customers purchase and access their sub-accounts.
HighLevel supports two SaaS billing architectures: SaaS V1 and SaaS V2. Both can be managed from the SaaS Configurator, but they differ in where products, subscriptions, and billing records are maintained.
Key Benefits of the SaaS Configurator
The SaaS Configurator centralizes the core components needed to sell recurring software access. This gives agencies a repeatable way to package services, automate onboarding, and manage different billing architectures from one SaaS management experience.
SaaS V1 vs. SaaS V2
SaaS V1 and V2 are separate billing architectures rather than sequential versions that require migration. Understanding which system owns the subscription helps you choose the correct setup, payment provider, and troubleshooting workflow.
| Architecture | SaaS V1 | SaaS V2 |
|---|---|---|
| System of record | Stripe | HighLevel through the selected Agency Sub-Account |
| Payment providers | Stripe | Supported payment providers connected to the Agency Sub-Account |
| Products managed in | Stripe | HighLevel |
| Billing interval changes | Handled according to the V1/Stripe subscription workflow | Monthly and annual intervals can be changed as part of a supported plan upgrade or downgrade |
| Proration for plan changes | Can be handled through the V1/Stripe billing workflow | Not supported for tier changes, interval changes, or combined tier and interval changes |
Architecture guardrail: The SaaS V1 subscription bridge does not change the V1 system of record. Stripe continues to own the V1 subscription even when the corresponding subscription in a selling sub-account is synchronized after a supported plan change.
For a deeper architectural comparison, see SaaS V1 vs SaaS V2: What's the Difference?
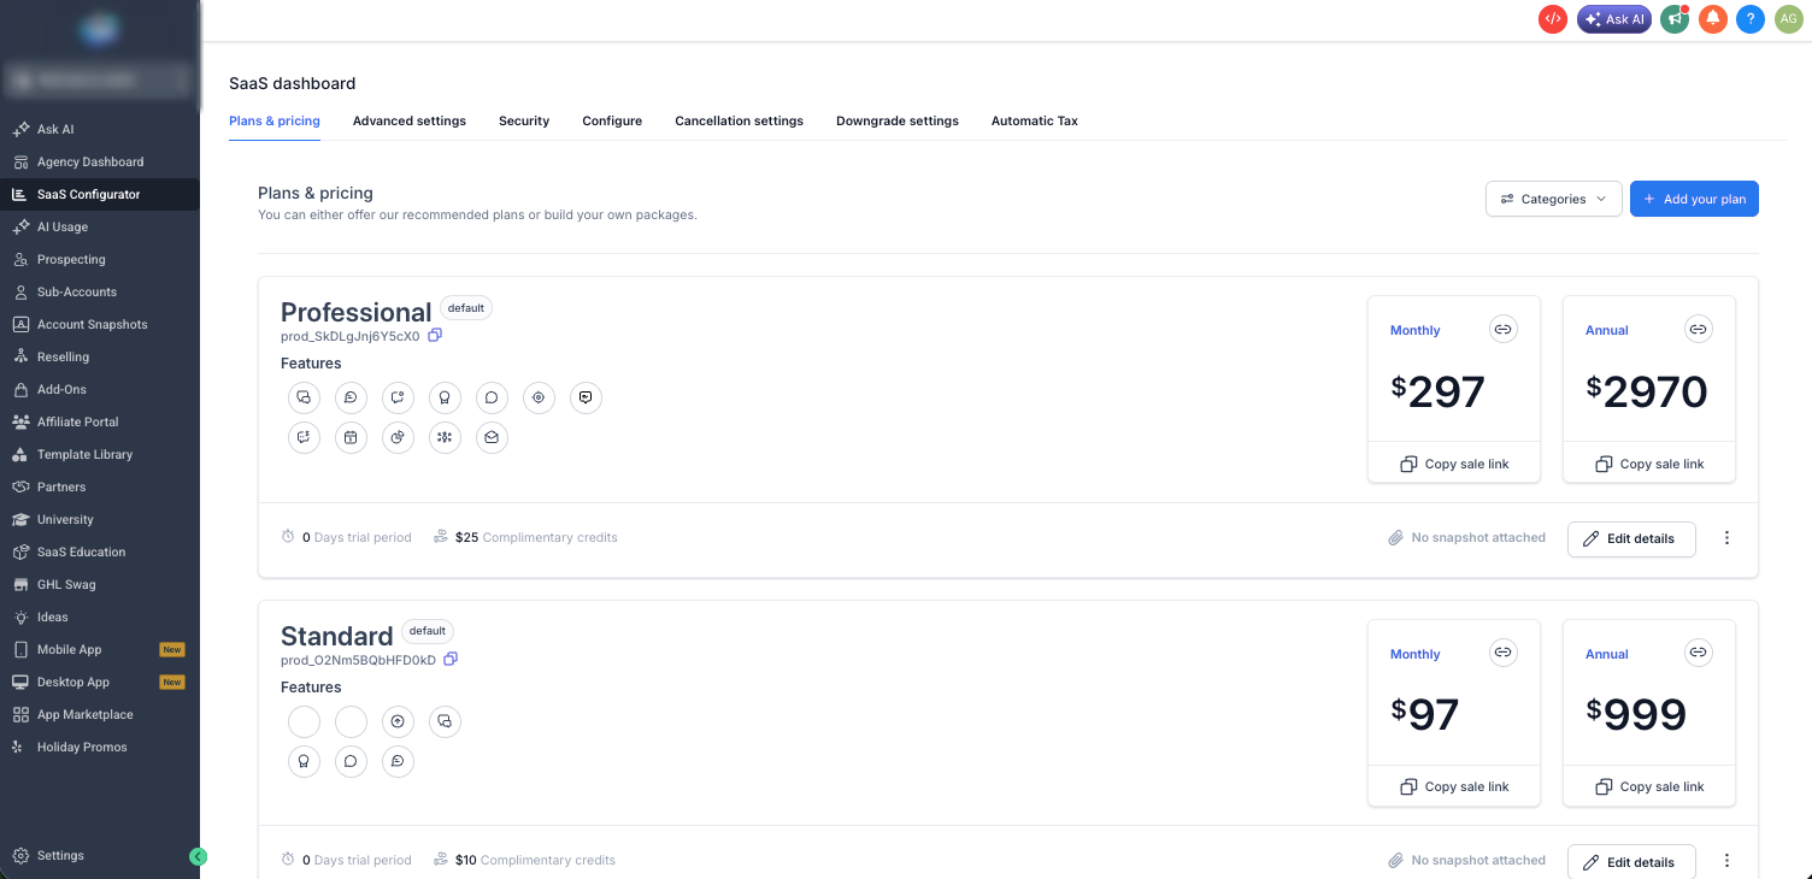
How To Set Up the SaaS Configurator
Proper setup establishes which billing architecture owns your subscriptions and ensures customers can purchase the correct plans. Complete the payment-provider configuration before creating plans so pricing, products, and subscription records are associated with the intended system.
Before You Begin
Confirm the required agency access and payment-provider configuration before creating your first SaaS plan. The prerequisites differ depending on whether you are using V1 or V2.
- You have the appropriate Agency Admin access.
- For SaaS V1: You have a Stripe account available to connect to the agency.
- For SaaS V2: You have an Agency Sub-Account with a supported payment provider configured under Payments > Integrations.
Connect Stripe for SaaS V1
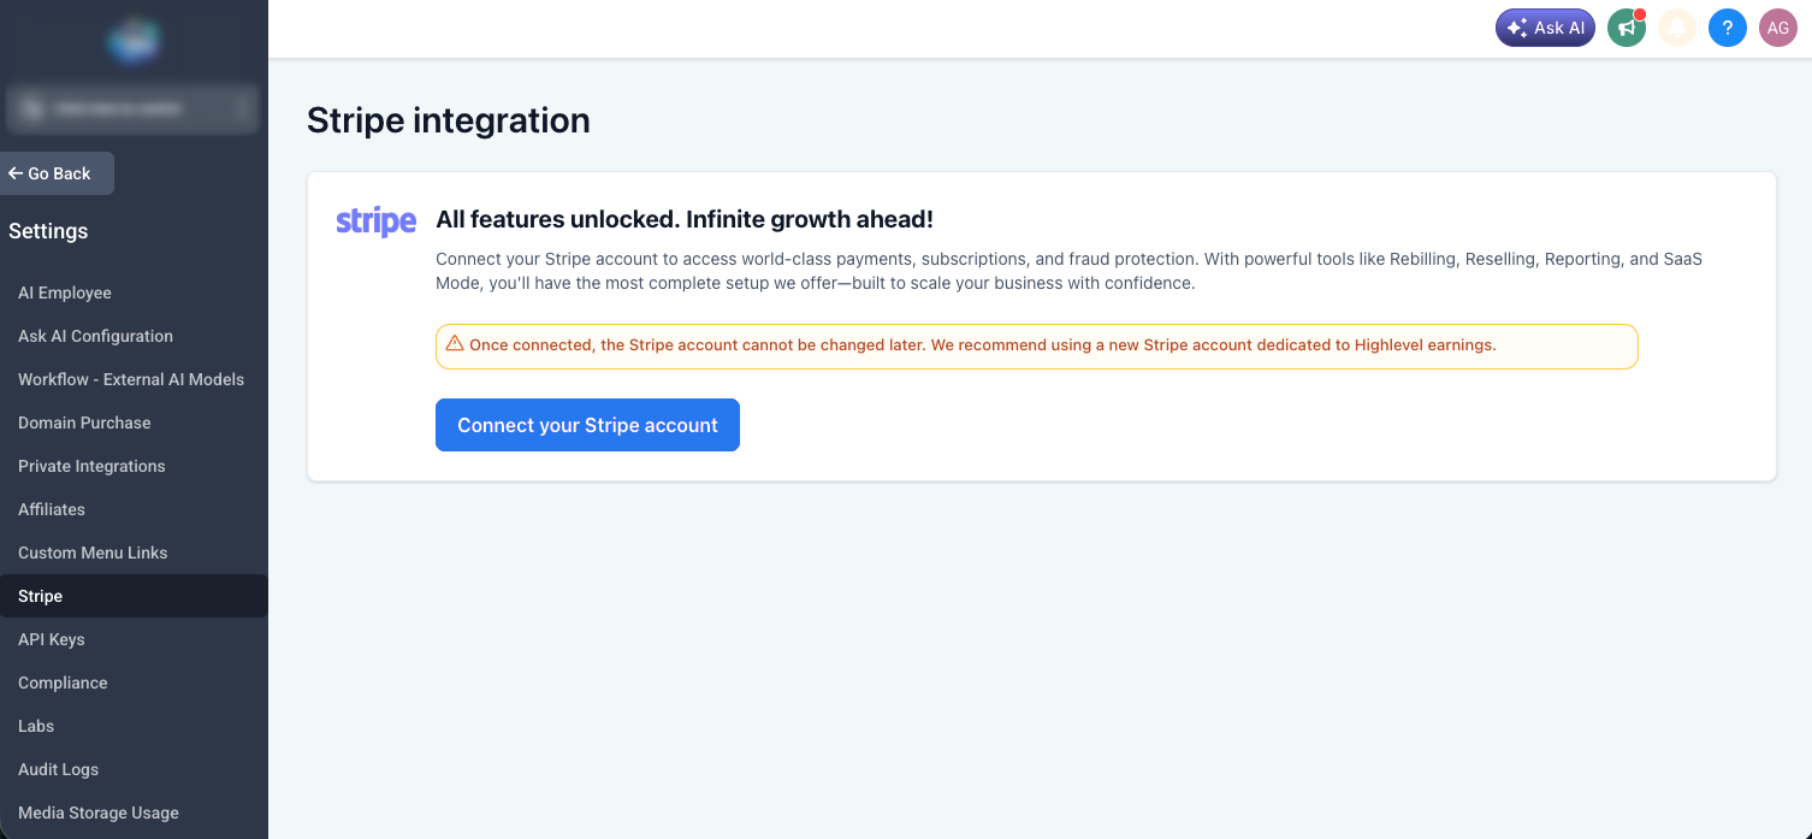
SaaS V1 uses Stripe as the billing system of record, so the agency Stripe connection must be established before creating V1 plans and prices.
- Go to Agency View > Settings > Stripe.
- Click Connect with Stripe and complete the connection flow.
- Return to Agency View > SaaS Configurator and continue to plan creation.
Select an Agency Sub-Account for SaaS V2
SaaS V2 uses a designated internal Agency Sub-Account to manage products, subscriptions, and payments. Select the sub-account that should serve as the billing system of record before creating V2 plans.
- Go to Agency View > SaaS Configurator > Configure.
- Click Select Sub-Accounts.
- Choose the Agency Sub-Account and click Add Sub-Account.
- Confirm that a supported payment provider is configured under Payments > Integrations inside that sub-account.
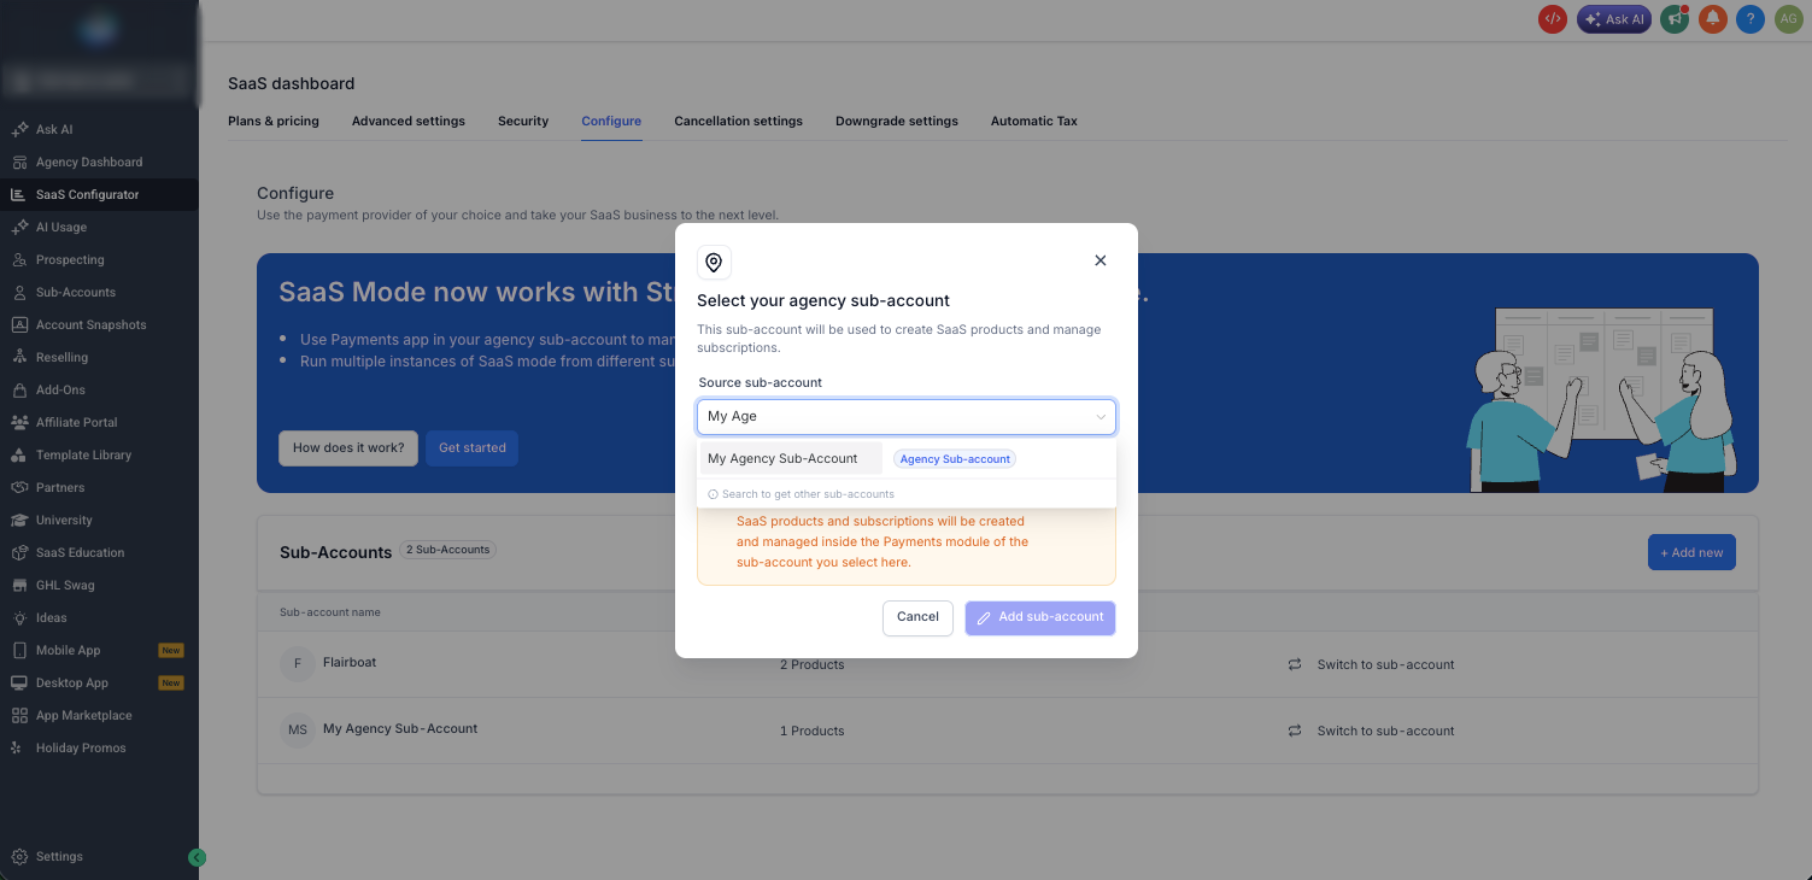
What is an Agency Sub-Account? It is an internal sub-account owned by the agency and used for agency operations. In SaaS V2, it serves as the billing system of record for the SaaS products and subscriptions associated with it.
Create a Plan Category
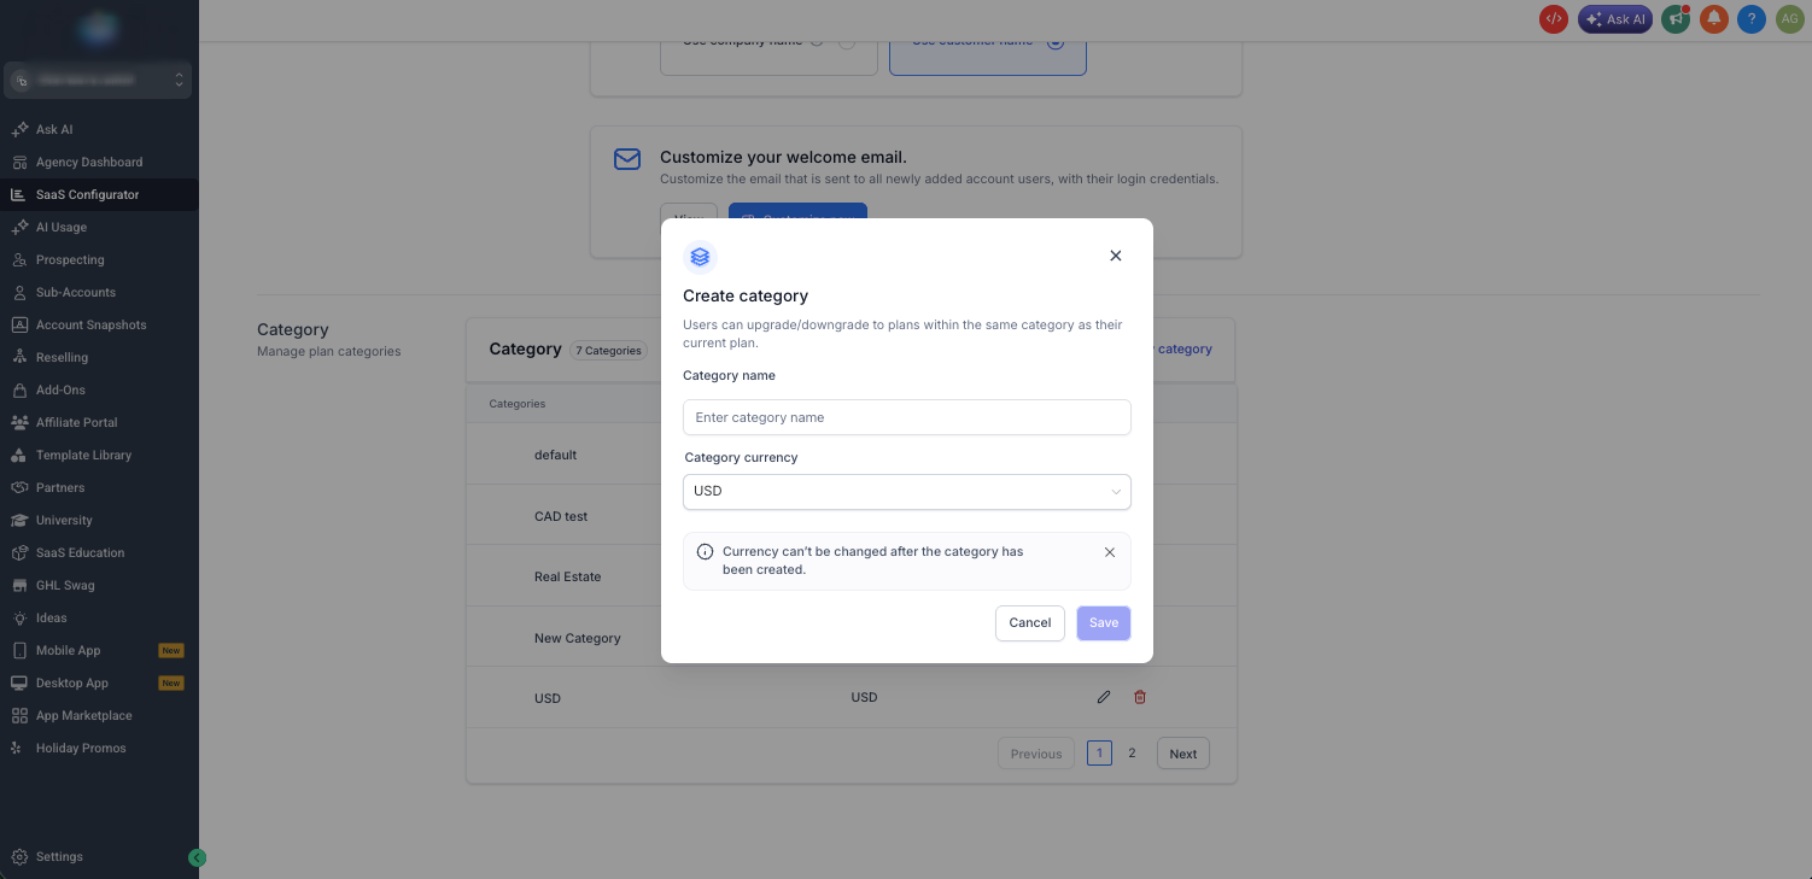
Plan categories organize related plans into upgrade and downgrade paths. Keeping compatible plans in the same category helps determine which destination plans customers can select later.
- Open SaaS Configurator > Advanced Settings.
- Click Add New Category.
- Enter a category name and select the currency.
- Click Save.
Currency: Plans within the same category should use the same currency. If you sell in multiple currencies, use separate categories so customers are presented with compatible upgrade and downgrade options.
Plan changes: Supported upgrades and downgrades do not require disabling and re-enabling SaaS. Changing a plan's category or level can affect which plan-change paths are available to customers, so review category structure carefully before editing it.
Create a SaaS Plan
A SaaS plan defines what the customer pays and what they receive. Configure the plan details carefully because pricing, feature access, snapshots, add-ons, and usage rules become part of the customer's subscription experience.
- In SaaS Configurator, click Add Your Plan.
- Select the applicable payment processor or billing architecture.
- Configure the plan details, category, pricing, features, snapshot, add-ons, Marketplace apps, trial or credits, and usage billing as needed.
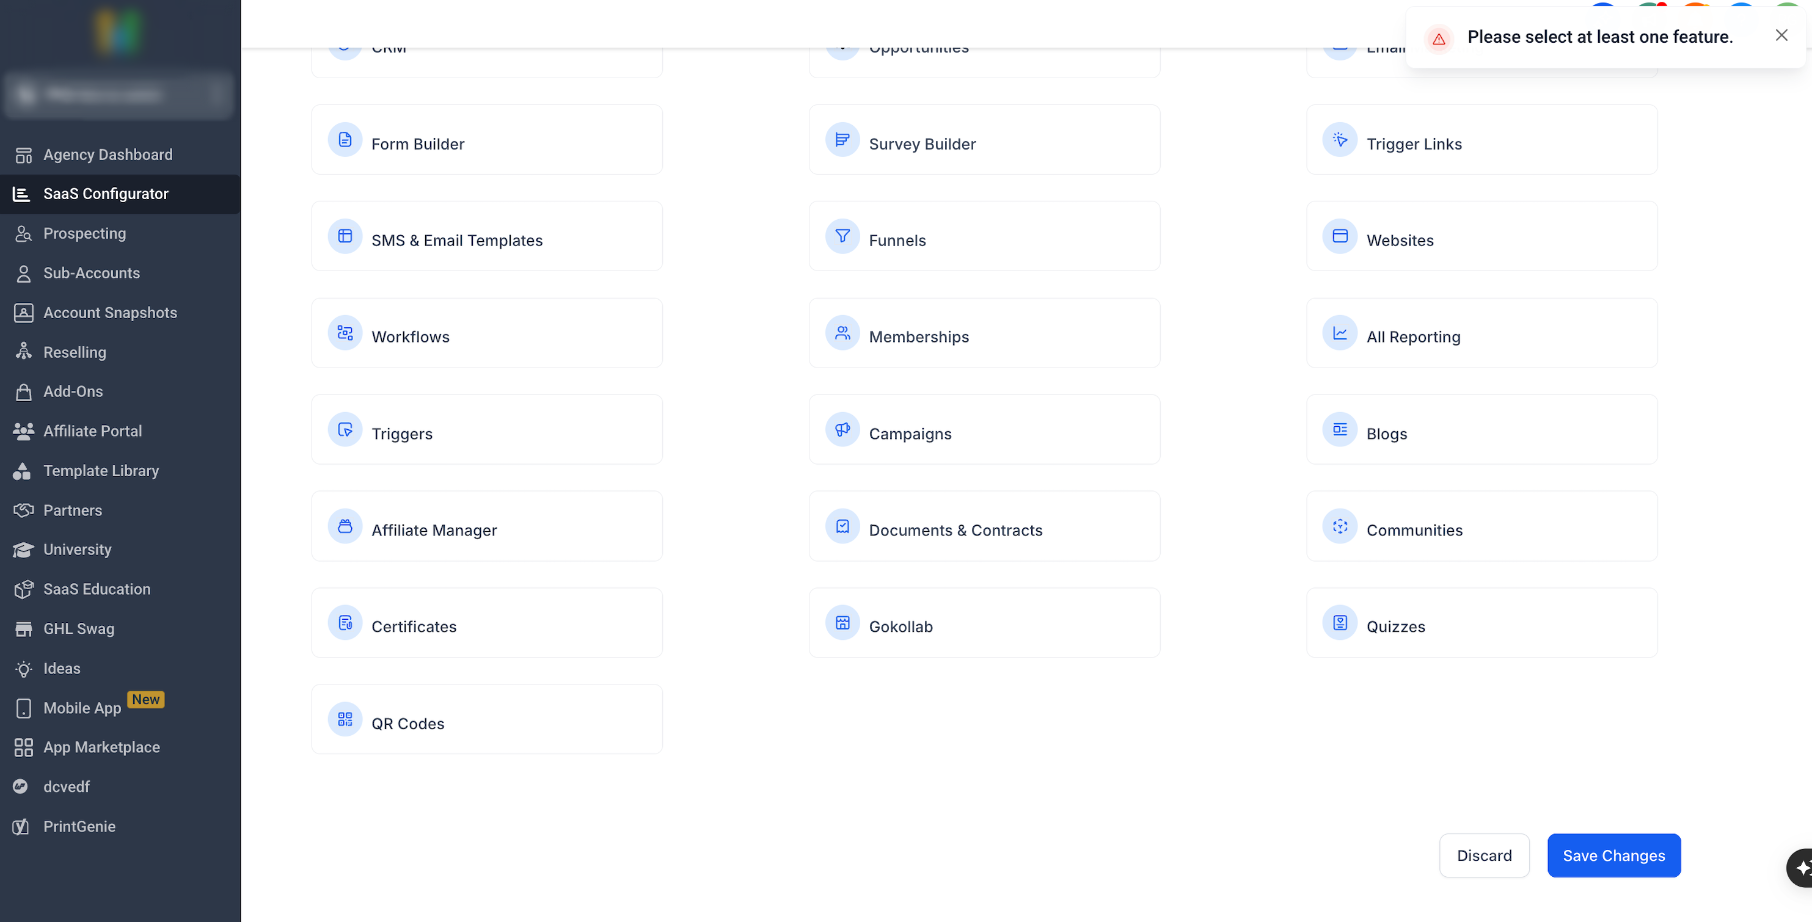
- Select at least one product feature for the plan.
- Review the configuration and save the plan.
| Configuration | Purpose |
|---|---|
| Plan Details | Name and customer-facing plan information |
| Category | Determines related upgrade and downgrade paths |
| Pricing | Monthly and/or annual subscription pricing |
| Features & Snapshot | Controls access and optional automatic sub-account configuration |
| Add-ons | Optional paid capabilities customers can select |
| Marketplace Apps | Eligible third-party apps bundled with the plan |
| Trial & Credits | Trial duration and complimentary-credit behavior |
| Usage Billing | Usage-based or per-unit charges configured for the plan |
At least one feature is required: Select one or more features before saving a SaaS plan. A plan cannot be completed without a product feature selected.
Selling SaaS
SaaS plans can be sold through a branded funnel or through a direct SaaS checkout link. The sales workflow differs between V1 and V2 because V1 products originate in Stripe while V2 products are managed from the selected Agency Sub-Account.
Sell SaaS V1 Through a Selling Sub-Account Funnel
The V1 funnel workflow brings the Stripe-based SaaS product into a selling sub-account so it can be placed on an order form. This is also the selling pattern associated with the V1 subscription synchronization behavior described later in this guide.
- Switch to the sub-account used to sell the SaaS subscription.
- Go to Payments > Products > Import From Stripe.
- Find the SaaS Stripe product and import the applicable price.
- Go to Sites > Funnels.
- Add the imported SaaS product to a supported order form and publish the funnel.
For detailed import instructions, see Import Products / Price From Stripe.
When a V1 Stripe price changes: Re-import the updated price into the selling sub-account before selecting it in a funnel or website. Updating the SaaS plan or Stripe price does not automatically replace the product price already selected on an existing funnel order form.
Sell SaaS V2 Through an Agency Sub-Account Funnel
V2 products are created and managed through the Agency Sub-Account, so they can be selected directly from that sub-account's Payments and funnel tools without importing them from Stripe.
- Switch to the applicable Agency Sub-Account.
- Go to Payments > Products and confirm the SaaS product is available.
- Go to Sites > Funnels and add the SaaS product to the appropriate order form.
Generate a Direct SaaS Checkout Link
A direct checkout link provides a faster sales option when you do not need a full funnel. The link can be shared through email, proposals, social channels, or buttons on another webpage.
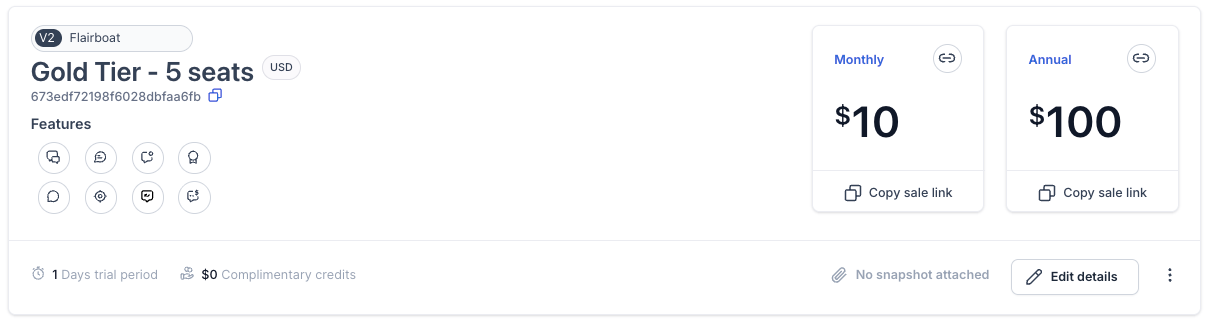
- Open SaaS Configurator > Plans & Pricing.
- Locate the SaaS plan.
- Click Copy Sale Link.
- Share the checkout link with the customer.
Subscription-sync scope: The V1 bridge described below applies to eligible subscriptions using the selling-sub-account workflow. Do not assume every SaaS Configurator checkout method uses the same selling-sub-account subscription path unless that workflow is specifically documented.
SaaS V1 Subscription Sync After Plan Changes
Eligible SaaS V1 subscriptions sold through a selling sub-account can have a Stripe subscription and a corresponding subscription record inside that selling sub-account. Supported SaaS upgrades and downgrades now update both records so plan information does not remain stale in the selling sub-account.
| Before | After a Supported V1 Plan Change |
|---|---|
| The SaaS plan change could update Stripe while the corresponding selling-sub-account subscription remained on older plan data. | The supported plan change updates Stripe and the corresponding selling-sub-account subscription in the same flow. |
| The selling-sub-account subscription could reference an outdated product or price. | The current product and price are synchronized to the corresponding subscription. |
| Downstream invoices could use stale plan information. | Invoices generated from the selling-sub-account subscription can reflect the current plan information. |
| Applicable tax could be based on older plan information. | When tax applies, it can be recalculated using the current plan information after the qualifying plan change. |
Covered V1 pattern: SaaS plan → Stripe product → product imported into the selling sub-account → subscription sold from that selling sub-account → supported SaaS upgrade or downgrade.
Not retroactive: Existing Stripe and selling-sub-account subscription mismatches are not automatically backfilled. A future qualifying upgrade or downgrade can update both records through the new synchronization flow.
Manual Stripe edits: Do not assume arbitrary changes made directly in Stripe automatically trigger the V1 subscription bridge. The synchronization described here is tied to supported SaaS upgrade and downgrade events.
Onboarding Customers
SaaS onboarding connects a successful subscription purchase to the client's sub-account, feature access, and any configured snapshot. Understanding what happens at checkout helps distinguish initial provisioning from later subscription lifecycle events such as upgrades and downgrades.
New Customer Through SaaS Checkout
When a new customer successfully completes a supported SaaS checkout, the configured SaaS workflow provisions the subscription and corresponding sub-account access.
- Payment is confirmed through the applicable billing architecture.
- The sub-account is created or linked to the customer as applicable.
- The configured snapshot is applied when a snapshot is attached to the SaaS plan.
- Customer access is established according to the onboarding workflow.
- The subscription becomes active or trialing according to the plan configuration.
After onboarding: For eligible SaaS V1 subscriptions sold through the selling-sub-account workflow, a later supported upgrade or downgrade can update both the Stripe subscription and the corresponding selling-sub-account subscription.
Manually Add SaaS to an Existing Sub-Account
Use the manual SaaS subscription flow when the client already has a sub-account and needs to be placed on a SaaS plan without creating a new location through checkout.
- Go to Agency View > Sub-Accounts.
- Open the target sub-account and select Manage Client.
- Open the SaaS area and select Add a SaaS Subscription.
- Select the applicable payment processor.
- Choose or create the customer profile.
- Select the SaaS plan.
- If needed, configure a Special Price for that specific client.
- Complete the payment flow so the subscription can be linked to the sub-account.
Special Prices: A special price can be useful for promotional pricing, enterprise agreements, or grandfathered rates because it applies to that client without changing the public plan price.
Running SaaS V1 and V2 in Parallel
Agencies can operate V1 and V2 plans at the same time. Keeping the architectures separate lets existing Stripe-based V1 subscriptions continue while new plans use V2 where its billing architecture is a better fit.
- Both architectures can appear in the SaaS Configurator.
- V1 subscriptions continue to use Stripe as the billing system of record.
- V2 subscriptions use the selected Agency Sub-Account as the billing system of record.
- The V1 subscription bridge does not migrate or convert a V1 subscription into V2.
Where to Troubleshoot Billing
Start troubleshooting in the system of record for the subscription. This helps avoid making a billing change in the wrong architecture.
| Architecture | Start Here |
|---|---|
| V1 | Stripe and the SaaS V1 subscription configuration |
| V2 | The selected Agency Sub-Account and its Payments module |
Frequently Asked Questions
Was this article helpful?
That’s Great!
Thank you for your feedback
Sorry! We couldn't be helpful
Thank you for your feedback
Feedback sent
We appreciate your effort and will try to fix the article