TABLE OF CONTENTS
Feature 1: Creating a New Custom Object Record

To create a new custom object record, follow these steps:
Navigate to the relevant custom object:
- In the left-hand navigation panel, select the custom object type (e.g., Pets, Cars, etc.).
Click "Add" to Create a New Record:
- On the top right corner of the screen, click on the Add button (e.g., “Add Pet”).
Fill in the Required Fields:
- In the form that appears, enter the value for the primary field for that object.

- In the form that appears, enter the value for the primary field for that object.
Save the Record:
- Once the required information is added, click Save.
- Optionally, you can choose Save and Add Another to create additional records without leaving the form.
You can only add values for the primary fields while creating a custom object record
Feature 2: Updating an Existing Custom Object Record

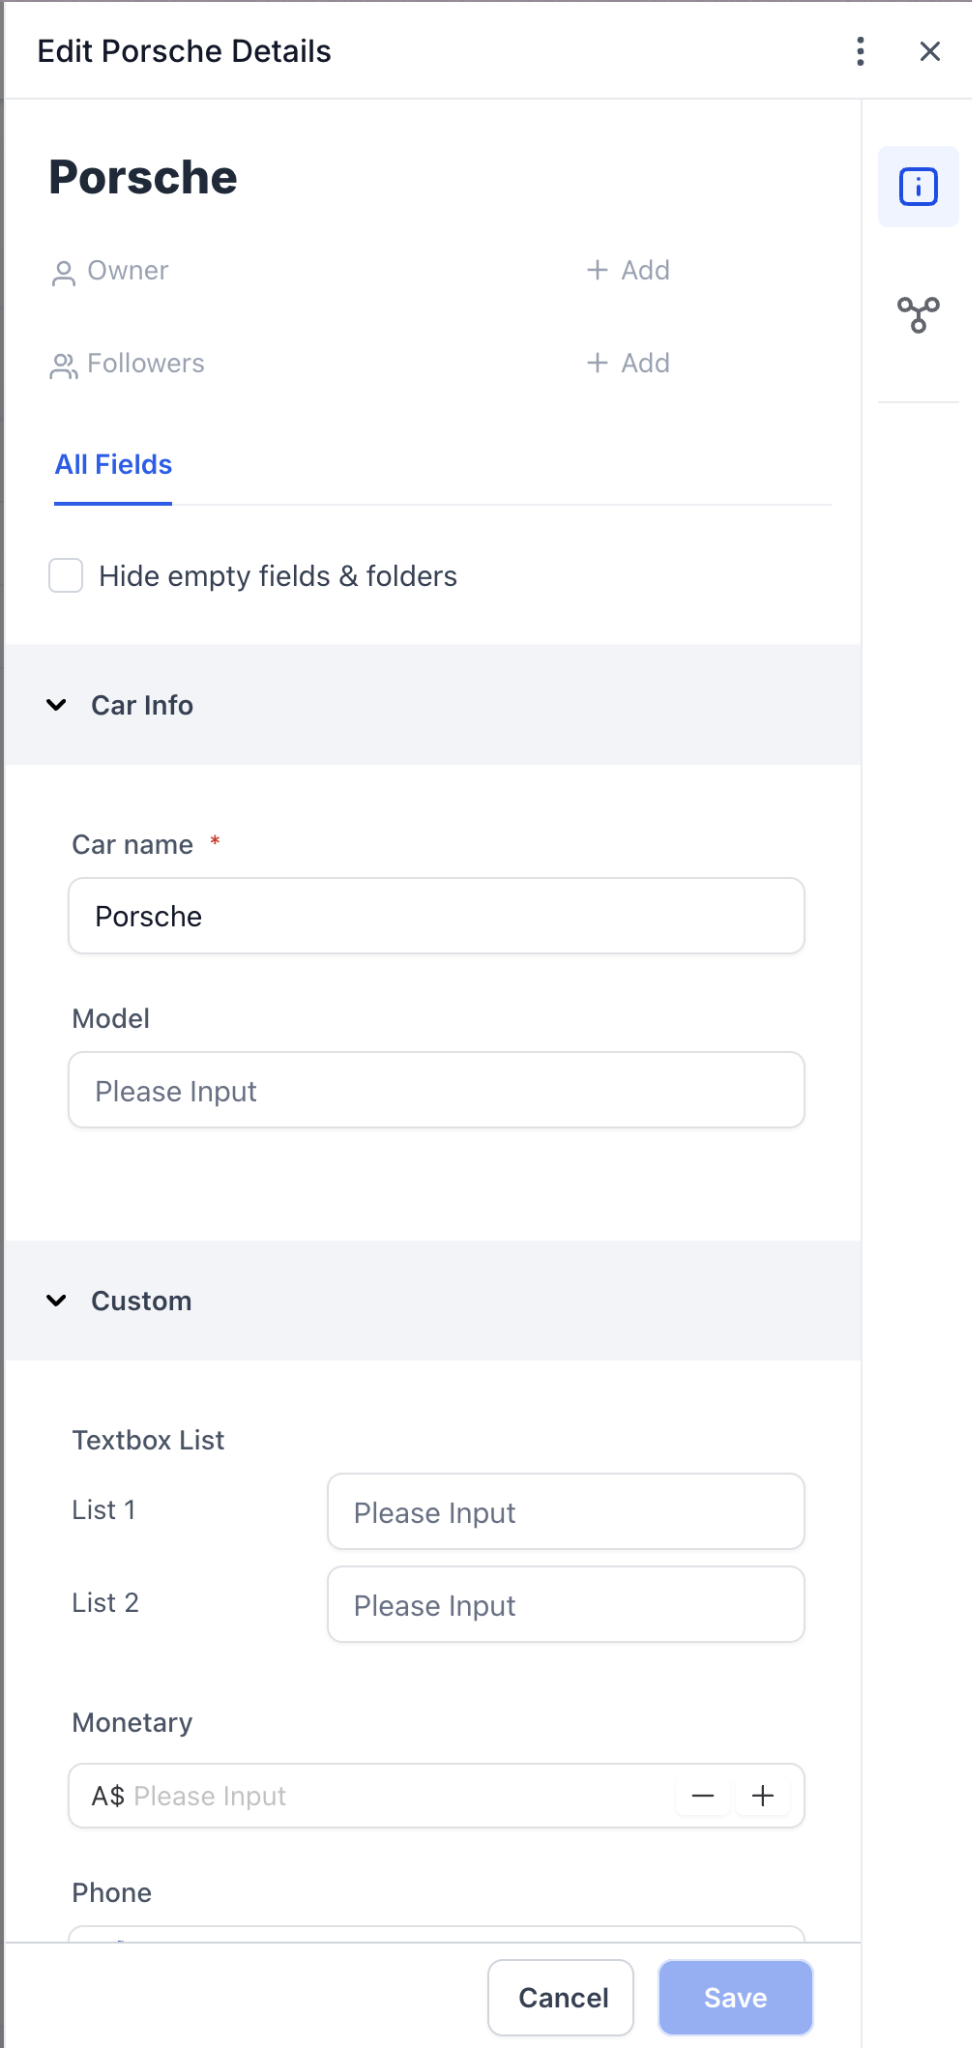
To update a record, follow these steps:
Open the Custom Object Record:
- Navigate to the list of custom objects and locate the record you wish to update.
- Click on the record name to open its details.
Edit the Required Fields:
- Click the Edit button to make changes to the object.
- Update fields such as text, numeric values, dropdowns, etc., based on the changes you need to apply.
Save Changes:
- After making the necessary updates, click the Save button to apply changes.
- Alternatively, click Cancel if you do not wish to save the changes.
Feature 3: Managing Related Objects

Learn more about associations here
For some custom objects, you may want to associate other records like contacts, products, or houses with them. Here’s how you can manage those associations:
Navigate to the "Related Objects" Section:
- Open the object record and locate the Related Objects section.
- Click Add next to the object you want to associate (e.g., Contacts, Products).
Associate New Records:
- Search for the related record (e.g., a contact) you want to associate and click Associate to link it to the custom object.
Feature 4: Deleting a Custom Object Record

If you need to delete a custom object record, follow these steps:
Open the Record:
- Navigate to the record you wish to delete and open it.
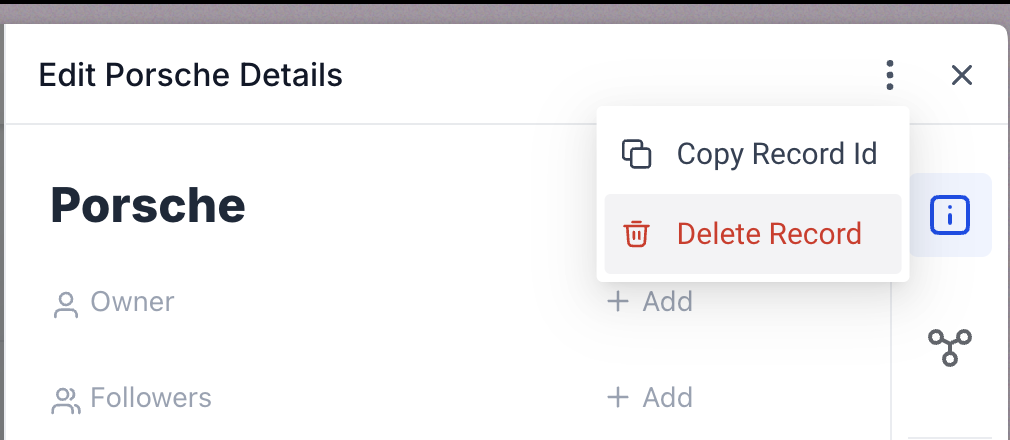
Click on the Kebab (Three Dots) Menu:
- In the record details view, click the kebab menu (three dots) on the top right.
Select "Delete":
- From the dropdown, click Delete Record to permanently remove the record.
- In the next confirmation modal, confirm the deletion.
Deleting a custom object is an irreversible change. Once deleted, a custom object record cannot be restored.
Was this article helpful?
That’s Great!
Thank you for your feedback
Sorry! We couldn't be helpful
Thank you for your feedback
Feedback sent
We appreciate your effort and will try to fix the article