There are many cases where we want to use our own phone number as caller ID. So, In this article will help you to go through the step by step process. How to Set Up Verified Caller ID (Use your own number for voice cals). This is only supported for LC Phone not for clients using personal twilio account
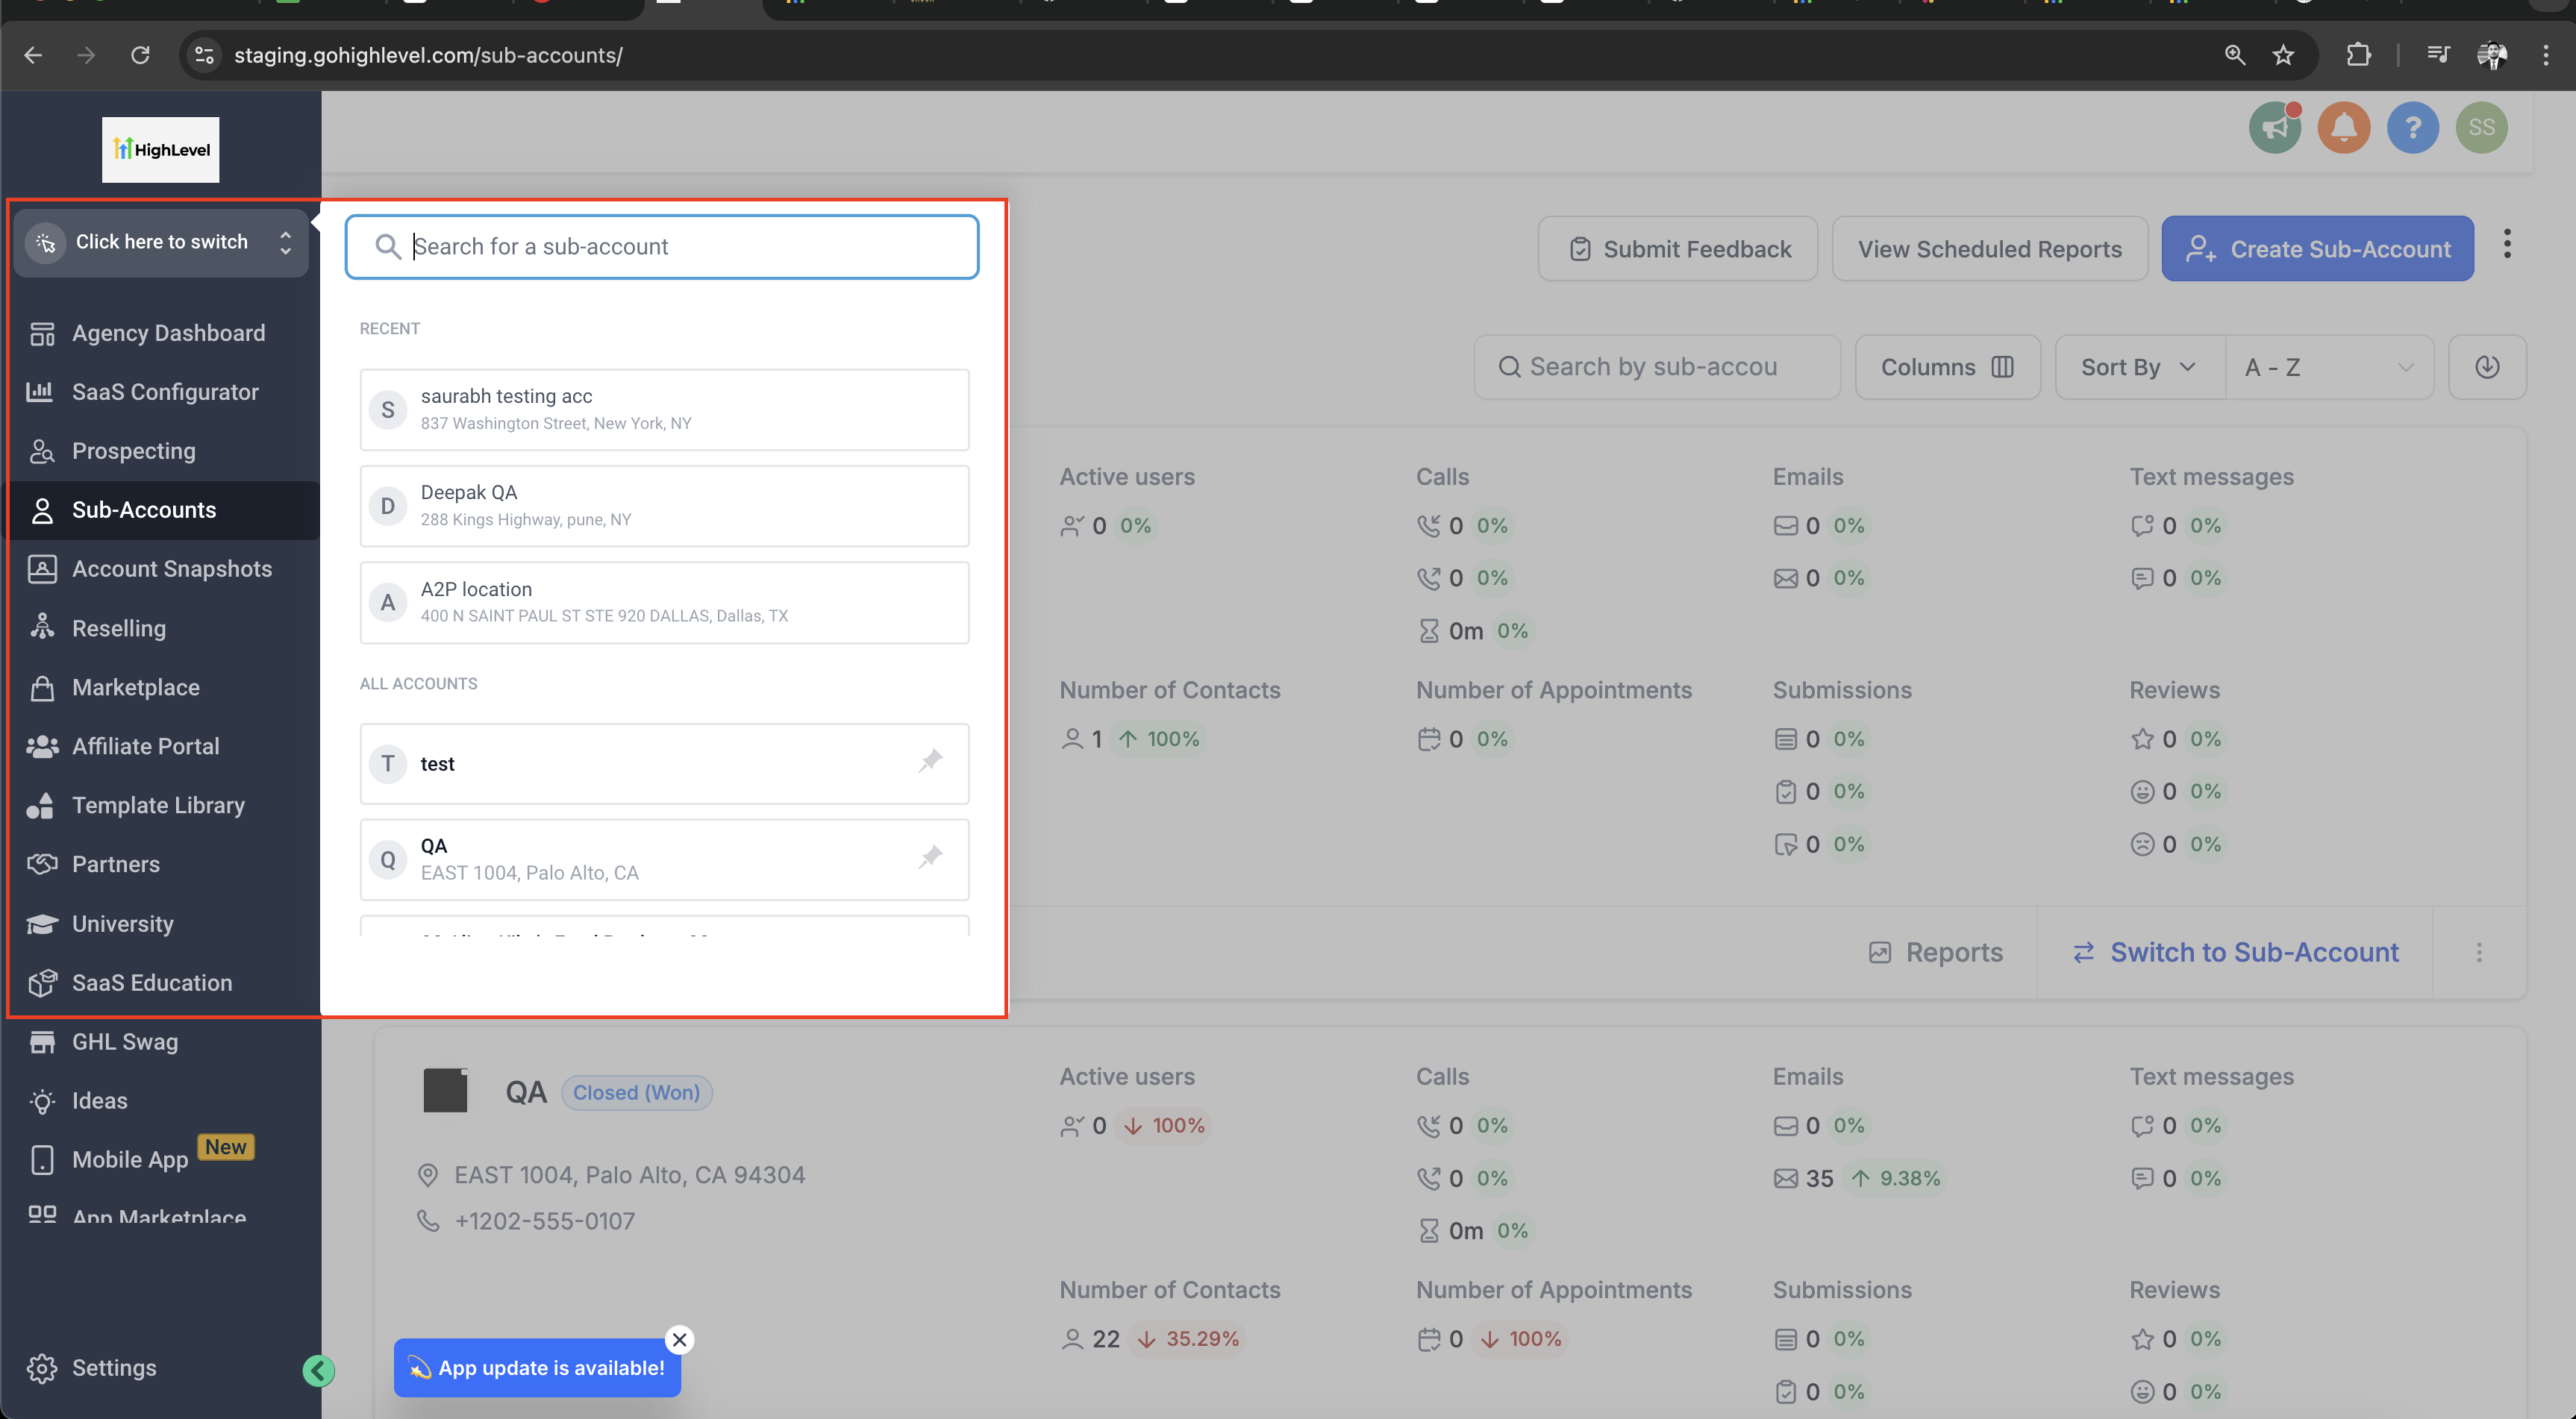
Step 1: At the top left, click here to switch to the sub-account where you want to set up verified caller ID
- Click on the Click here to switch option and search for the sub-account where you want to set up verified caller ID Then, click on the sub-account.
Step 2: Once you are in the sub-account, click on Settings

Step 3: Click on Phone Numbers

Step 4: Click on Add Verified Caller ID Under Add Number Tab

Step 5: Verify your own phone number as New Caller ID
- Enter your own phone number and click on Verify Number

- After clicking verify number you will get a pop up with verification code and a call to your phone number for verification. You will be asked to enter the verification code. Please answer the call and enter the provided verification code to proceed. Once this is done your number will be verified and will added under verified caller iD tab.

Step 6: Select the Twilio Number under Phone Number Tab for which you want to use your phone number as caller ID.
- Click on three dots for the Twilio Phone Number under Phone Number Tab for which you want to use your phone number as caller ID

- Click on Edit Configuration Option

- Select Use your Verified Number as callerID for outbound calls option and choose the verified caller number and save it.
- Once this setting is enabled. Now you can use your own phone number as caller id for making calls.

Please Note
A limit of 10 verified caller IDs per sub-account is placed by default to avoid misuse. Please reach out to our support team to increase this limit.
Due to local regulations on domestic calls in India, effective from August 1, 2024, calls placed from +91 caller ID to +91 destination will not work.
Was this article helpful?
That’s Great!
Thank you for your feedback
Sorry! We couldn't be helpful
Thank you for your feedback
Feedback sent
We appreciate your effort and will try to fix the article