Webhook.site is a free third-party tool that lets you inspect and capture the raw HTTP requests sent from integrations, workflows, or custom API calls. Using Webhook.site makes it easy to debug webhook payloads, verify configuration, and troubleshoot issues before sending payloads to HighLevel or your production endpoints.
TABLE OF CONTENTS
- What is Webhook.site
- How It Works
- Step 1: Visit Webhook.site
- Step2. Click on "Copy to clipboard" next to your unique Testing Webhook on the homepage
- Step 3. Go to Your Custom Integration, like Zapier or other third-party solution
- Step4. Replace the HighLevel API URL with the Webhook.site testing URL
- Step5. Save your updates
- Step 6. Review Payload Data
- Step 7. Click Copy
What is Webhook.site
Webhook.site instantly generates a unique test URL that collects all incoming webhook requests and displays them in real time. This makes it ideal for:
Capturing raw webhook payloads (headers, body, method)
Validating the structure of requests before sending them to your live endpoint
Troubleshooting integrations from Zapier, Make (Integromat), custom apps, or other automation tools
IMPORTANT: The steps in this article are for Advanced Integration and for informational purposes only.

While we do not currently support or service either the Basic or Advanced API due to their complexity, we have many tools and groups to help you get started and connected! For assistance with APIs, you can join our Developer Council Slack Community here: https://www.gohighlevel.com/dev-slack

We also hold a Developer Council Zoom Call once a month (second to last Friday) which you can find on the Events calendar here: https://www.gohighlevel.com/events

For more information and links to our API documentation, visit our developer's website: https://marketplace.gohighlevel.com/docs/
How It Works
Step 1: Visit Webhook.site
Open https://webhook.site in your browser. A unique test URL will be generated automatically.

Step2. Click on "Copy to clipboard" next to your unique Testing Webhook on the homepage

Step 3. Go to Your Custom Integration, like Zapier or other third-party solution
For this example, we are using Zapier, and to use Webook.site to test you will need to click "Set Up Action."

Step4. Replace the HighLevel API URL with the Webhook.site testing URL
Temporarily swap out the HighLevel API URL for the Webhook.site URL for testing purposes. You'll follow a similar process for any other custom integration that is POSTING data into HighLevel.

Step5. Save your updates
Make sure to save your changes, then run whatever flow you have in place that would normally execute the webhook. If your tool or integration (like Zapier, Integromat, etc.) has a built-in testing tool, don't utilize this. Instead, use a real-world example. If the webhook is triggered when a form is submitted, go to the form and submit a test. If the automation fires when an action is performed in an external system, perform said action.
This will provide you and your developers with the most accurate information, and will be incredibly valuable when troubleshooting advanced API-related issues.
Step 6. Review Payload Data
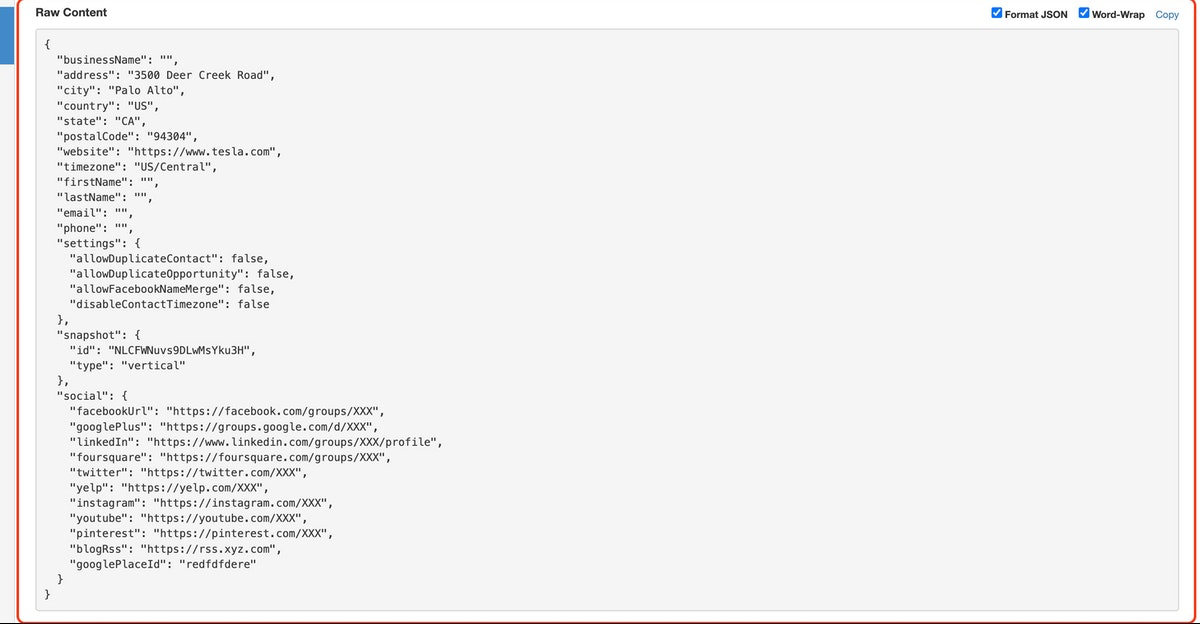
Next, you'll be presented with the raw data being received by HighLevel anytime the webhook is executed. You can compare this with the information available on our API documentation websites to test your configuration.

Step 7. Click Copy
Click Copy in the Upper Right of the Raw Data input box to copy the entire Payload. Save this for troubleshooting with your developers, or with the HighLevel team.

Was this article helpful?
That’s Great!
Thank you for your feedback
Sorry! We couldn't be helpful
Thank you for your feedback
Feedback sent
We appreciate your effort and will try to fix the article