Events: Custom CSS with Live Element Selection
HighLevel's Events Custom CSS editor eliminates the need to manually inspect the DOM. You can now style all your public event pages directly from Pages & Design with live element selection, starter CSS snippets, and real-time preview.
This article explains how to use the live Custom CSS editor, select elements by clicking them, apply quick style presets, and preview your design changes instantly.
What is the Custom CSS Editor?
The Custom CSS editor is a live styling tool built into HighLevel's Events management area. It allows you to write and apply custom CSS rules to your public event pages without leaving the Pages & Design interface.
Previously, customizing event page styles required manually inspecting the page's HTML structure in the browser to identify CSS selectors. The new editor eliminates this step by providing click-to-select functionality, instant preview, and pre-configured starter snippets for common styling needs.
All CSS you add in the editor applies globally across your public event pages, including Details, Schedule, Checkout, Payment, Confirmation, Leave Checkout, and Online Event pages.
Key Features
The Custom CSS editor includes several features designed to simplify event page styling and speed up your workflow.
How to Use the Custom CSS Editor
Follow these steps to access the Custom CSS editor and start styling your event pages. The editor provides both manual CSS editing and click-to-select functionality to identify page elements.
Navigate to your event in HighLevel, then go to Pages & Design → Custom CSS. The editor opens with a live preview of your event page on the right and a CSS input panel on the left.
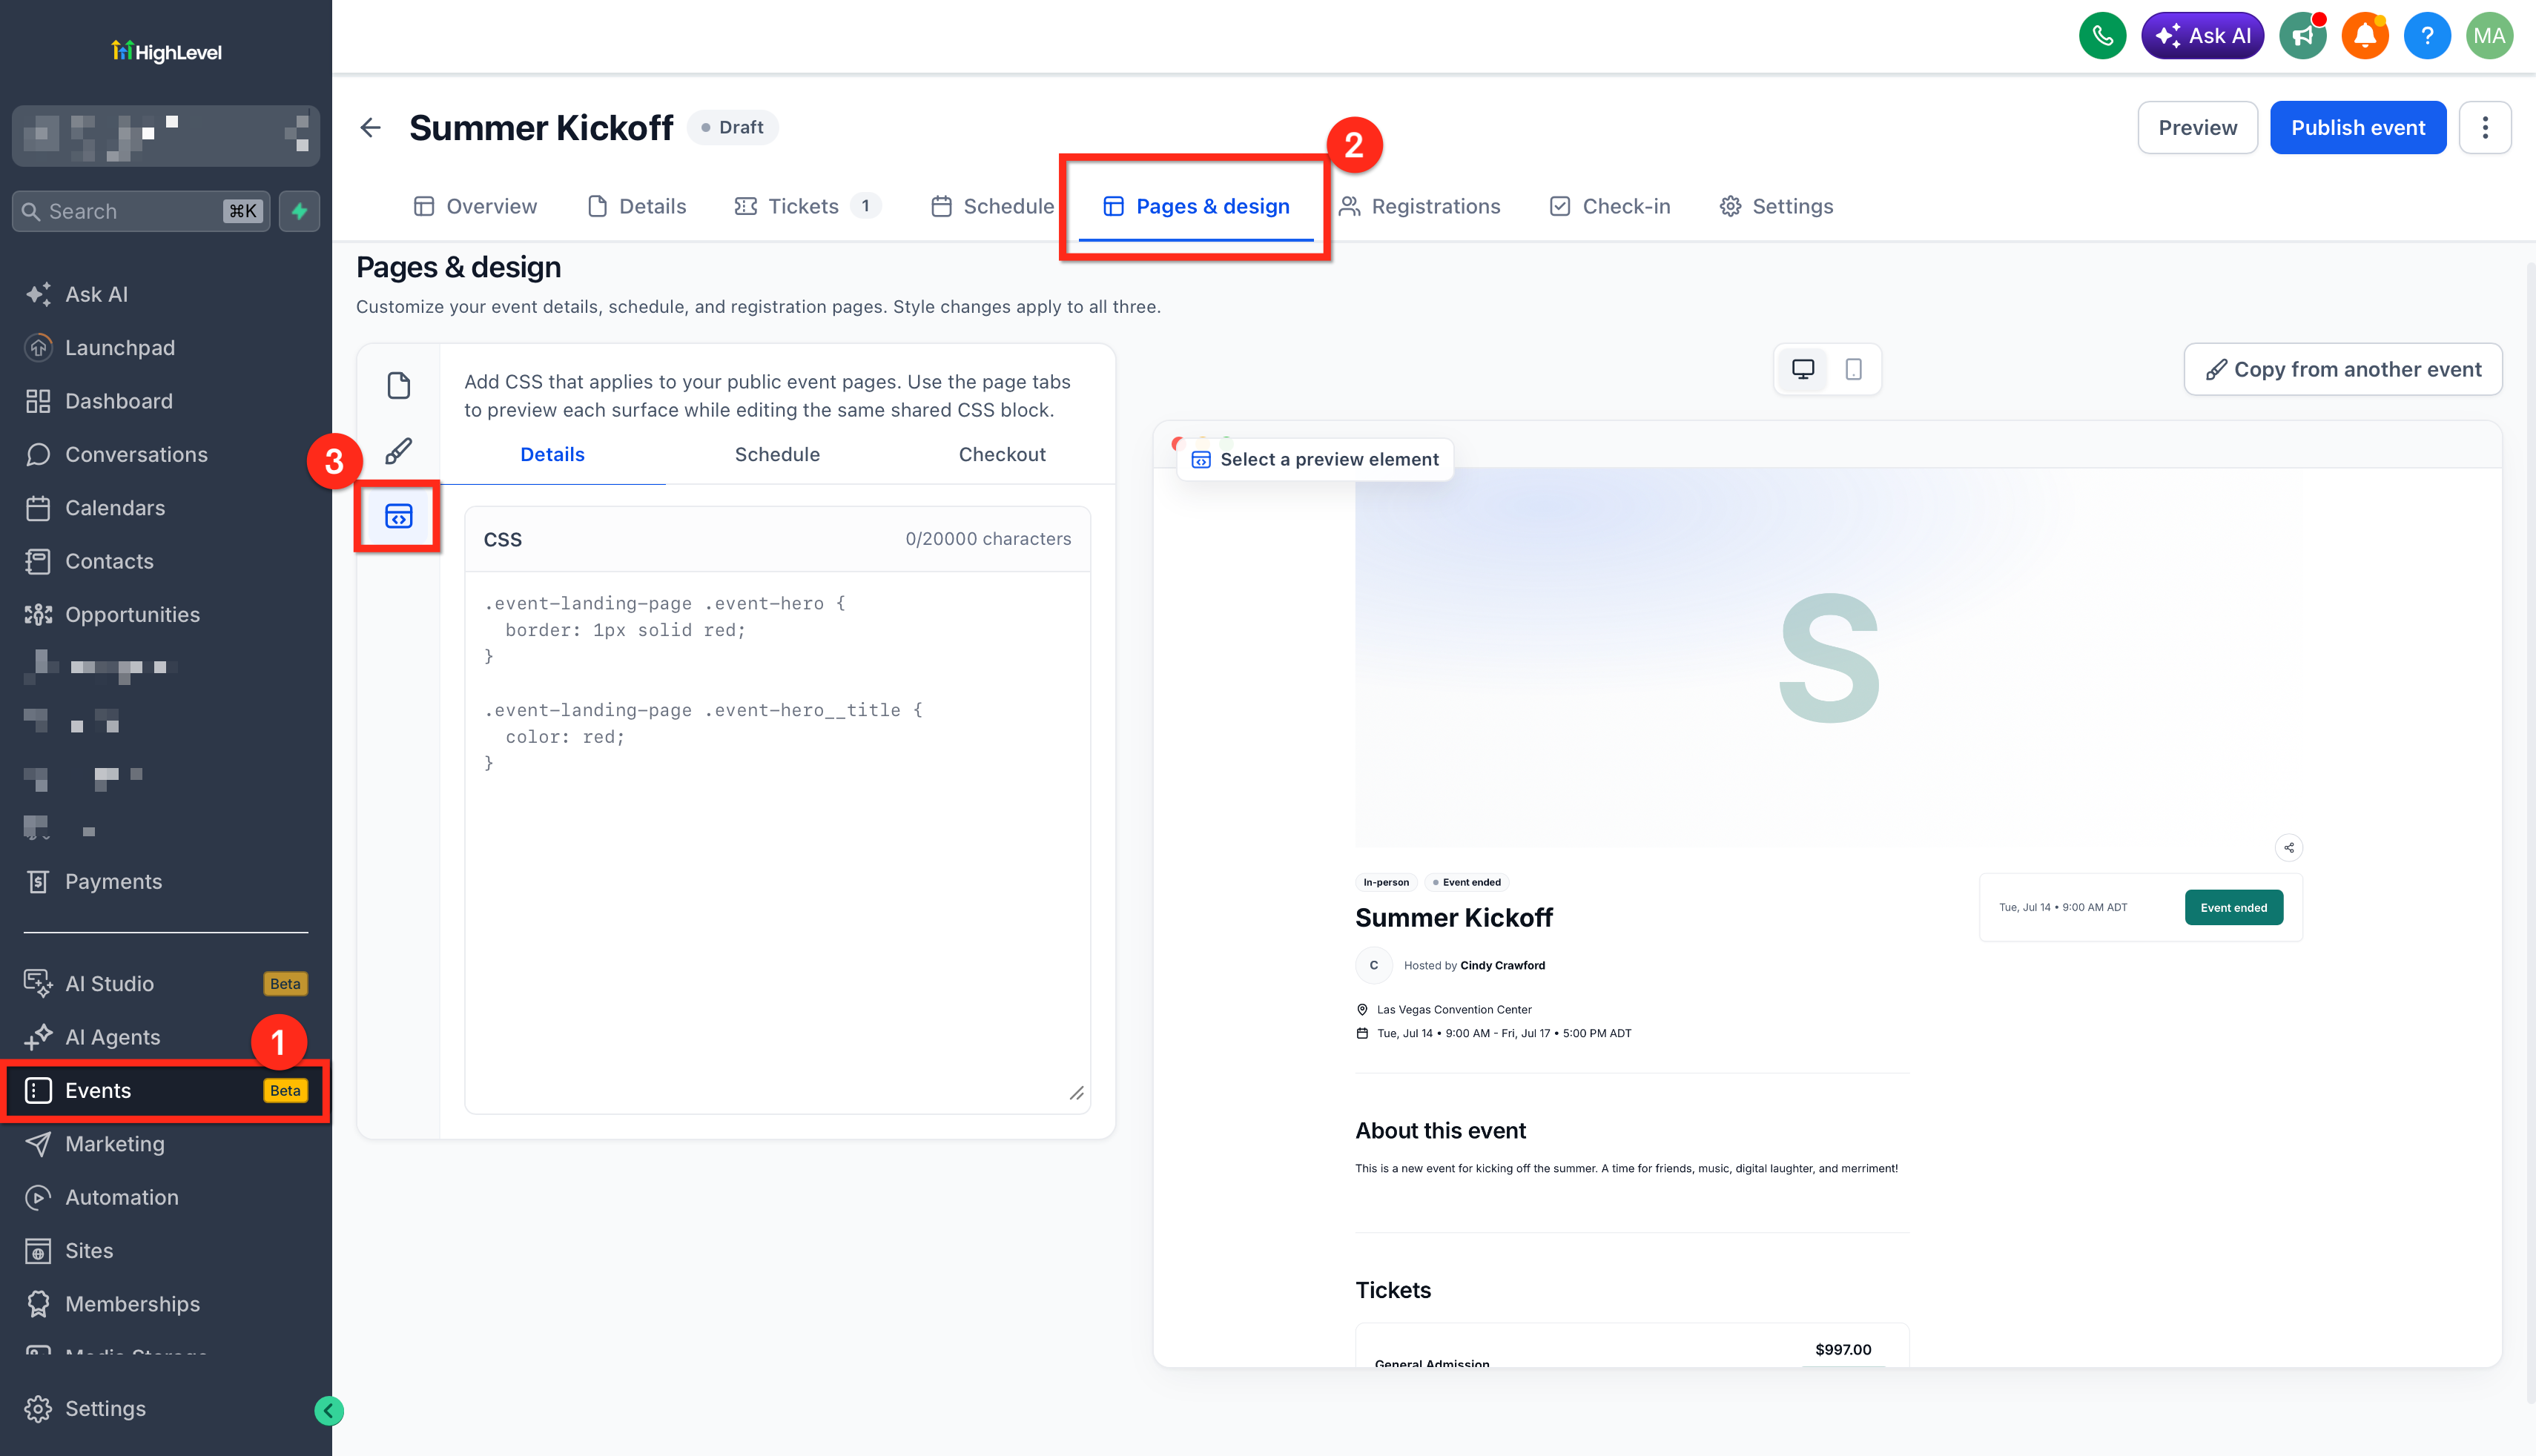
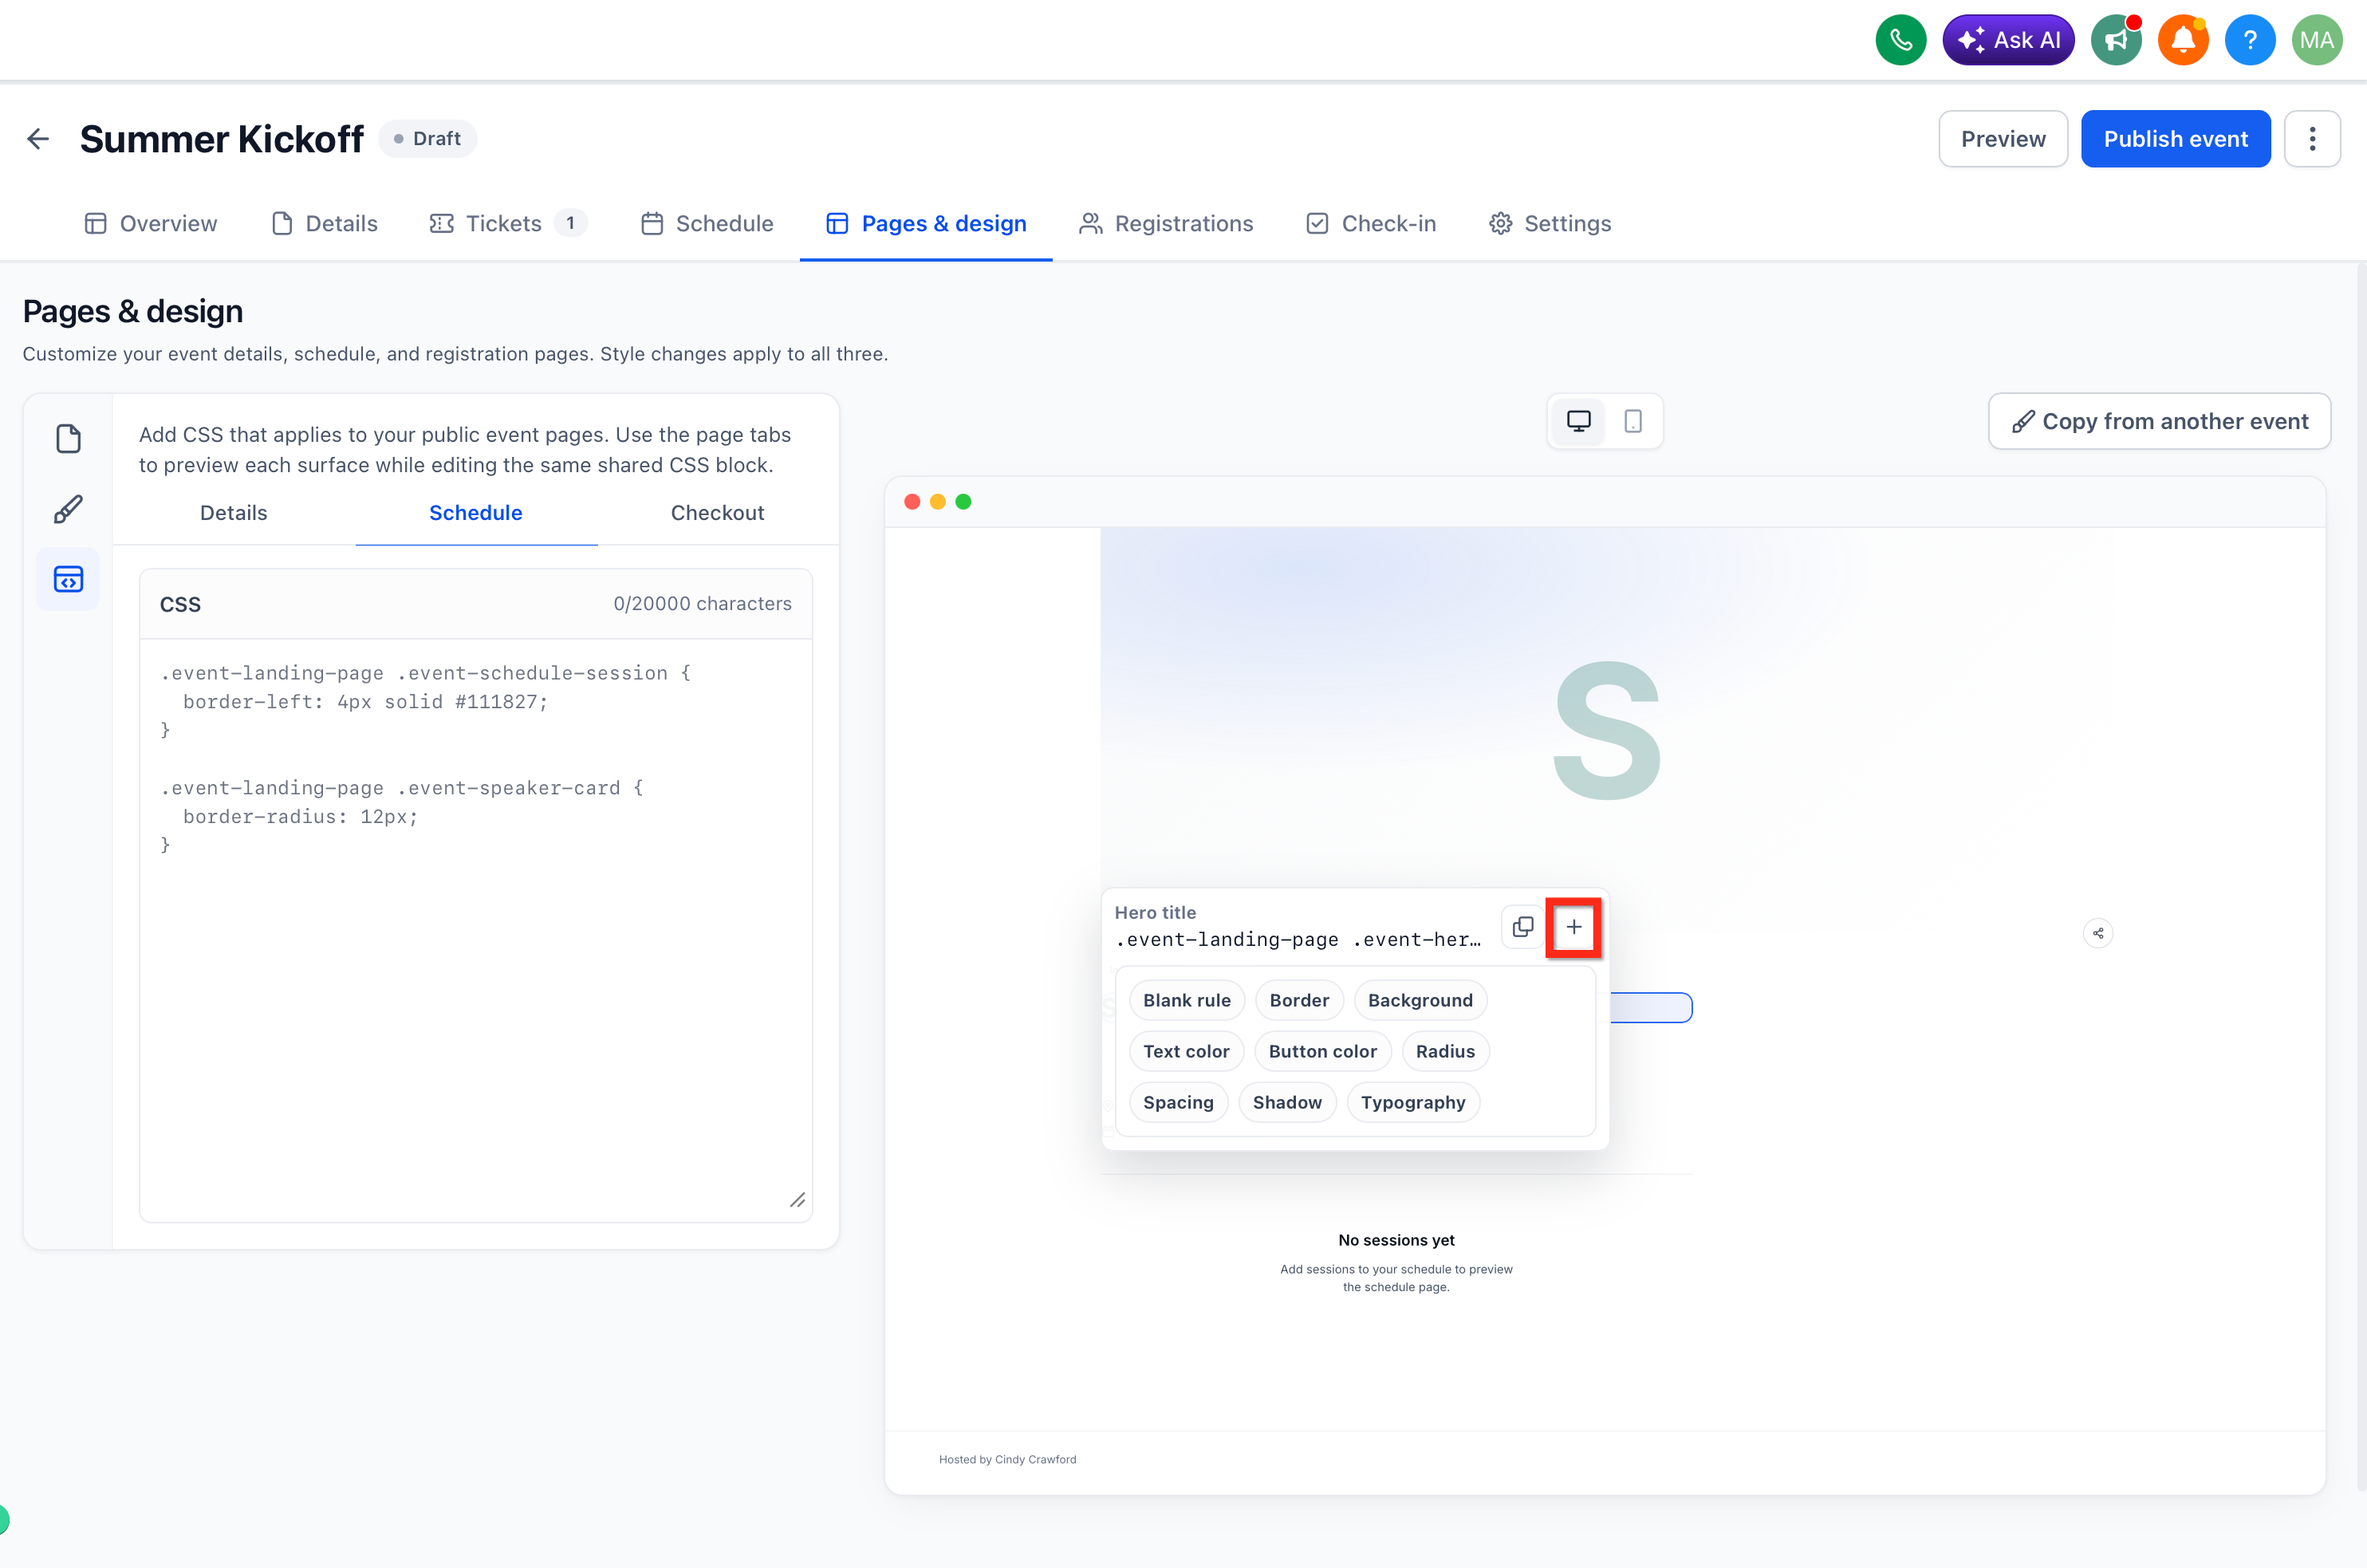
Click any element in the page preview to identify its CSS selector. The selector appears in a popup with options to copy it or insert a starter CSS rule into the editor.
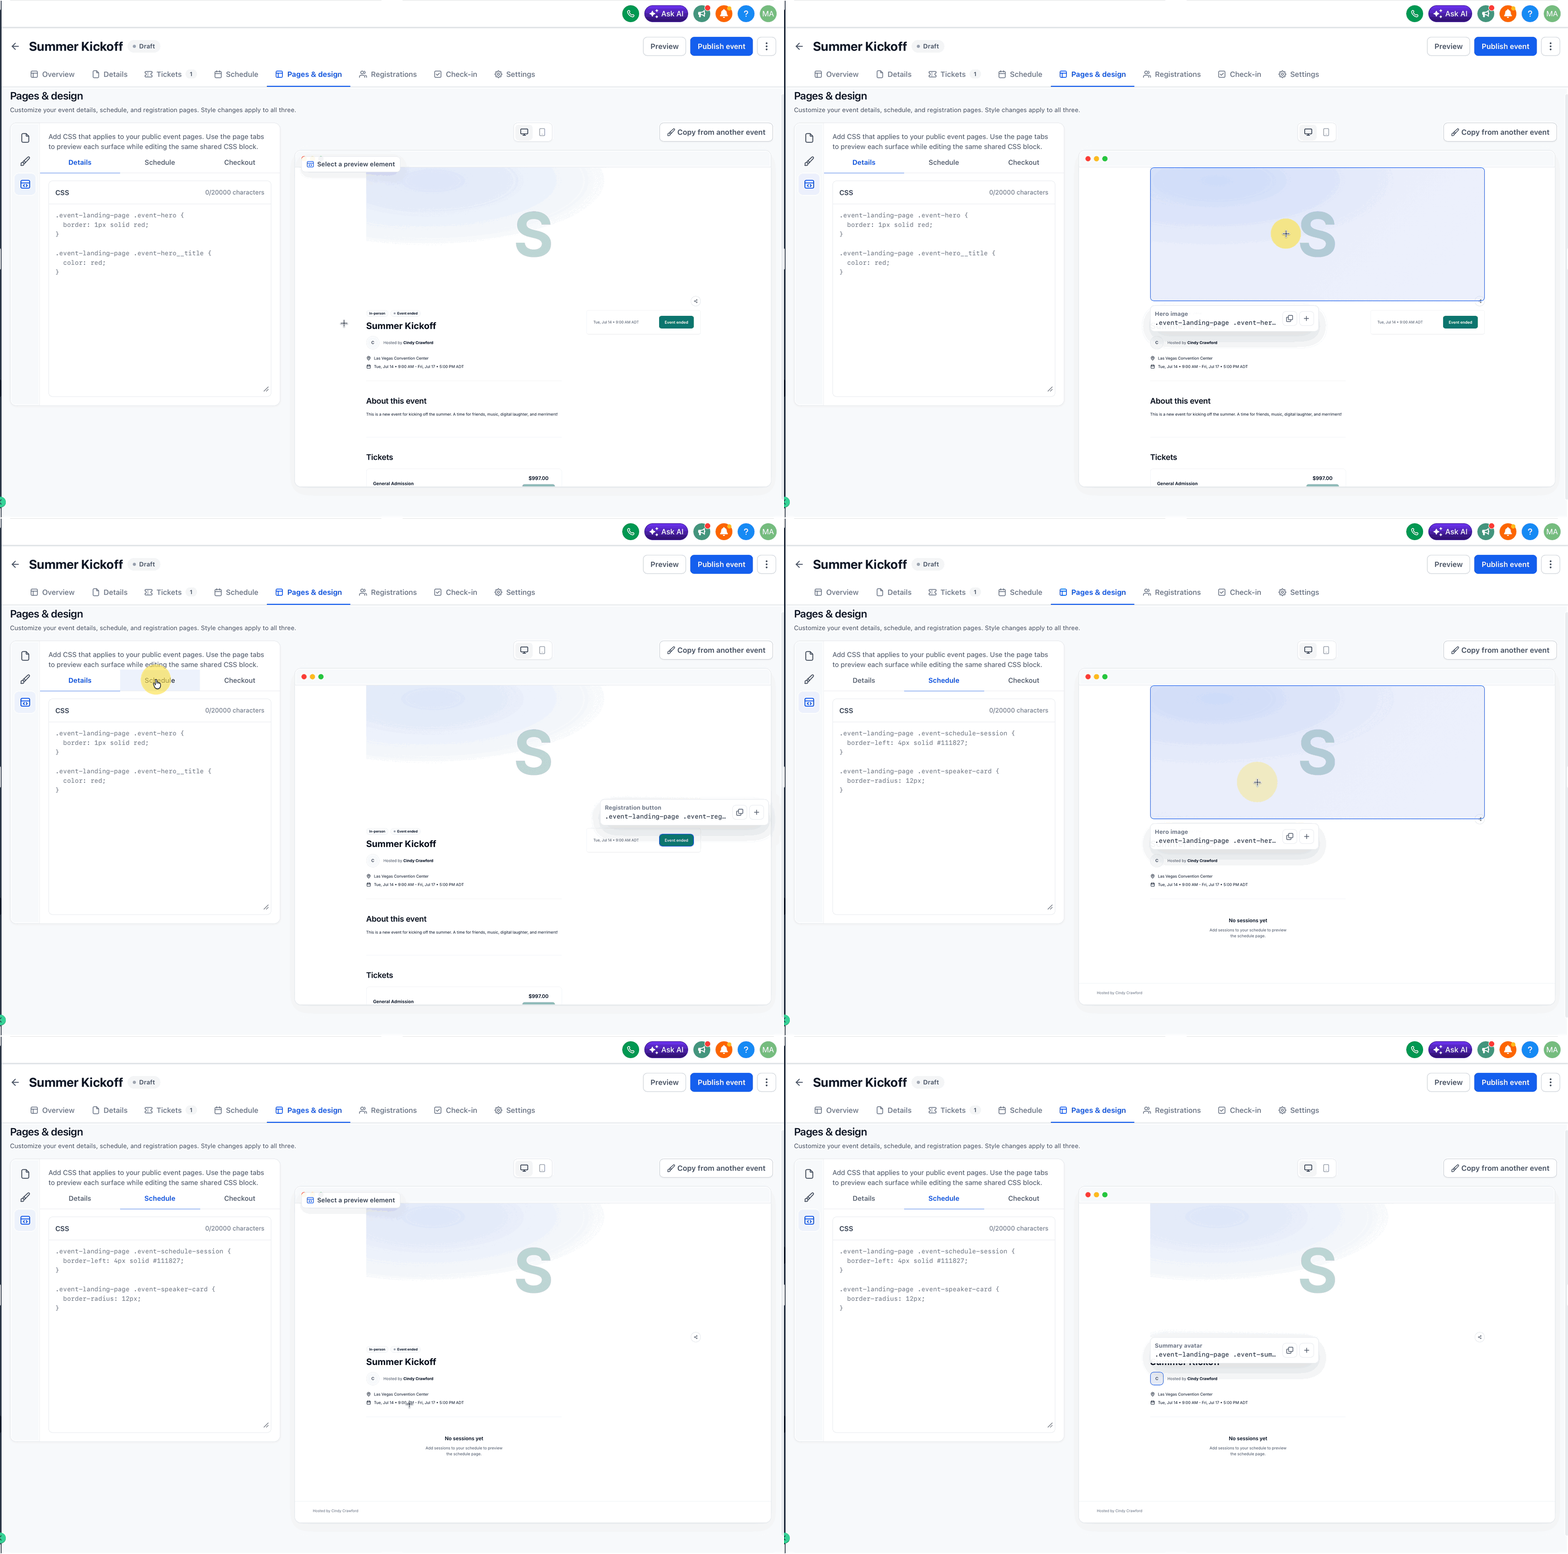
Add your custom CSS rules in the editor. You can write CSS manually or use the quick style presets (see next section) to generate starter code for common styling properties. Changes appear instantly in the preview pane.
Review your changes in real time using the preview pane. Once satisfied, save your custom CSS. The styles will apply to all public event pages automatically.
Use the click-to-select feature to quickly identify complex nested elements without inspecting the DOM manually.
Quick Style Presets
Quick style presets allow you to generate starter CSS code for commonly customized properties without writing CSS from scratch. After selecting an element, choose a preset to insert pre-configured CSS rules into the editor.
The following presets are available:
Inserts CSS rules to customize border width, style, and color for the selected element.
Generates CSS to change the background color or image of the selected element.
Inserts a CSS rule to modify the text color of the selected element.
Generates CSS to change the background and text color of buttons.
Inserts CSS to adjust the corner rounding of the selected element.
Generates CSS rules to modify padding and margin of the selected element.
Inserts a CSS rule to add or modify box shadow effects on the selected element.
Generates CSS to change font family, size, weight, and line height of the selected text element.
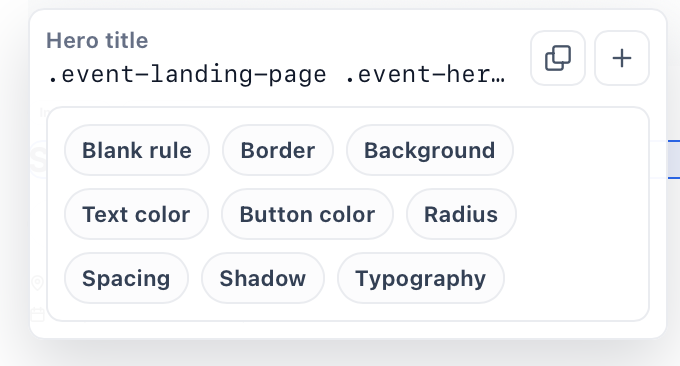
After inserting a preset, customize the generated CSS values to match your brand guidelines. The starter code provides a working foundation you can refine.
Public Page Coverage
Custom CSS applies globally to all public-facing event pages. This ensures consistent branding and styling across your event participant experience.
The following event page types support Custom CSS:
Copying and Duplicating Events with Custom CSS
When you duplicate an event or copy settings from another event, custom CSS is automatically retained. This allows you to quickly replicate your styling across multiple events without re-entering CSS code.
Use these workflows to preserve custom CSS:
When you duplicate an event, all custom CSS from the original event is copied to the new event. The duplicated event will have identical styling out of the box.
When you copy settings from one event to another, custom CSS is included in the copied settings. This allows you to apply an existing event's design to a new or different event.
After duplicating or copying settings, you can modify the custom CSS in the new event without affecting the original event's styles.
Frequently Asked Questions
Related Articles
Explore these articles to learn more about customizing your Events experience in HighLevel.
Was this article helpful?
That’s Great!
Thank you for your feedback
Sorry! We couldn't be helpful
Thank you for your feedback
Feedback sent
We appreciate your effort and will try to fix the article