Learn how to add staff, assign services, configure recurring and date-specific availability, set service-level options, and create reusable staff role badges.
A staff member must be assigned to an active service and location and have availability for that service before customers can book them.
What Is Staff Configuration in Services?
Staff configuration determines which team members can provide services, where they work, when they are available, and how they appear during customer booking.
Each staff profile can include:
- Contact and profile details
- Assigned services and locations
- Default and recurring availability
- Date-specific schedule changes
- Service-specific pricing and appointment limits
- Customer-facing staff role badges
Key Benefits of Configuring Staff
Centralized staff configuration keeps service assignments, schedules, pricing, and customer-facing information aligned with the booking experience.
- Staff Visibility: Show staff only for the services they can provide.
- Centralized Availability: Manage recurring schedules and one-time exceptions from the staff profile.
- Flexible Work Hours: Add multiple time blocks to support breaks or split shifts.
- Service-Level Controls: Configure individual pricing and appointment limits.
- Clear Staff Roles: Add concise role badges customers can understand quickly.
- Reusable Labels: Create a badge once and assign it to multiple staff members.
Prerequisites and Limitations
Confirm the staff profile, service assignments, availability, and badge limits before testing customer bookings.
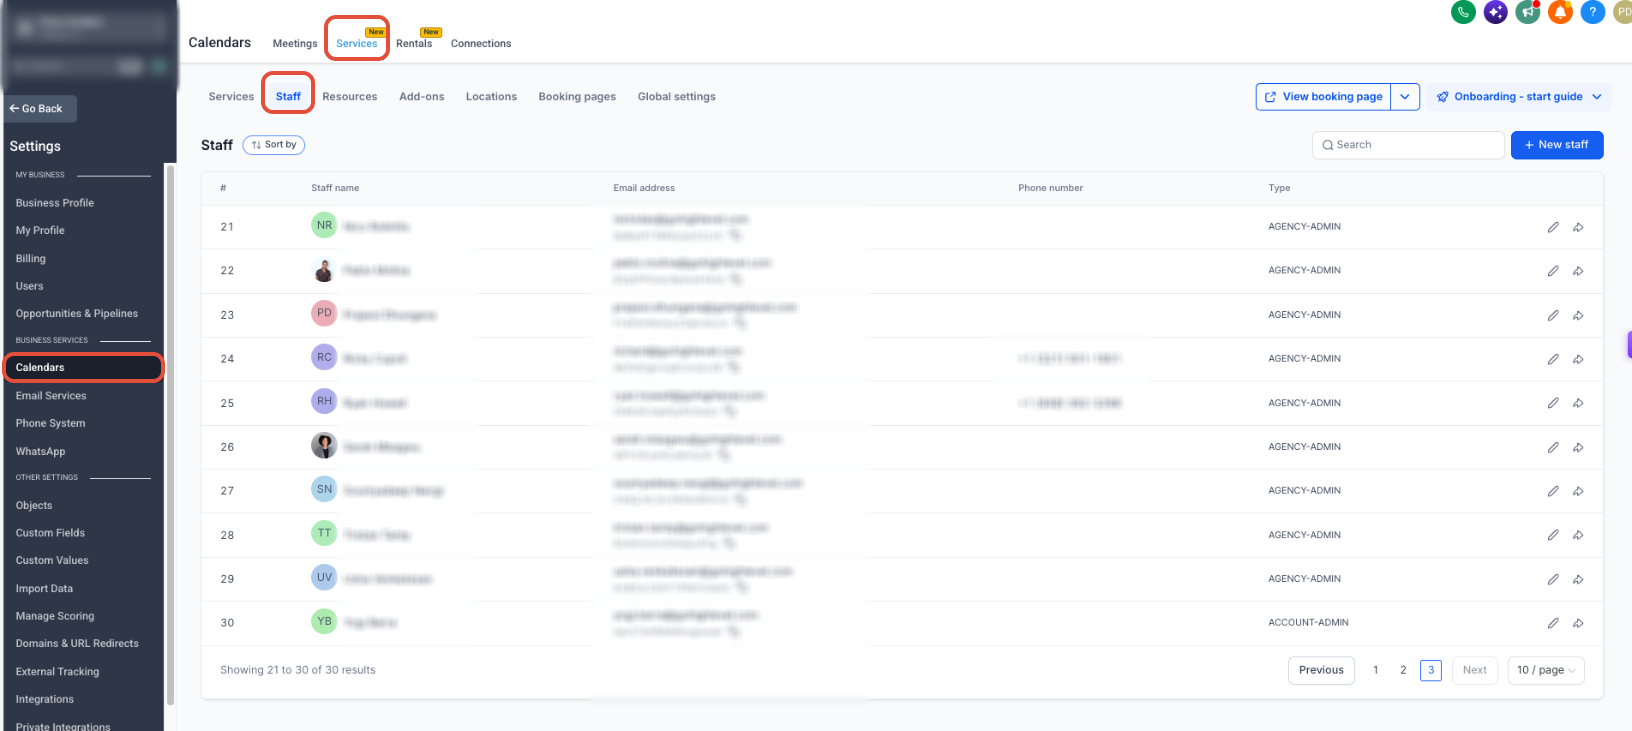
- Staff is managed under Calendar → Calendar Settings → Services → Staff.
- Each staff email address must be unique.
- The staff member must be assigned to at least one service and location.
- Availability must exist for the assigned service.
- Each staff member can have one role badge.
- Badge text can contain up to 30 characters.
- Reusable badges can have individual colors.
- Staff without a badge display normally without an empty placeholder.
How To Add and Configure Staff
Create the staff profile first, then assign services and configure the recurring or one-time availability that controls when the provider can be booked.
Step 1: Add or Edit a Staff Member
- Go to Calendar → Calendar Settings → Services → Staff.
- Add a staff member or click the pencil icon beside an existing staff member.
- Enter or update the name, email, phone number, timezone, profile picture, and custom booking URL.
- Save the staff profile.
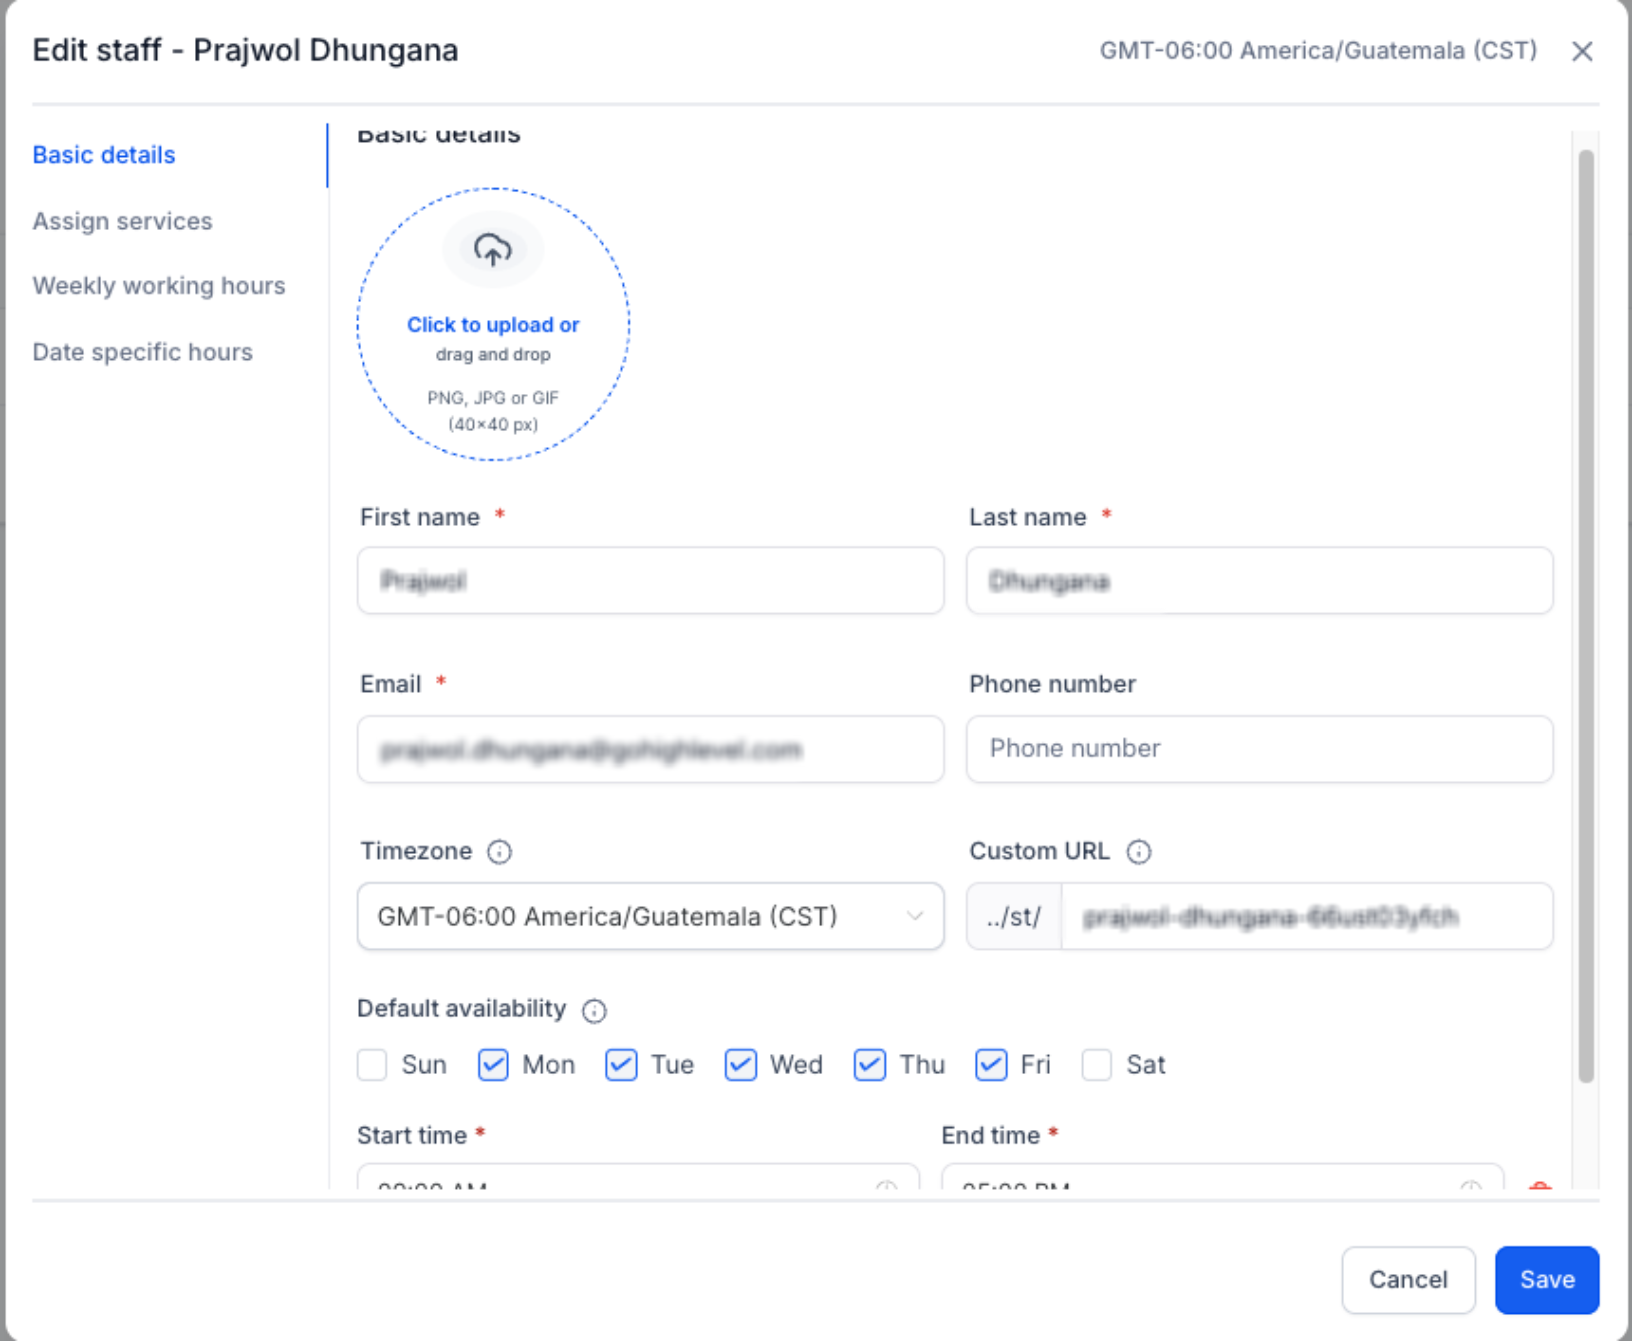
Default availability: When a staff member is added to a service, a starting schedule of 9:00 AM–5:00 PM is applied. Review and adjust those hours before publishing the booking page.
Step 2: Assign Services
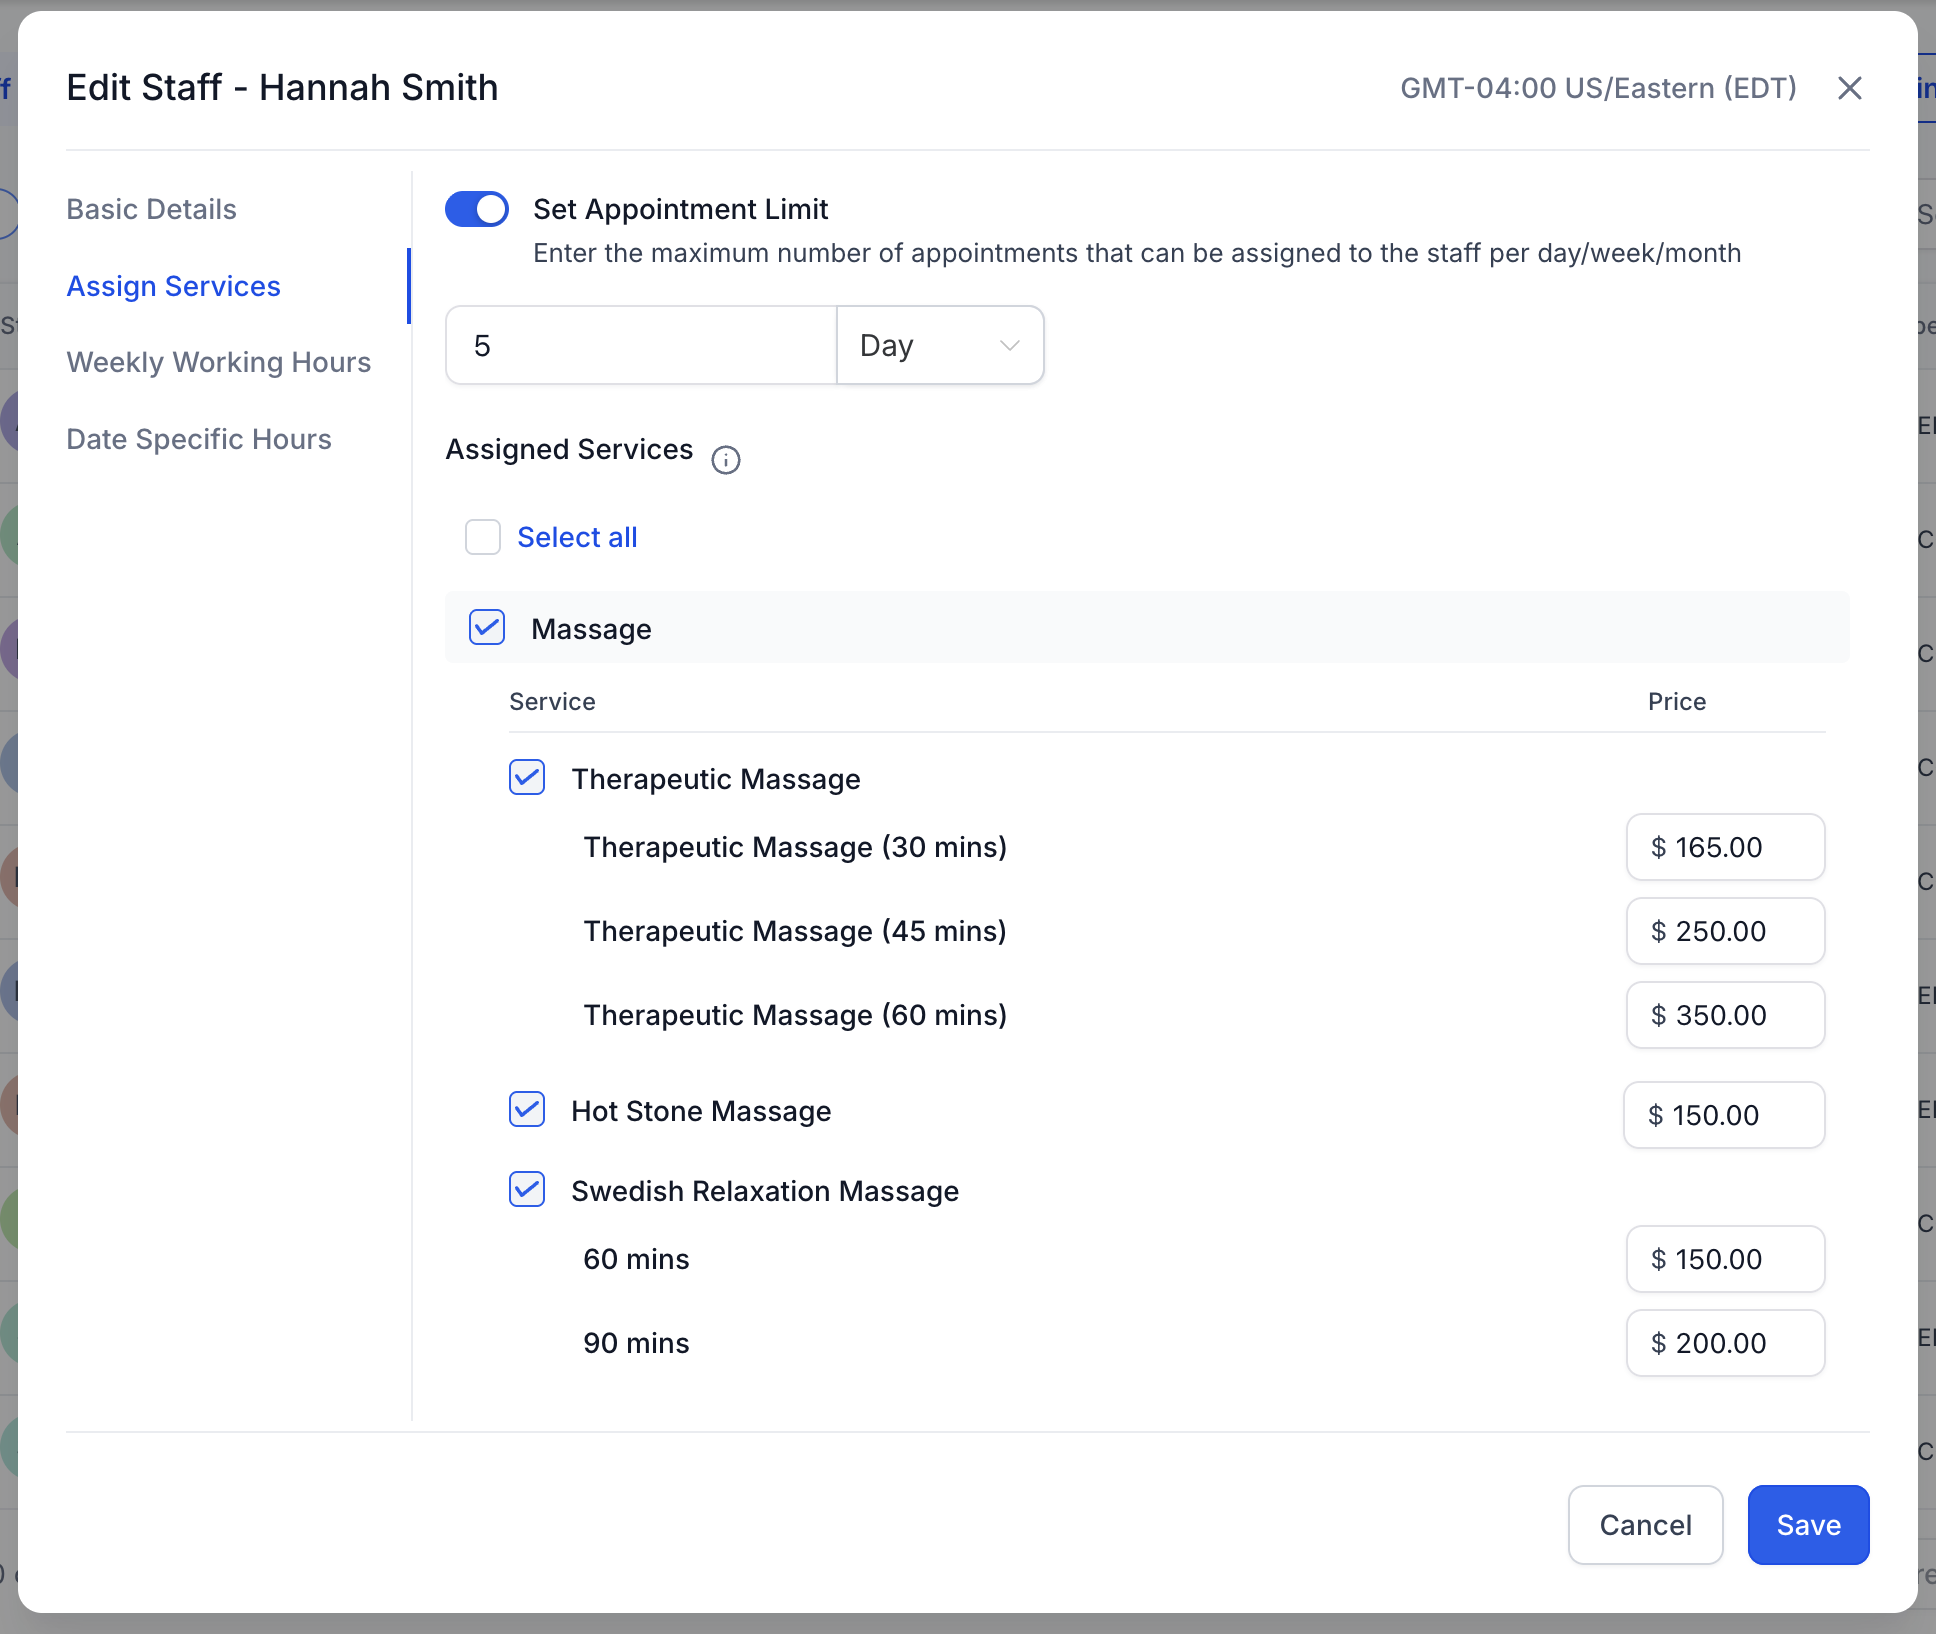
Service assignments determine which bookings the staff member can receive and expose staff-level pricing and appointment-limit options.
- Open the Assign Services tab.
- Select one or more services.
- Adjust service-specific pricing when needed.
- Set daily, weekly, or monthly appointment limits when needed.
- Save the changes.
Step 3: Configure Weekly Working Hours
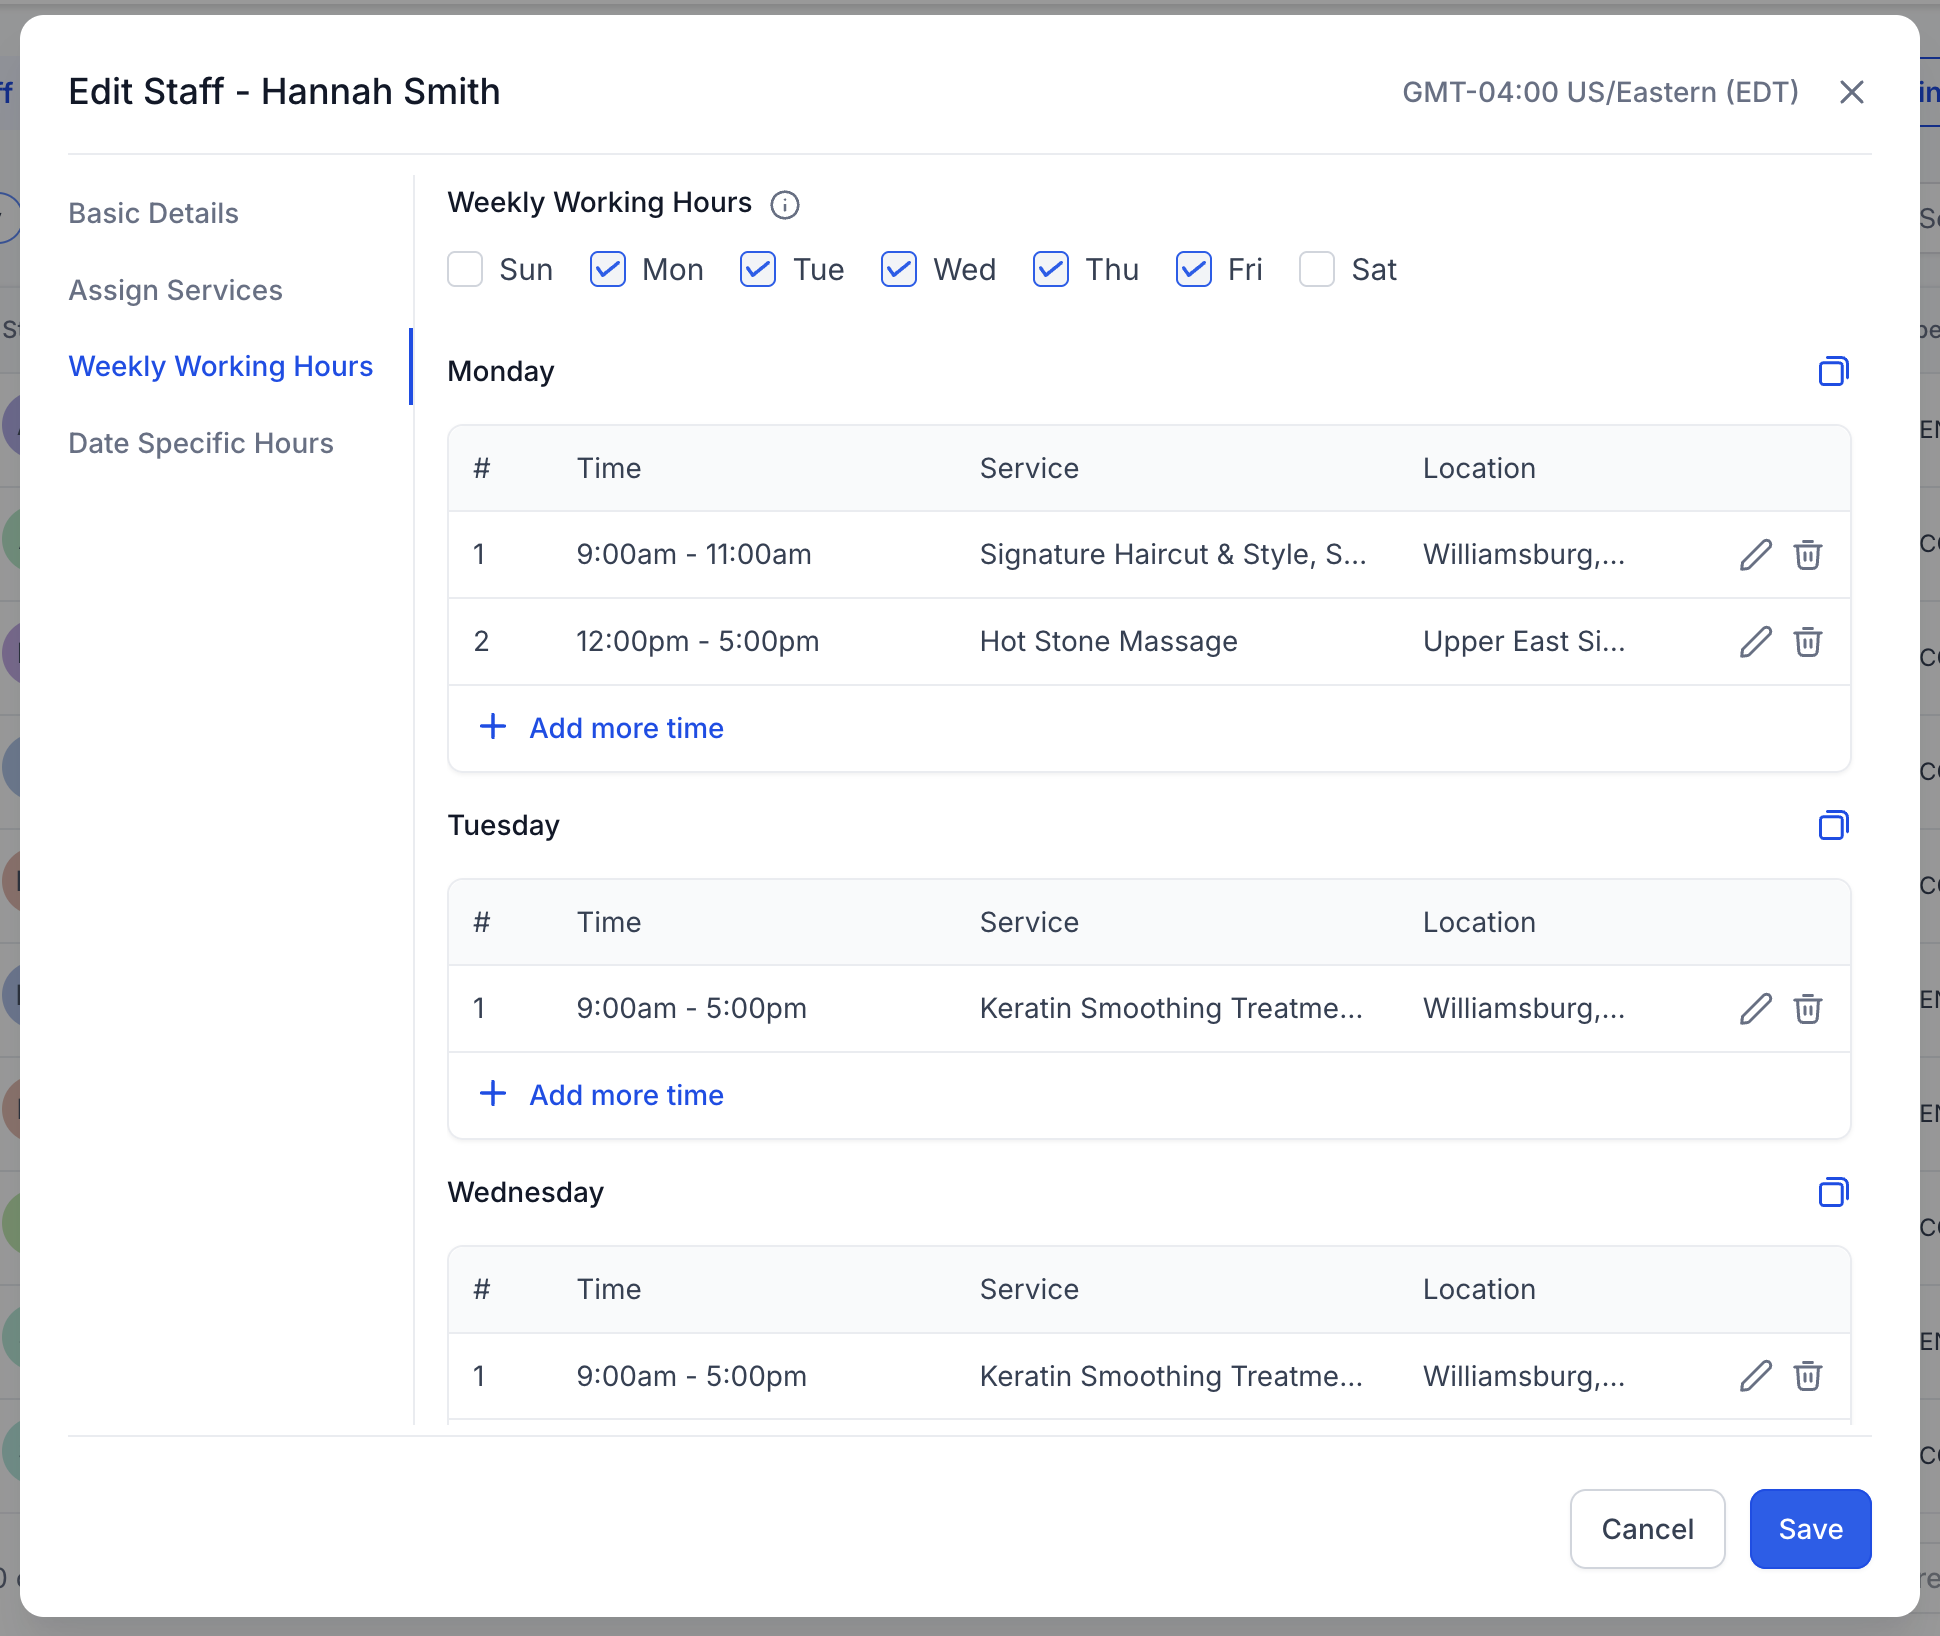
Weekly Working Hours define the recurring schedule that controls the staff member's regular bookability.
- Open Weekly Working Hours.
- Select the working days.
- Add one or more time blocks for each day.
- Assign the applicable services and locations.
- Save the schedule.
To create a break, use separate time blocks, such as 9:00 AM–12:00 PM and 1:00 PM–5:00 PM.
Step 4: Add Date-Specific Hours
Date-Specific Hours override the recurring weekly schedule for holidays, time off, extended hours, or other one-time changes.
- Open Date-Specific Hours.
- Select one or multiple dates.
- Mark the staff member available or unavailable.
- Set the applicable time blocks, services, and locations.
- Save the changes.
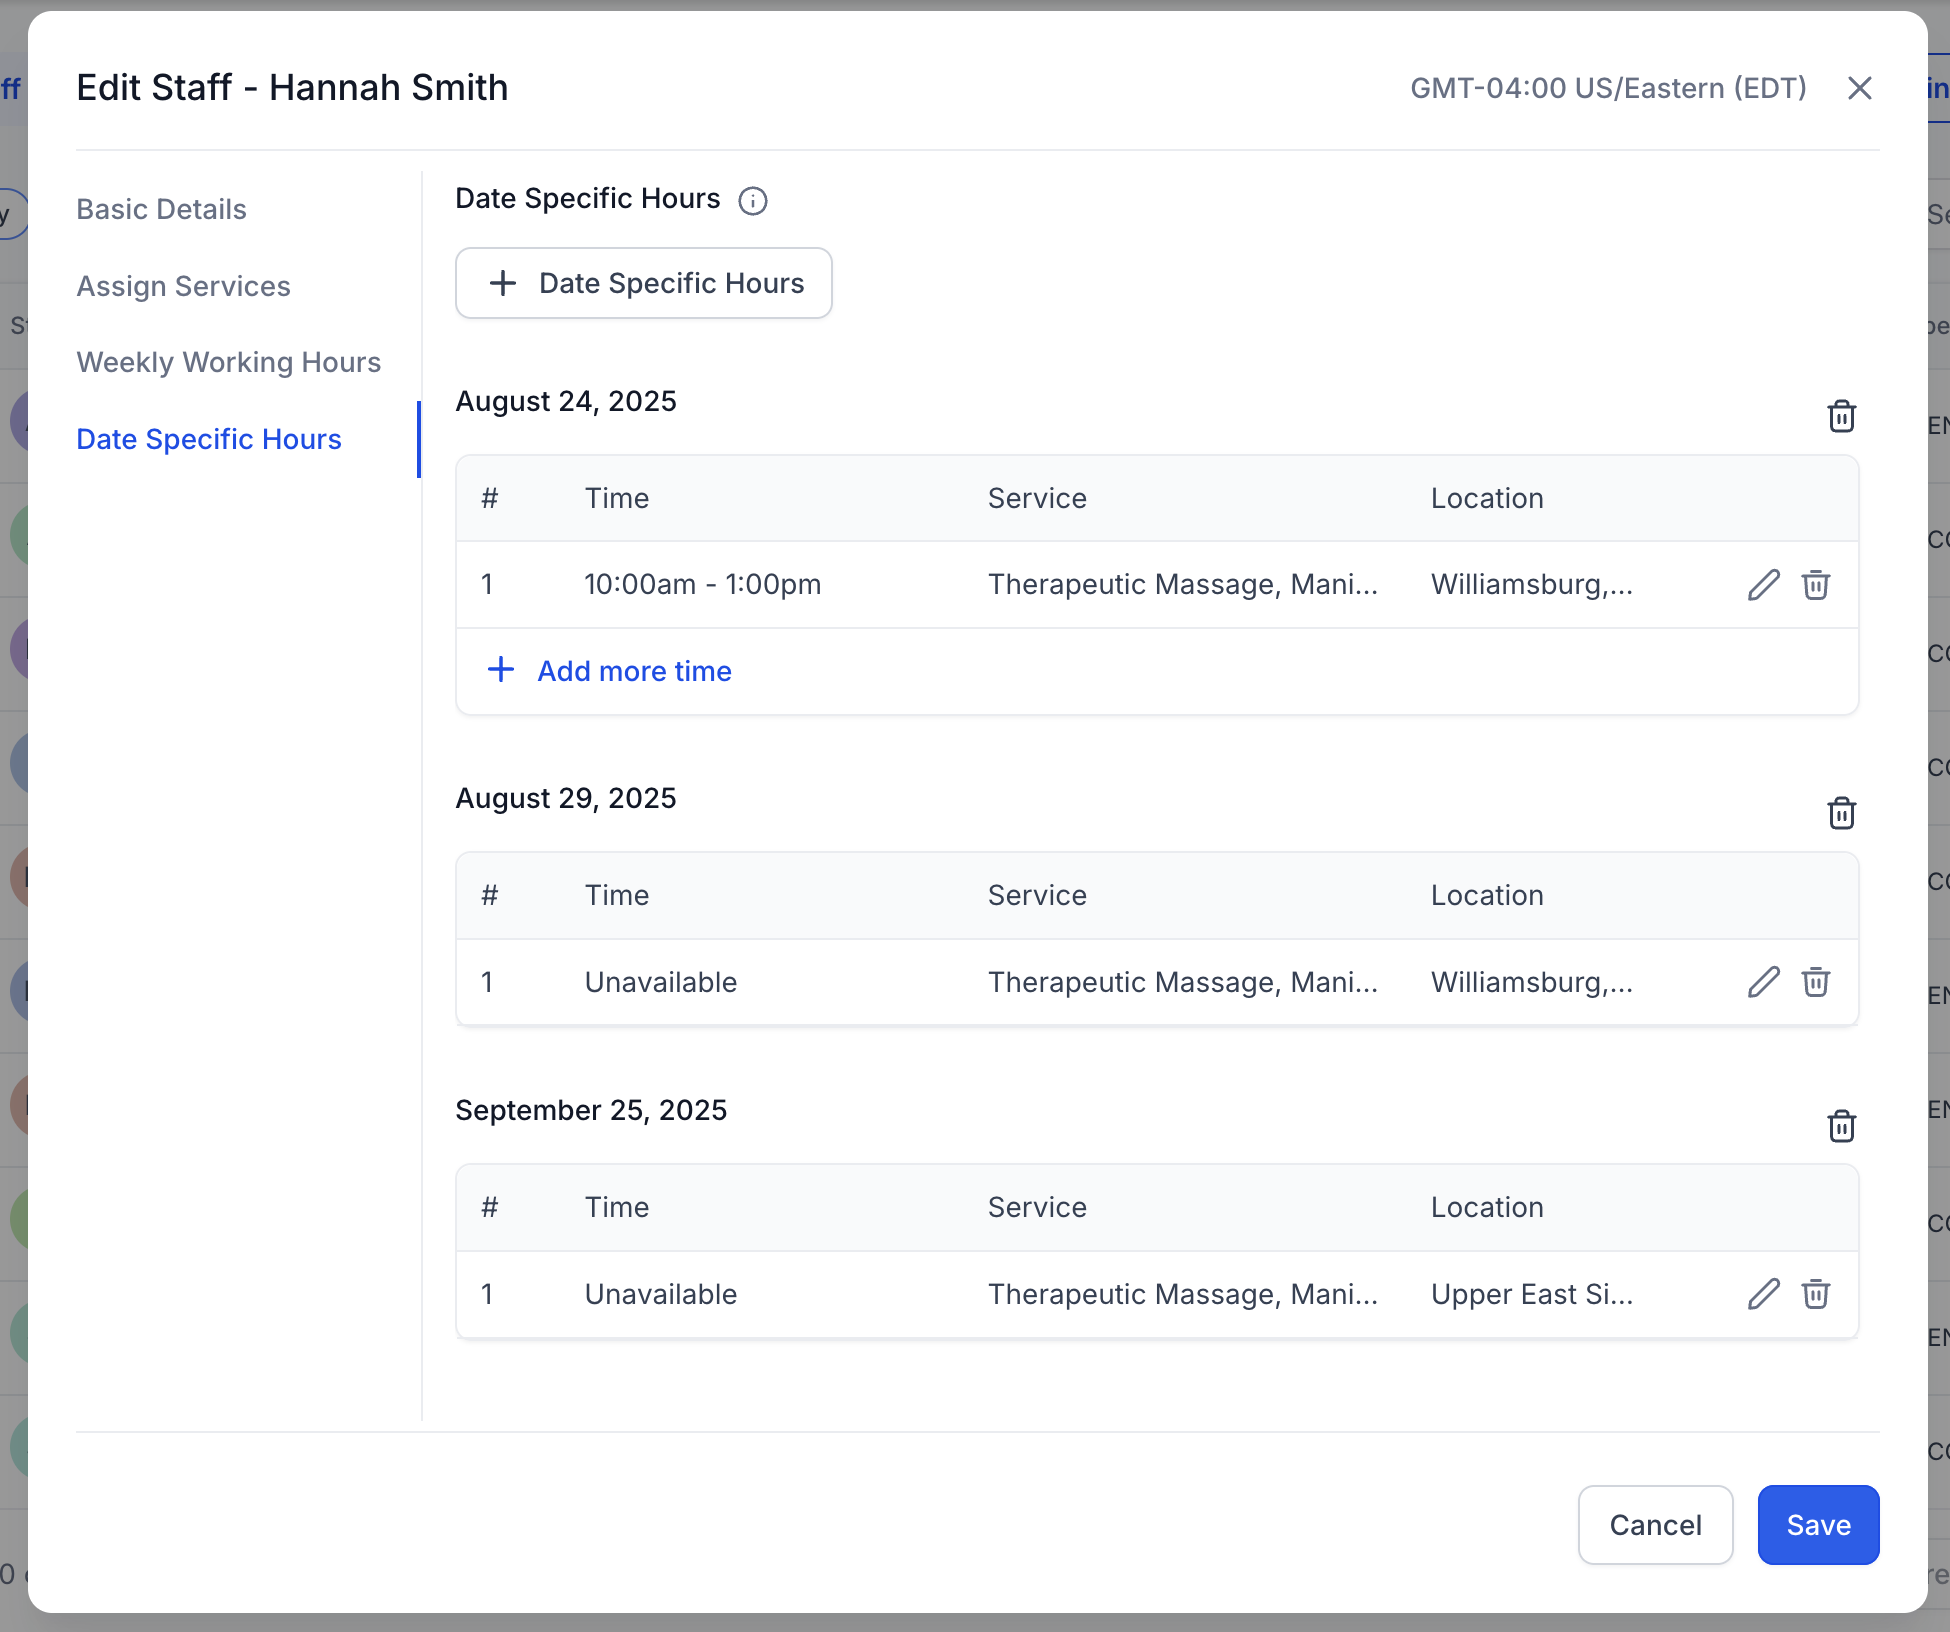
Availability priority: Date-Specific Hours override Weekly Working Hours for the selected date.
How To Add or Assign a Staff Role Badge
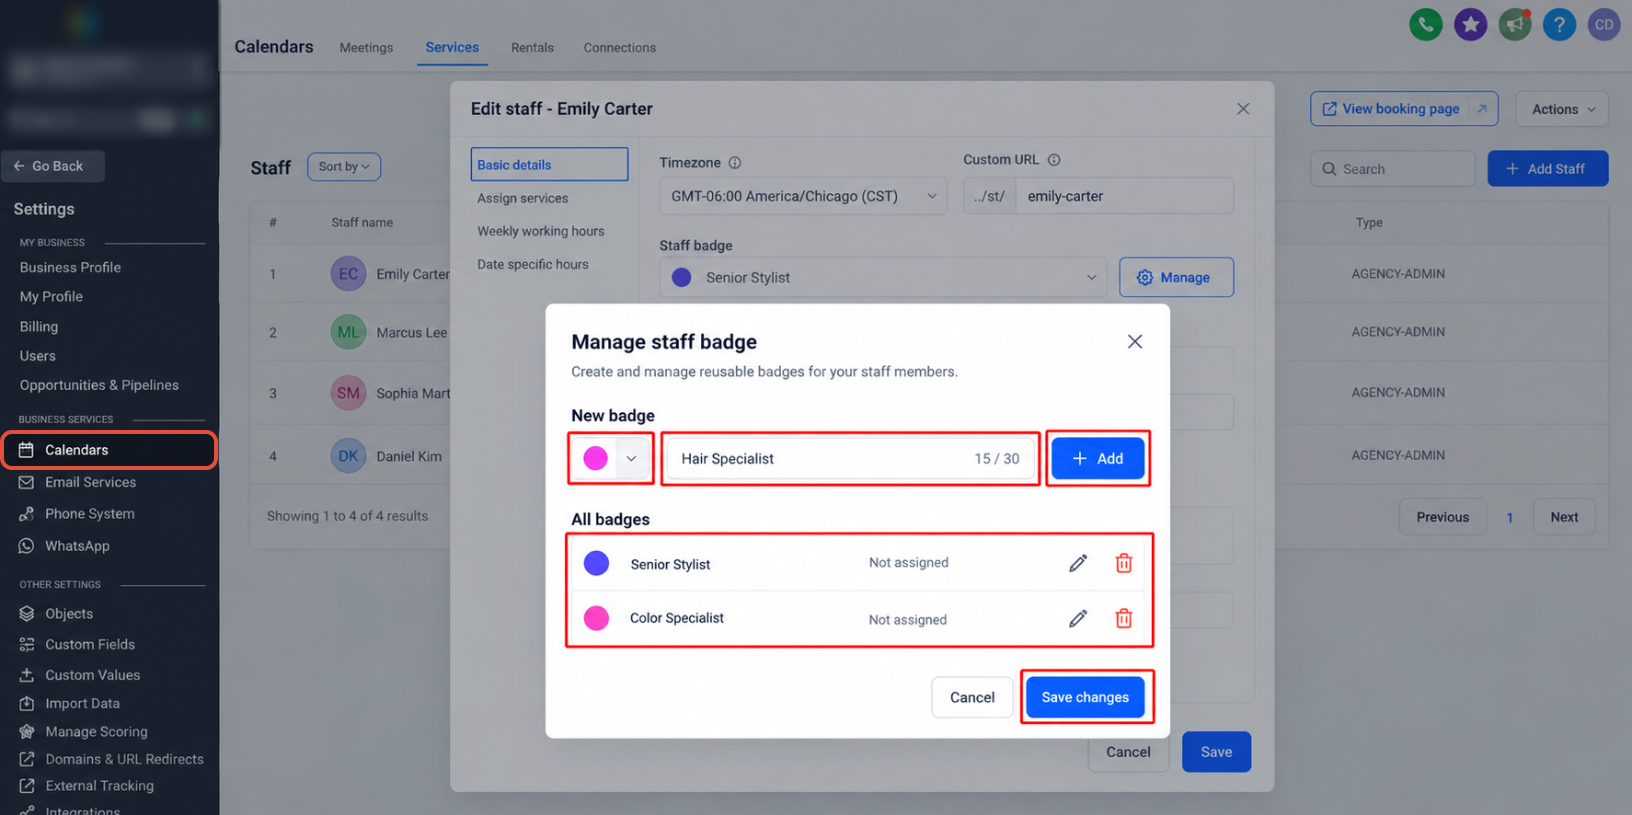
Staff role badges provide concise context such as Lead Therapist or Senior Consultant when customers choose a provider. Badges are reusable and can be assigned from the staff member's Basic details.
- Go to Calendar → Calendar Settings → Services → Staff.
- Click the pencil icon beside the staff member.
- Open Basic details.
- Open the Staff badge dropdown.
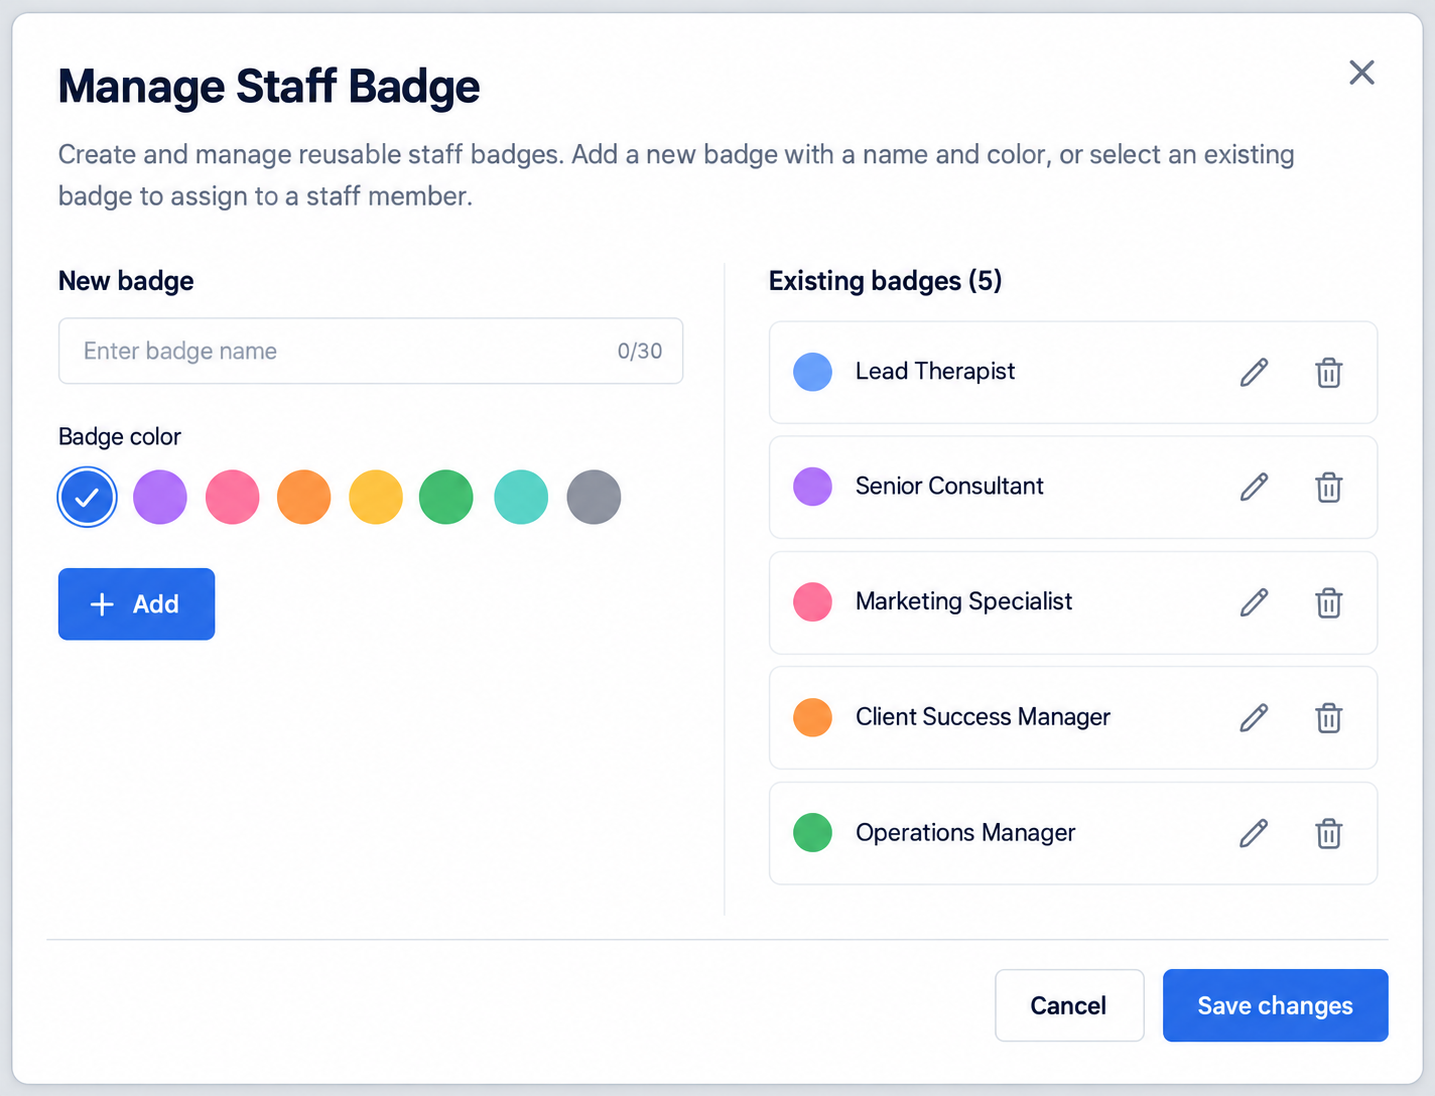
To use an existing badge, select it from the dropdown and save the staff profile.
To create a reusable badge:
- Select Manage.
- Enter the badge name under New badge.
- Keep the name within the 30-character limit.
- Select a color.
- Click + Add.
- Click Save changes.
- Select the new badge from the Staff badge dropdown.
- Save the staff profile.
How Staff Role Badges Appear During Booking
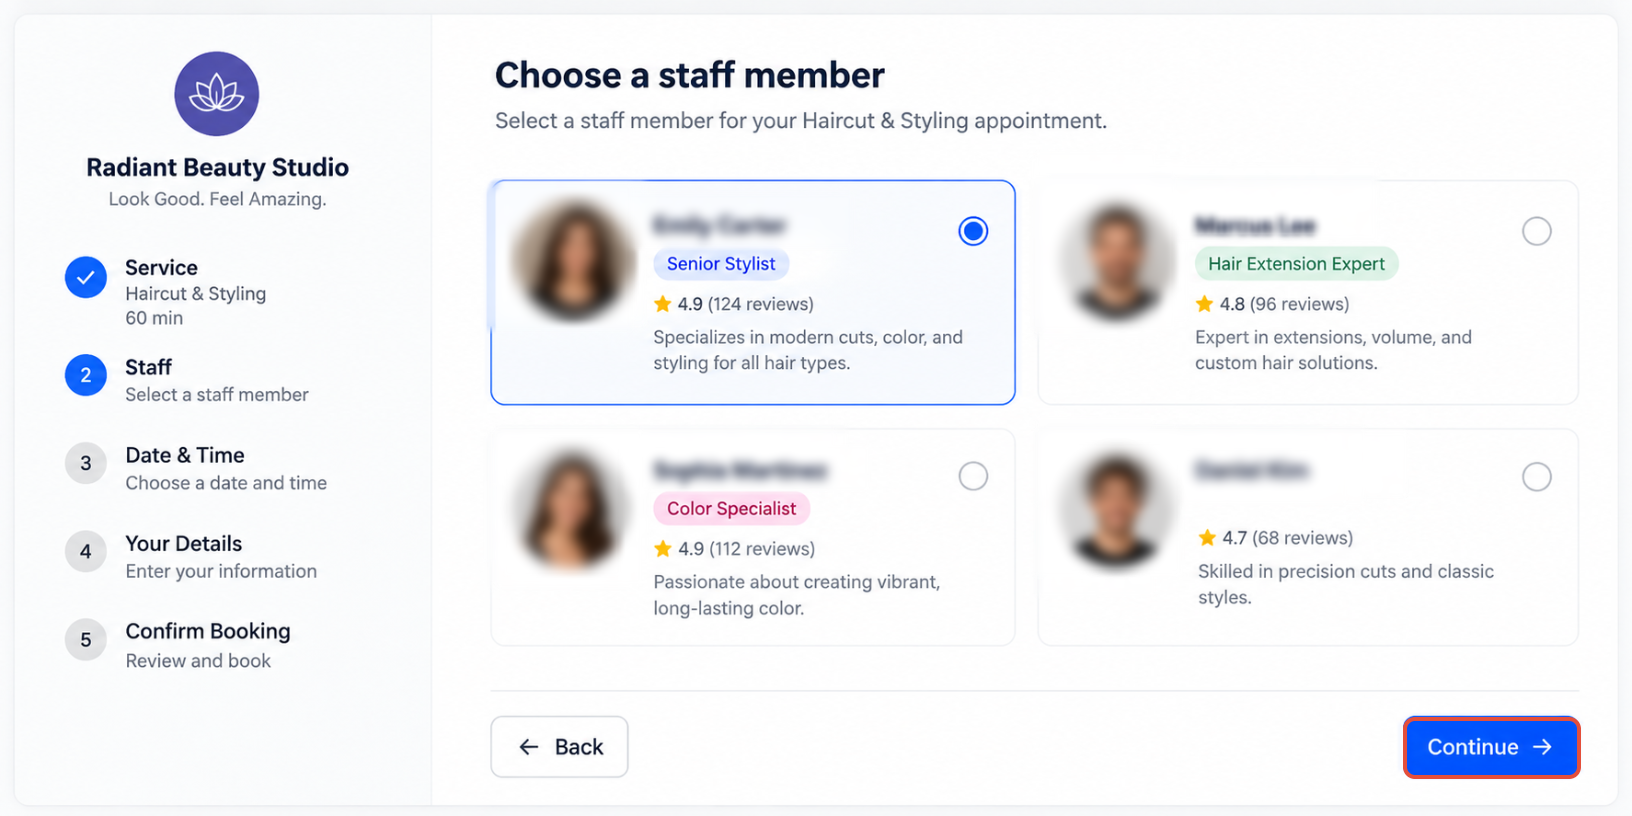
Assigned role badges appear on staff cards during the customer-facing staff-selection step, helping customers distinguish between available providers before choosing who to book with.
- The badge appears on the staff member's booking card.
- The customer-facing badge uses a lighter shade of the booking widget's primary color.
- Staff without a badge display normally without an empty placeholder.
- Changes appear the next time the booking widget loads.
- Badges display on desktop and mobile booking layouts.
Staff selection: Enable Allow customers to pick who they book with under Global Settings → Booking Page.
Frequently Asked Questions
Was this article helpful?
That’s Great!
Thank you for your feedback
Sorry! We couldn't be helpful
Thank you for your feedback
Feedback sent
We appreciate your effort and will try to fix the article