This article will help you add an additional custom domain or sub-domain to your WordPress site hosted through our platform.
Follow the instructions below to successfully link your domain, verify your SSL certificate, and set it as your primary web address.
? Step-by-Step Connection Guide
Step 1: Initiate the Domain Setup
Navigate to your WordPress dashboard and locate the domains section. Click on the Add Domain button to begin.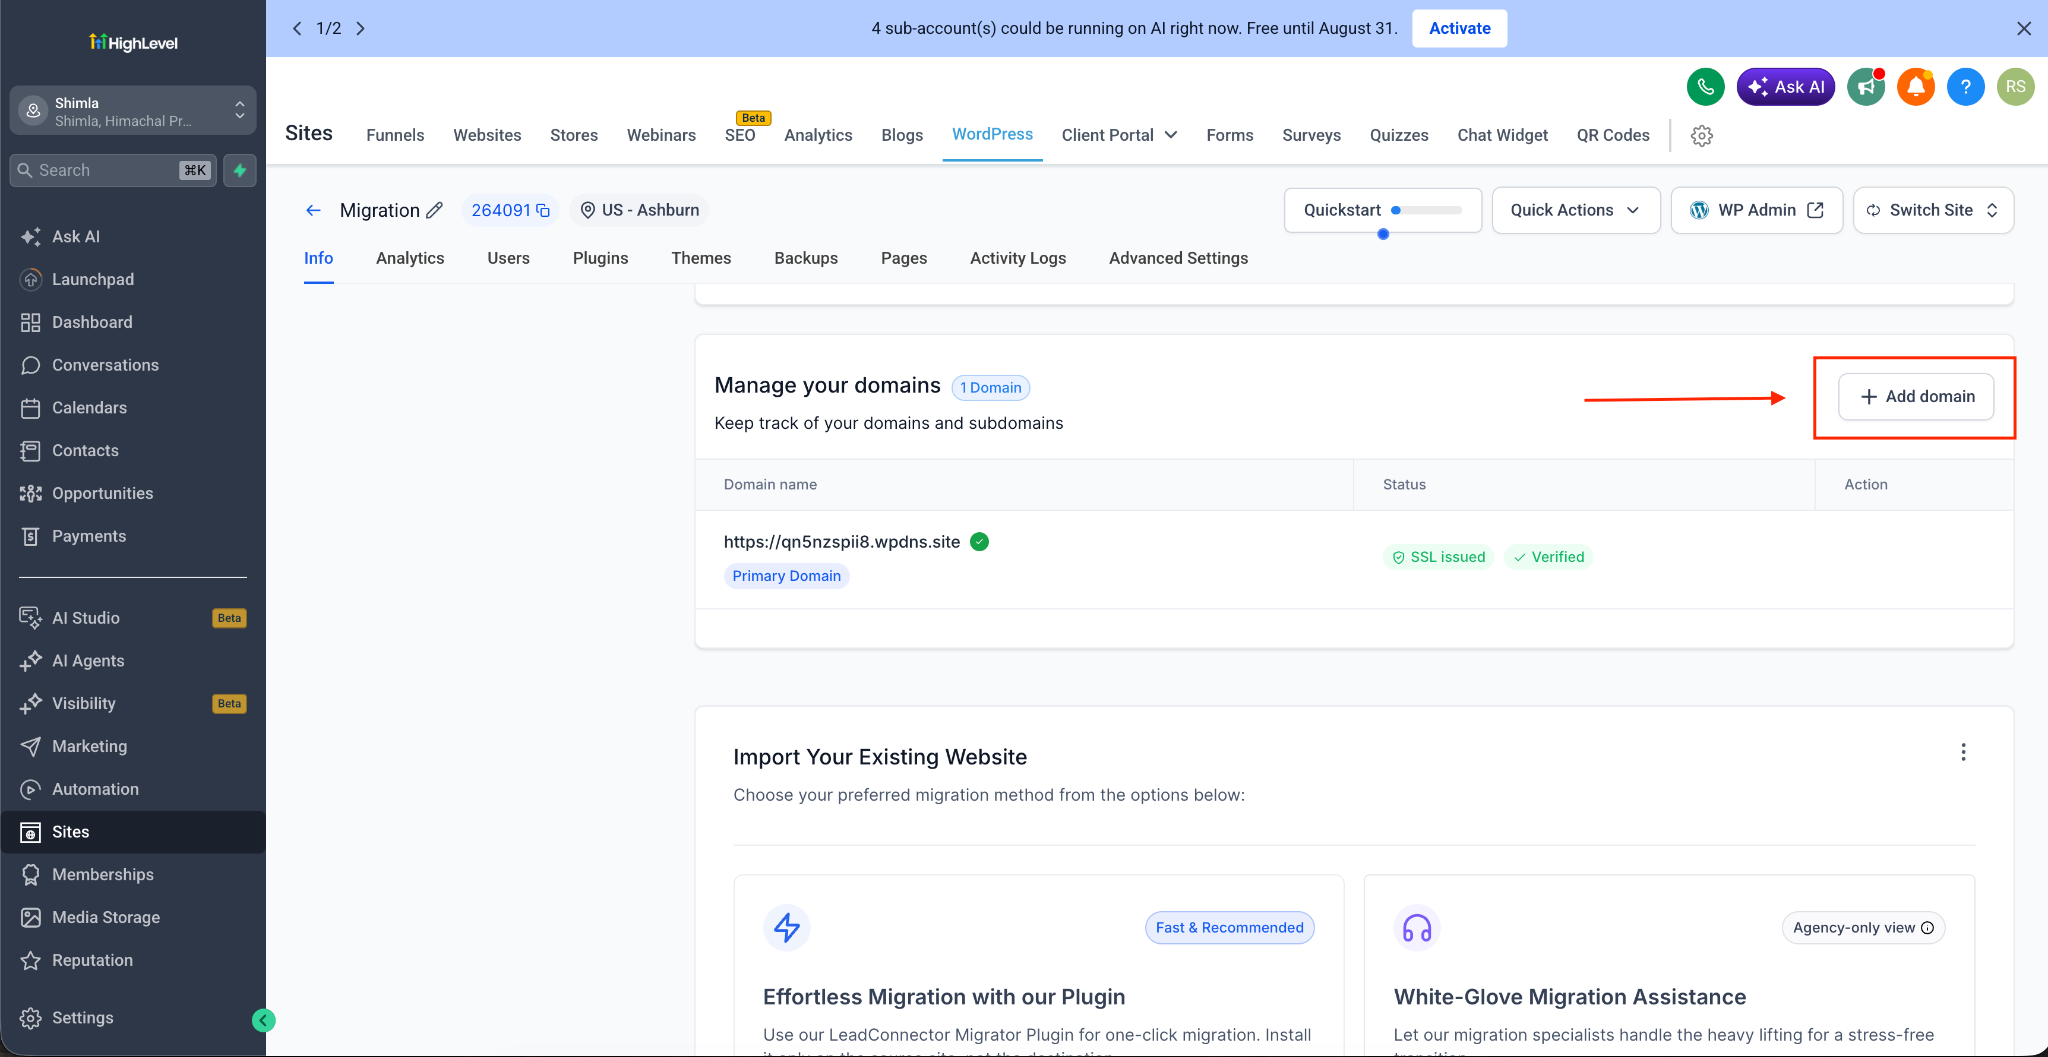
Step 2: Enter Your Domain Name
Enter the exact domain or sub-domain name you wish to connect to your WordPress site.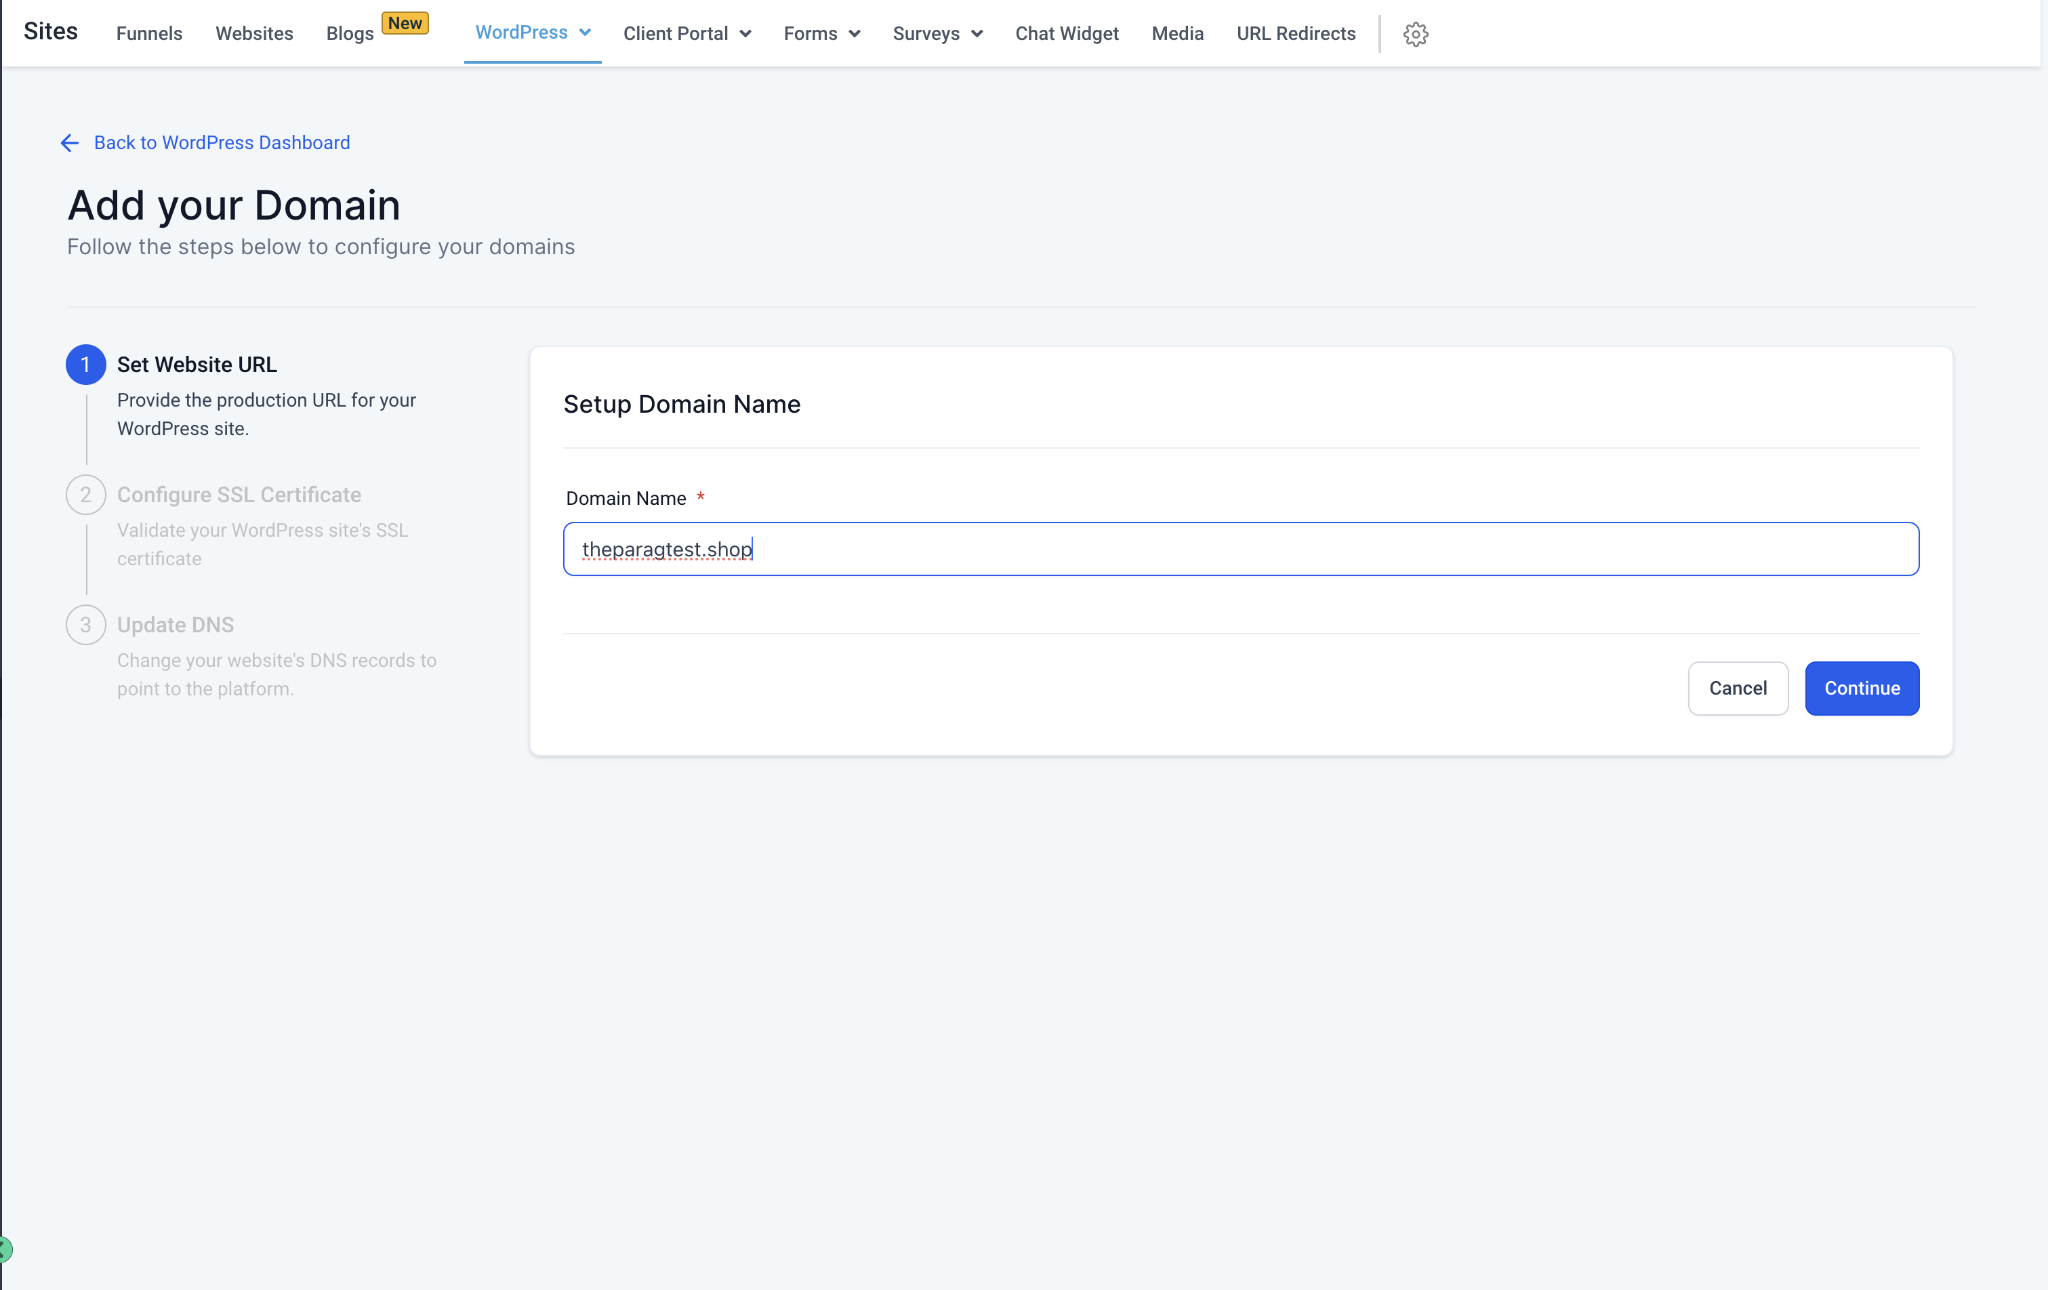
Step 3: Generate and Copy Your DNS Records
Once you enter your domain, the system will dynamically generate the specific DNS records required for your site. These records will be displayed directly on your dashboard. Note: The exact records (such as an A Record or CNAME) and values might look different depending on your specific server routing (e.g., wp1, wp2, etc.). Always use the exact Key and Value pairs shown on your screen.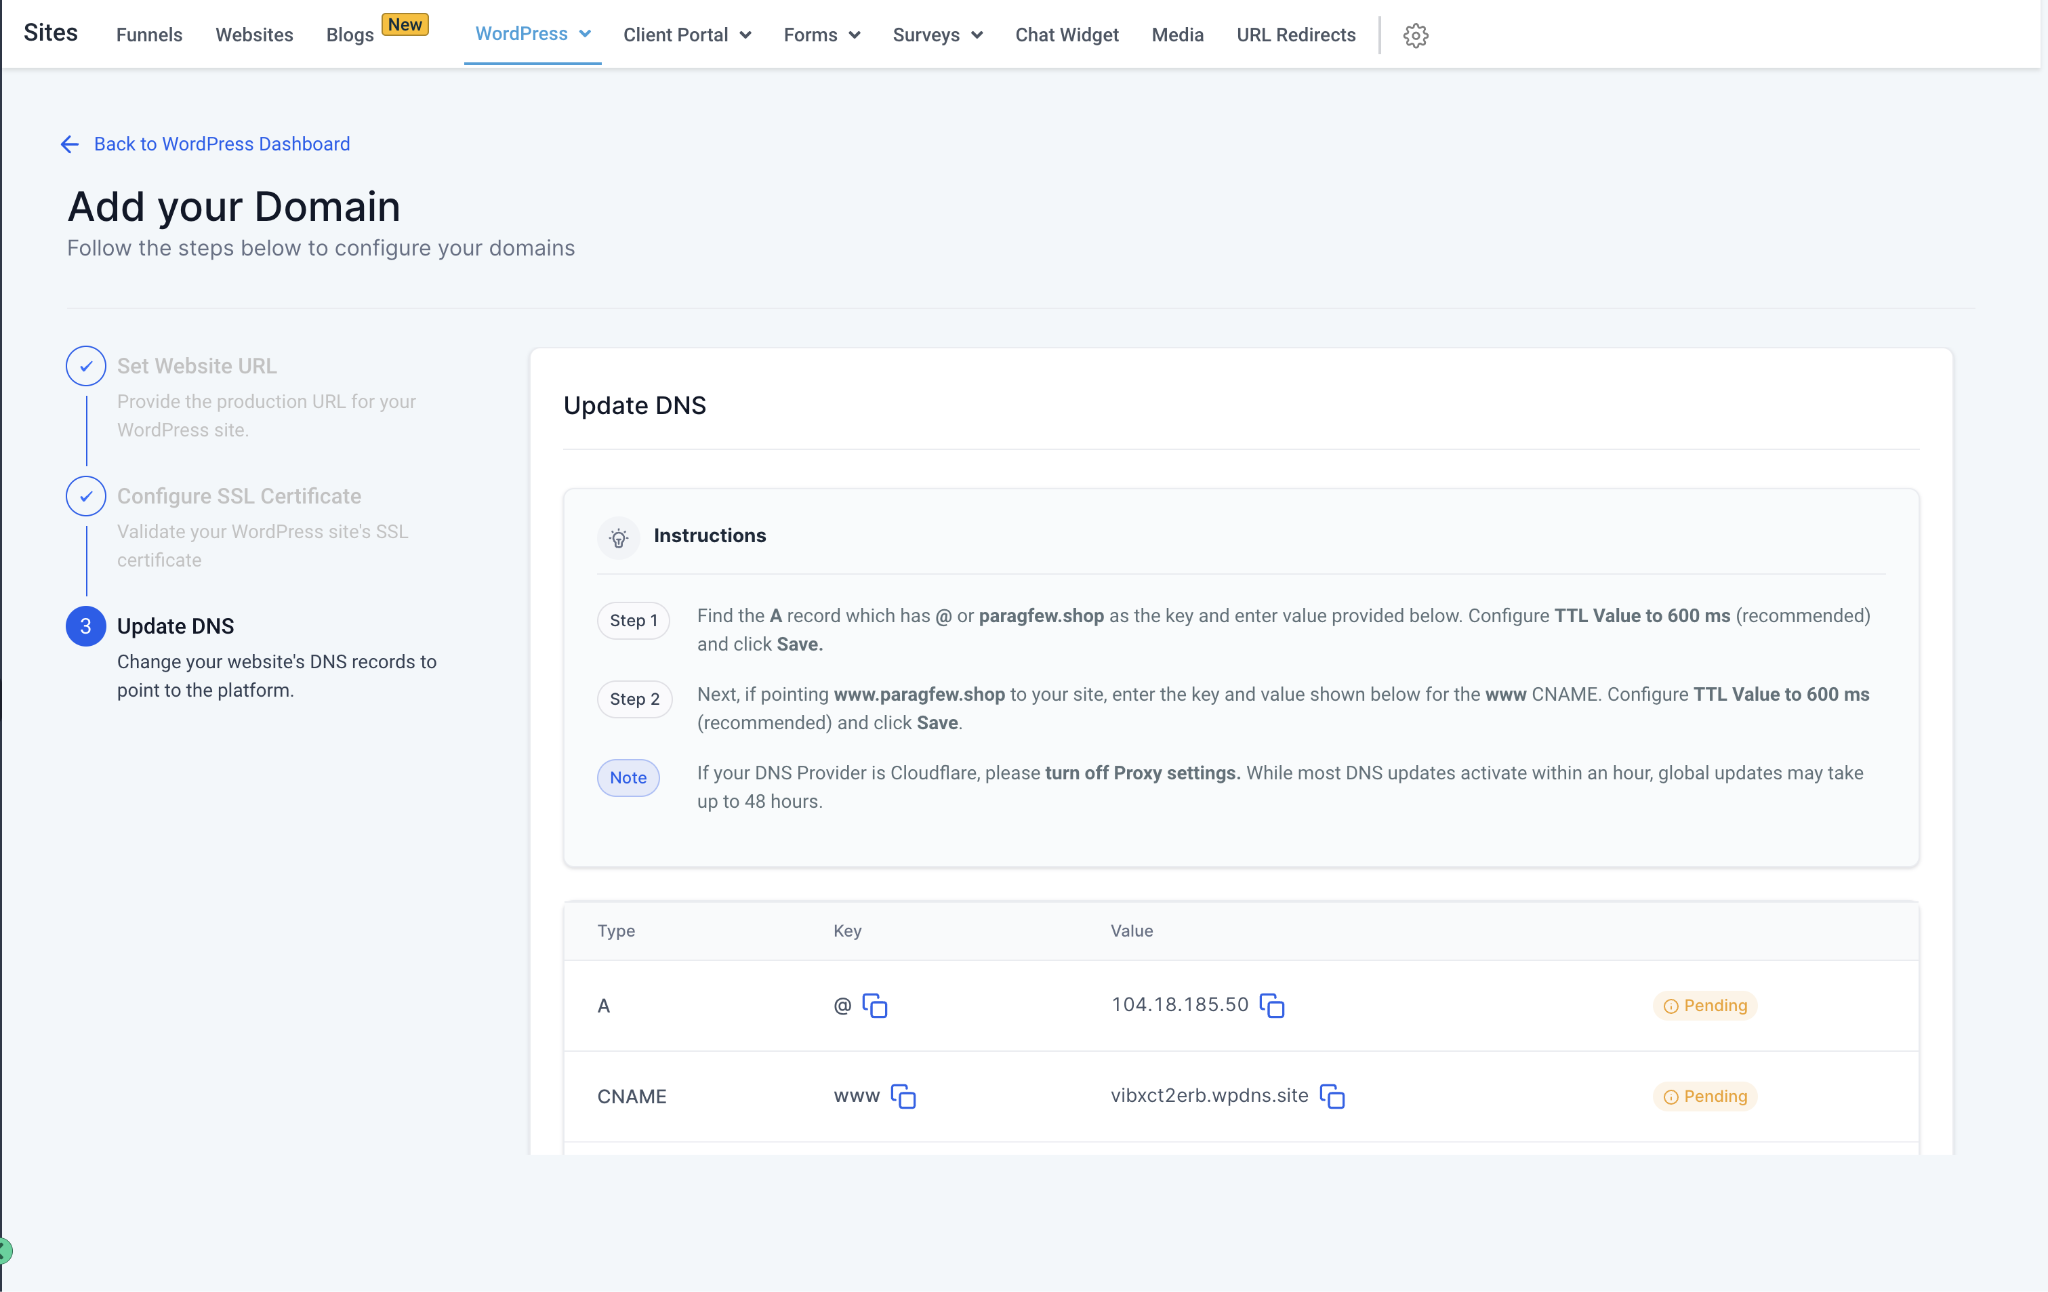
Step 4: Update Your DNS Provider
Log in to your domain registrar (e.g., GoDaddy, Cloudflare, Namecheap) and paste the copied Key and Value records into your DNS settings.
Step 5: Confirm and Verify
Return to your HighLevel WordPress dashboard. Check the confirmation box stating that you have successfully added the records to your DNS provider. Then, hit Verify (or Verify Certificate).
Step 6: Set as Primary Domain (Optional)
Once the domain is successfully verified and the SSL certificate is active, a popup will appear. You can choose to set this newly added domain as your Primary Domain right from this screen.
⏱️ A Note on DNS Propagation
DNS providers can take anywhere from a few minutes up to 24 - 48 hours to fully propagate these changes globally. While some providers are instant, others take time.
You can use free online tools like DNS Checker to monitor your domain's propagation status worldwide.
? Common Issues & Troubleshooting
If you've added the records but the domain is still not verifying, it is usually due to one of the following reasons:
Typo in the Domain Name: Double-check the spelling of the domain you entered in the dashboard versus what you own. Fixing a simple typo will often resolve the issue immediately.
DNS Changes Haven't Propagated: If you just made the changes, you may need to wait a few hours (or up to a day) and try verifying again.
Incorrect DNS Configuration: Ensure the Key and Value pairs were pasted exactly as they appeared on your dashboard without any extra spaces. If you are stuck, reach out to your domain provider's support team.
Conflicting (Multiple) Records: You cannot have conflicting records pointing to the same destination. For example, if blog.mydomain.com has a new CNAME record pointing to us, but it also has an old A record pointing to a previous host, the connection will fail. Removing the duplicate/old record will fix your issue.
? Guides for Popular DNS Providers
If you need help navigating your specific domain registrar, here are some helpful guides:
Cloudflare: Managing DNS Records in Cloudflare
Bluehost: DNS Management in Bluehost
HostGator: How to Change DNS Records in HostGator
GoDaddy: Add a CNAME Record in GoDaddy
Namecheap: How to Create a CNAME Record in Namecheap
(Note: Please link the placeholders above to the respective support articles in your actual help center).
Was this article helpful?
That’s Great!
Thank you for your feedback
Sorry! We couldn't be helpful
Thank you for your feedback
Feedback sent
We appreciate your effort and will try to fix the article