AI-Powered WordPress Page Builder helps you create WordPress landing pages faster with AI in HighLevel. This article shows how to generate a page, customize its content and style, and continue editing it in Elementor.
TABLE OF CONTENTS
- What is AI-Powered WordPress Page Builder?
- How To Use AI-Powered WordPress Page Builder
- Preview, Publish, and Unpublish an AI-Generated Page
- How to Provide Feedback on AI-Generated Pages
- Frequently Asked Questions
- Related Articles
What is AI-Powered WordPress Page Builder?
AI-Powered WordPress Page Builder lets you generate WordPress landing pages with AI inside HighLevel. After generation, new AI Pages are created in Draft mode by default so you can review, customize, and preview them before publishing. When a page is ready, you can publish it or unpublish it later when you need to take it offline.
Important: Draft & Preview Mode for AI Pages requires LeadConnector plugin version 4.0.3 or later.How To Use AI-Powered WordPress Page Builder
A clear setup process helps you create a stronger first draft, guide the AI more effectively, and make faster updates after the page is generated.
Go to Sites > WordPress > All Sites.

Click Manage Website.

Go to Pages.
Select AI Generated Pages.
Click Generate New AI Page.

Enter the page details:
Add the Page Name.
Add the Custom Site Slug.
Add the Name of Business.
Click Next.

Choose your design preferences:
Select your business niche.
Select your business goal.
Select how the content should feel.
Click Next.

Describe the page you want: Enter a plain-language prompt describing the type of page you want the AI to create. Include important details such as offers, sections, services, brand style, or calls to action.
Click Improvise if you want HighLevel to improve your prompt.Click Generate Page.

Review the generated page. New AI-generated pages are created in Draft mode by default, so the page can be reviewed and customized before it is published.
Use the Customizations panel to update content and styles.
Content options:
Edit generated text directly in the editor.
Use Refine to improve selected copy.
Use rewrite options such as Shorten or Elaborate when available.
Use Change Tone to adjust the voice of the content.
Available tone options include:
Professional
Friendly
Compelling
Confident
Customize an AI-generated image:
Hover over the image you want to replace.
Click Regenerate Image.
In the Generate custom image window, choose one of the following options:
Generate with AI: Describe the image you want under Describe your vision, then click Regenerate.
Upload image: Select an image from your device. Supported formats include JPEG, PNG, WebP, and GIF, up to 10 MB.
Review the replacement image in Live preview.
Click Insert image to replace the selected image.
Click Save Changes to apply the update.
You can replace individual images without regenerating the entire page.
Style options:
Open the Styles tab inside Customizations.
Choose from available color palettes such as Default, Marine, Nature, and Earth.
- Preview palette changes live across headings, body text, buttons, backgrounds, and accent colors.
Click Update Page to apply styling changes.
Click Save Changes, Update Page, or Save & View as needed.
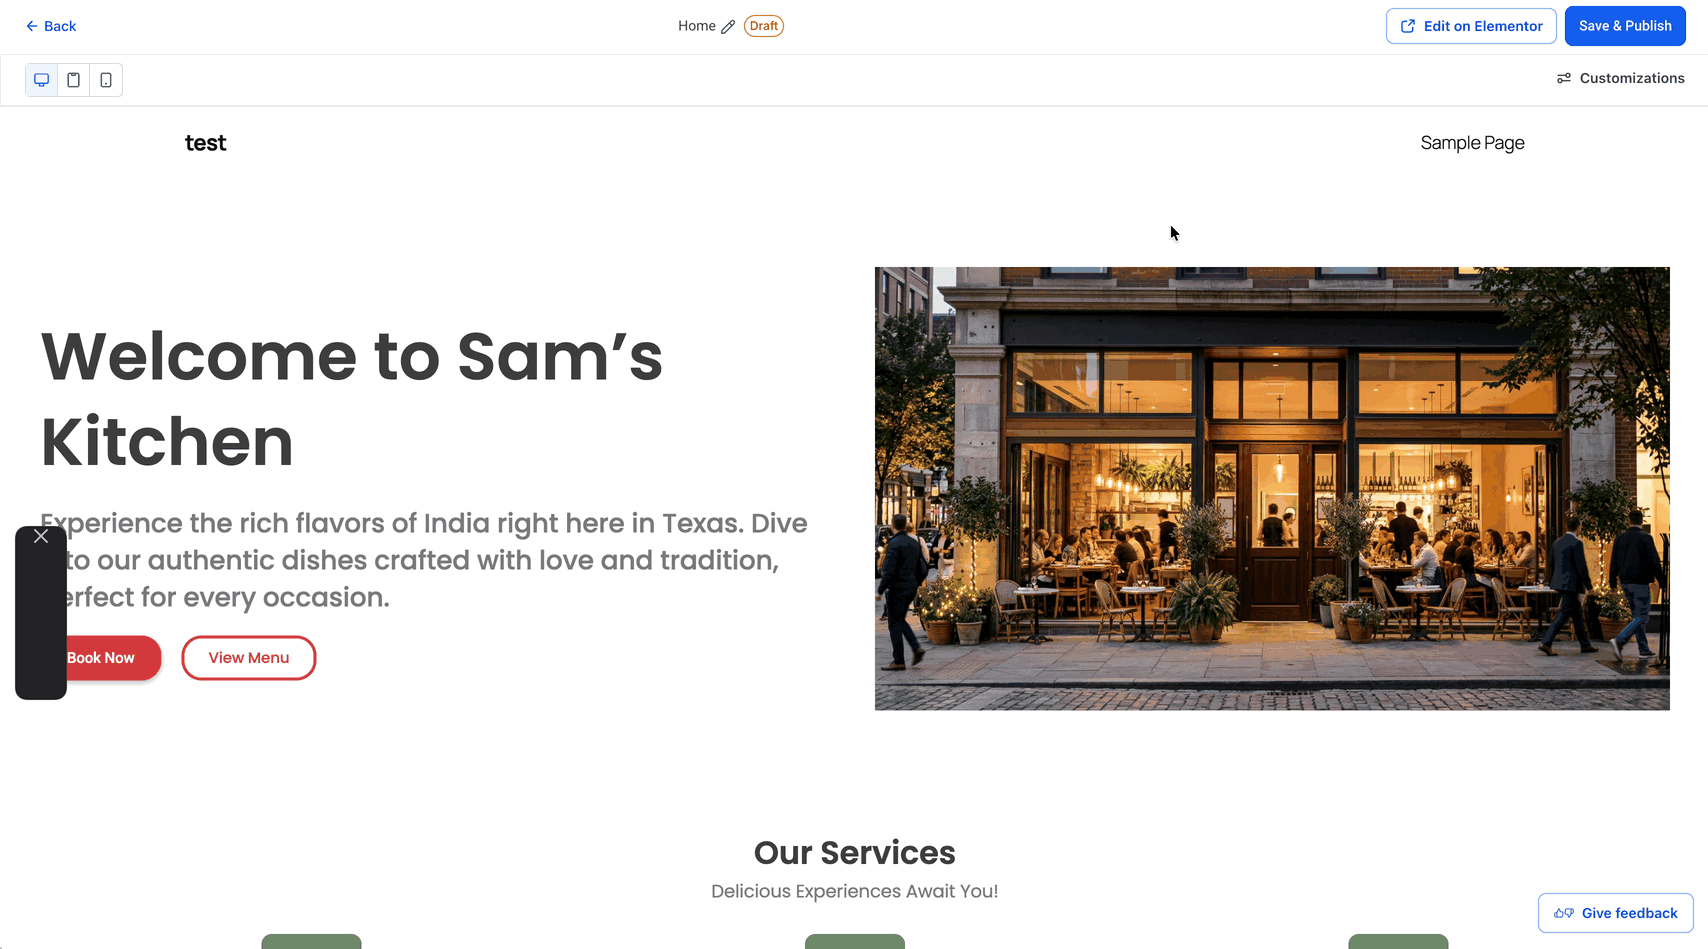
Click Edit on Elementor if you want to continue editing the page in Elementor.

Preview, Publish, and Unpublish an AI-Generated Page
The AI-generated pages remain in Draft mode by default, giving you control over when they become visible on your website.
Review and customize the generated page while it is in Draft mode.
In AI Generated Pages, open the three-dot menu for the draft page and select Preview Page to review it before publishing.
When the page is ready, select Publish from its three-dot menu. Alternatively, click Save & Publish in the page preview.
To take a published AI Page offline, use Unpublish.

Important: Draft, Preview, Publish, and Unpublish support requires LeadConnector plugin version 4.0.3 or later.
How to Provide Feedback on AI-Generated Pages
You can rate AI-generated WordPress pages and share suggestions to help improve future AI-generated results.
Open an AI-generated WordPress page in the page preview.
Click Give feedback.
Under How well does this page match what you had in mind?, select a rating:
Not at all
A little off
It's okay
Pretty close
Nailed it!
Optionally, enter suggestions in What could be improved?
Click Submit.
Your feedback helps improve the AI Pages experience.

Frequently Asked Questions
Q: Can I edit the AI-generated page after it is created?
Yes. You can update content and styles in the Customizations panel and continue editing the page in Elementor.
Q: Does AI Pages remember my business information when generating new pages?
Yes. AI Pages saves business information, branding, and preferences across your WordPress site and reuses this context during future page generation.
Q: Can I upload my own images to an AI-generated WordPress page?
Yes. You can replace supported images with your own JPEG, PNG, WebP, or GIF files, up to 10 MB. Use Regenerate Image → Upload image, select your file, and click Insert image.
Q: Can I provide feedback on an AI-generated page?
Yes. Click Give feedback in the page preview, select a rating, optionally add suggestions, and click Submit.
Q: Can I improve my prompt before generating the page?
Yes. Use the Improvise option to help optimize your prompt before generation.
Q: Can I change the tone of the generated content?
Yes. You can switch the content tone using available options such as Professional, Friendly, Compelling, and Confident.
Q: Can I change the page colors after the page is generated?
Yes. You can switch to a different color palette from the Styles tab in the Customizations panel.
Q: How many AI page generation credits are included?
HighLevel includes 12 AI page generation credits per site per month.
Q: Where can I see my remaining credits?
Your remaining AI page generation balance is displayed in the AI Generated Pages area.
Q: Do color palette changes apply immediately?
Color palette changes preview live while you browse available palettes. The changes are only saved after you click Update Page.
Q: Can I regenerate only one image on an AI-generated page?
Yes. Hover over the image, click Regenerate Image, enter a prompt, generate a preview, and insert the new image. Only the selected image is replaced.
Q: Can I use different section variants on the same page?
Yes. You can mix and match available section variants across the page.
Q: Are new AI-generated pages published automatically?
No. New AI-generated pages are created in Draft mode by default so you can review and customize them before publishing.
Q: Can I preview an AI-generated page before publishing it?
Yes. You can preview an AI-generated page before publishing to review how it will appear on your website.
Q: Can I take a published AI-generated page offline?
Yes. Use Unpublish to take a published AI Page offline.
Related Articles
Was this article helpful?
That’s Great!
Thank you for your feedback
Sorry! We couldn't be helpful
Thank you for your feedback
Feedback sent
We appreciate your effort and will try to fix the article