Build with AI helps you generate JavaScript for the Custom code workflow action by describing what you need in plain language. Instead of writing every snippet from scratch, you can add input properties, explain the desired logic, review the generated code, test the output, and save the action inside your workflow.
This article explains how to use Build with AI safely and how to test generated custom code before publishing your workflow.
TABLE OF CONTENTS
- What is Build with AI for Workflow Custom Code?
- Key Benefits of Generating Custom Code with AI
- Before You Begin
- Build with AI vs. Workflow AI Builder
- Input Properties in Custom Code
- Custom Code Output and Reference Output
- How To Generate Custom Code with AI in Workflows
- Prompt Examples for Build with AI
- Reviewing AI-Generated Code Before Publishing
- Testing and Troubleshooting Generated Code
- Frequently Asked Questions
What is Build with AI for Workflow Custom Code?
Build with AI is an AI-assisted code generation option inside the Custom code workflow action. It helps generate JavaScript based on your prompt, input properties, and expected output.
Build with AI is useful when you need to transform data, format values, calculate results, prepare API requests, or create custom logic for one workflow step. It does not generate a complete workflow. Use Workflow AI Builder when you want AI to help create or edit an entire workflow.
Key Benefits of Generating Custom Code with AI
Build with AI helps users create custom workflow logic faster while still keeping control over what gets saved and published. Generated code should always be reviewed and tested before the workflow is used live.
- Faster code creation: Generate JavaScript from a plain-language description.
- Workflow data support: Use input properties from the workflow inside generated code.
- Flexible logic: Format data, calculate values, build conditions, or prepare API requests.
- Review before saving: Inspect generated code before using it in the action.
- Built-in testing: Test the code and confirm output before saving the workflow action.
- Reusable output: Return fields that later workflow actions can reference.
Before You Begin
Custom code can affect how data moves through your workflow, so it is important to prepare the action carefully before generating or saving code. A clear prompt, correct input properties, and a successful test help prevent unexpected workflow behavior.
Before using Build with AI, confirm the following:
- You can create or edit the workflow.
- You are using the Custom code workflow action.
- You understand what data the code should use.
- You know the expected output fields needed by later workflow actions.
- You will review and test the generated code before publishing the workflow.
- The Custom code action is a premium workflow action.
Build with AI vs. Workflow AI Builder
HighLevel includes multiple AI tools for workflows. Choosing the right one depends on whether you need help with the entire automation or only one custom code step.
Use Workflow AI Builder when you want AI to help create or edit a full workflow, including triggers, actions, and overall automation structure.
Use Build with AI inside the Custom code action when you only need JavaScript for one workflow step.
For example, use Workflow AI Builder to create a lead follow-up workflow. Use Build with AI when one step in that workflow needs to format a phone number, calculate a value, extract part of an email address, or prepare data for another system.
Input Properties in Custom Code
Input properties allow the Custom code action to use values from the workflow. These properties define the data your JavaScript can reference while running.
Each input property includes a key and a value. The key is the name your code uses, and the value is the workflow data assigned to that key.
In the code editor, input properties can be referenced using either format:
inputData.keyNameor
inputData['keyName']For example, if you add an input property with the key email, the code can reference it as:
inputData.emailAdd the needed input properties before testing your code. If generated code does not use the right fields, review the property keys and make sure your prompt clearly describes which values should be used.
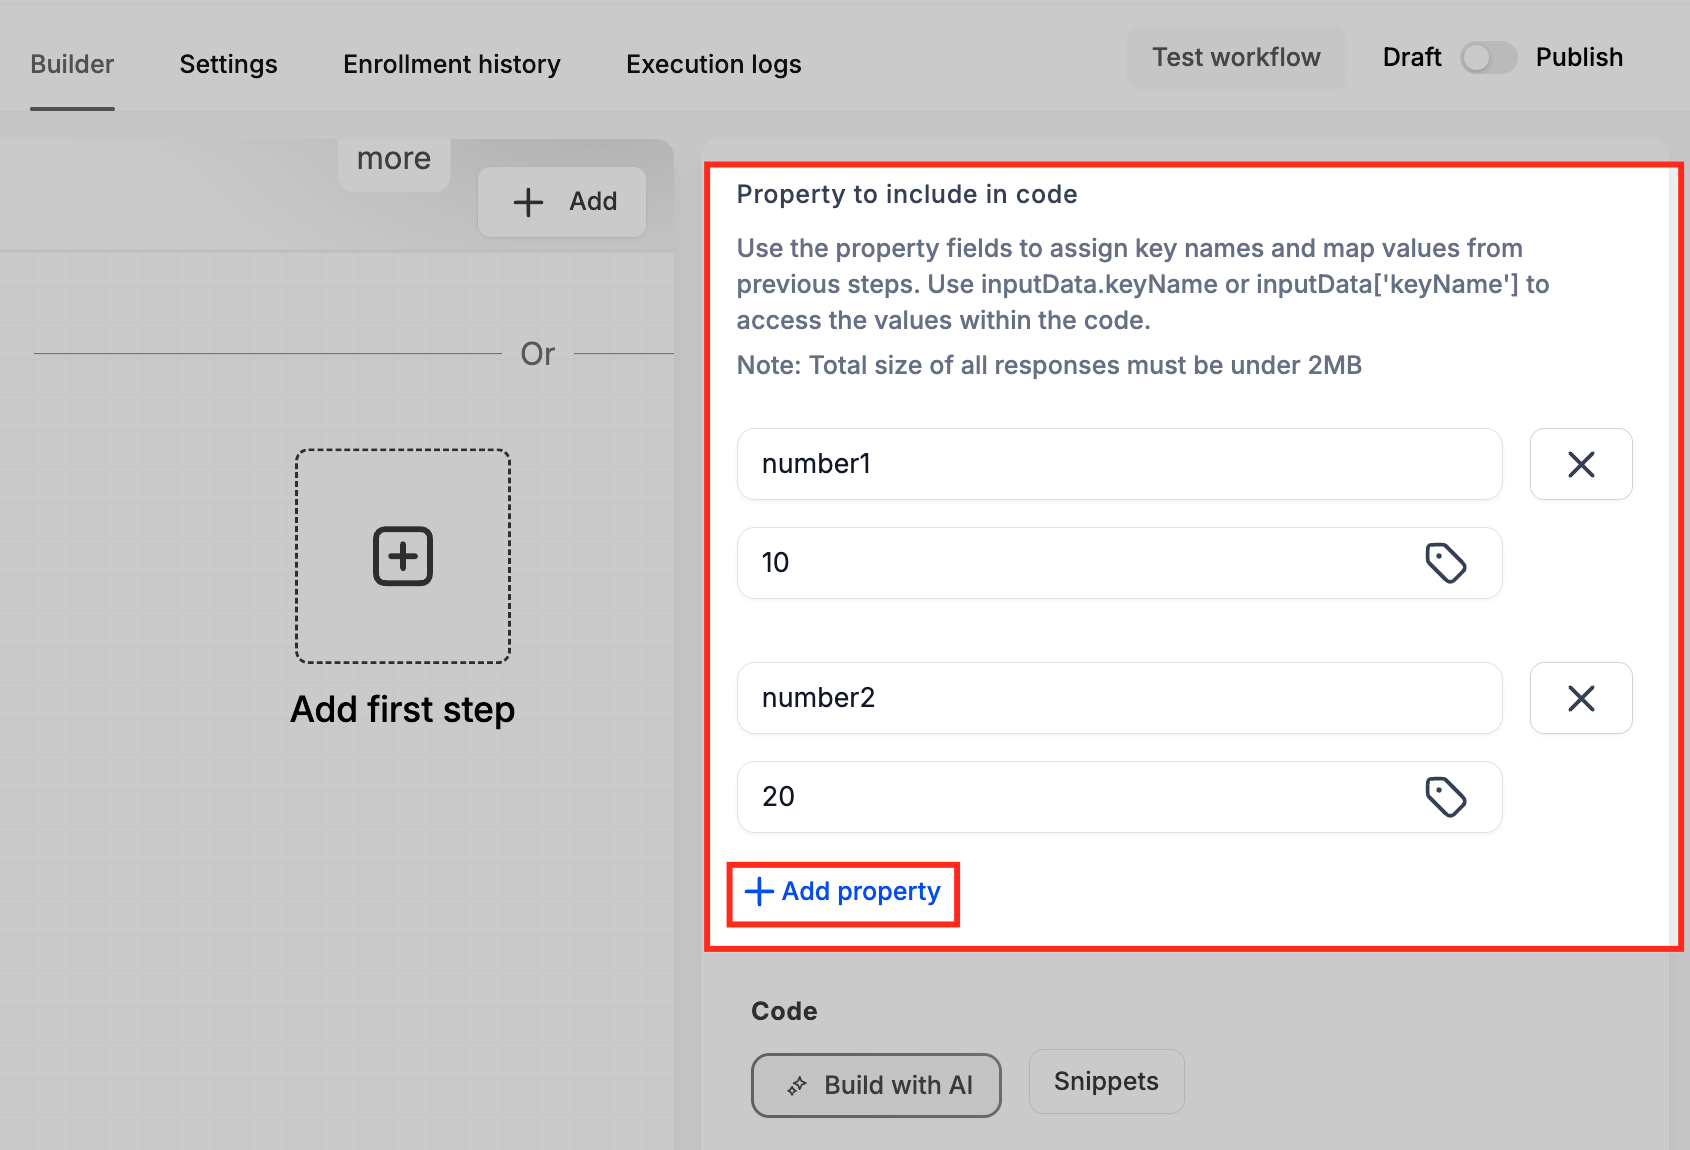
Screenshot: Property to include in code area showing inputData guidance and Add property fields.
Custom Code Output and Reference Output
The Custom code action should return a JavaScript object or an array of objects. These returned values become the output that later workflow actions can reference.
For example:
return { emailDomain: domain, formattedPhone: formattedPhone };After testing the code successfully, use Reference output to review the available output fields. Later workflow actions can use these fields only when the code returns the expected structure.
Important output notes:
- Return a JavaScript object or array of objects.
- Test the code so output fields can be referenced later.
- Keep the total response size under 2MB.
- Review Reference output after testing to confirm the output structure.
How To Generate Custom Code with AI in Workflows
Build with AI is available inside the Custom code action in the workflow builder. Use it to describe the JavaScript you need, review the generated code, test the output, and save the action.
Go to Automation > Workflows
Open Automation, then select Workflows. This is where you can create, edit, test, and publish workflow automations.
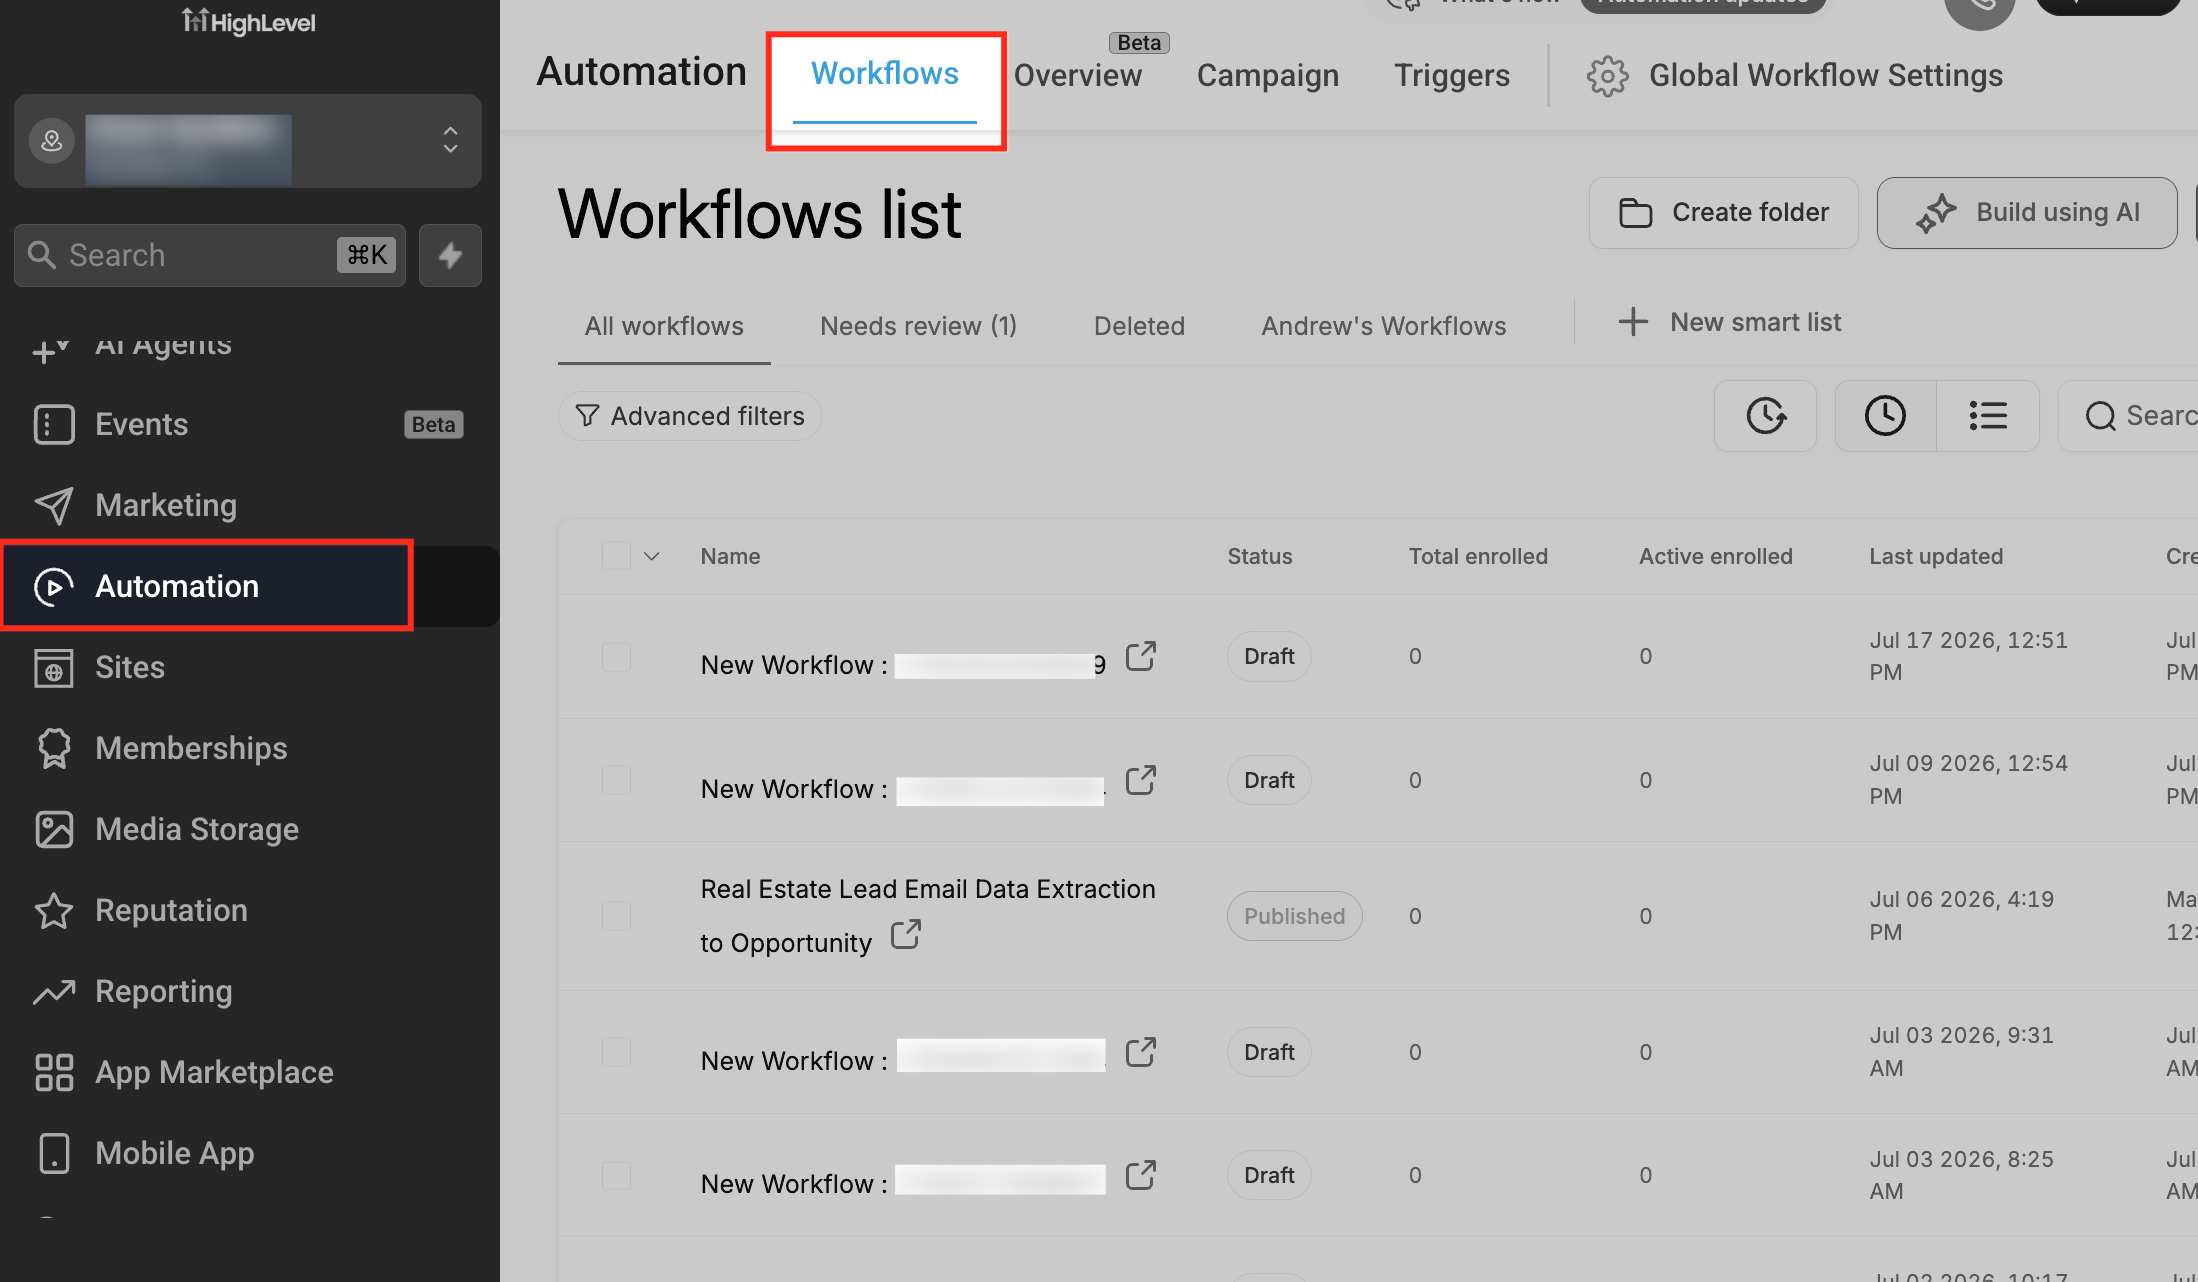
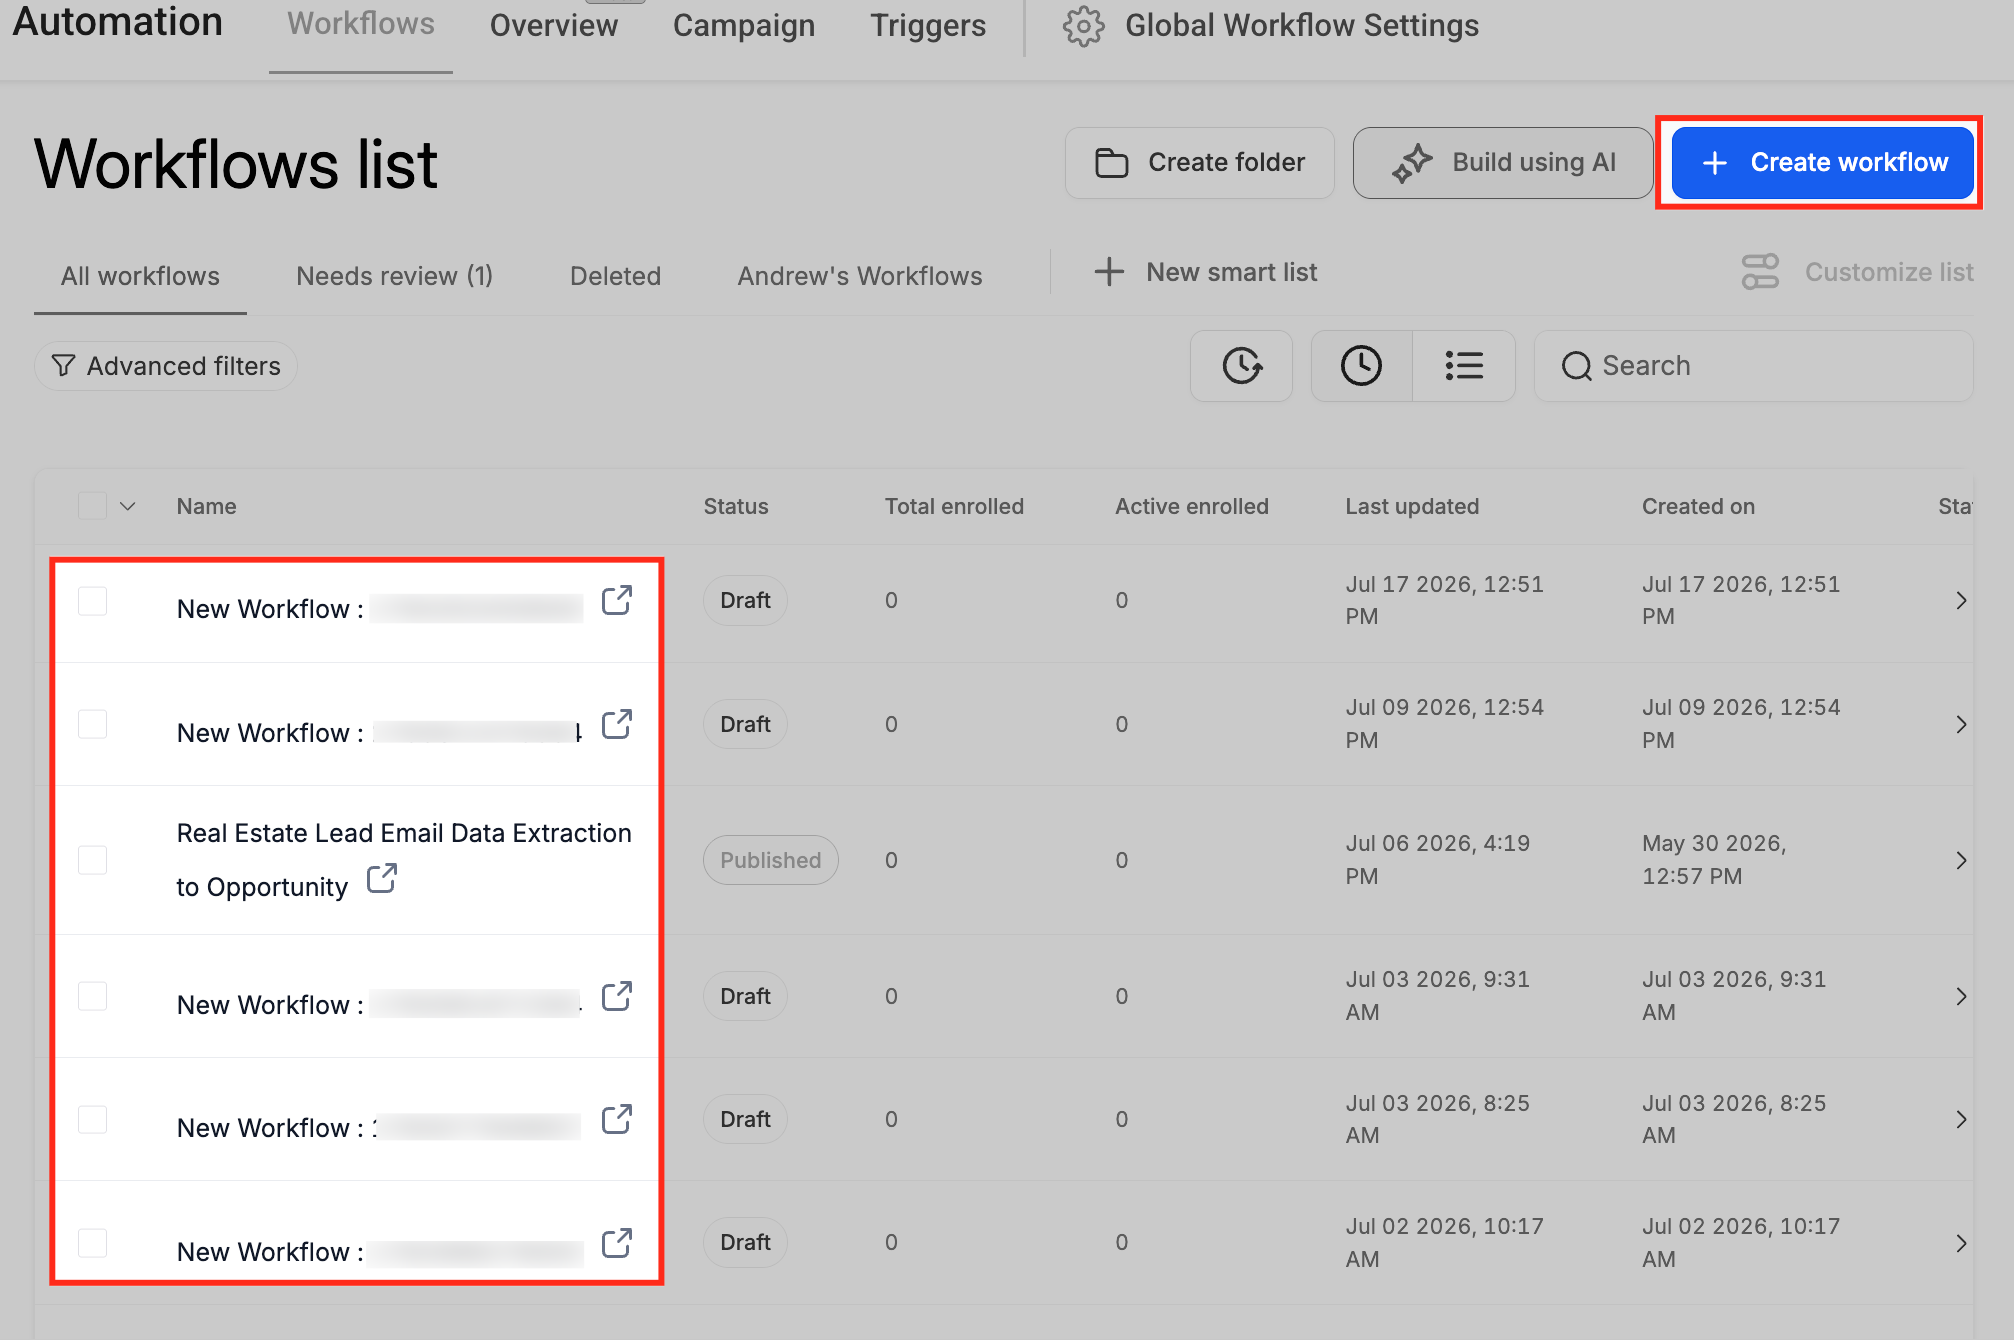
Create or open a workflow
Create a new workflow or open an existing workflow draft. Use a test or draft workflow when experimenting with generated code so you can validate the behavior before using it live.
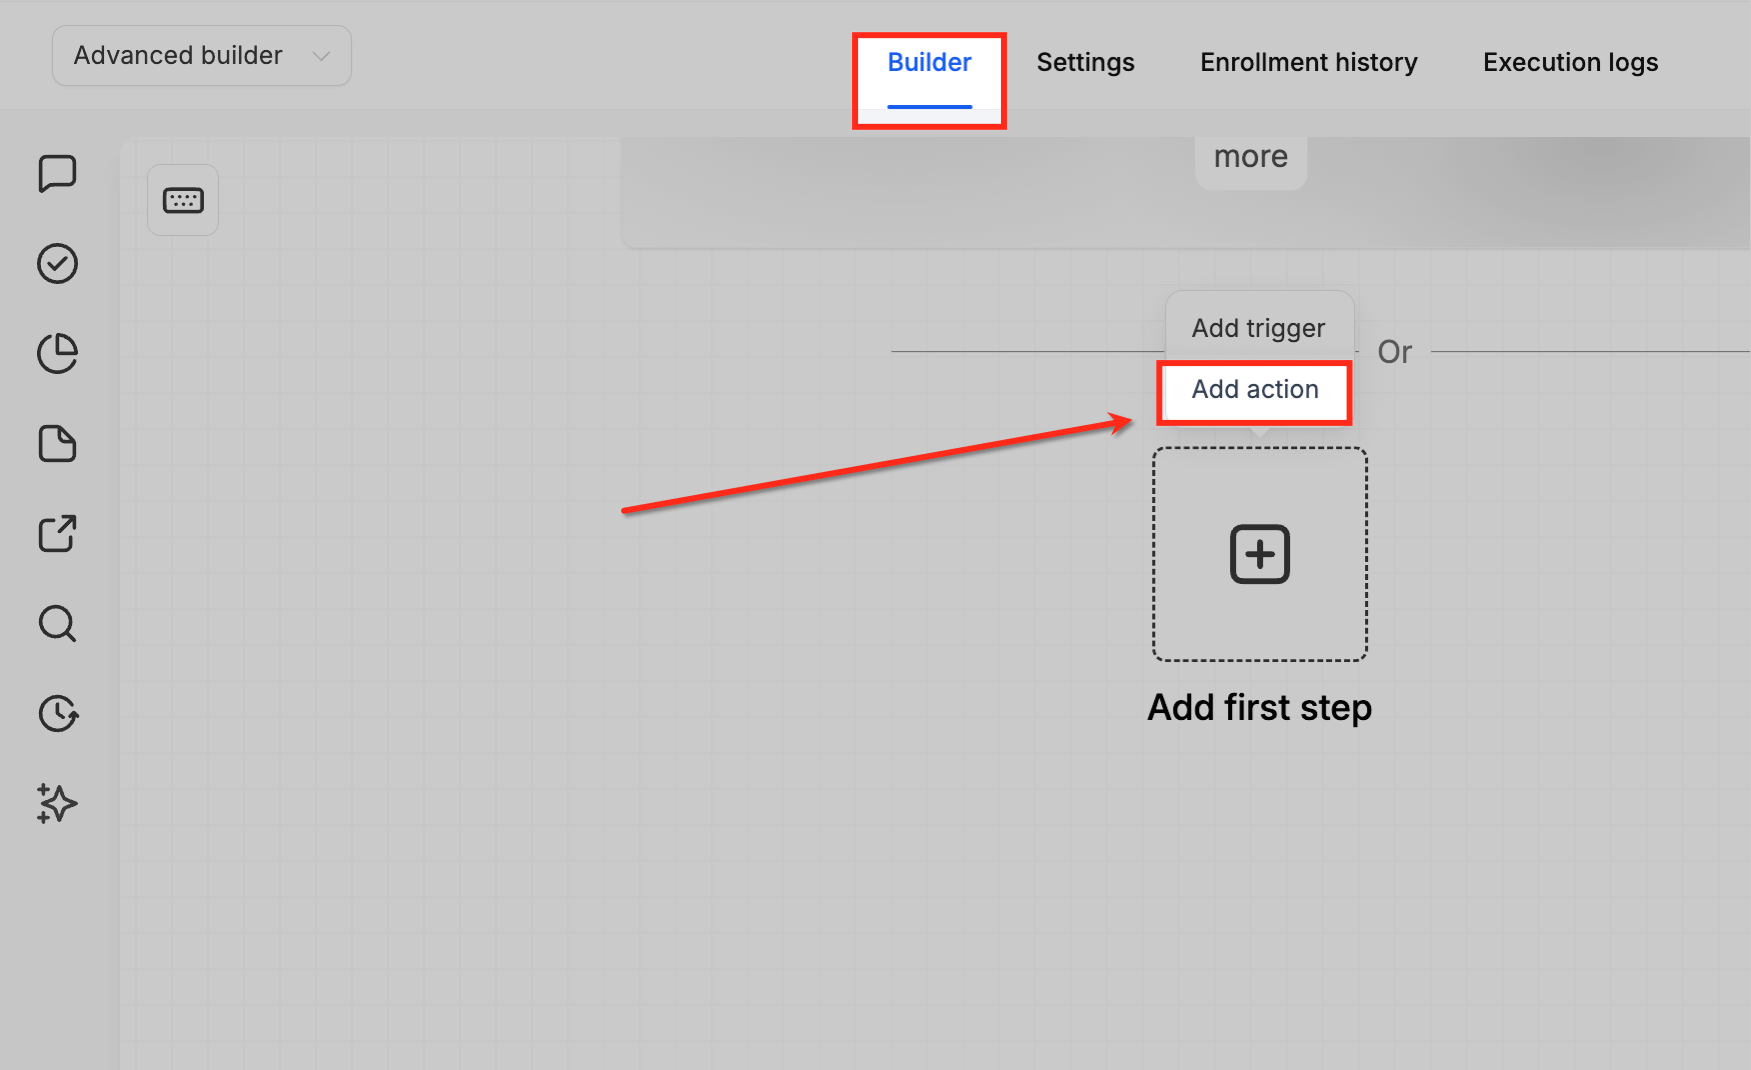
Add a workflow action
Under builder tab, hover over Add first step and click Add Action at the correct point in the workflow. Choose the step location based on where the custom logic should run.
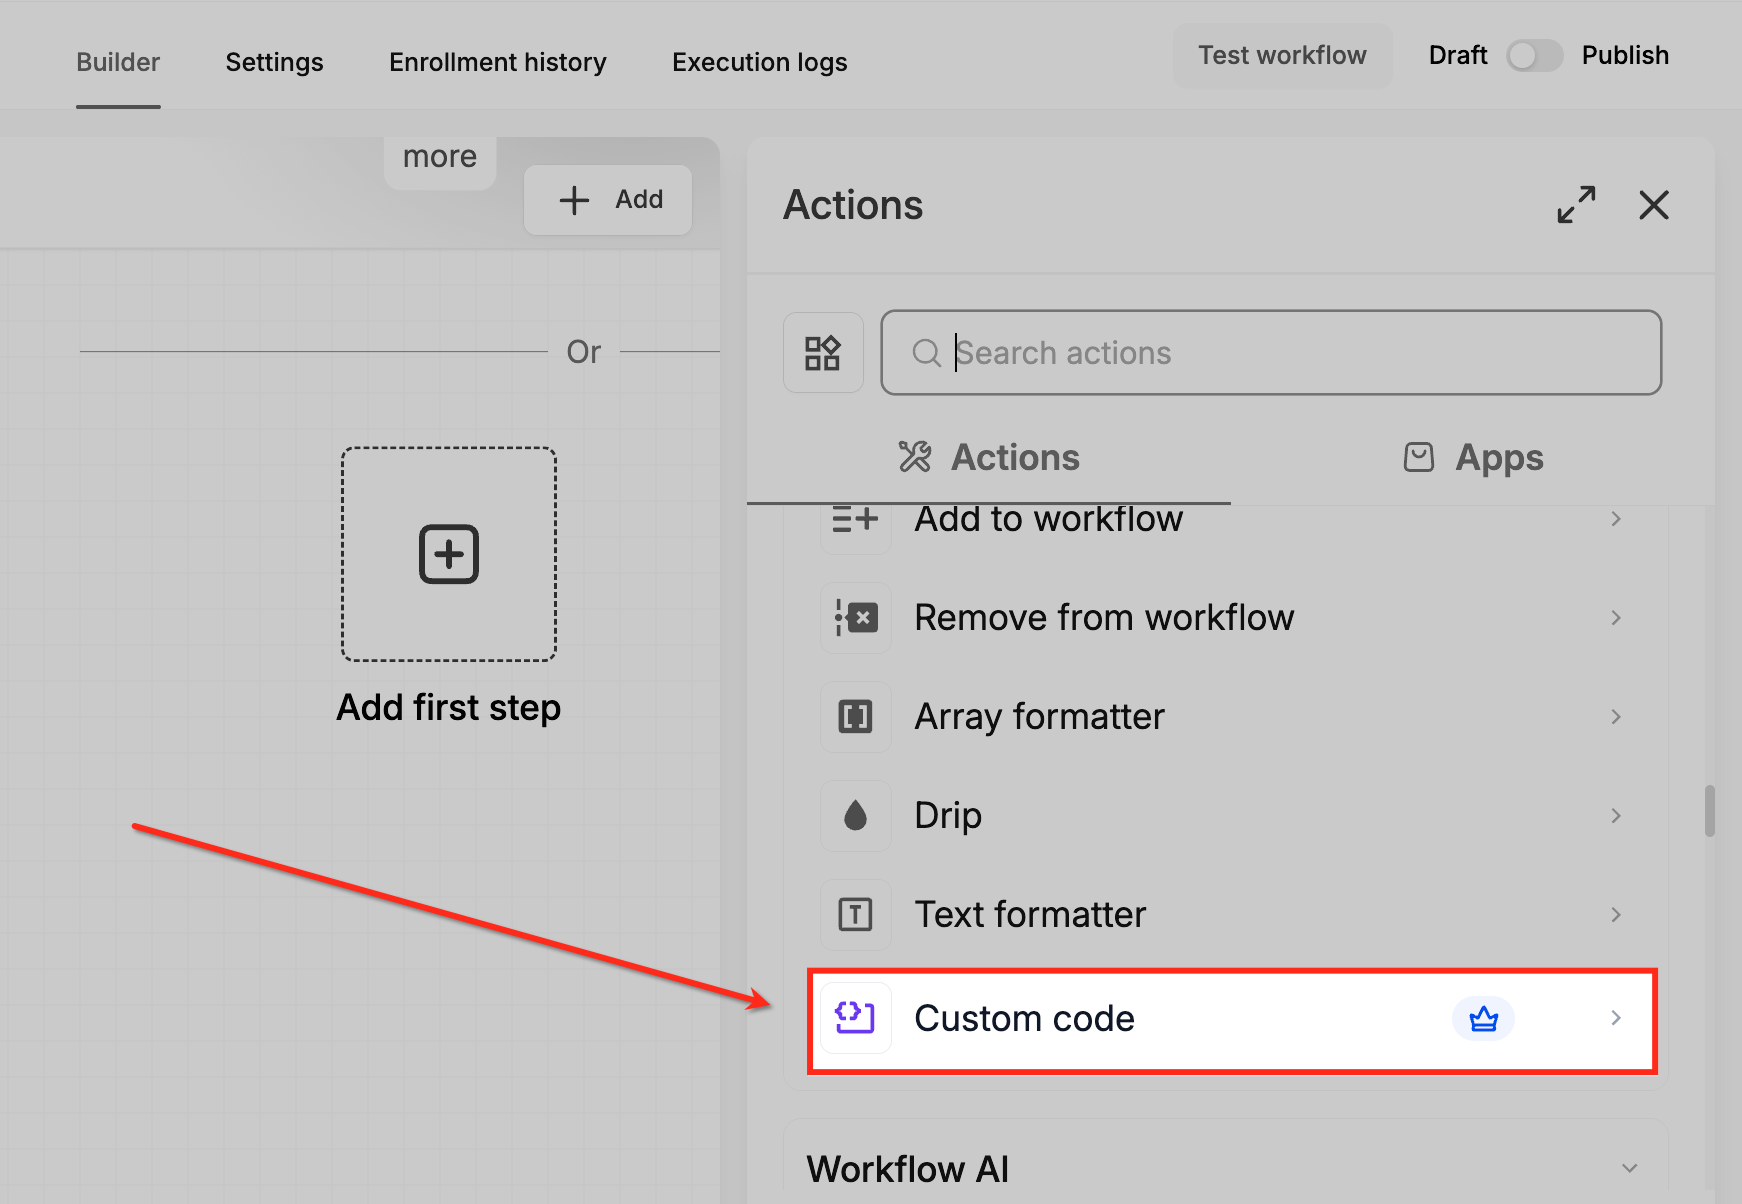
Select Custom code
In the Actions panel, search for or select Custom code. The action opens in the right-side configuration panel.
Review the Custom code action panel
The Custom code panel includes the action name, language selection, input properties, code editor, Build with AI button, testing tools, reference output, and save button. The panel also shows that Custom code is a premium action.
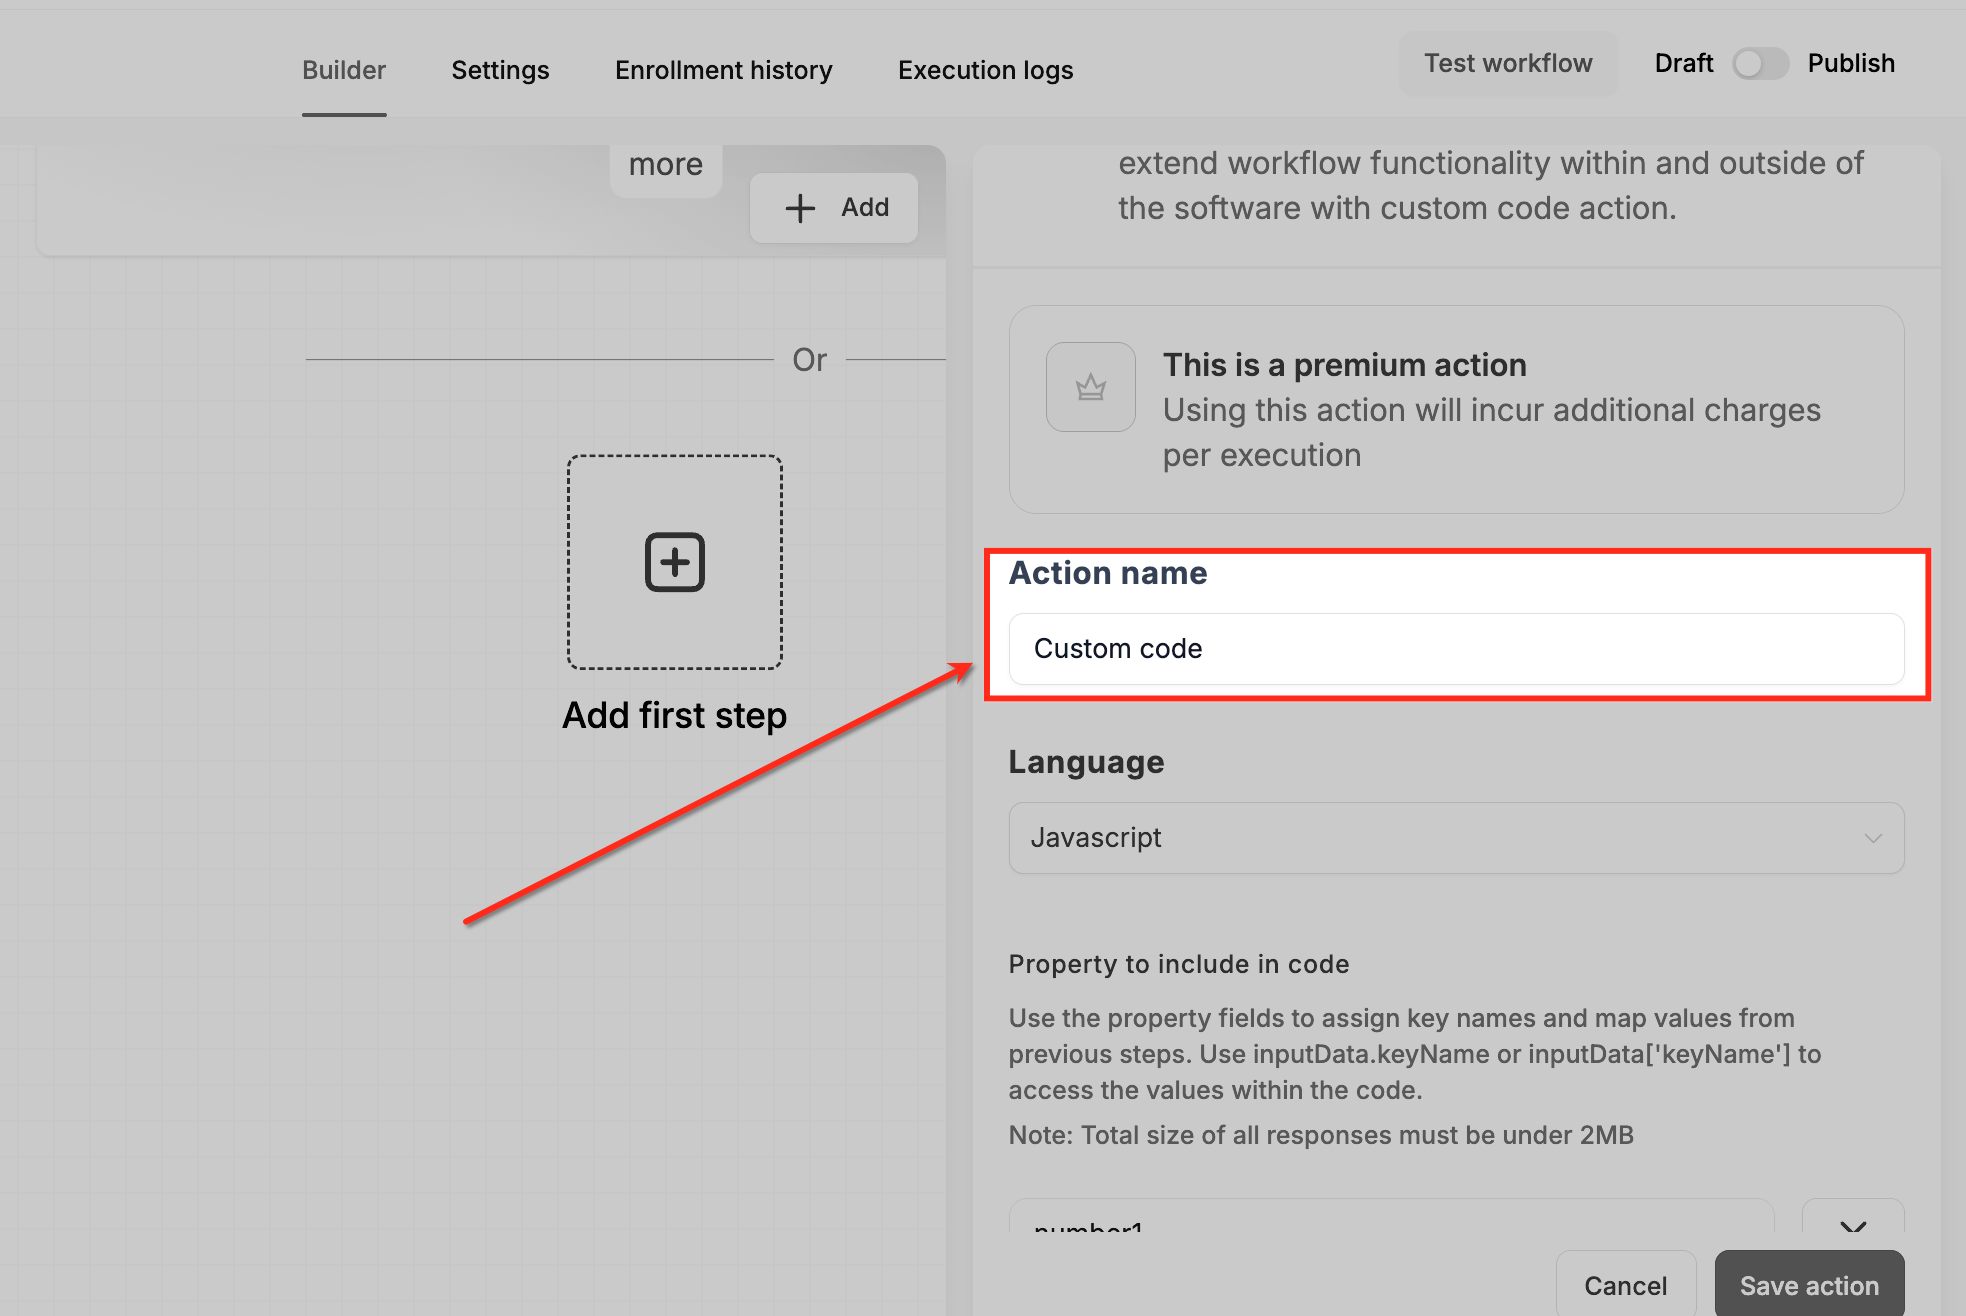
Name the action
Enter an action name that clearly describes what the code does. A descriptive name makes the workflow easier to review later, especially when there are multiple custom code steps.
Example names:
- Format Phone Number
- Extract Email Domain
- Calculate Discount
- Prepare API Payload
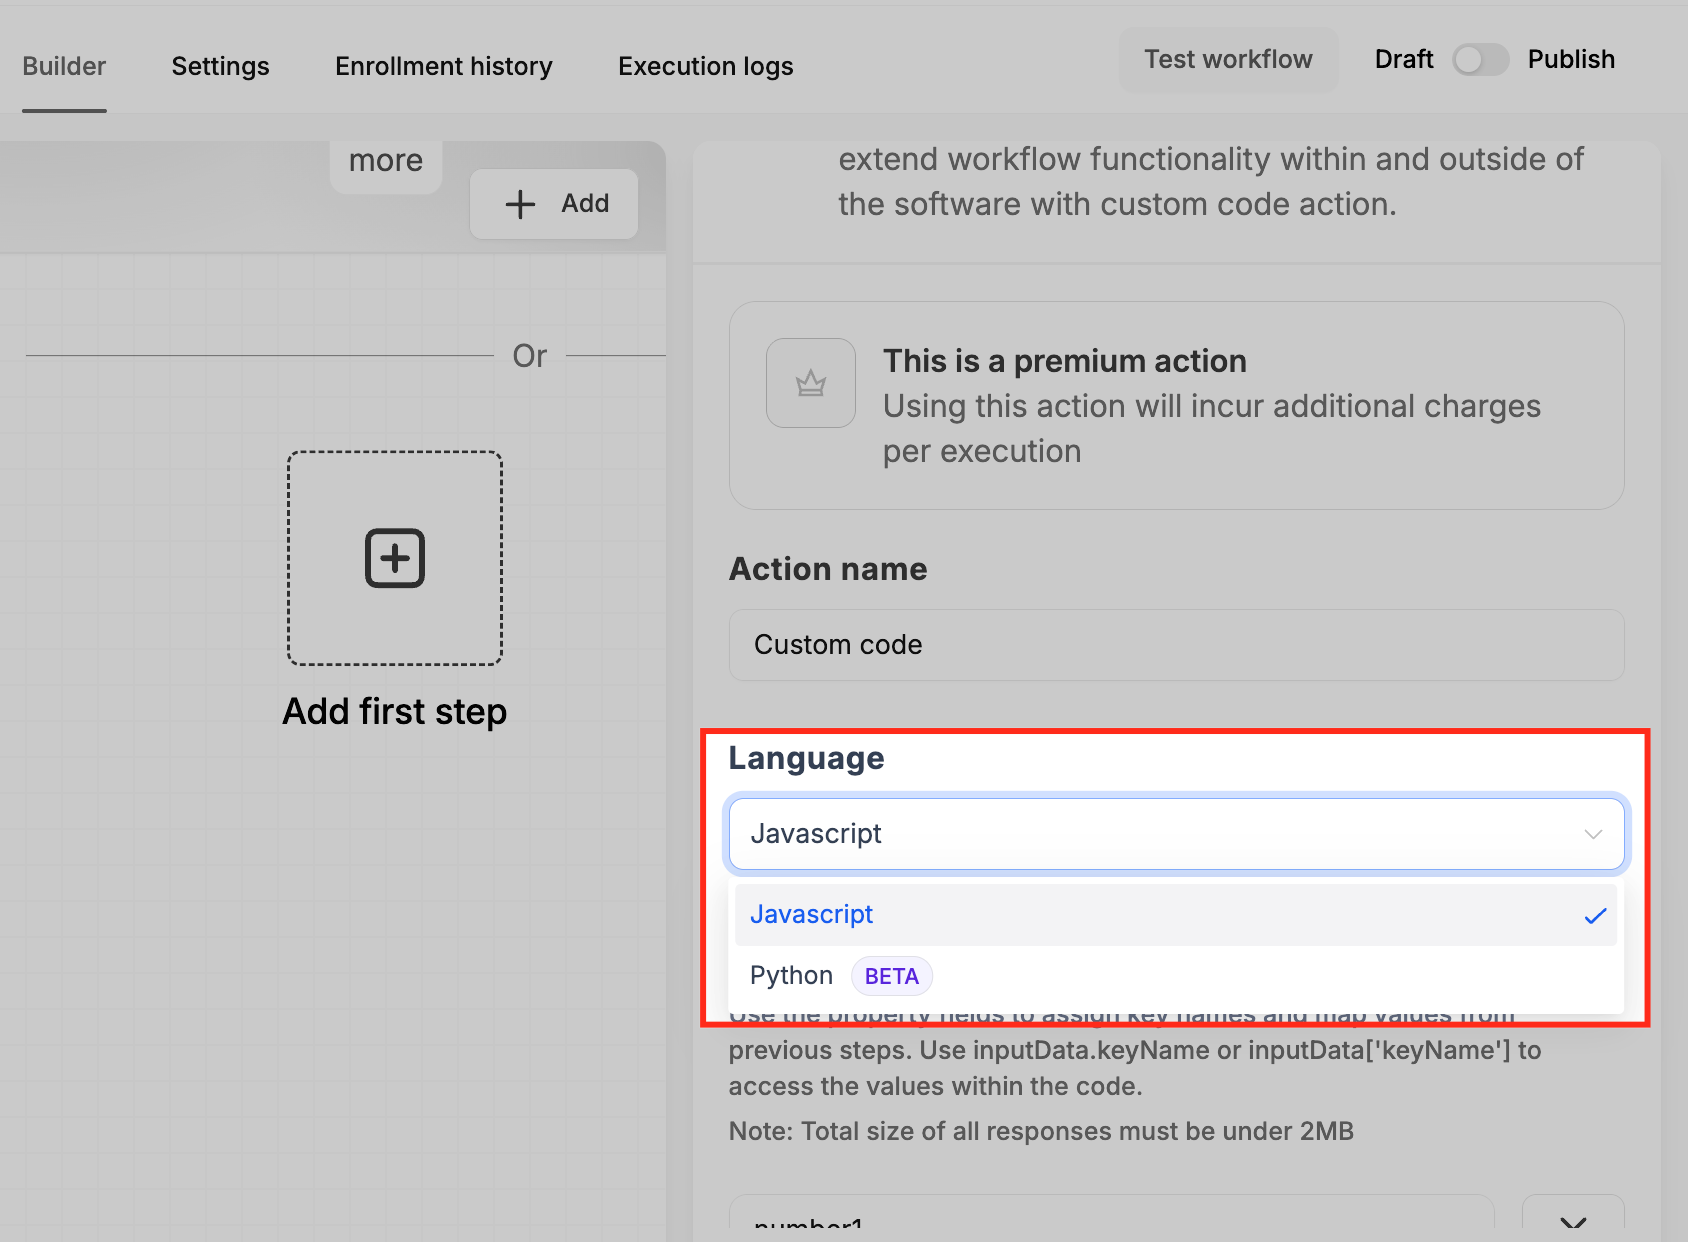
Confirm the language is set to Javascript
Review the Language dropdown and confirm it is set to Javascript. The Custom code action uses JavaScript for the generated code.
Add properties to include in code
Use Property to include in code to add the data your JavaScript should use. Add a clear key name and assign the correct workflow value.
For example, you might add:
email
phone
amount
fullName
opportunityValue
Your code can then reference those values using inputData.email, inputData.phone, or the matching key name.
Click Build with AI
In the Code section, click Build with AI. This opens the AI prompt experience for generating JavaScript.
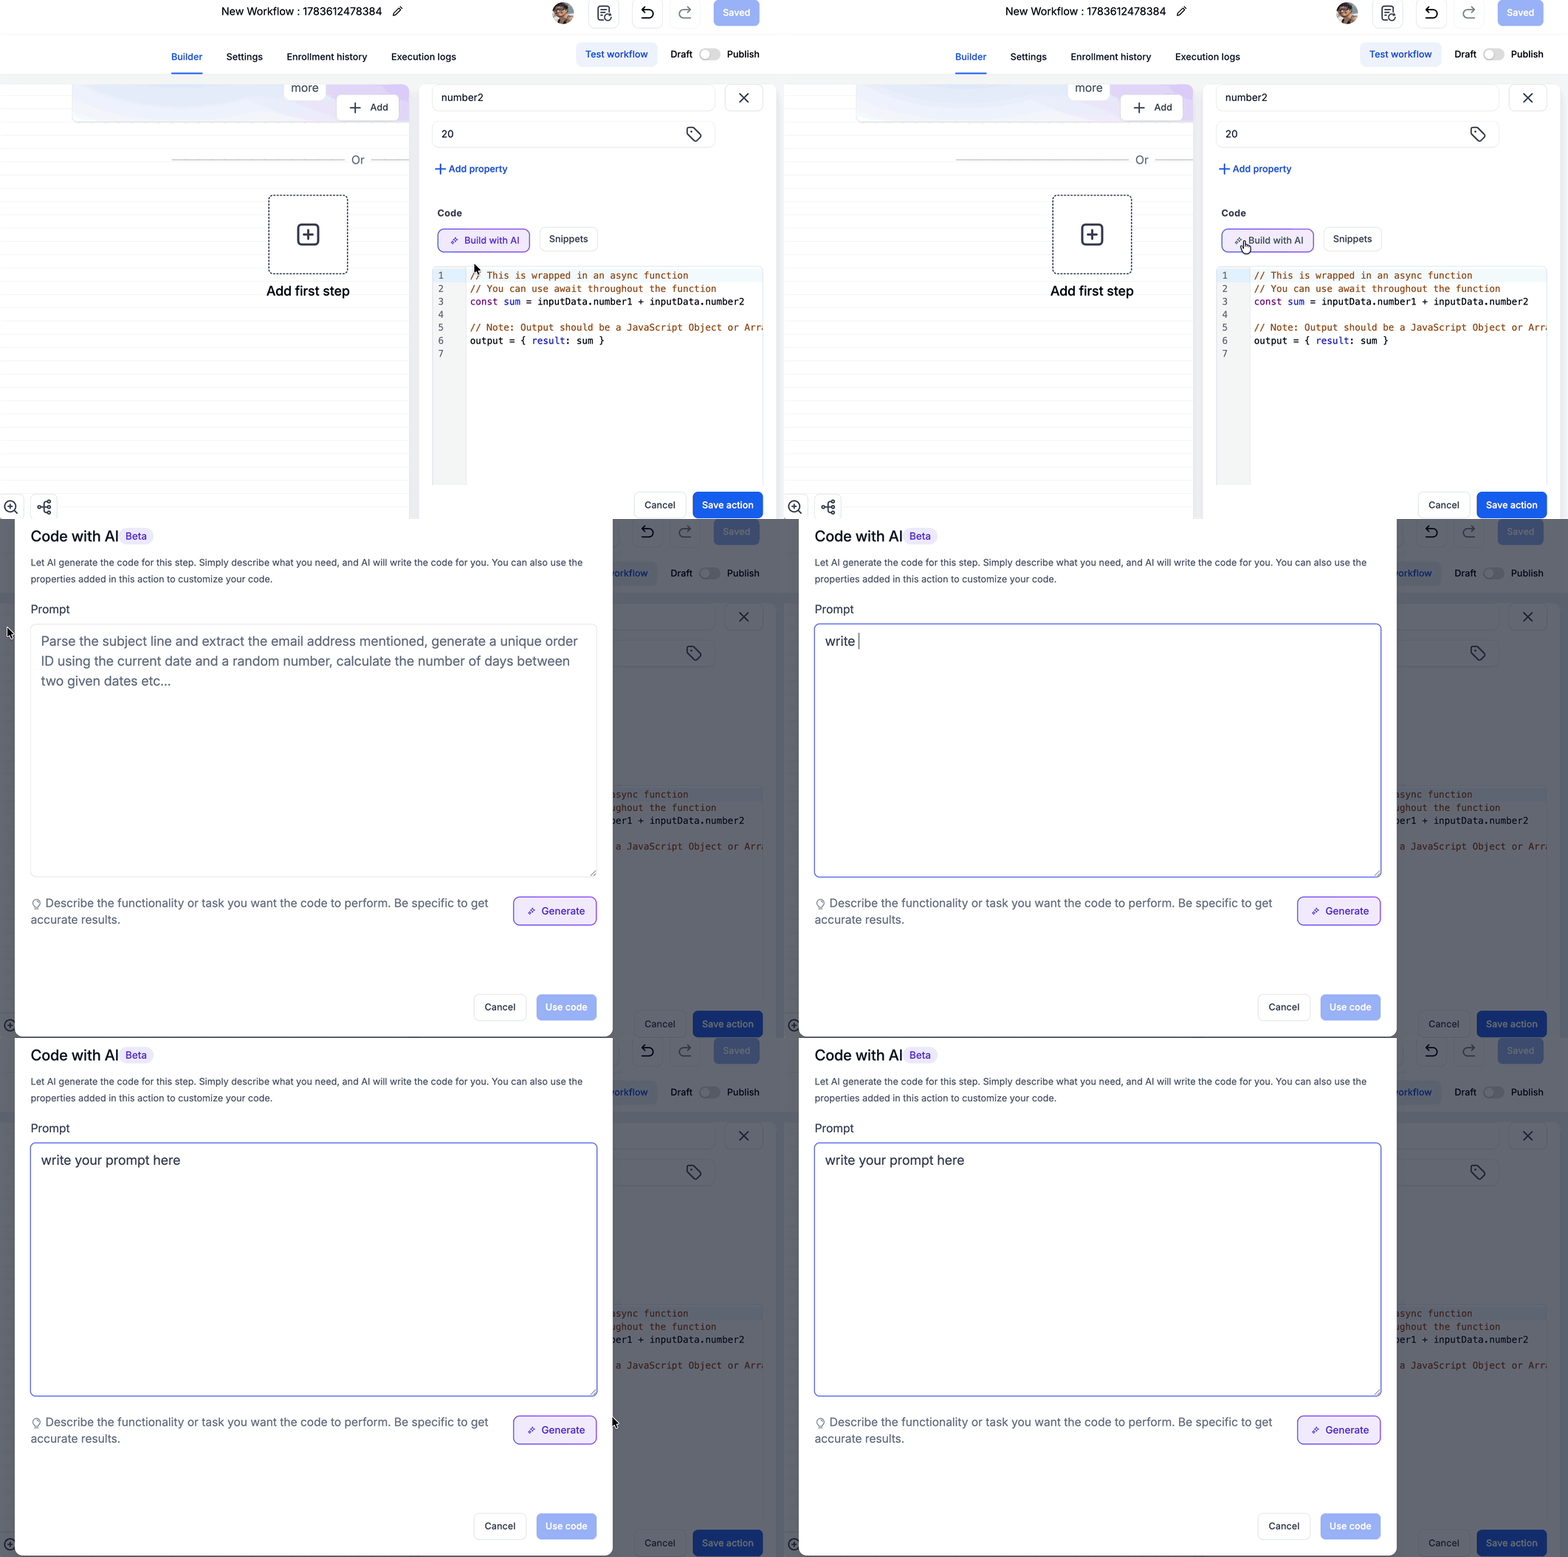
Describe the code you need
Enter a clear prompt that explains what the code should do, which input properties to use, and what output fields should be returned.
A strong prompt should include:
- The goal of the code
- Input property names
- Expected output field names
- Formatting rules
- Fallback behavior for missing values
- API endpoint, method, headers, or payload details, if using an API
- Example input and expected output, when helpful
Example prompt:
Use inputData.email to extract the email domain. Return the result as emailDomain. If the email is missing or invalid, return an empty string.
Review the generated JavaScript
Review the code before using it. Confirm that the logic matches your request, the input property keys are correct, and the output fields match what later workflow actions need.
Check for:
- Correct input property names
- Expected output field names
- Accurate calculations or formatting
- Safe handling of missing values
- Correct API endpoint, headers, and payload if making an API request.
Format the code, if needed
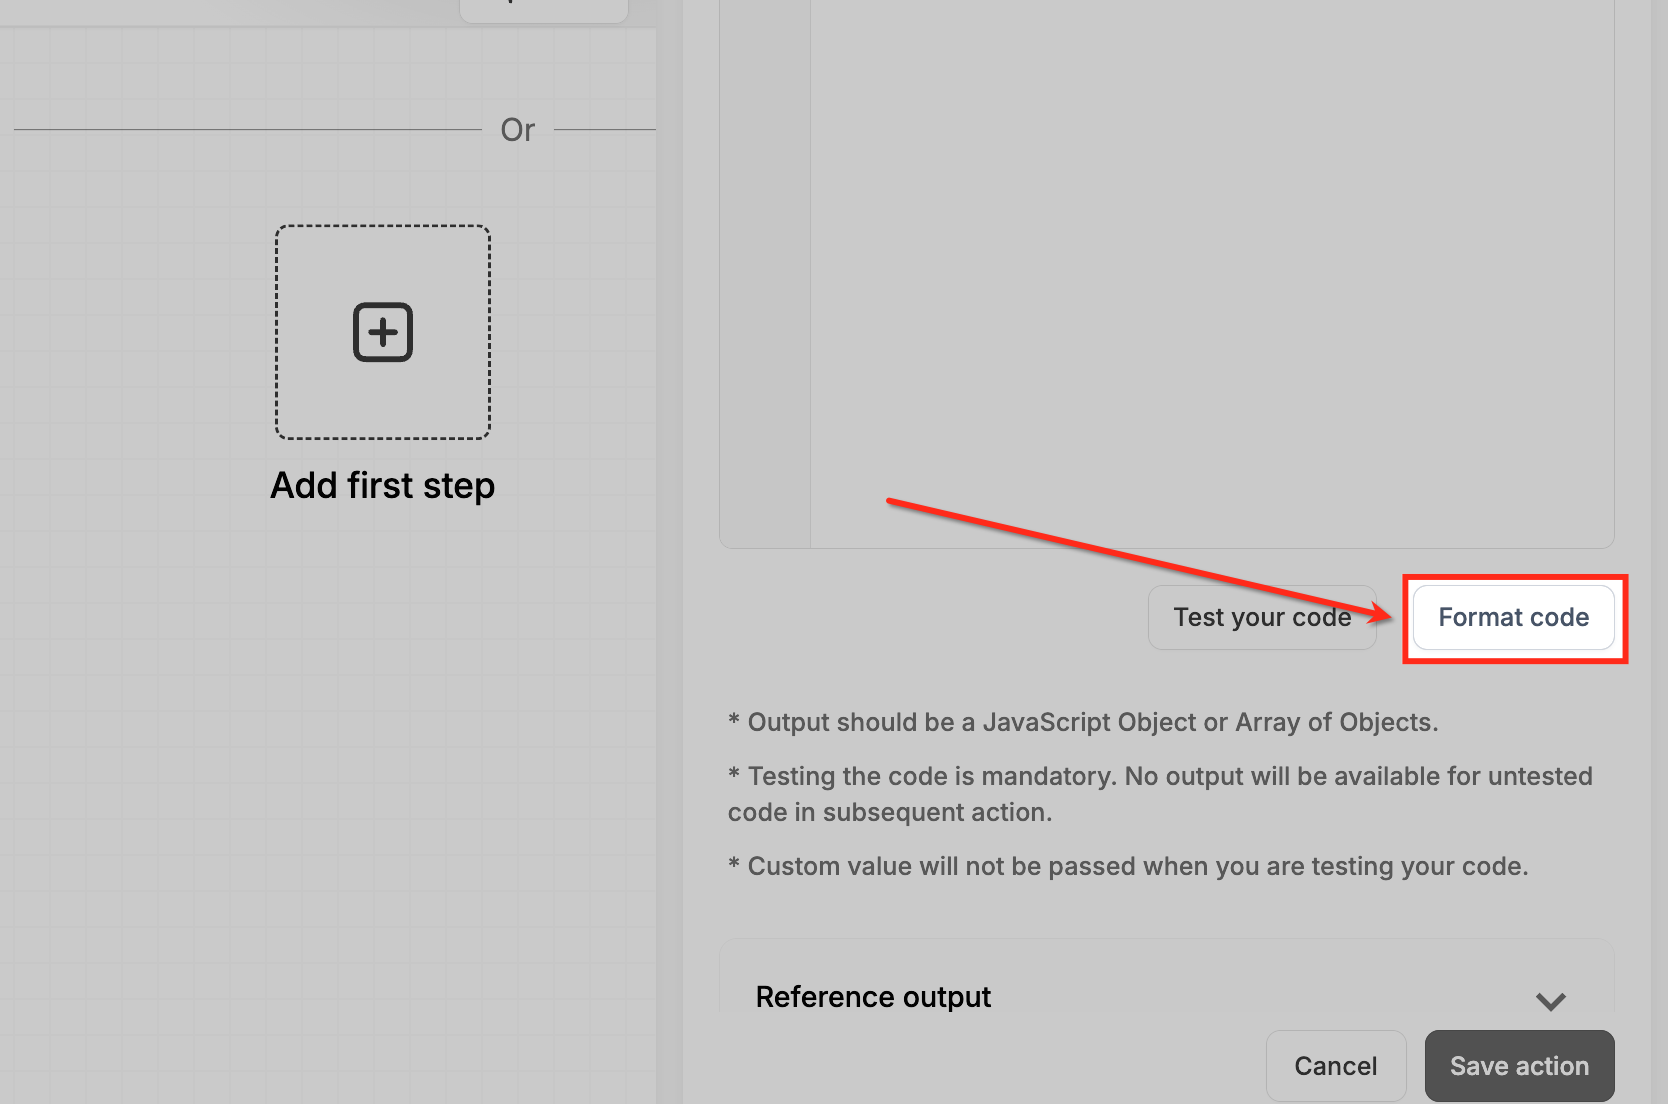
Use Format code to clean up the code layout. Formatting makes the code easier to read, review, and troubleshoot.
Test your code
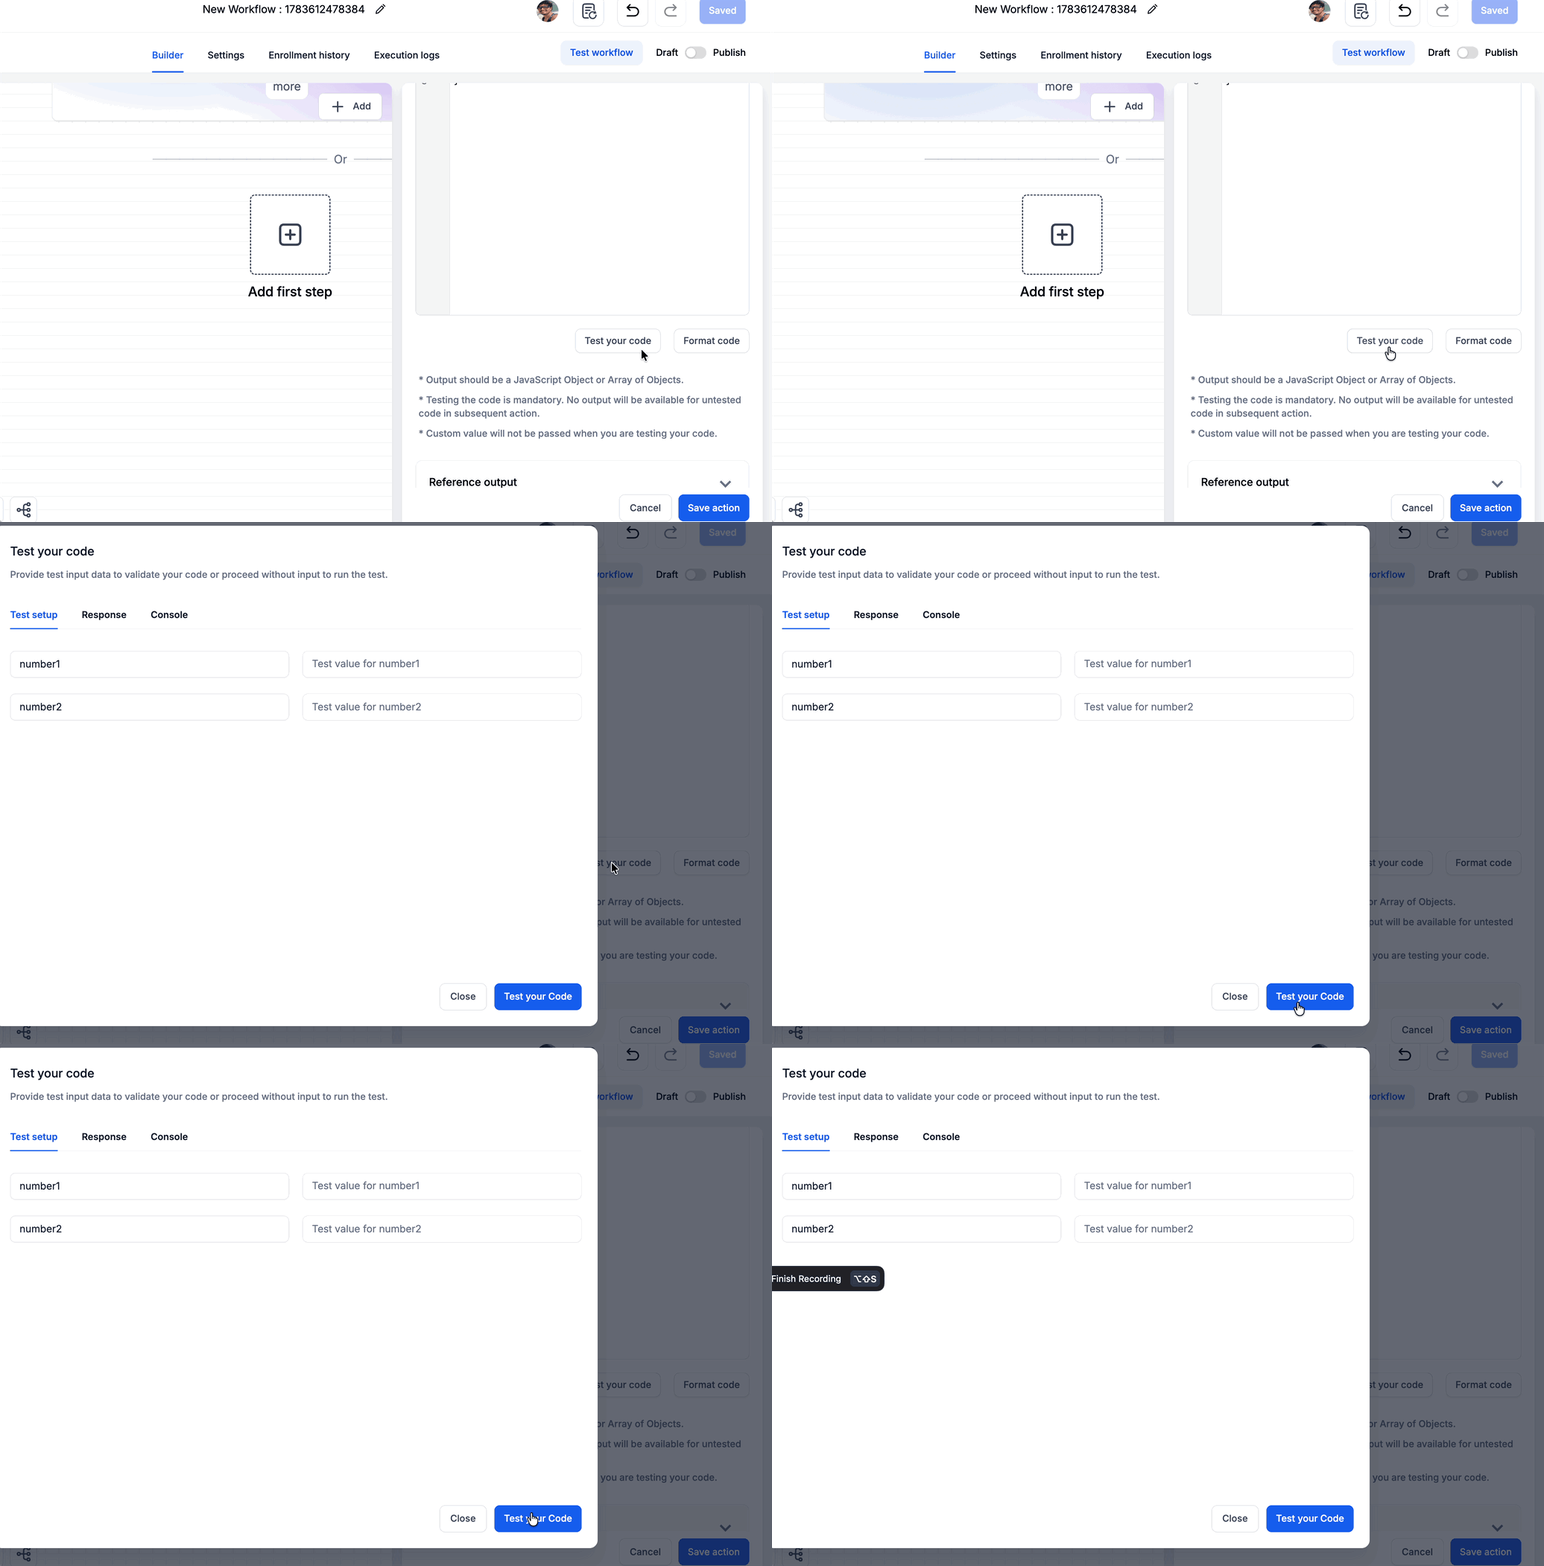
Click Test your code to confirm the code runs successfully. Testing helps verify that the action returns the expected output before the workflow is published.
The UI notes that custom values are not passed when testing code, so use appropriate sample values or workflow test data when validating behavior.
Review the output
After testing, review the returned output and confirm it matches the expected structure. Use Reference output to confirm which fields can be used in later workflow actions.
Save the action
Click Save action once the generated code is reviewed, tested, and returning the expected output. Unsaved changes may not be used in the workflow.
Test the full workflow
Run a full workflow test before publishing or enabling the workflow live. Confirm the Custom code action runs successfully and that later actions receive the expected output.
Use Execution logs or workflow test results to troubleshoot errors, missing values, or unexpected behavior.
Prompt Examples for Build with AI
Clear prompts help Build with AI generate more useful JavaScript. Include the input property names and the exact output fields you want returned.
Extract an email domain
Use inputData.email to extract the domain from the email address. Return it as emailDomain. If the email is missing or invalid, return an empty string.
Format a phone number
Use inputData.phone to format the phone number into E.164 format for the United States. Return the result as formattedPhone. If the phone number is missing or invalid, return an empty string.
Calculate a discount
Use inputData.amount to calculate a 15% discount. Return discountAmount and finalAmount. If the amount is missing, return both values as 0.
Split a full name
Use inputData.fullName to split the name into firstName and lastName. If only one name is provided, return it as firstName and leave lastName blank.
Prepare an API request
Send a POST request to the provided API endpoint using inputData.email, inputData.firstName, and inputData.lastName. Return the response status and response ID as status and externalId.
Reviewing AI-Generated Code Before Publishing
AI-generated code can speed up workflow setup, but it should still be reviewed before being used in live automation. Review helps prevent incorrect data formatting, failed API calls, missing output fields, or unexpected workflow behavior.
Before saving or publishing, check:
- The code uses the correct input property keys.
- The code handles missing or empty values safely.
- Output field names are clear and consistent.
- Calculations, date handling, and formatting rules are correct.
- API endpoint, method, headers, authentication, and payload are correct.
- Sensitive values are not hardcoded unless appropriate for your setup.
- Later workflow actions reference the correct output fields.
- The full workflow has been tested with sample records.
Testing and Troubleshooting Generated Code
Testing confirms that the Custom code action works before it affects live workflow records. Use the built-in code test first, then test the full workflow and review execution results.
Recommended testing steps:
- Add sample input properties or use appropriate workflow test data.
- Click Test your code.
- Confirm the returned output matches the expected structure.
- Review Reference output after a successful test.
- Save the action.
- Test the full workflow.
- Review Execution logs if the workflow does not behave as expected.
Frequently Asked Questions
Q: What is Build with AI in the Custom code action?
Build with AI is an AI option inside the Custom code workflow action that helps generate JavaScript from a plain-language prompt.
Q: Where do I find Build with AI?
Go to Automation > Workflows, open or create a workflow, add a Custom code action, then click Build with AI in the Code section.
Q: Is Build with AI the same as Workflow AI Builder?
No. Workflow AI Builder helps create or edit entire workflows. Build with AI generates JavaScript for one Custom code workflow action.
Q: What language does the Custom code action use?
The current Custom code action uses Javascript.
Q: Can Build with AI use data from previous workflow steps?
Yes. Add the needed values as input properties, then reference them in code using inputData.keyName or inputData['keyName'].
Q: What should my code return?
The code should return a JavaScript object or an array of objects so later workflow actions can reference the output.
Q: Why is output not available in later workflow actions?
Confirm the code was tested successfully and that it returns the expected output fields.
Q: Can I use Build with AI for API requests?
Yes. Include the endpoint, method, headers, authentication details, payload requirements, and expected response fields in your prompt.
Q: Should I test AI-generated code before publishing?
Yes. Always test generated code and the full workflow before publishing or using the workflow live.
Q: What does the 2MB response limit mean?
The total response returned by the Custom code action must be under 2MB.
Q: Are custom values passed when testing code?
The UI notes that custom values are not passed when testing code. Use appropriate sample values or workflow test data when validating the code.
Q: Is the Custom code action free to use?
The current UI identifies Custom code as a premium action.
Related Articles
Was this article helpful?
That’s Great!
Thank you for your feedback
Sorry! We couldn't be helpful
Thank you for your feedback
Feedback sent
We appreciate your effort and will try to fix the article