The Add Contact Tag workflow action allows you to automatically organize and segment your contacts based on behaviors, attributes, or triggers. Using tags helps streamline automation, improve targeting, and maintain a well-structured database. This article explains how the action works, how to set it up, and how to use it effectively in your workflows.
TABLE OF CONTENTS
- What Is the Add Contact Tag Workflow Action?
- Key Benefits of the Add Contact Tag Action
- Add Contact Tag Options
- How to Set Up the Add Contact Tag Action
- Frequently Asked Questions
- Related Articles
What Is the Add Contact Tag Workflow Action?
This section explains how the Add Contact Tag action applies one or more tags to contacts automatically inside a workflow. Tags help organize contacts, create segmentation, trigger automations, and support reporting. Understanding how this action behaves ensures accurate categorization and smooth automation logic throughout your system.
The Add Contact Tag workflow action makes it easy to classify contacts based on behavior, source, or stage of engagement helping you segment audiences and build more personalized automation journeys.
Key Benefits of the Add Contact Tag Action
Tagging contacts automatically provides structure and clarity to your database, ensuring your workflows operate with clean, predictable segmentation. These benefits help agencies maintain system consistency, improve targeting, and eliminate manual work.
- Segmentation: Organizes contacts into meaningful groups for targeted communication.
- Automation: Helps trigger or control workflow routing based on tag logic.
- Personalization: Enables tailored messaging based on contact behaviors or attributes.
- Database Organization: Keeps records structured across multiple workflows and campaigns.
- Scalability: Supports growing accounts with clear classification standards.
Add Contact Tag Options
Each setting within this action plays a role in how tags are chosen, created, or removed from the action setup. Mastering these options ensures the right tags are applied during automation without causing duplicates or misclassification.
Select Tags
Choose one or multiple existing tags from the dropdown list.
The dropdown supports search functionality to quickly find tags.
Selected tags will appear as labeled items above the dropdown.
Delete Tags
Clicking the “x” icon removes the tag from the action setup.
This does not remove the tag from the contact record—only from the action configuration.
Add New Tag
If a tag you need does not exist, type the new tag name in the dropdown.
Click Add New Tag to create and select it instantly.
Newly created tags become available for future workflows and manual tagging.
How to Set Up the Add Contact Tag Action
Setting up this action correctly ensures that your workflows assign tags consistently and predictably. Following the steps prevents errors and ensures tags drive accurate segmentation and automation behavior.
Create a Workflow
Navigate to the Automation tab in the left-hand menu to access your workflow library. This is where you can view existing workflows or begin creating a new one.
Click Create Workflow in the upper-right corner of the Workflow List page to start building a new automation. From the dropdown, choose the workflow creation method that best fits your needs, such as starting from scratch or selecting a recipe.

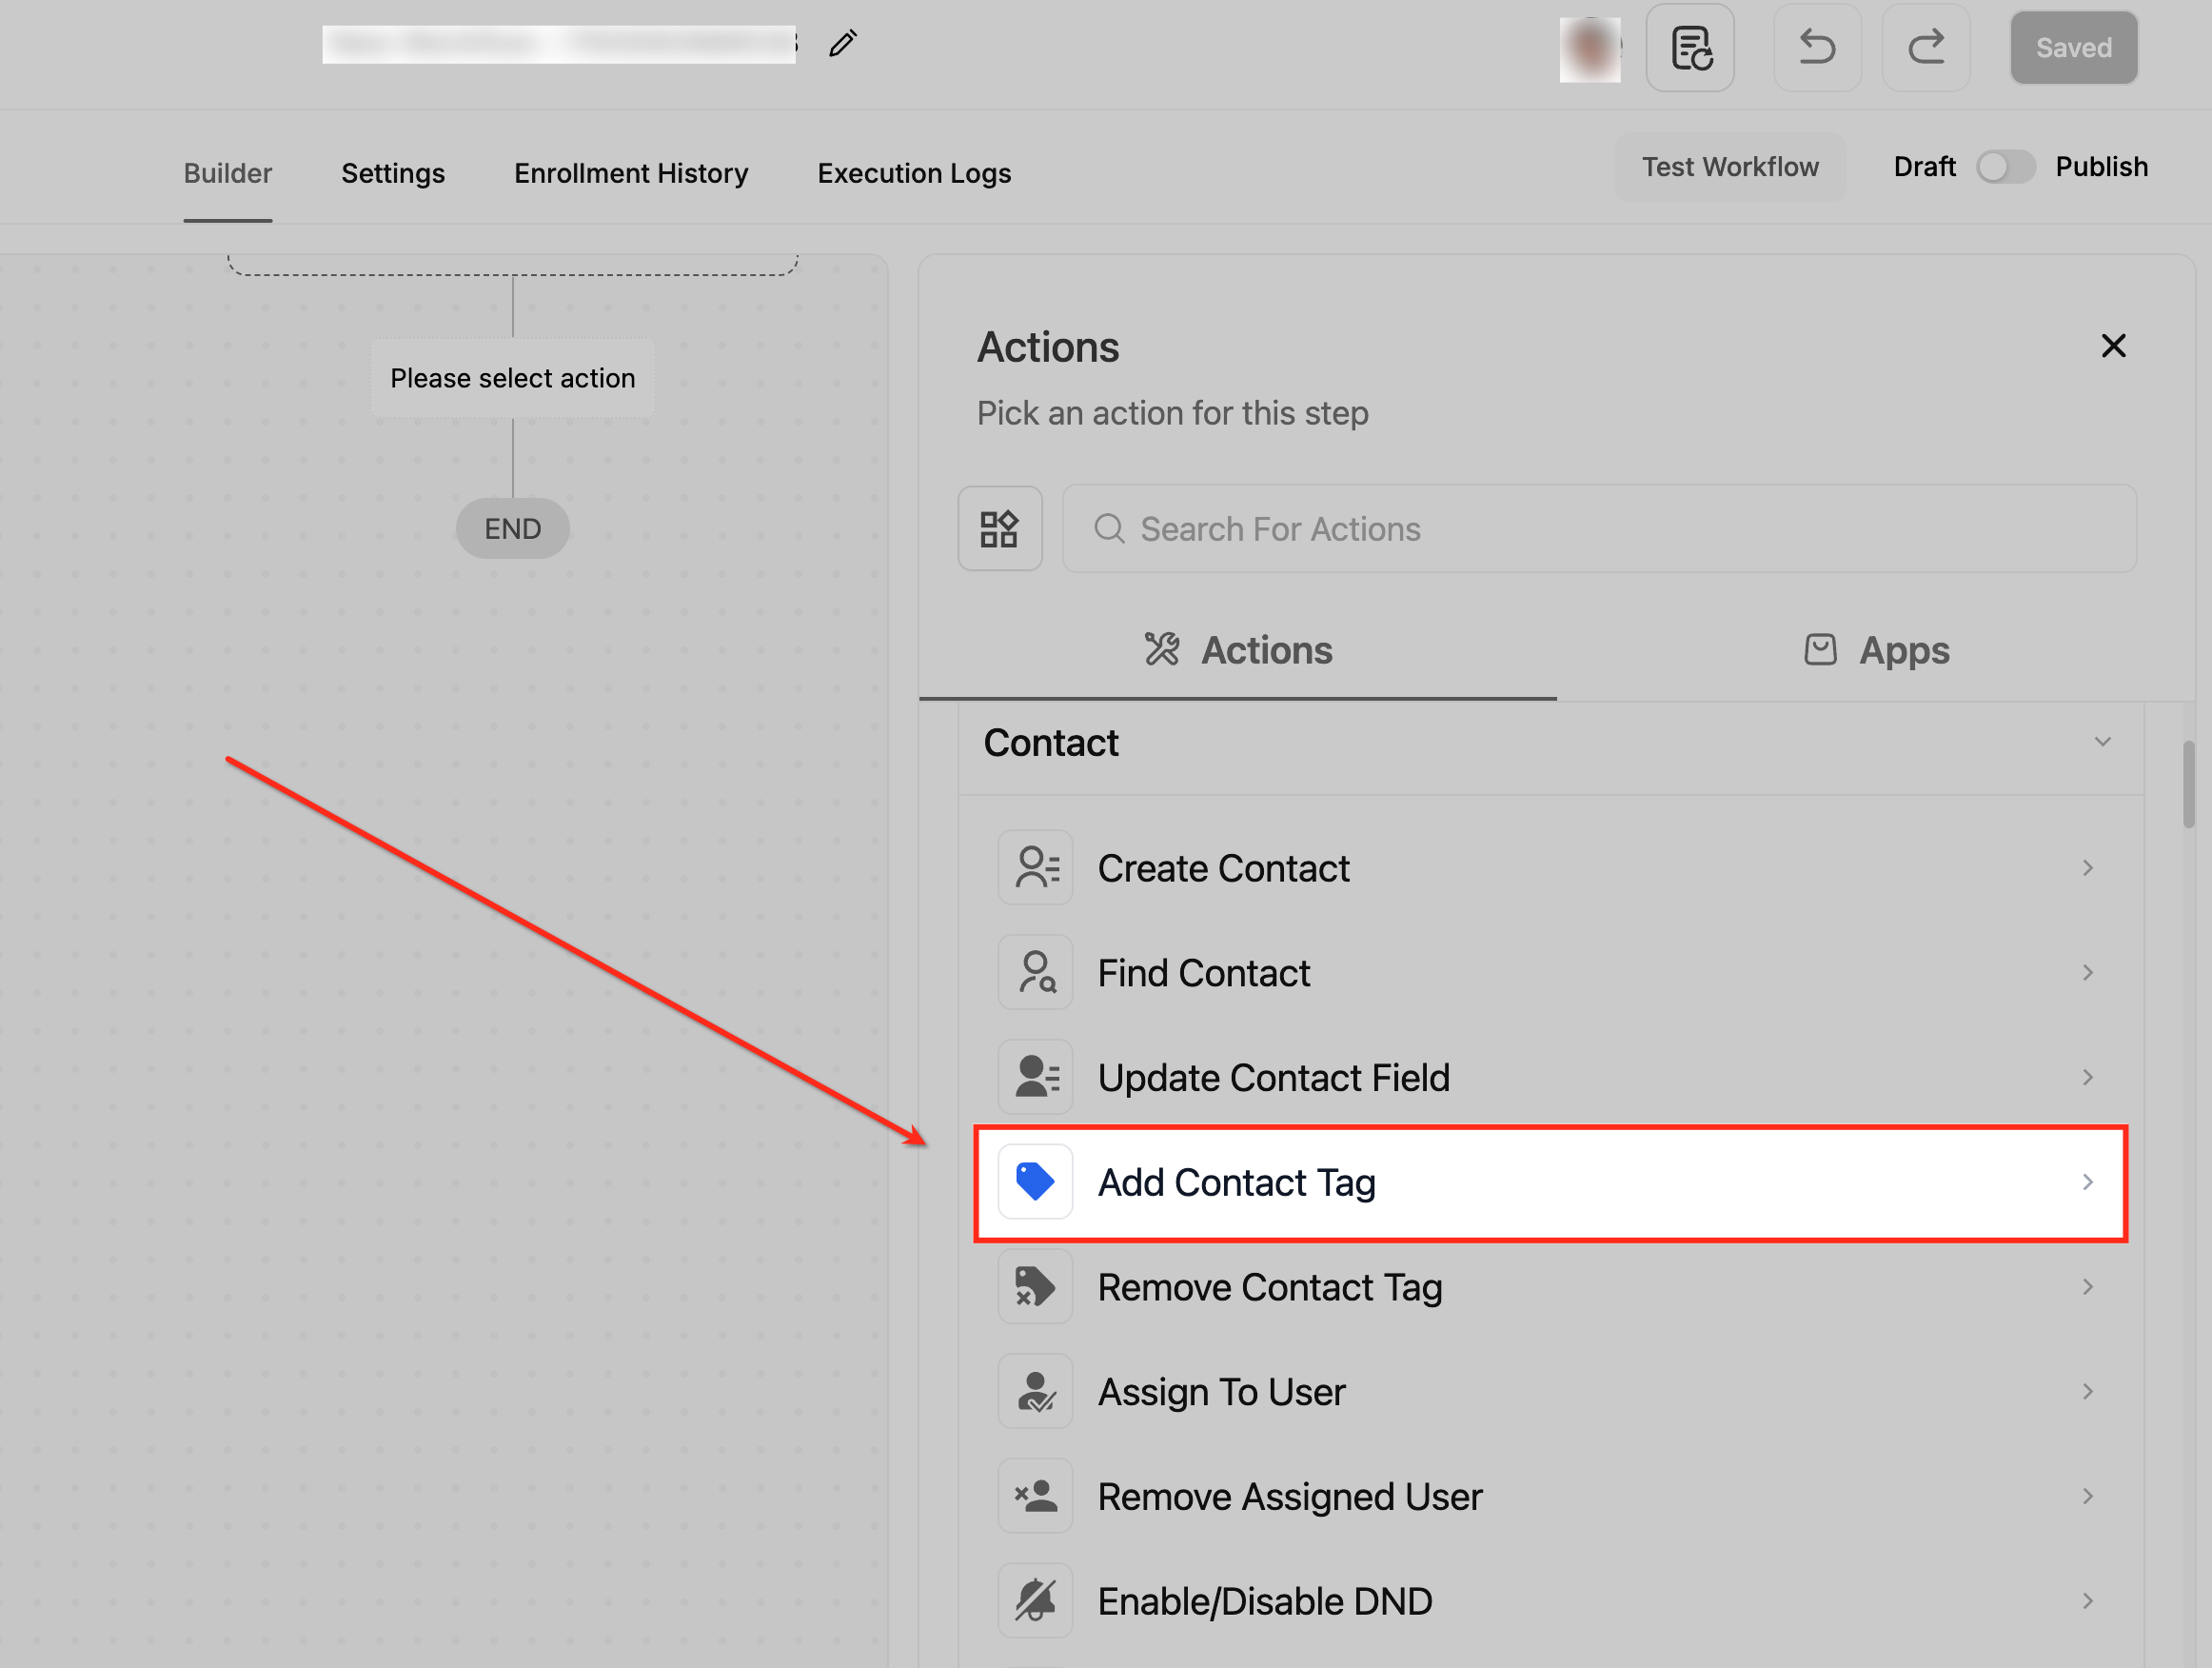
Select Add Contact Tag
In the workflow builder, open the Actions panel and scroll to the Contact section to locate the Add Contact Tag option. Selecting this action allows you to apply one or more tags to a contact when they reach this step in the workflow.
Name the Action
Enter a clear and descriptive name in the Action Name field to identify what this step will do inside your workflow. Using a meaningful name makes it easier to understand the workflow logic when reviewing or editing it later.

Select a Tag
Use the Tags dropdown to choose an existing tag from the list, or click the dropdown arrow to view all available options. You can also remove a selected tag at any time by clicking the X next to it, allowing you to refine your selection before saving.

Create a New Tag
If the tag you need doesn’t exist, type the new tag name into the field to generate a creation option. Click Add New Tag to instantly add it to your system and include it in the action.
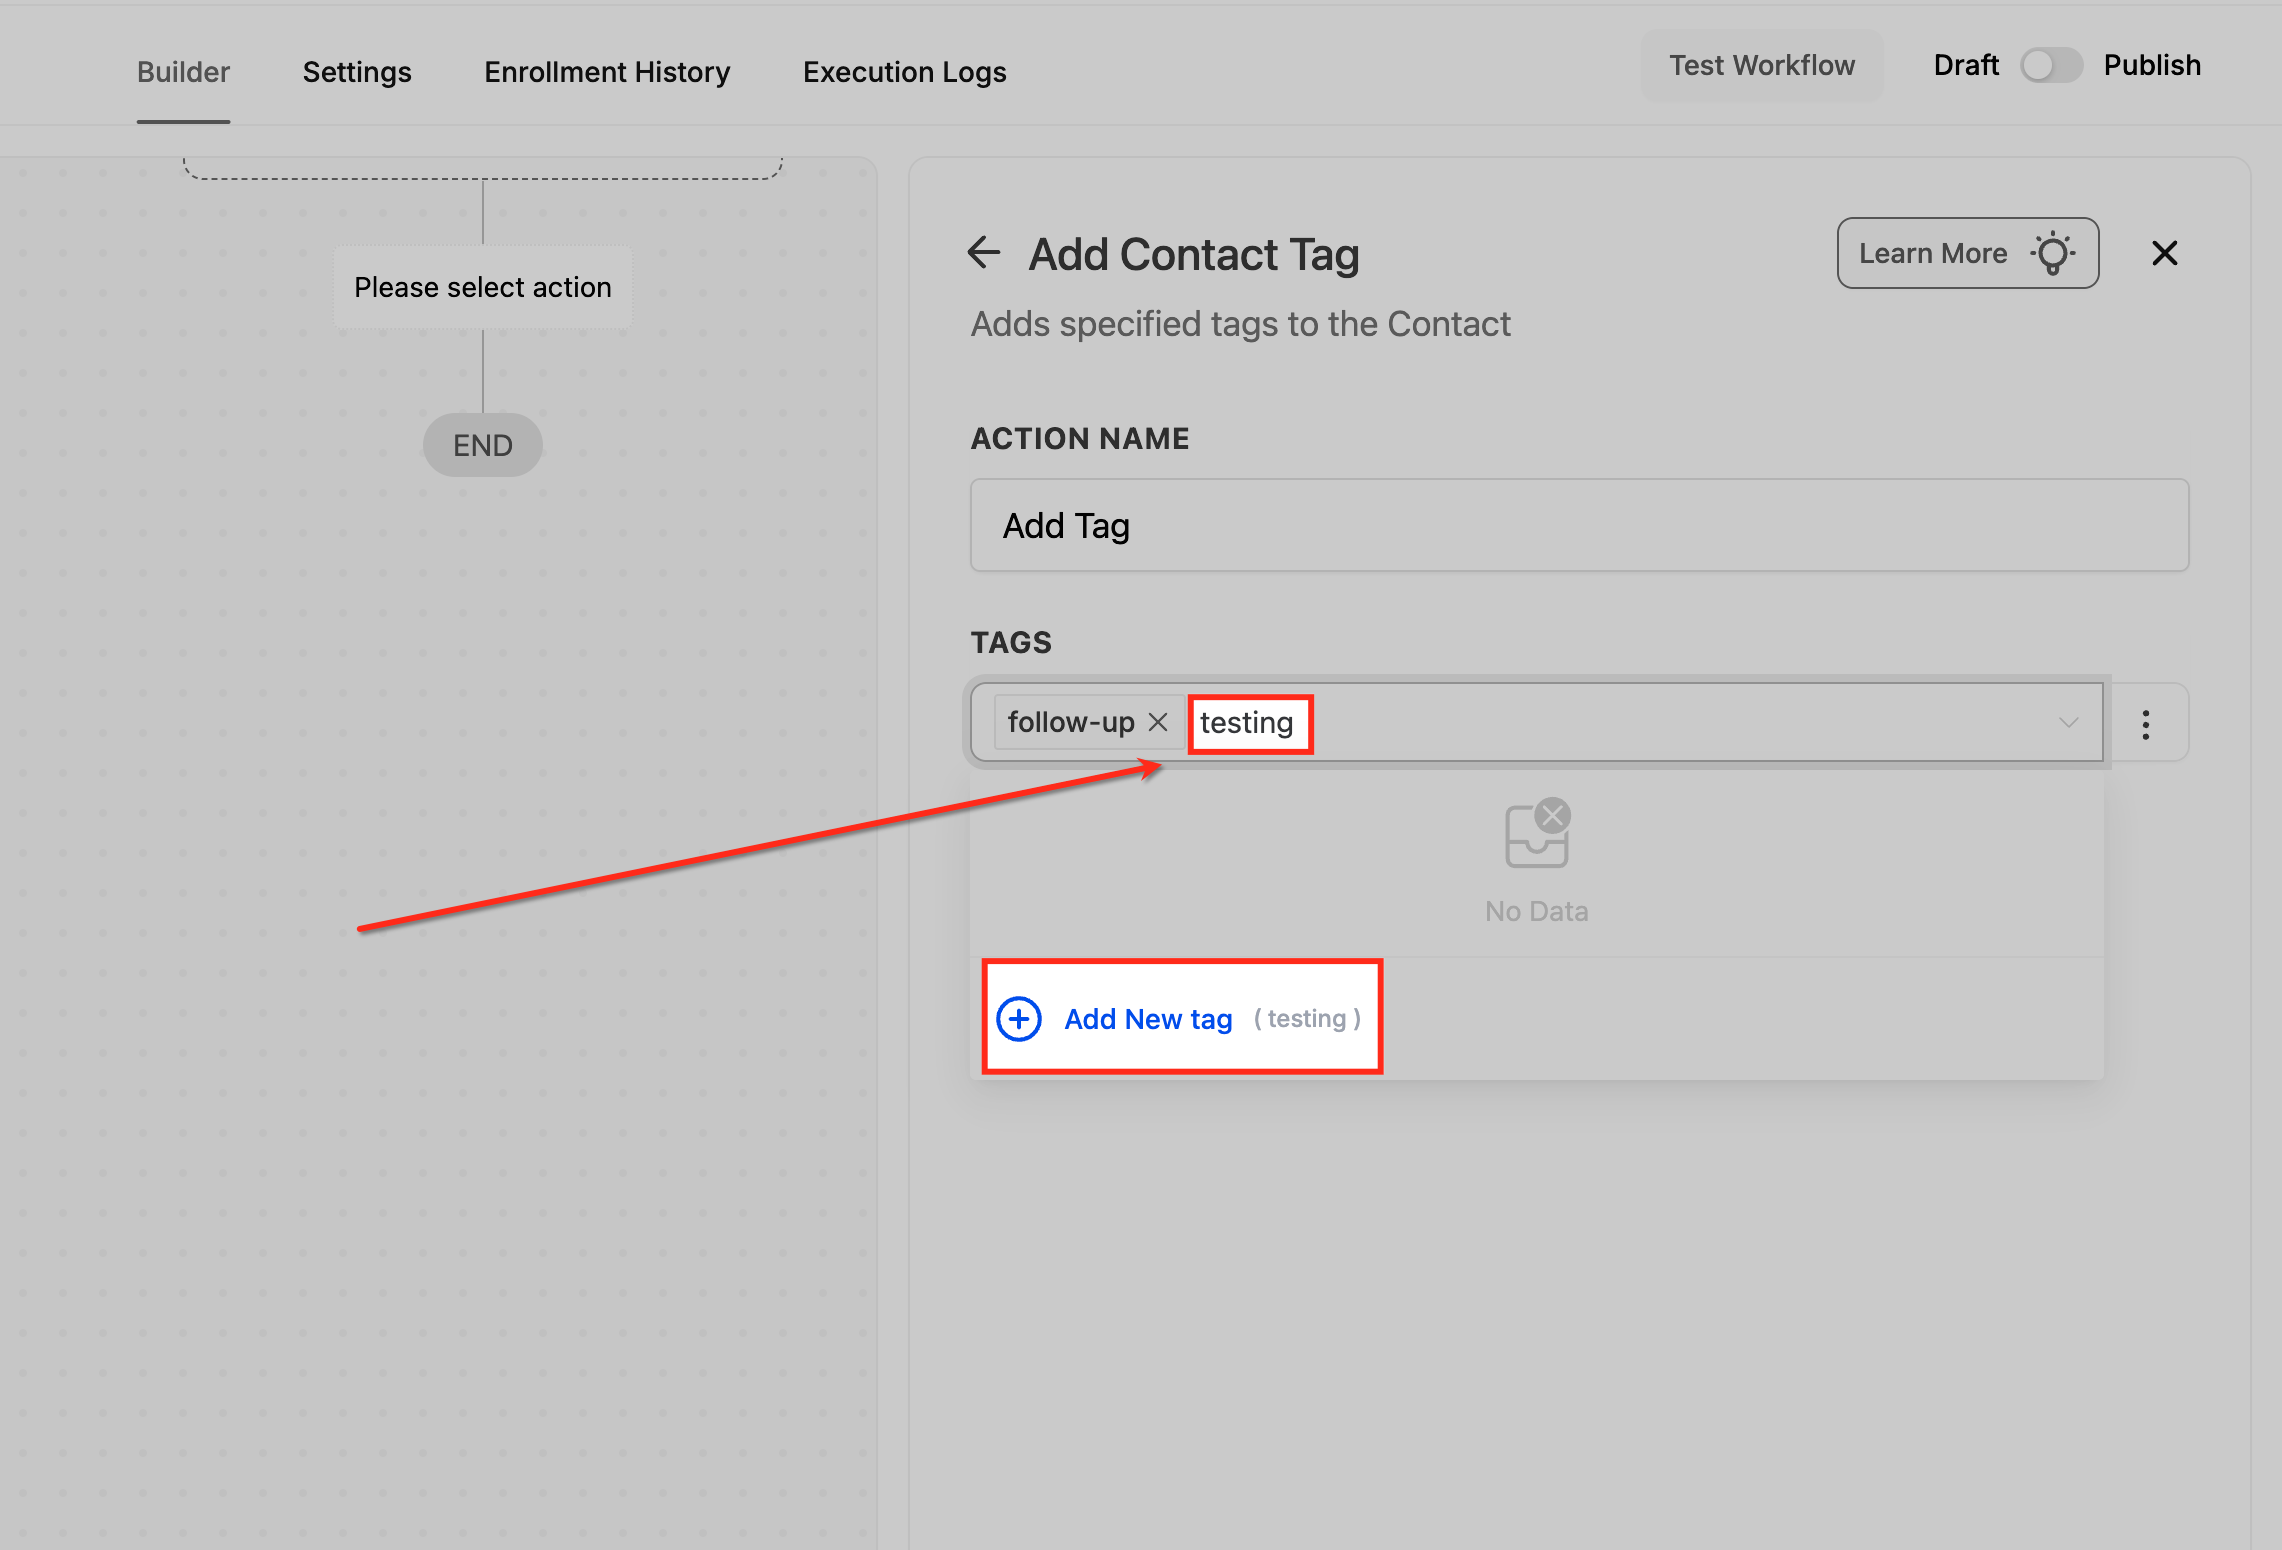
Choose Tag Mode
Open the three-dot menu beside the Tags field to switch between Standard and Dynamic tagging modes. This allows you to decide whether tags are applied exactly as selected or generated dynamically based on workflow data.

Save the Action
Click Save Action to finalize your tag settings and add the step to your workflow. This ensures the selected tags will be applied automatically whenever a contact reaches this point in the automation.

Frequently Asked Questions
Q: Can I add multiple tags at once?
Yes. The Add Contact Tag action supports selecting as many tags as needed.
Q: Can I automatically add tags based on an opportunity’s custom field value?
Yes. You can use the Opportunity Custom Field Changed trigger or conditional logic inside a workflow to check the field value and then apply the appropriate tag automatically using the Add Contact Tag action.
Q: Can I remove tags using this action?
No. Tag removal is done using the Remove Contact Tag action.
Q: Can anyone create new tags?
Tag creation depends on user permissions within the HighLevel account.
Q: Are tags case-sensitive?
Yes. “Facebook” and “facebook” would be treated as separate tags.
Q: Will this tag trigger another workflow?
Yes, if you have a workflow using the Contact Tag trigger.
Q: Can I use tags to segment campaigns?
Absolutely. Tags are one of the primary filtering tools for smart lists, campaigns, and workflows.
Related Articles
Was this article helpful?
That’s Great!
Thank you for your feedback
Sorry! We couldn't be helpful
Thank you for your feedback
Feedback sent
We appreciate your effort and will try to fix the article